Creating Kitchen layout, Hatching of Architectural elements and sectional view of an Industrial Building in AutoCad
CREATING KITCHEN LAYOUT,HATCHING OF ARCHITECTURAL ELEMENTS AND SEECTIONAL VIEW OF AN INDUSTRIAL BILDING IN AUTOCAD
1. KITCHEN LAYOUT
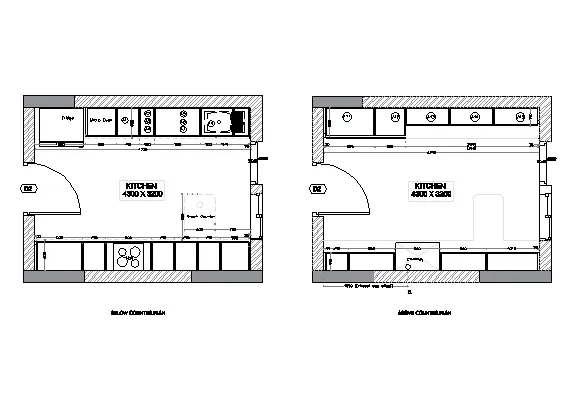
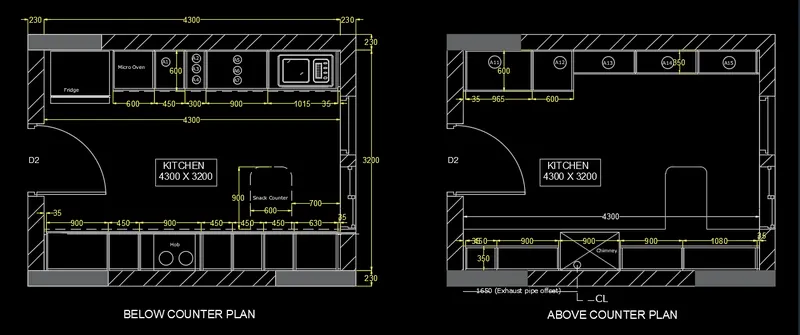
AIM - TO DRAFT A KITCHEN LAYOUT USING AUTOCAD AND INSERT A DIMENSION AND HATCH WHENEVER REQUIRED.
INTODUCTION-
The KITCHEN detail drawing is created using a AutoCAD software. The main purpose of this challenge is to be familiar with the annotation and dimensioning command also a hatching system .So the layout is drafted step by step and procedure is mention below with diagrams and final result is given.
TOOLS USED-
- LINE - Command for line is L
- CONSTRUCTTION LINE - Command for construcction line is XL
- TRIM - Command for trim is TR
- TEXT- Command for text is DTEXT/MTEXT
- DIMENSION - Command for line is Dimension DIM
- OFFSET - Command for offset is O
- FILLET - Command for fillet is F
- SPLINE - Command for spline is SPL
- LAYERS -Command for layer is LA
- CIRCLE - Command for circle is C
- RECTANGLE - Command for the rectangle is REC
- HATCH - Command for hatch is H
- ARC - Command for arc is A
- ARROW - Command for arrow is LE
PROCEDURE -
STEP 1
- Go to START MENU, and select AutoCAD.
- The User Interface of AutoCAD is OPEN.
- Click the start Drawing tab
- The workspace of AutoCad is open,
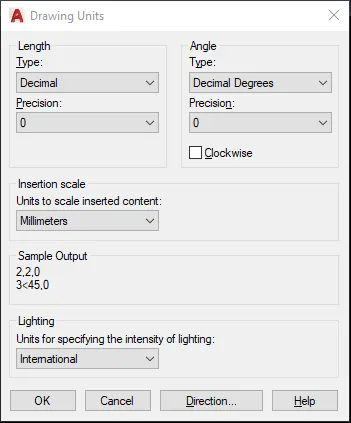
- Enter UNITS in the command box.
- Select DECIMAL in TYPE, 0 in PRECISION, and MILLIMETER in UNITS TO SCALE INSERTED CONTENT.
- Select Angle type as DECIMAL DEGREE, and precision is 0 and direction are Anti-clockwise.
- Press OK.
STEP 2
- Selct the RECTANGLE tool or type a REC and press ENTER
- Click on dimension in the command line
- Specify the length og rectangle ass 4300 and
- Specify width of rectangle as 3200 and
- Prees ESC
- Select the OFFSET from the ribbion or type O and press EENTER
- Click on THROUGH on the command line
- Now click on MULTIPAL in the command line
- Specify the Offset distance as 230
- press ESC

STEP 3
- Select the OFFSET from the ribbion or type O and press EENTER
- Click on THROUGH on the command line
- Now click on MULTIPAL in the command line
- Specify the Offset distance as 35
- Select new line and give offset distance as 900
- Select new line and give offset distance as 450
- Select new line and give offset distance as 900
- Select new line and give offset distance as 450
- Select new line and give offset distance as 450
- Select new line and give offset distance as 450
- Select new line and give offset distance as 560
- Select botton horzontal line and give offset distance as 600
- Select botton horzontal line and give offset distance as1500
- Select right vertical and give offset distance as 700
- Select right vertical and give offset distance as 1300
- press ESC
STEP 4
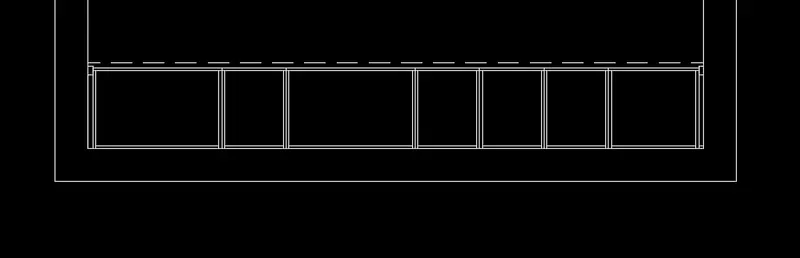
- Select the OFFSET from the ribbion or type O and press EENTER
- Click on THROUGH on the command line
- Now click on MULTIPAL in the command line
- Specify the Offset distance as 35
- Select new line and give offset distance as 945
- Select new line and give offset distance as 300
- Select new line and give offset distance as 900
- Select new line and give offset distance as 300
- Select new line and give offset distance as 450
- Select new line and give offset distance as 600
- Select new line and give offset distance as 1000
- press ESC
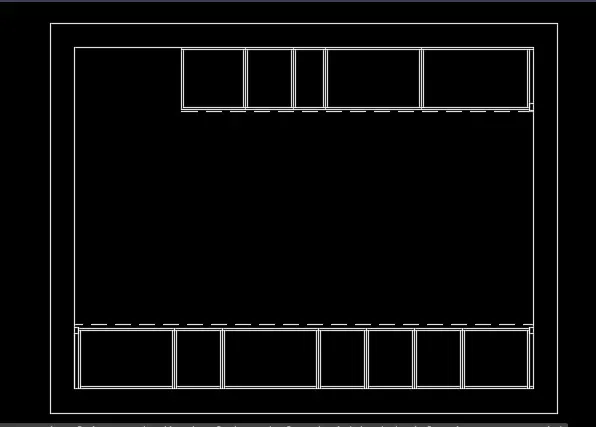
STEP 5
- Open a dimension-style dialog box by pressing DIMSTY in the command line.
- Click on the Modify tab.
- Now go to the text and change the text height and color as per Requirement.
- Here, I used a 80 unit for a text height
- Open a dimension-style dialog box by pressing DIMSTY in the command line.
- Click on the Modify tab.
- Now go to the text and change the arrow size and color as per Requirement.
- Here, I used a 50 unit for a arrow size.
- Now select a TEXT layer
- Type a DTEXT
- specify the base point and angle of rotation as 0
- Specify a text height as 100
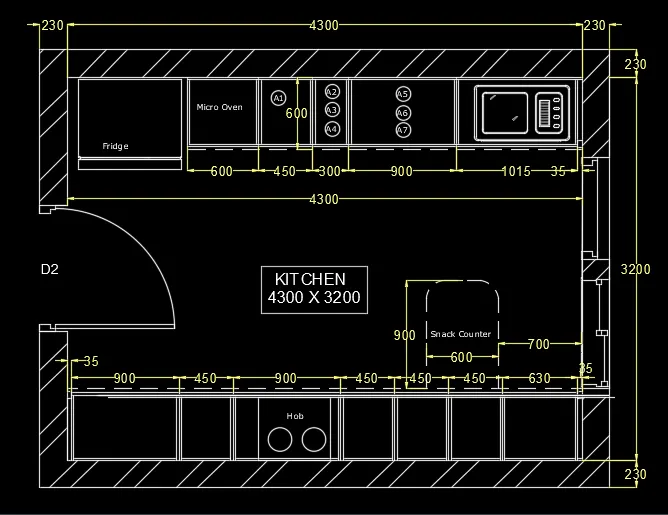
STEP 6
- Select a COPY tool from the ribbion ortype CO and press ENTER
- Select complete plan ,Specify the base poitn and make one more copy
- Select a ERASE tool from the ribbion ortype E and press ENTER
- Select all the object inside the plan and press ENTER
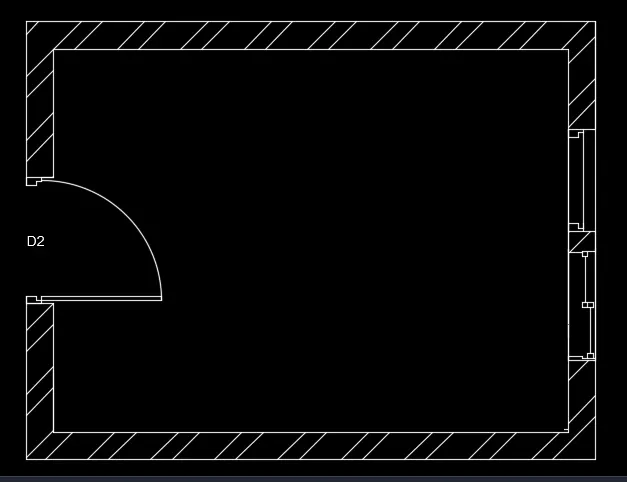
STEP 7
- Open a dimension-style dialog box by pressing DIMSTY in the command line.
- Click on the Modify tab.
- Now go to the text and change the text height and color as per Requirement.
- Here, I used a 80 unit for a text height
- Open a dimension-style dialog box by pressing DIMSTY in the command line.
- Click on the Modify tab.
- Now go to the text and change the arrow size and color as per Requirement.
- Here, I used a 50 unit for a arrow size.
- Now select a TEXT layer
- Type a DTEXT
- specify the base point and angle of rotation as 0
- Specify a text height as 100
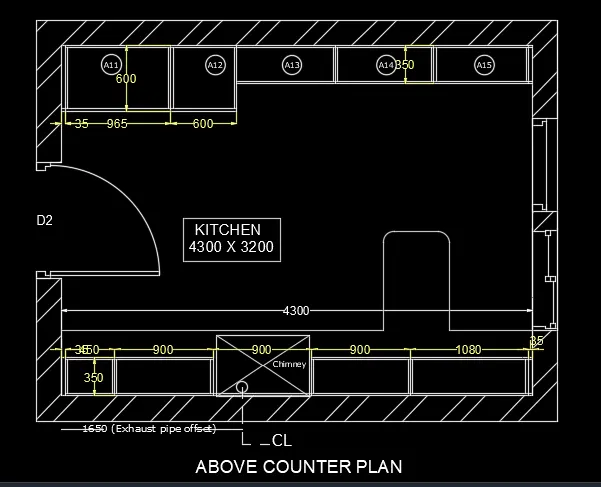
- Creat a box for soild hatch and fill the hatch inside the box of grey color
RESULT -
2. ELEVATION
AIM-
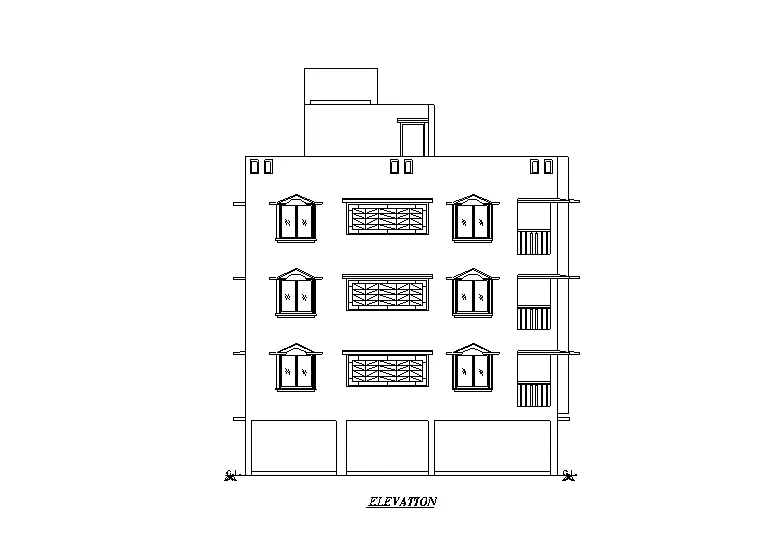
TO DRAFT A ELVATION OF A PLAN USING AUTOCD
INTODUCTION-
The elevation is drafted using AutoCAD and the plan for which elevation is drafted is already created in challenges 7 .the main purpose of these challanges is to used a proper hatching in the wall , doors and window and other architectural elements
TOOLS USED-
- LINE - Command for line is L
- CONSTRUCTTION LINE - Command for construcction line is XL
- TRIM - Command for trim is TR
- TEXT- Command for text is DTEXT/MTEXT
- DIMENSION - Command for line is Dimension DIM
- OFFSET - Command for offset is O
- FILLET - Command for fillet is F
- SPLINE - Command for spline is SPL
- LAYERS -Command for layer is LA
- CIRCLE - Command for circle is C
- RECTANGLE - Command for the rectangle is REC
- HATCH - Command for hatch is H
- ARC - Command for arc is A
- ARROW - Command for arrow is LE
PROCEDURE -
STEP 1
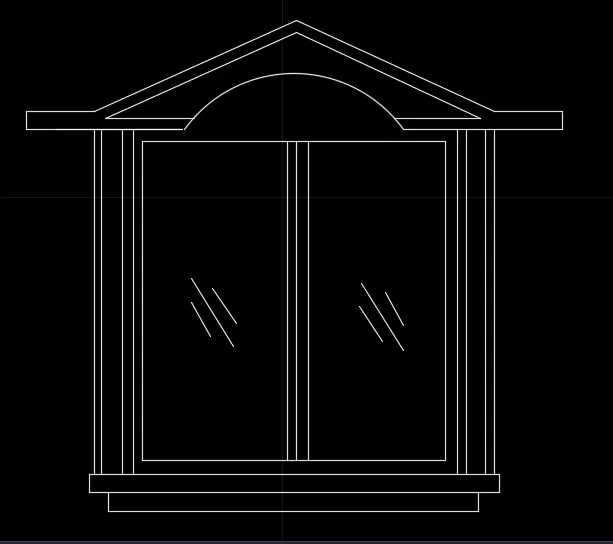
- CREATING A WINDOW
- Select a LINE tool to draw a outer surface of window
- Select a OFFSET tool to draw a internal surface of window
- and use a ARC tool to draw a arc
STEP 2
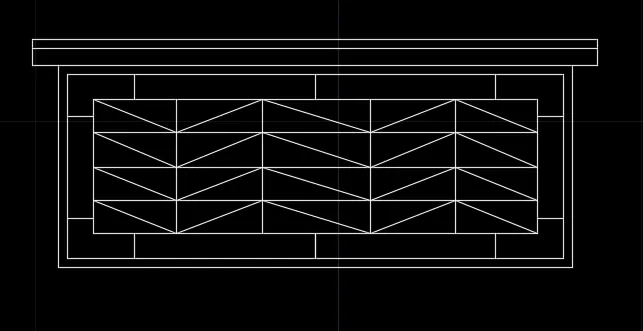
- LINE and RECTANGLE TOOL is used for draft
STEP 3
- For drafting a balcony with sunshade line and rectangle tool is used
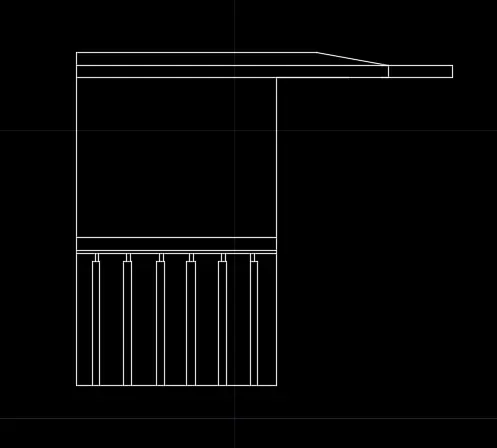
STEP 4
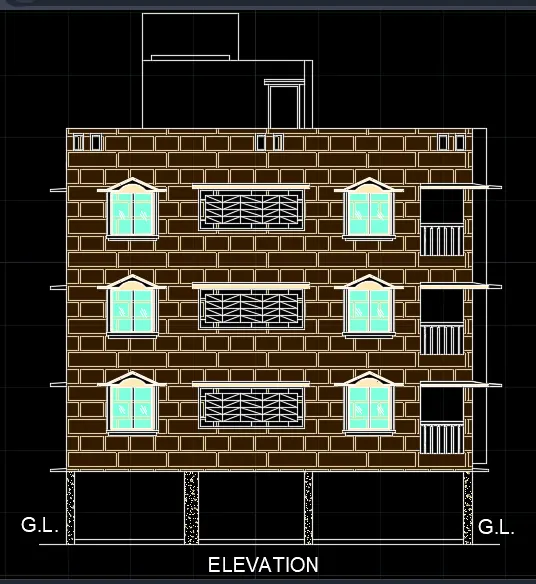
- THE ELEVATION IS DRAFTED AND LATER HATCHES IS GIVEN USING H ENTER TOOL
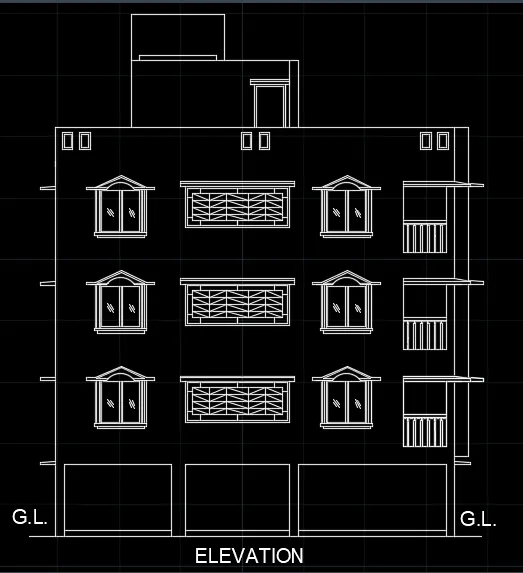
RESULT -
3. SECTION VIEW
AIM- TO DRAFT A SECTIONAL VIEW OF A PLAN USING AUTOCD
INTODUCTION-
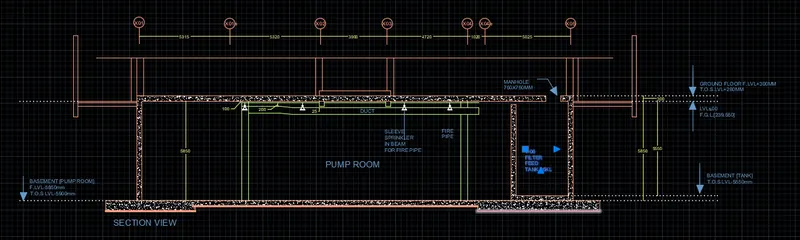
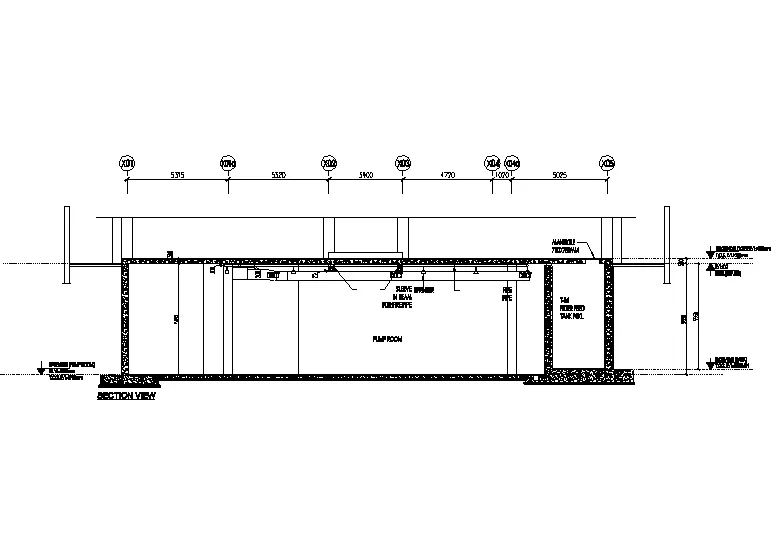
The section view is drafted using AutoCAD and the section view is of industrial building as shown.the main purpose of these challanges is to used a proper hatching in the wall , doors and window and other architectural elements
TOOLS USED-
- LINE - Command for line is L
- CONSTRUCTTION LINE - Command for construcction line is XL
- TRIM - Command for trim is TR
- TEXT- Command for text is DTEXT/MTEXT
- DIMENSION - Command for line is Dimension DIM
- OFFSET - Command for offset is O
- FILLET - Command for fillet is F
- SPLINE - Command for spline is SPL
- LAYERS -Command for layer is LA
- CIRCLE - Command for circle is C
- RECTANGLE - Command for the rectangle is REC
- HATCH - Command for hatch is H
- ARC - Command for arc is A
- ARROW - Command for arrow is LE
PROCEDURE -
STEP 1 -
- Create a New layer and name it and choose the color
- now create a all the geometry given in the figure using line and offset tool
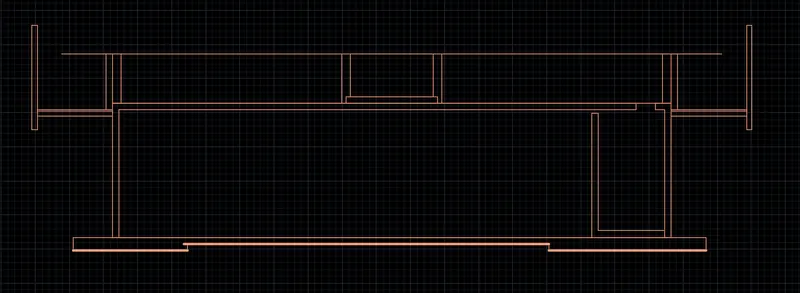
STEP 2 -
- Now create again a new layer and choose a differt color
- and draft the fire pipe and duct
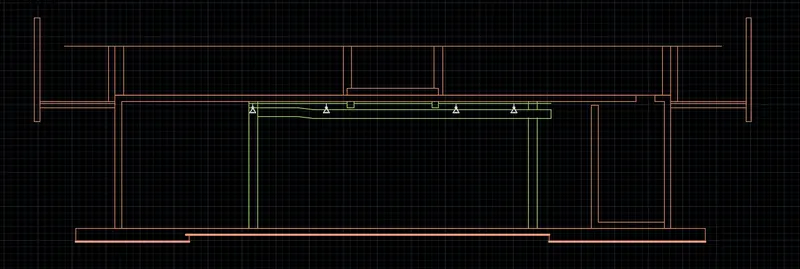
STEP 3 -
- Press a h and ENTER for hatch
- Select a AR-CONC for hatching and pick the point inside where we want to hatch.
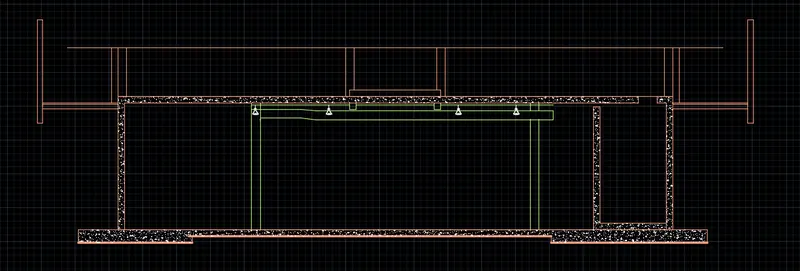
- Open a dimension-style dialog box by pressing DIMSTY in the command line.
- Click on the Modify tab.
- Now go to the text and change the text height and color as per Requirement.
- Open a dimension-style dialog box by pressing DIMSTY in the command line.
- Click on the Modify tab.
- Now go to the text and change the arrow size and color as per Requirement.
- Now select a TEXT layer
- Type a DTEXT
- specify the base point and angle of rotation as 0
- Specify a text height
RESULT -