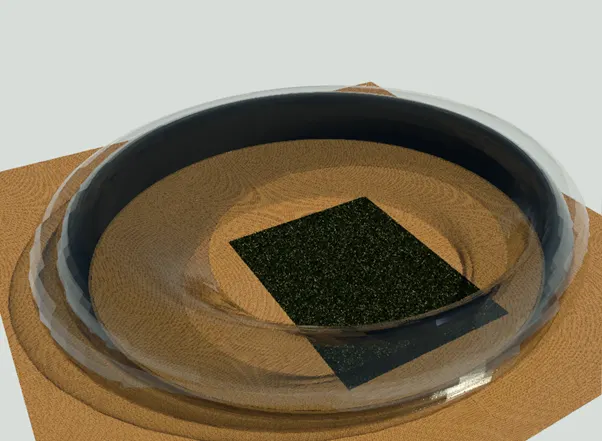
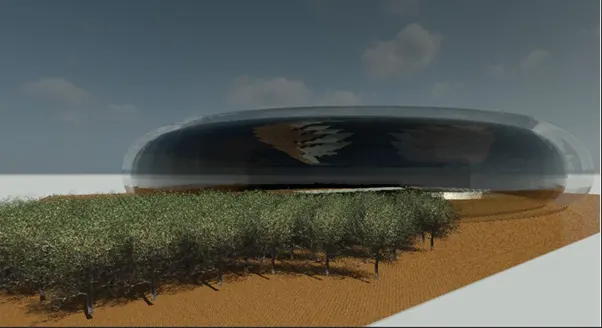
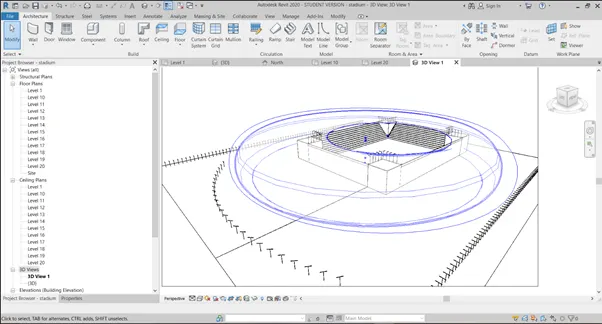
Creating Conceptual mass in REVIT and Creation of Sinusoidal curve and a Parametric stadium using Dynamo
1) Using Dynamo create a set of sinusoidal points and create a curve and create a surface out of the curve.
Aim:
Using Dynamo creation of a set of sinusoidal points and create a curve and create a surface out of the curve.
Procedure:
I. Open Revit software
II. Go to file click on new
III. And then in the menu bar
IV. Go to the manage command bar
V. And the click on the dynamo
VI.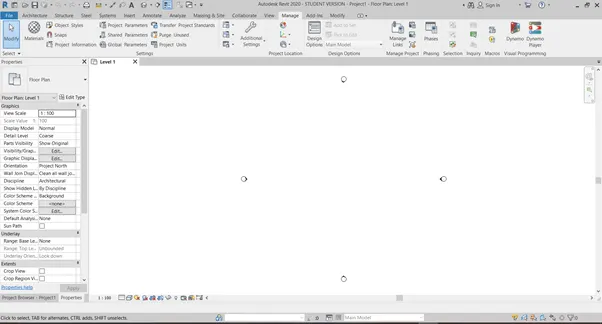
VII. Then dynamo window will be opened
VIII. Here click on new
IX.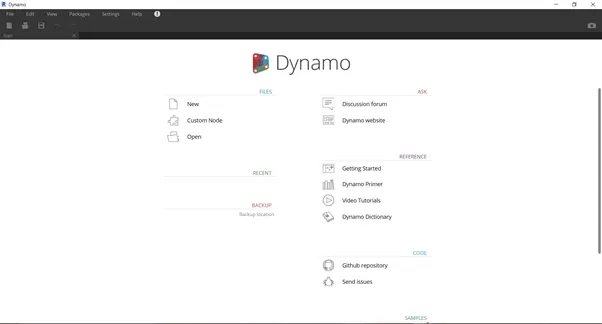
X. In search bar search for integer slider
XI. And insert in for 3 times
XII. Double click and create the code block and name it amp
XIII. In search bar search for range and add it
XIV. Join all the integer for the range start, end and step respectively
XV. In search bar search for math. Sin and add it
XVI. Connect the range to math.sin
XVII. In search bar search for add and add it
XVIII. In search bar search for product and add it
XIX. In search bar search for point by cordinates and add it
XX. Connect the math.sin and amp to the add
XXI. Then connect add and integer slider to the product
XXII. And connect the range and product to the coordinates
XXIII.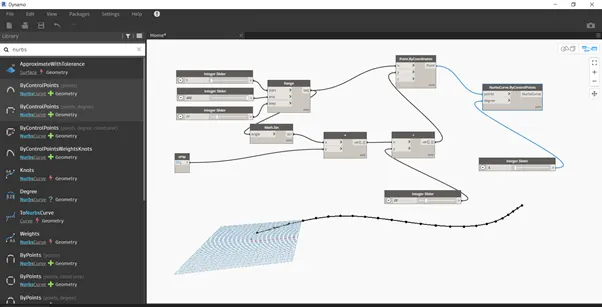
XXIV. In search bar search for nurbscurve and it will be connected by the points and integer slider
XXV. Copy and past the whole flowchart 3 times
XXVI. And change the value of y at start
XXVII. In search bar search for list create
XXVIII. And add all the surface to the list
XXIX. In search bar search for surface by loft
XXX. connect the list to surface by loft
XXXI.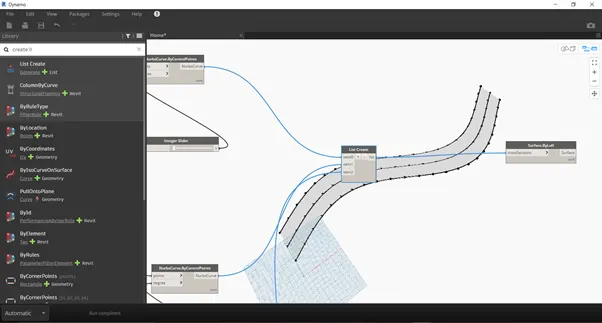
Result:
Spline surface was drawn using the dynamo.
2) Create a conceptual layout of floor plan in dynamo. Using the tools available in dynamo link the lines to appropriate model elements in Revit by choosing the wall types and wall parameters. Make use of the sliders to slide through the height of the wall and length of the wall.
Aim:
Creating a conceptual layout of floor plan in dynamo. Using the tools available in dynamo link the lines to appropriate model elements in Revit
Procedure:
I. Open Revit software
II. Go to file click on new
III. And then in the menu bar
IV. Go to the manage command bar
V. And the click on the dynamo
VI. Then dynamo window will be opened
VII. Here click on new
VIII. In search bar search for integer slider
IX. And insert in for 2 times
X. In search bar search and add the points by coordinate 4 times as the corners of the wall
XI. And connect the integer slider and the points as shown below
XII.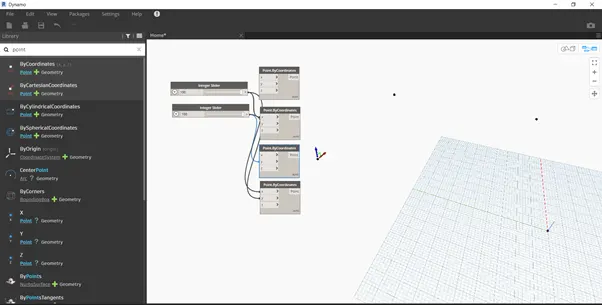
XIII. In search bar search and add the line by points
XIV. And connect the points to the line as shown below
XV.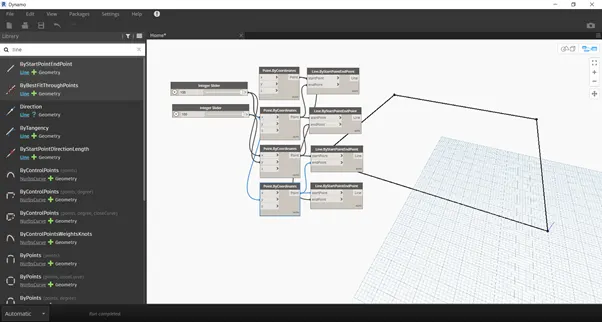
XVI. In search bar search and add the list create
XVII. In search bar search and add the floor by outline
XVIII. In search bar search and add the wall by curve
XIX. Connect the list to both
XX. And In search bar search and add the floor types and level
XXI. Connect it to floor by outline
XXII. In search bar search and add the wall type and level and integer slider name it height
XXIII. And connect all to wall by curve
XXIV.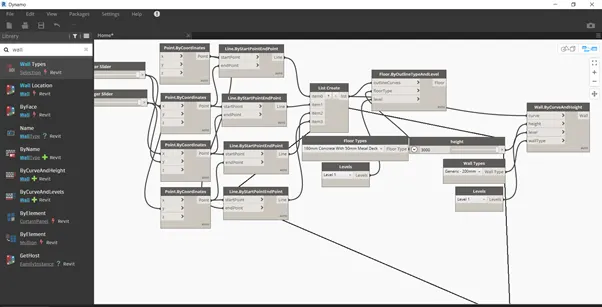
Result:
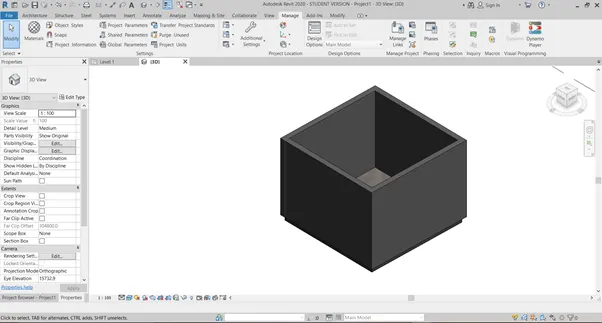
Creating a conceptual layout of floor plan in dynamo. Using the tools available in dynamo link the lines to appropriate model elements in Revit was done.
3) Create an array of model elements in Revit. Use dynamo to vary the properties of model elements by using the slider or code block
Aim:
Creation an array of model elements in Revit and Using dynamo to vary the properties of model elements by using the slider or code block
Procedure:
I. Open Revit software
II. Go to file click on new
III. From architecture command place the column at desired location
IV. Using array copy the columns
V.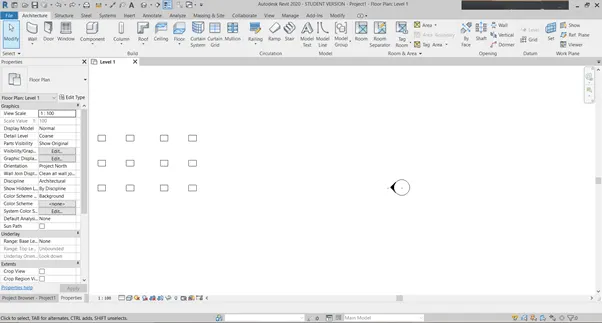
VI. And then in the menu bar
VII. Go to the manage command bar
VIII. And the click on the dynamo
IX. Then dynamo window will be opened
X. Here click on new
XI. In search bar search for integer slider and add
XII. In search bar search and add select and model elements
XIII. In Revit select all the columns
XIV. In search bar search and add set rotation
XV. Connect the model elements and the integer slider to the rotation
XVI. In the integer slider specify the rotation
XVII.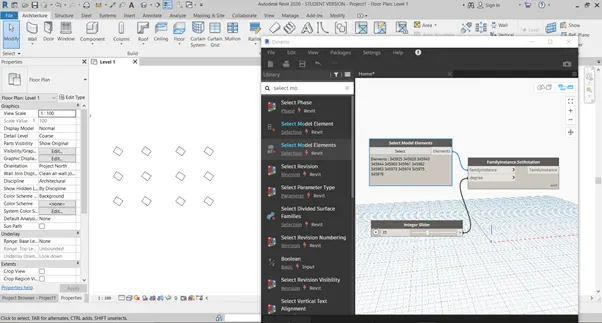
Result:
Dynamo was used to vary the properties of the elements using the slider.
4) Create a conceptual mass in Revit and develop a parametric column by dividing the surfaces and apply the concepts similar to use in parametric walkway modelling. Use triangular bent or square shaped panels to add finish to the parametric column
Aim:
Creation a conceptual mass in Revit and develop a parametric column by dividing the surfaces
Procedure:
I. Open Revit
II. In file drop down select the new
III. Select the family and conceptual mass
IV.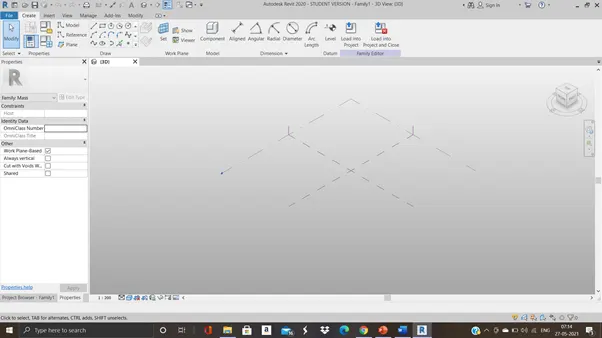
V. In project browser go to the elevation and create a level of height 10’
VI.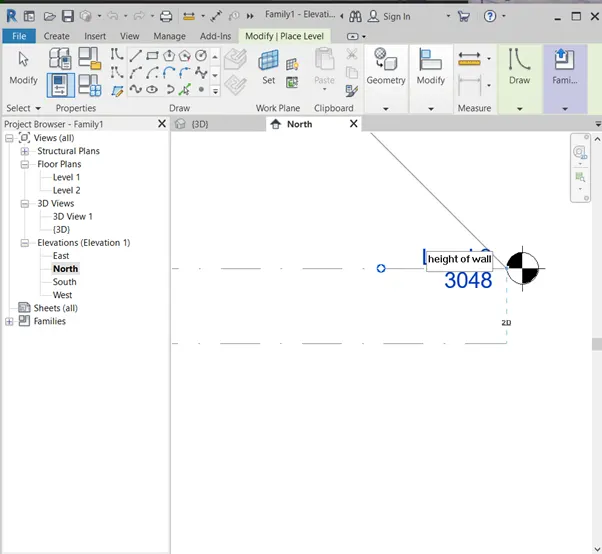
VII. Then project browser go to the floor plan of the height of the wall
VIII. Here draw the spline
IX.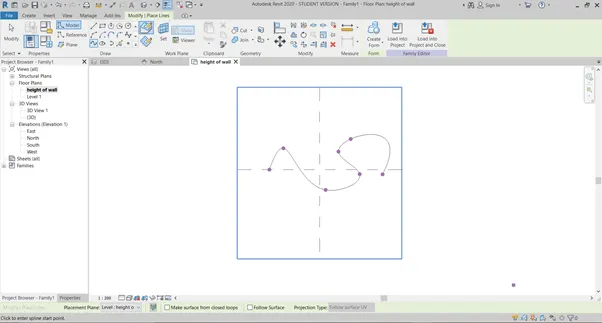
X. Then at the grips set the reference plane and draw the hexagon of 3000
XI. Repeat6 this process at every grip
XII.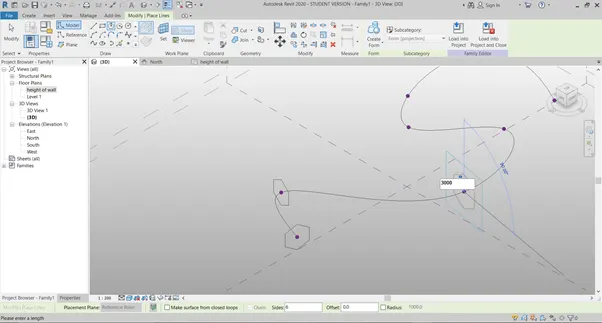
XIII. Select all the hexagon and spline path
XIV. Click on the create form
XV.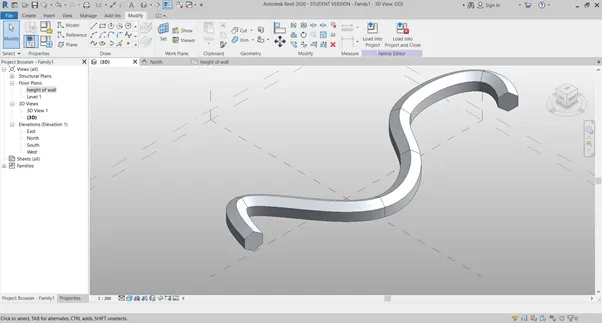
XVI. Now select the surface and the click on the divide surface
XVII. In properties bar select the pattern
XVIII. In properties bar change the u and v grid for smoothness
XIX. And here I applied triangular pattern to top
XX. And rectangular pattern to the sides
XXI.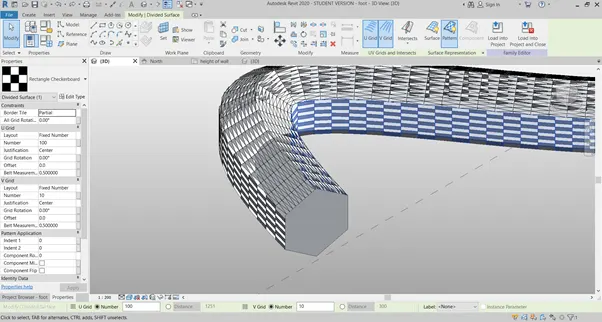
XXII. Next go the family and load the triangular and rectangular
XXIII.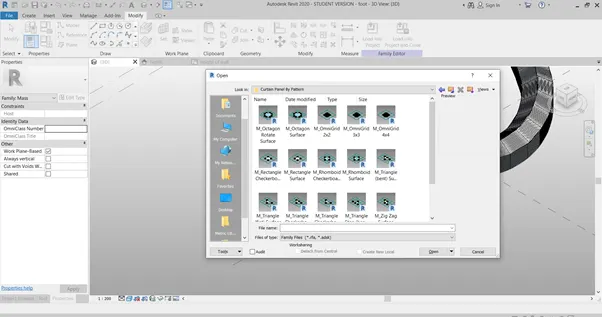
XXIV. Here add the grip at midpoint
XXV. And set it as the reference plane and draw circle
XXVI. And sweep using the create form
XXVII. Then load it into the project
XXVIII.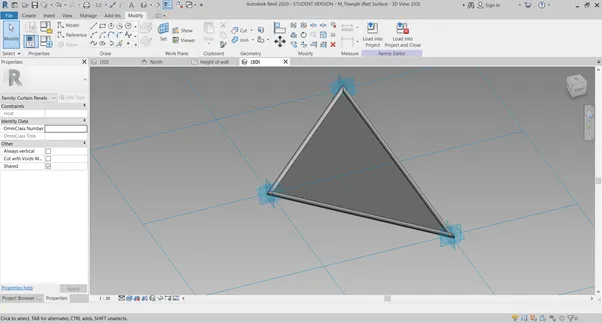
XXIX. And similarly do it for the rectangle.
XXX. Go to the properties tab and select the loaded families to the surfaces
XXXI.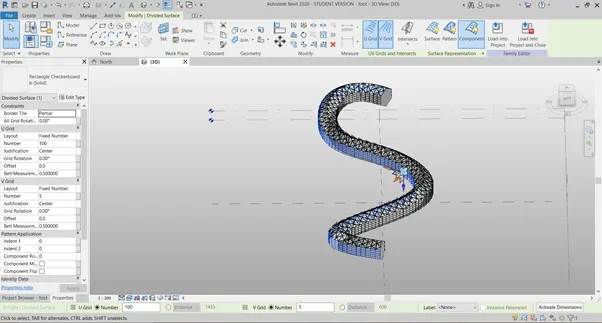
XXXII.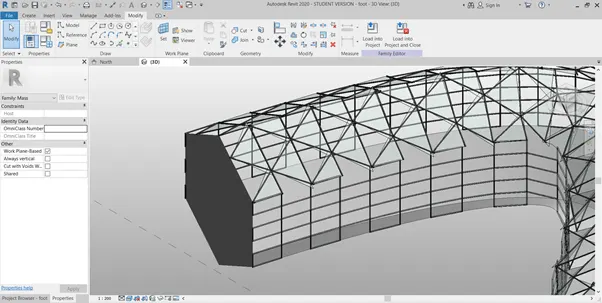
XXXIII.
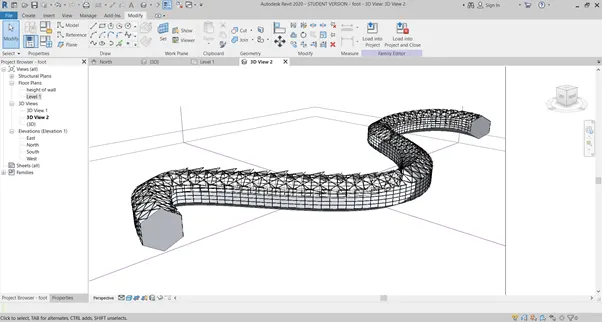
Result:
Creation a conceptual mass in Revit and develop a parametric column by dividing the surfaces was done.
5) Use Dynamo to work on developing a Parametric Stadium. List your parameters and use the visual programming approach to complete the modelling, You can use the concepts discussed in parametric high rise tower in class for reference.
Aim:
Using Dynamo to work on developing a Parametric Stadium
Procedure:
I. Open Revit software
II. Go to file click on new
III. And then in the menu bar
IV. Go to the manage command bar
V. And the click on the dynamo
VI. Then dynamo window will be opened
VII. Here click on new
VIII. In search bar search and add integer slider 1o times and keep aside
IX. Double click and add code block a+b
X. In search bar search and add addition for 5 times
XI. In search bar search and add circle by radius and point 5 times
XII. In search bar search and add points coordinate
XIII. Connect the integer slider for the radius of bottom circle
XIV. And other integer slider with the addition code to the radius of another circle
XV. And provide coordinate as the increase in the height of the circle
XVI. Similarly continue for the 3rd circle
XVII.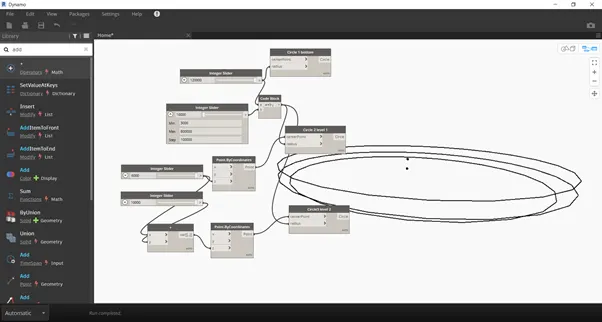
XVIII.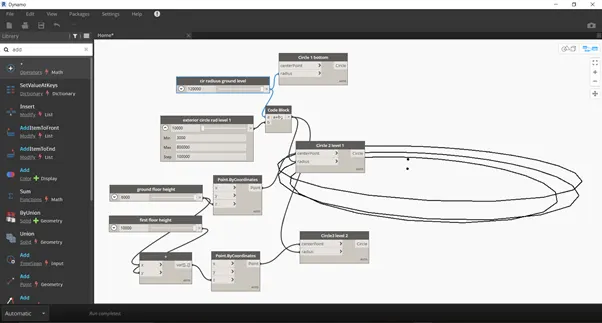
XIX. In the place for addition code add the subtract code for the radius of the next to circle
XX. And similarly code the other 2 circles
XXI.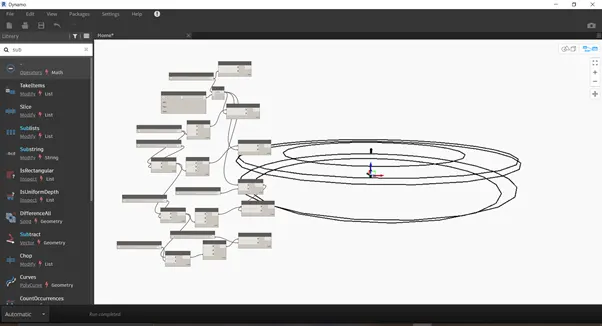
XXII. In search bar search and add list create
XXIII. And add all the circles created to the list
XXIV. In search bar search and add surface by loft
XXV. And connect the list to the surface
XXVI.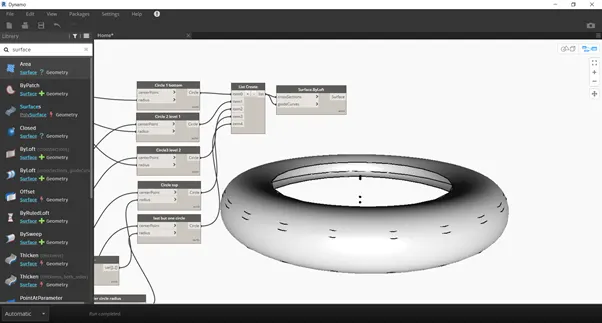
XXVII. In search bar search and add surface thickness
XXVIII. And provide the integer slider for the thickness and connect the surface.
XXIX.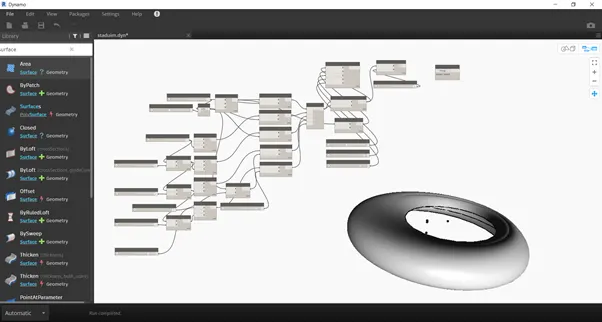
Result:
Using Dynamo to work on developing a Parametric Stadium was done.