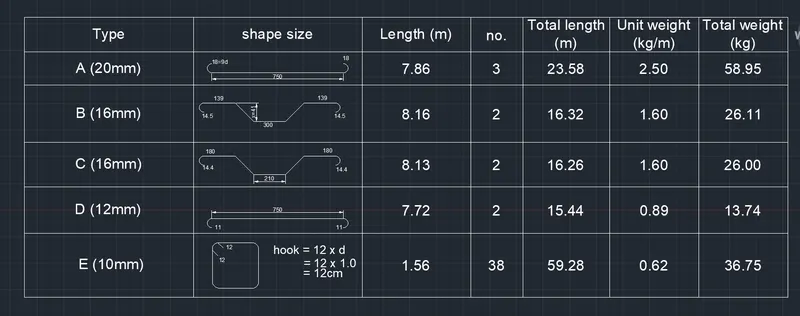
Creating Bar Bending schedule, Different Door types, and Creation of standard drawing templates using AutoCad
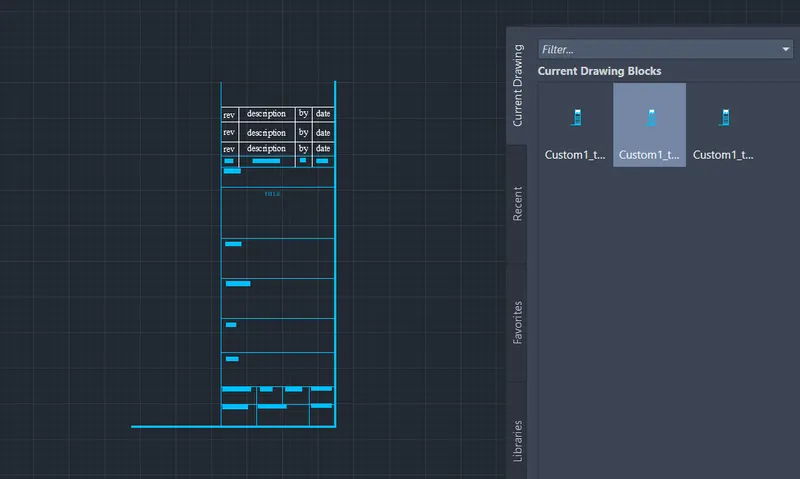
1.Create the templates as shown in Figures. Take the size of the title block as per industry standards or you can assume it as per the size of the paper. Use text and attributes wherever required. After creating the title block you need to save it as a block with names: Custom1_titleblock and Custom2_titleblock, respectively.
AIM:-
Create the templates as shown in Figures. Take the size of the title block as per industry standards or you can assume it as per the size of the paper. Use text and attributes wherever required. After creating the title block you need to save it as a block with names: Custom1_titleblock and Custom2_titleblock, respectively.
INTRODUCTION:-
Assume the paper size for creating title block 600 X 850mm
Type L in command box and make vertical line at distance 600mm
Type O in command box and offset line at distance 200mm
Type L in command box and joint line
Type L in command box and make table as per given
Type DT in command box and give the type the text as per given data
Type B in command box for crete a block
Type the name of object and select the object
select the pick point for getting a grip
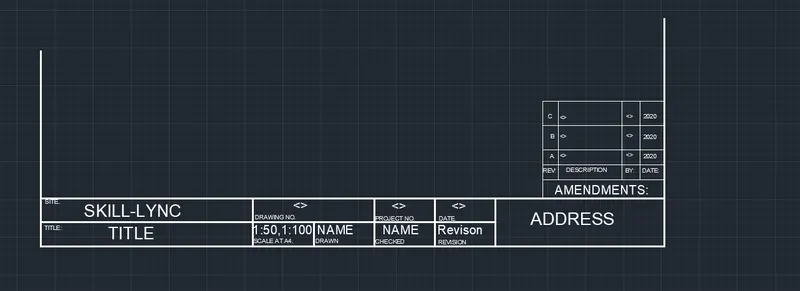
Assume the paper size for creating title block 600 X 850mm
Type L in command box and make vertical line at distance 850mm
Type O in command box and offset line at distance 40mm two time
Type L in command box and joint line
Type L in command box and make table as per given
Type DT in command box and give the type the text as per given data
Type B in command box for crete a block
Type the name of object and select the object
select the pick point for getting a grip
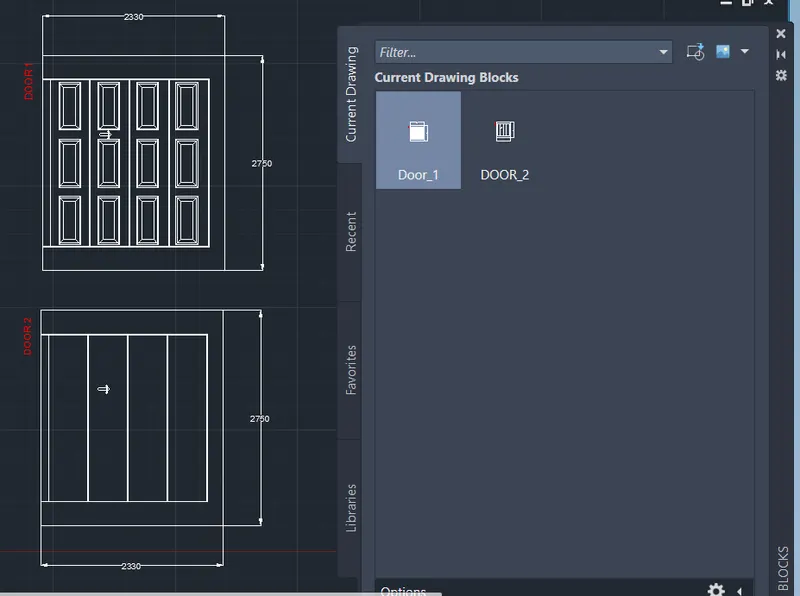
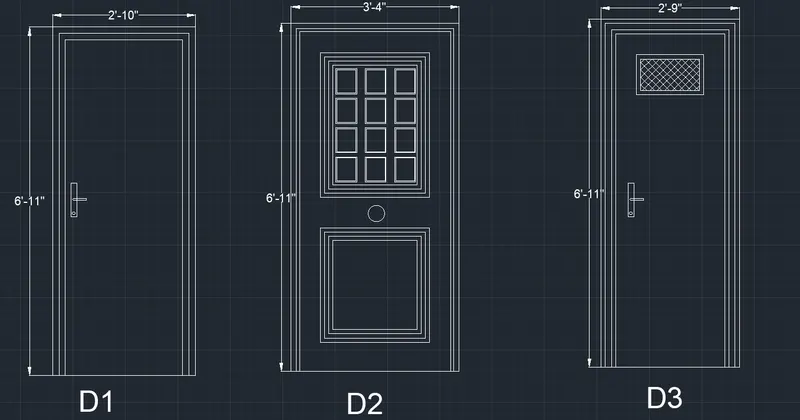
2. Create the doors type for warehouse as shown in the Figure. You need to create each door type as per standard size or given dimensions. Create the blocks of this door type after creating them.
AIM:-
Create the doors type for warehouse as shown in the Figure. You need to create each door type as per standard size or given dimensions. Create the blocks of this door type after creating them.
INTRODUCTION:-
Type L in command box and create a rectangle giving dimention as per 2750X2330mm
Type O in command box and offset at distance 300mm
Type L and create a pannel at door
Type ar and arrey pannel
after making a door create a block to door
Type I in cammand box insert and explode the block and remove the arrey
and crete block to door 2
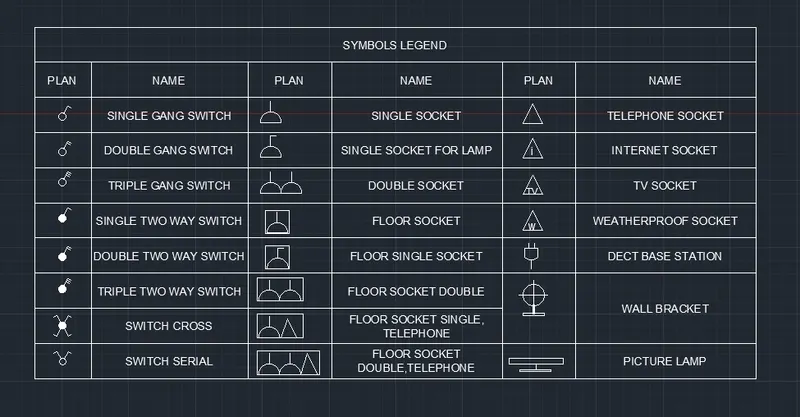
3. Create each symbol as a block with the name given in the legend. After creating the blocks arrange them in the legend as shown in the Figure.
Aim:-
Create each symbol as a block with the name given in the legend. After creating the blocks arrange them in the legend as shown in the Figure.
Introduction:-
create table of 9 row and 6 column and 1 title
create picture and insert in table give name in table after creating a table create block of each picture
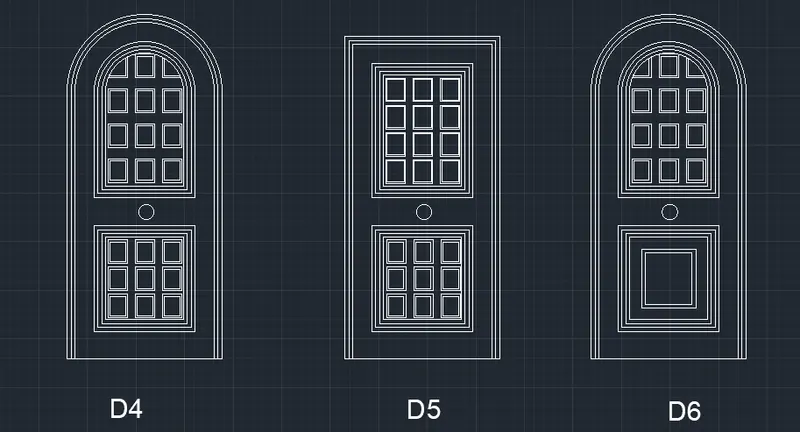
4. Create the door type for residential building as a block. Save the name of the blocks as type. Use given dimensions or assume dimensions as per industry standards.
AIM:-
Create the door type for residential building as a block. Save the name of the blocks as type. Use given dimensions or assume dimensions as per industry standards.
INTRODUCTION:-
To create door
Type Rec in command box and take dimension as per given
Type O in cammand box and offset line for pannel
TYPE Rec in command box and create 1 pannel
and this pannel arrey for create many pannel
after creating make block of door and give name select pick up point
5. Create each shape as a block as shown in the Figure. Save the block and insert them on the table as shown in the Figure.
AIM:-
Create each shape as a block as shown in the Figure. Save the block and insert them on the table as shown in the Figure.
INTRODUCTION:-
Create a table of 6 row and 7 column
Type L in command box and draw object in table
Type dt in command box give text
fill data in table
and created object make block