Creating a Wardrobe detailed drawing, Floor Plan, Kitchen Layout and Column Detail using AutoCad
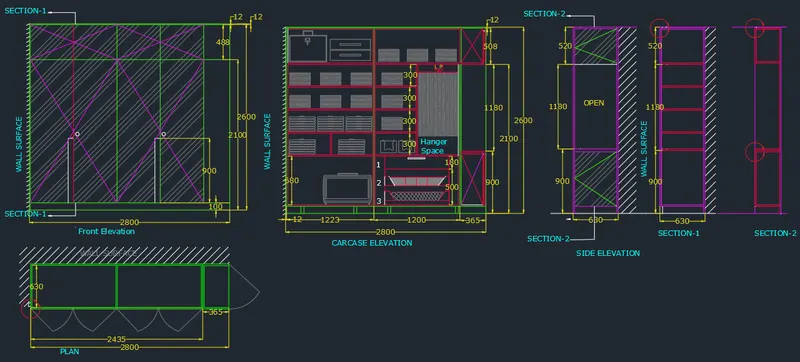
Aim: To Draw the elevation and details of a wardrobe as shown in the Figure below. After sketching and to provide the dimensions and text with the use of layers.
Procedure:
STEP 1:
- Units are set to mm
- Limits and lim-max are also set
- Zoom command is also used
STEP 2:
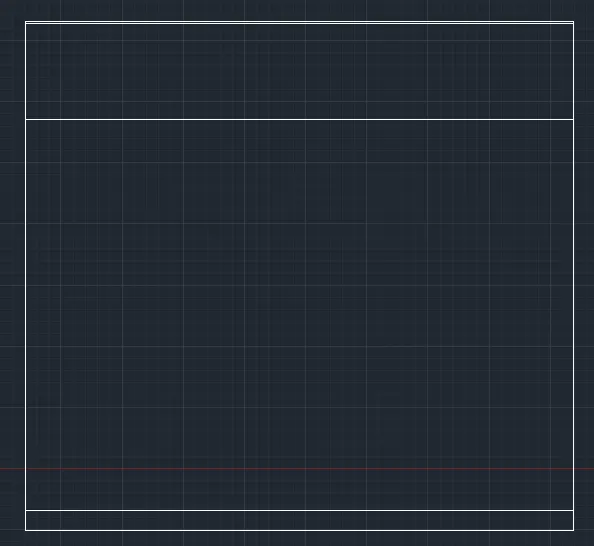
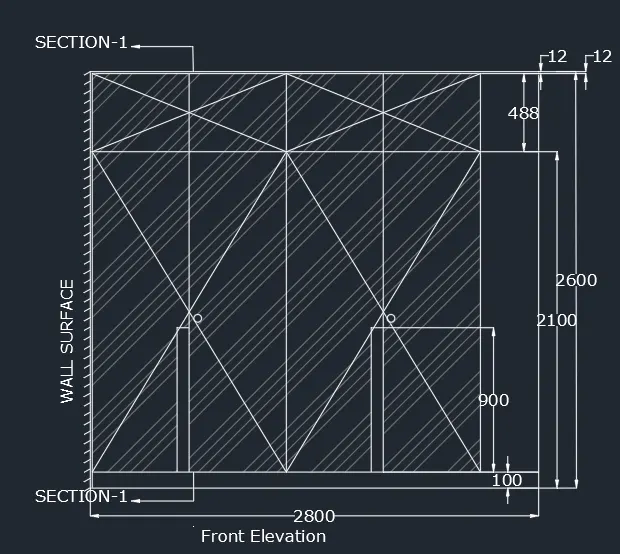
- In the command line type rec>2800, 2600
- In the command line type offset
- Offset from the top of dimensions 12 and 488 mm.
STEP 3:
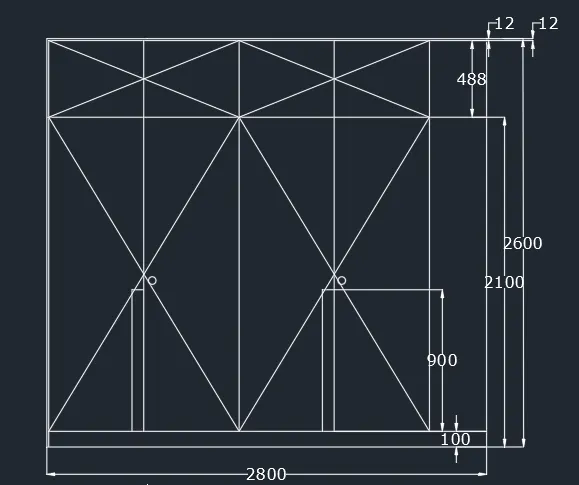
- In the command line type offset
- create the offset from the side at the distance of 608.75 and 365 .
STEP 4:
- In the command line type L and by increasing the transparency to create wall surface.
- by using hatch give the hatch and give scale 20.
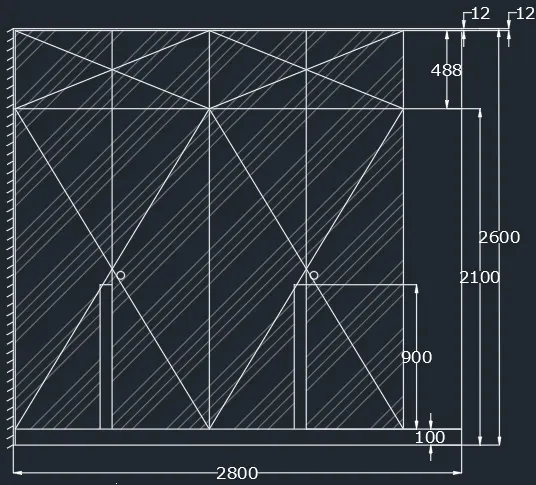
- In the command line type q leader to mention the annotations
STEP 5:
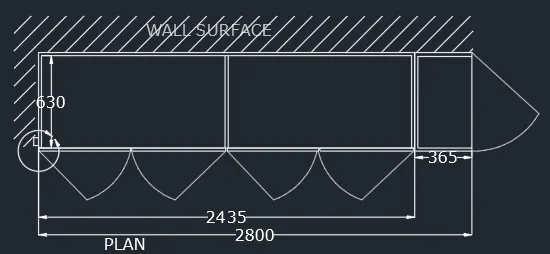
- In the command prompt type rectangle > 630 x2800
- In the command prompt type q leader to give the annotations .
STEP 6:
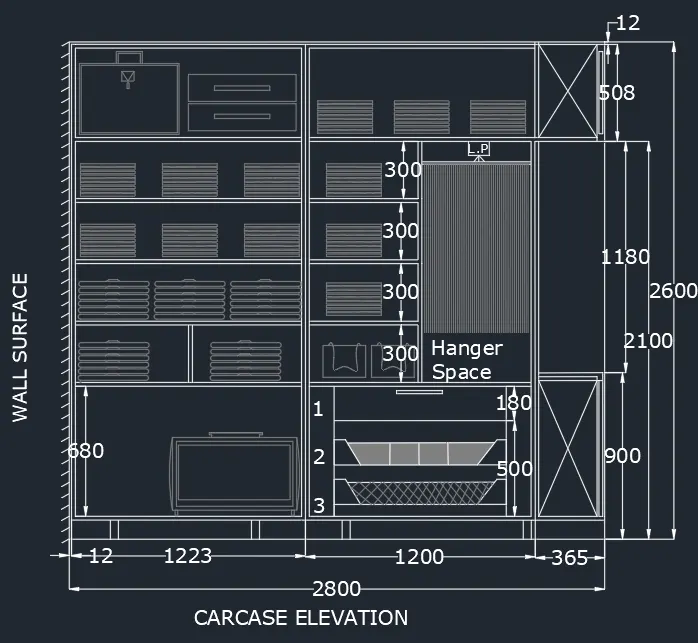
- In the command prompt type rectangle 2800 X 2600
- With the help of line command drawers and cabinets are created .
- For the drawers and cabinets give the grey colour.
- Dimension the drawing.
STEP 7:
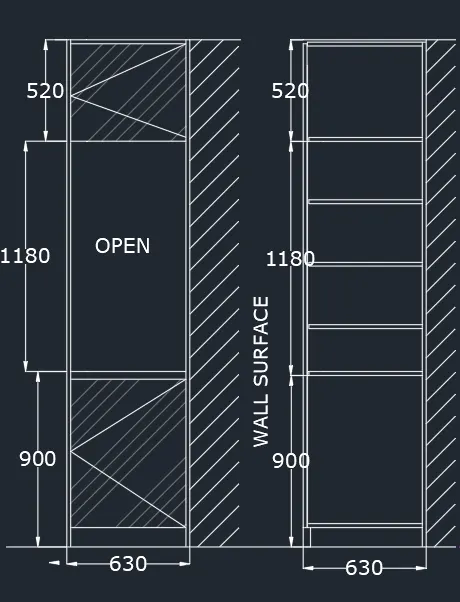
- In the command prompt type rectangle and dimensions of 520 x 630, 1180 x 630 ,900x630 This is repeated 2 times.
- using line commands, the next of the lines are drawn .
Step 8:
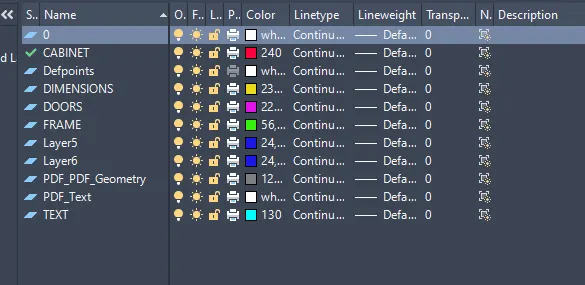
Place the entire drawing in the respective layers.
Result:
2)
Aim:
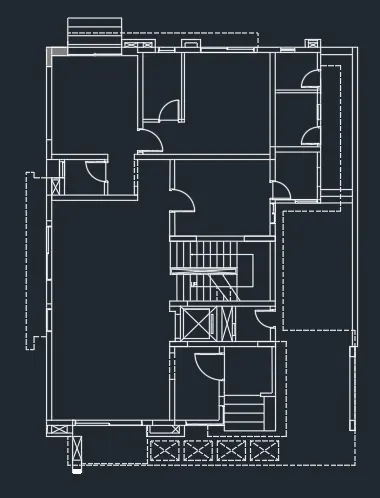
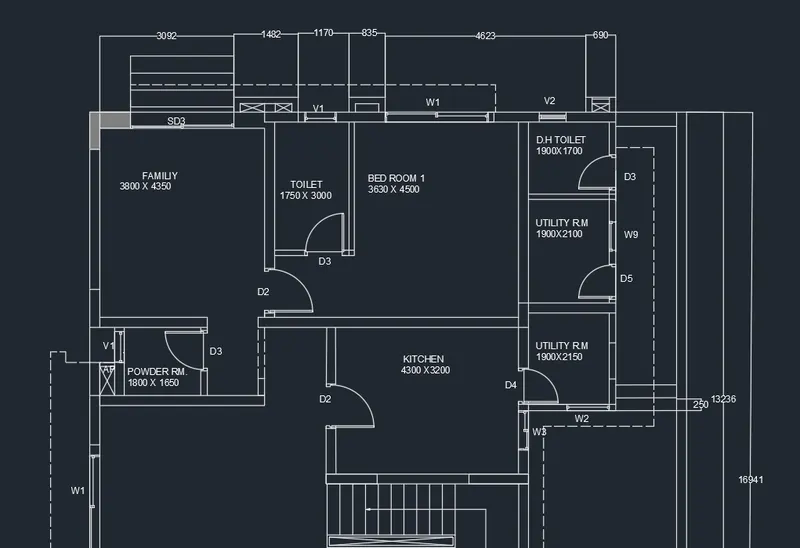
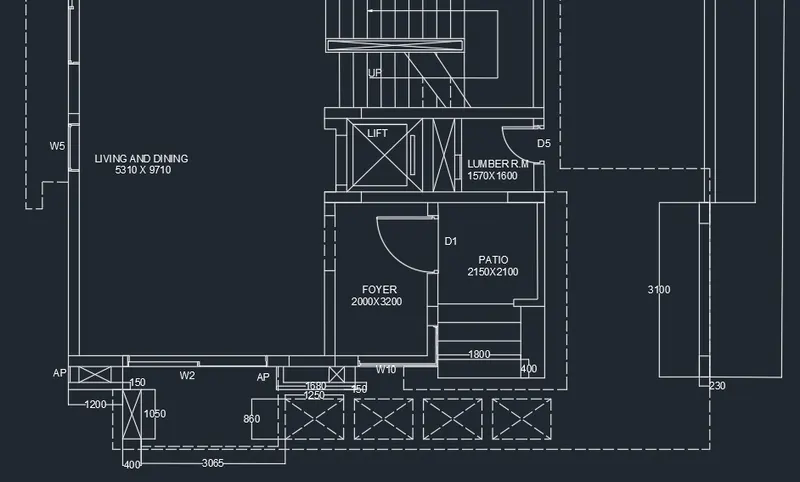
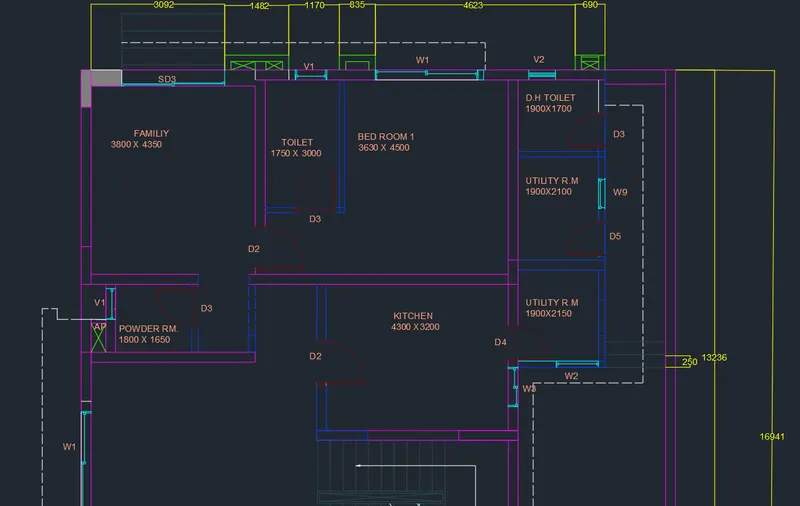
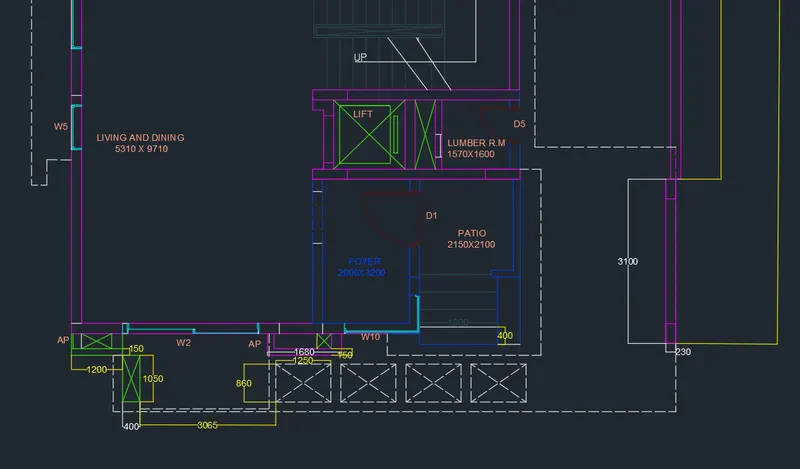
To draw the given floor plan
Procedure:
Step 1:
- Units are set to mm
- Limits and lim-max are also set
- Zoom command is also used
Step 2:
- In the command prompt type XL to draw the infinite lines
- In the command prompt type offset to offset the line for a particular distance
- Using arc command doors are also created .
Doors: Windows: Ventilators:
- D1 - 1000 x 2000 mm 1. W1 - 2700 x 1500 mm 1. V1- 800 x 500 mm
- D2 - 900 x 2100 mm 2. W2 - 2500 x 1500 mm 2. V2 - 750 x 500 mm
- D3 - 800 x 2100 mm 3. W3 - 900x 1500 mm
- D4 - 750 x 2100 mm 4. W5 - 1000 x 1500 mm
- D5 - 700 x 2100 mm 5. W9 - 800 x 1500 mm
- SD - 2256 X2100 mm
Step 3:
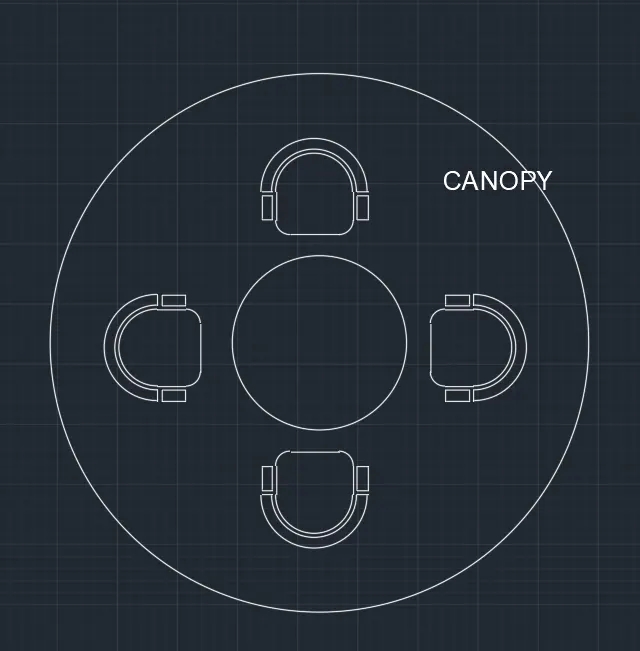
To draw canopy
circle:
- In the menu bar click on circle > centre, radius
- specify the centre point as 10,10 and radius 452
- In the meu bar click on circle > centre, radius
- specify the centre point same as the previous circle (10,10) and radius 1398
SEATS:
- In the menu bar click on rectangular or In the command prompt type rec
- specify the length of the rectangle as 662.3
- specify the width of the rectangle as 298 .0
- In the command prompt type FILLET > RADIUS > 100 .00 (to get curve edges in the corner)
- In the menu bar > circle > 2-point ( 2 points are the end points of the top line )
- In the men bar > circle > centre ,diameter
- centre is the midpoint of the line , diameter is 719 .0
- In the menu bar > circle > centre, diameter
- centre is the midpoint of the line , diameter is 777.2
- now, extend the centre line and trim the extra's
- In the menu bar click fillet> blend curves > and select the arc
- In the menu bar click fillet> blend curves > and select the arc
- In the menu bar click fillet> blend curves > and select the arc
Step 4:
Give the dimensions and anotation the drawing with the text where ever required.
Step 5:
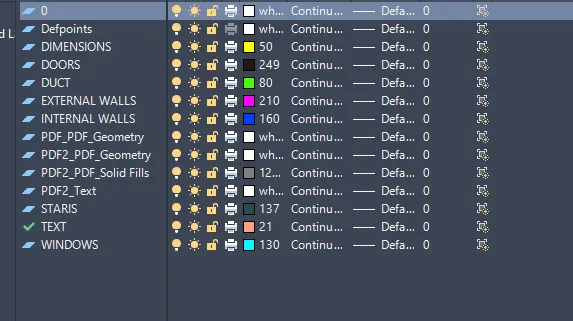
Place the all elements of the drawing in the respective layers.
Result:
3)
Aim:
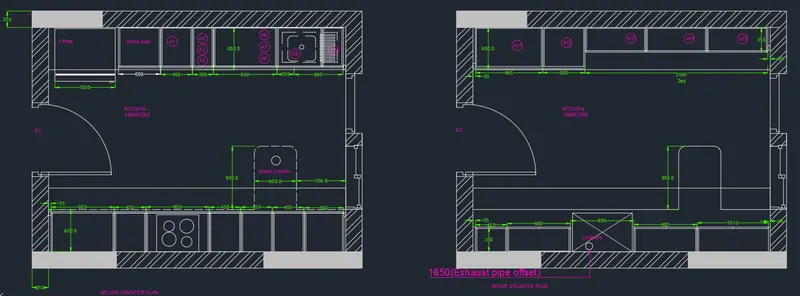
To Create the Kitchen Layout and to Also, use proper dimension techniques to dimension the kitchen layout. Also, insert text wherever required.
Procedure:
step 1:
- Units are set to mm.
- Limits and lim-max are also set .
- Zoom command is also used .
Step 2:
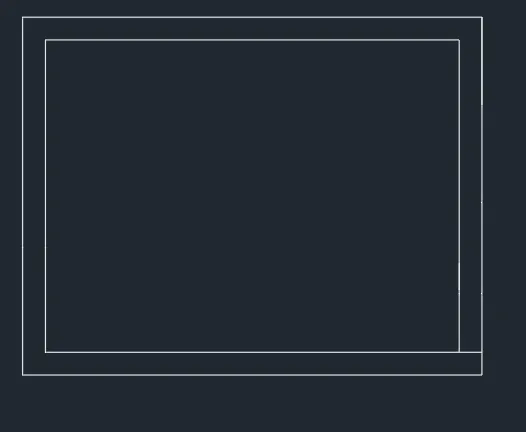
- In the command prompt type rec and the dimensions are 4734 x 3688 mm.
- In the command prompt type offset and offset it to the distance of 250mm.
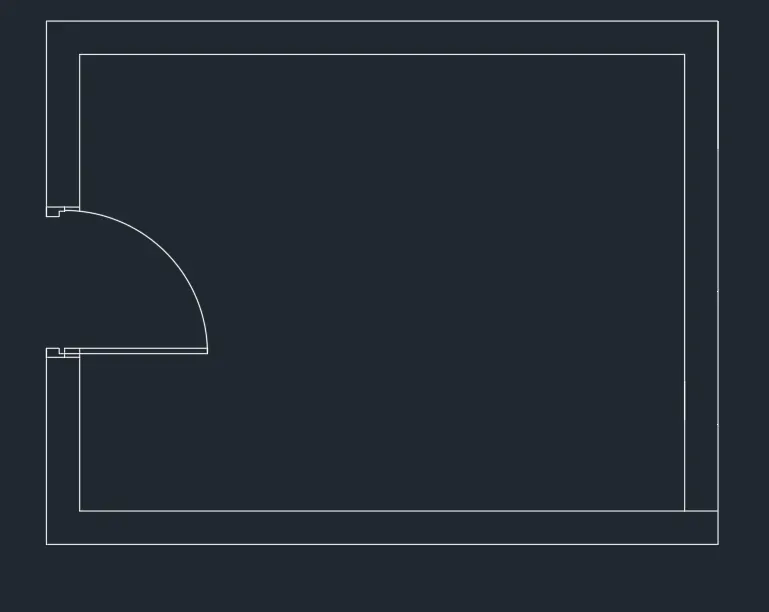
- Using arc and lines the door is drawn .
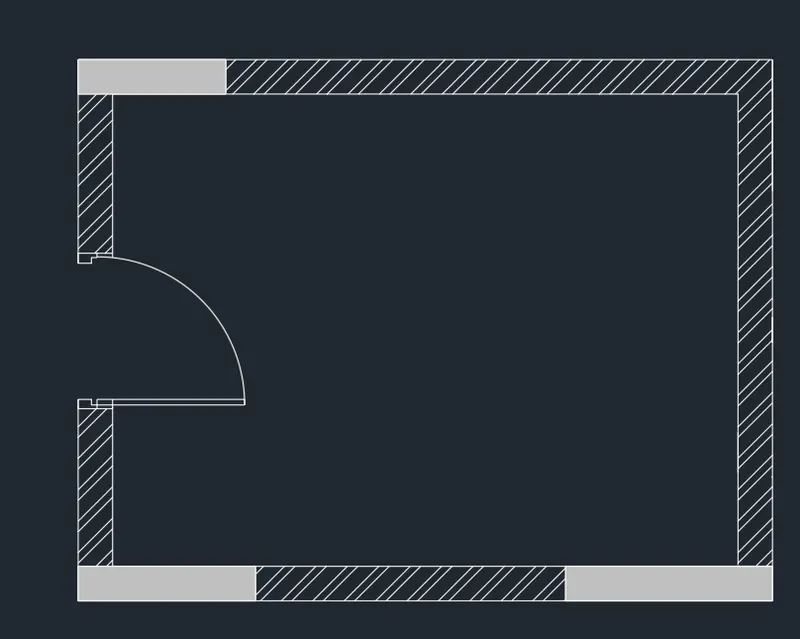
- In the command prompt type hatch to hatch the model .
Step 3:
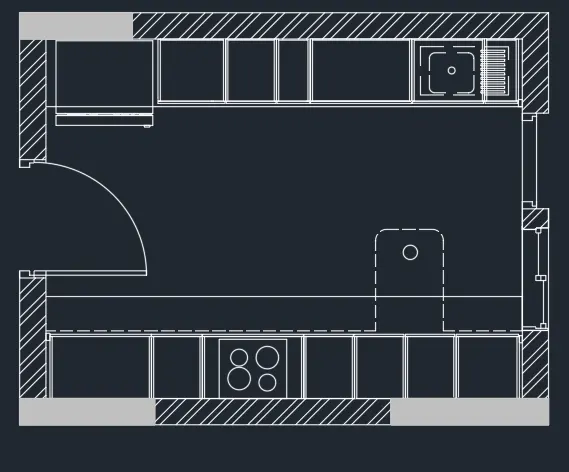
- In the command prompt type rec > dimensions, to do the fridge .
- In the command prompt type offset and offset it to the desired distance to get the Micro Oven .
- In the command prompt type trim to trim the extras.
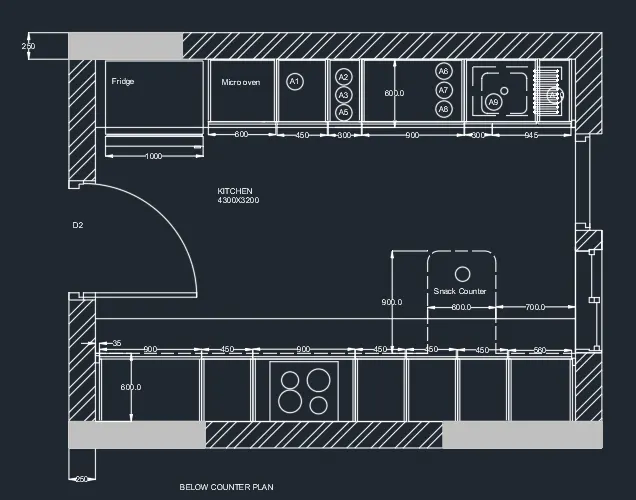
- In the command prompt type offset and offset it to the horizontal distance of 350,450,900,450,450 and 560 .
- In the command prompt type offset and offset it to the vertical distance of 600 .
- In the command prompt type trim to trim the extras .
- In the command prompt type line type and load the dotted lines .
Step 4:
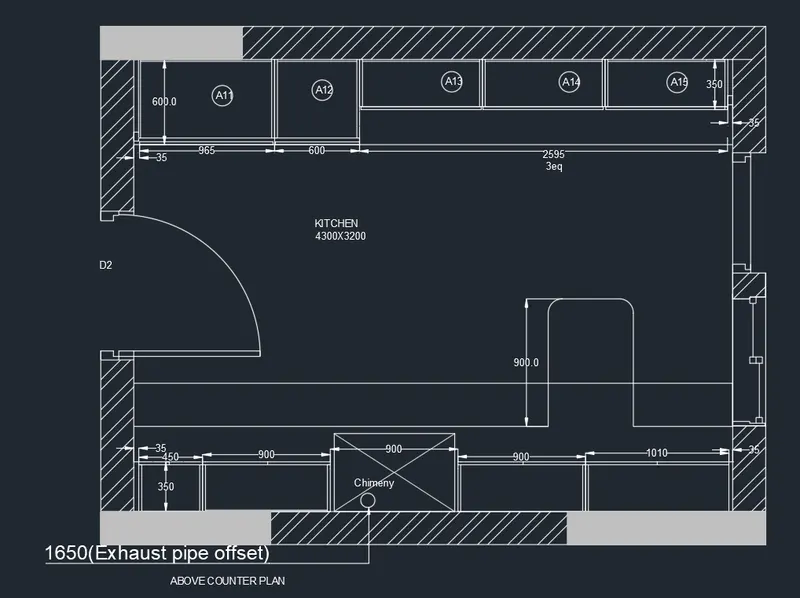
- In the command prompt type text to text the given annotations .
- In the command prompt type dimensions to given the dimensions to your plan .
- In the command prompt even the leader command is used to name the dimensions .
Step 5:
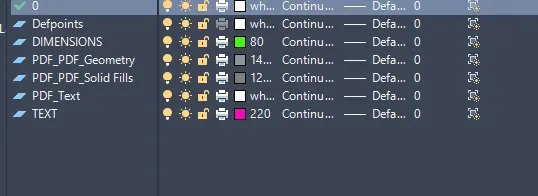
Place all the elements in the required layers .
Result:
4)
AIM:
To sketch the column details
PROCEDURE:
Step 1:
- Units are set to mm.
- Limits and lim-max are also set .
- Zoom command is also used .
Step 2:
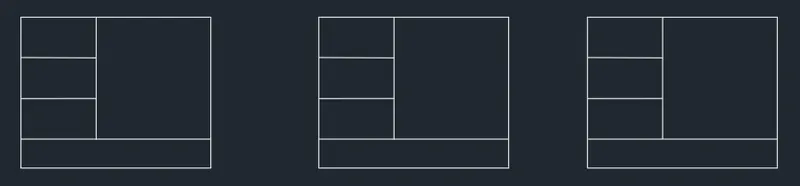
- Using rectangle and line command the tables are drawn .
Step 3:
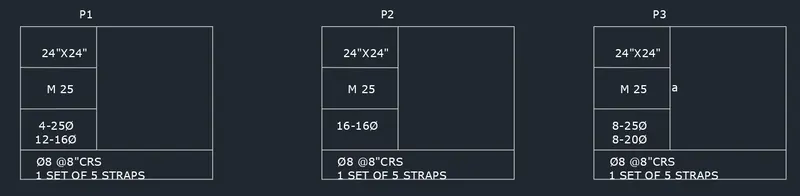
- Using text command, the text is given .
Step 4:
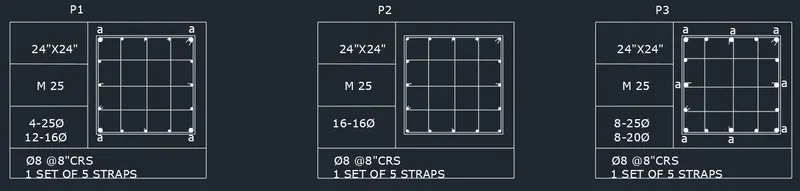
- In the command prompt type lines to draw the reinforcement .
- In the command prompt type circles to draw the reinforcement .
Result:
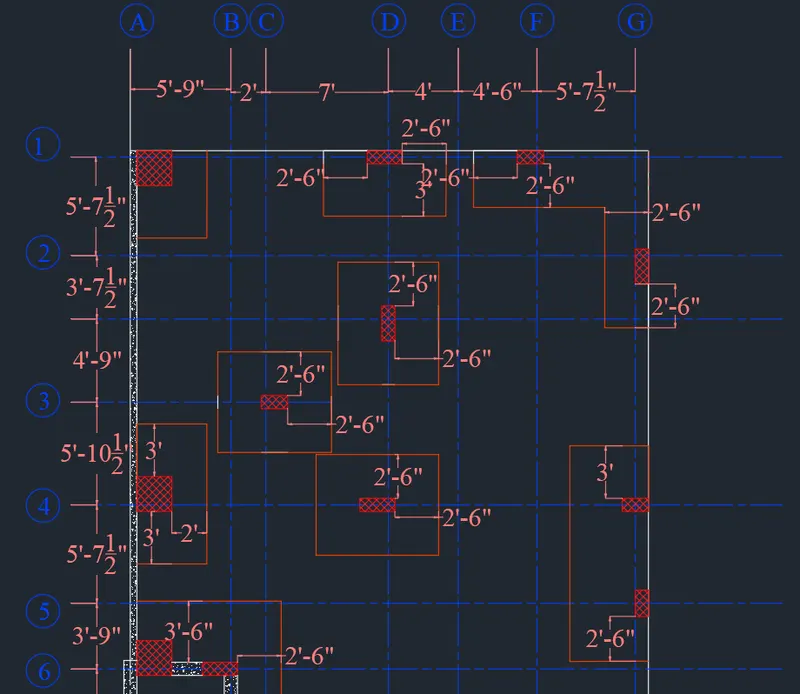
5)
Aim:
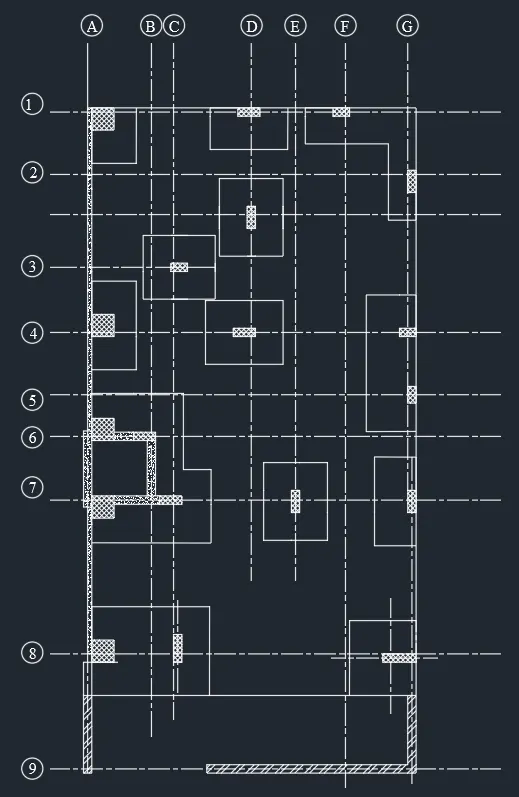
To draw the raft layout
Procedure:
Step 1:
- Units are set to Engineering > inches .
- Limits and lim-max are also set .
- Zoom command is also used .
Step 2:
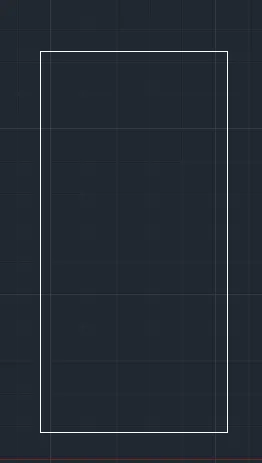
- In the command prompt type rectangle > dimensions are 29'-7" and 60 '
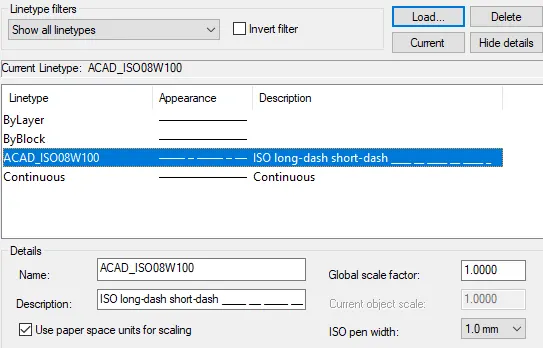
- To get dotted lines click on line type and load the dotted lines > set current .
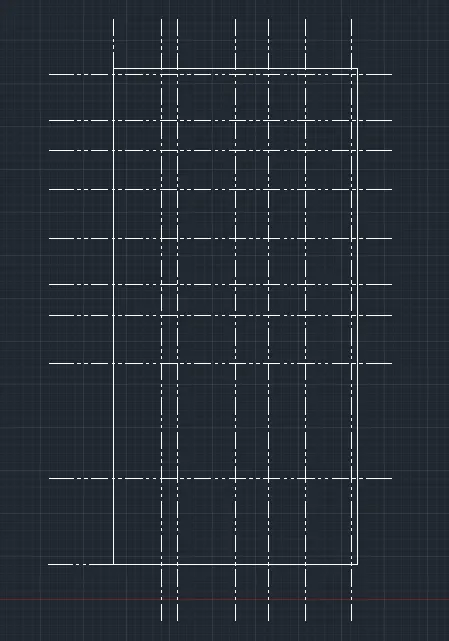
- With the help of dotted lines and offset command the grids are drawn
Step 3:
- In the command prompt offset the distance to 4"
- in the ribbon > hatch > AR-CONC
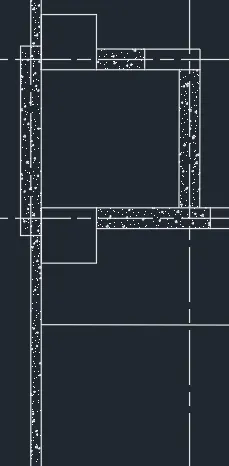
- In the command prompt type rec > 2' x2'
- In the command prompt type rec to draft the columns.
- In the ribbon bar select hatch > ANSI37 hatch the columns.
- In the ribbon bar select hatch > ANSI33 to hatch the walls.
Step 4:
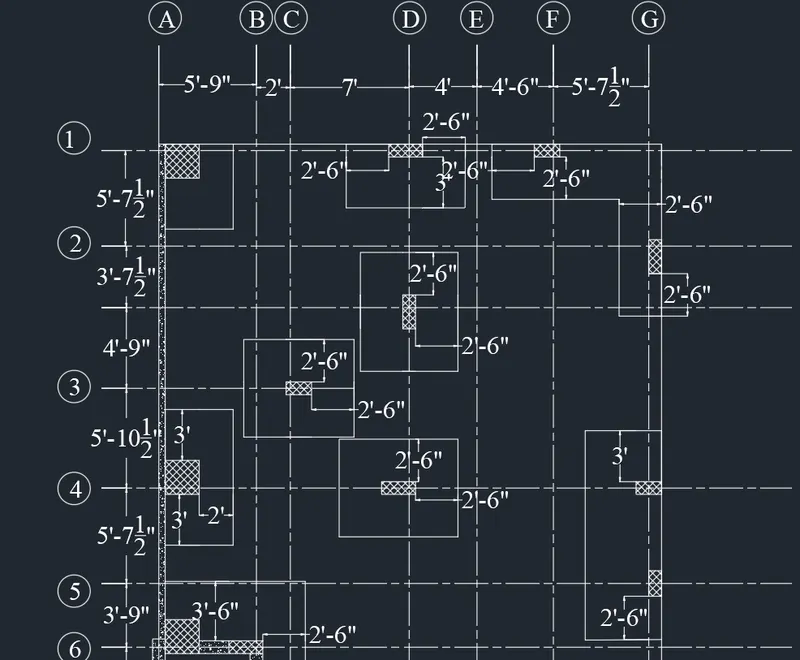
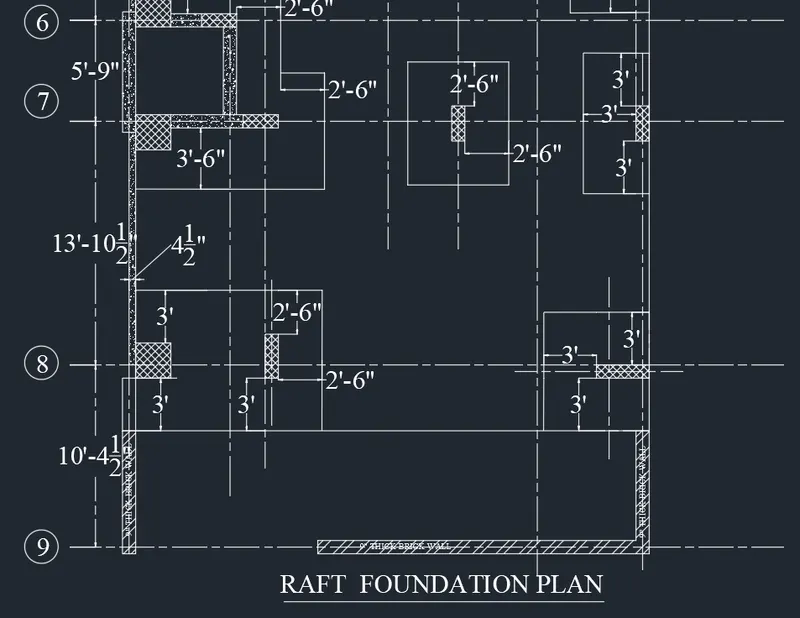
- In the ribbon tab > Annotate > text > Text to text the given annotations .
- In the ribbon tab > Dimensions > To give the dimensions .
Step 5:
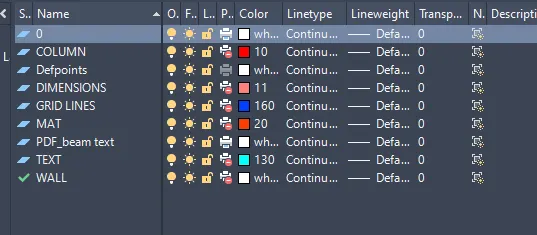
Place the all the elements of the drawings in the required layers .
Result: