AutoCAD_Footing Detailing, Floor Plan and Isometric View_Week 2
Q) Draw the following members in detail.
C1. Cross section of load bearing wall over spread footing.
C2. Cross section of isolated footing.
C3. Line diagram of a two bedroom building.
C4. Cross section of a load bearing wall showing foundation details.
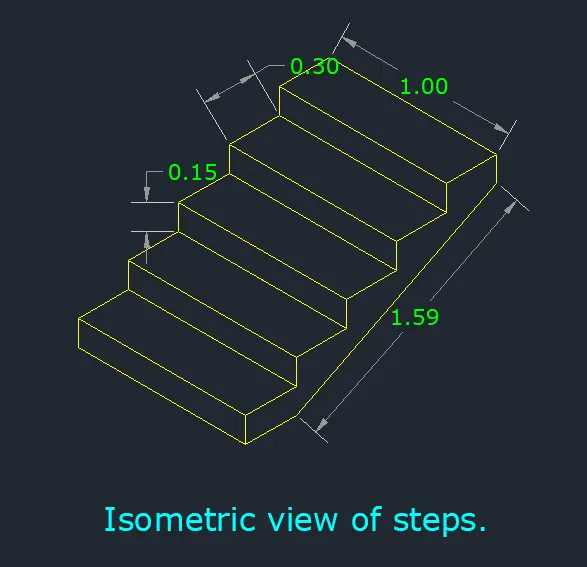
C5. Isometric view of steps.
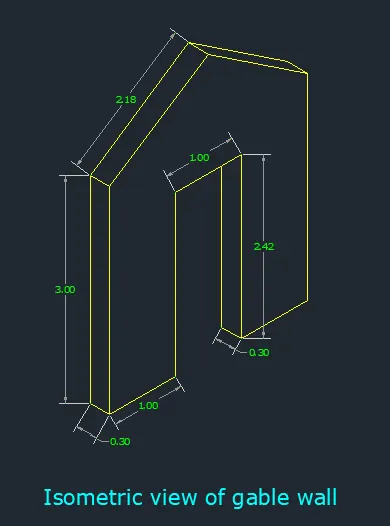
C6. Isometric view of gable wall.
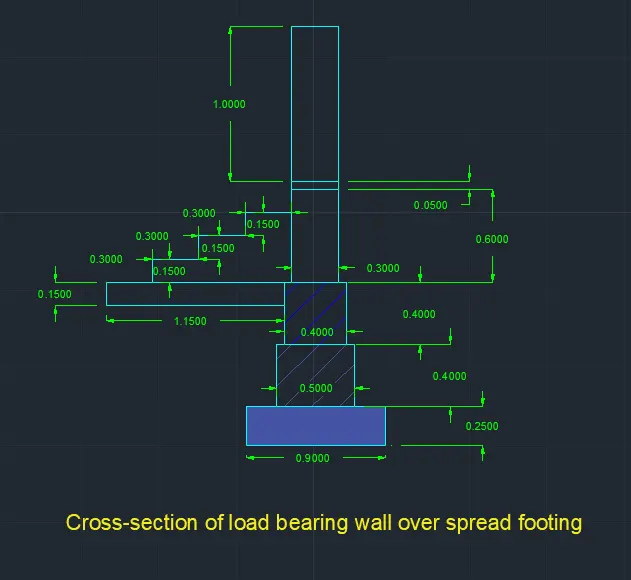
C1. Cross section of load bearing wall over spread footing.
Aim: To draw the cross section of load bearing wall over spread footing.
Procedure:
Step:1
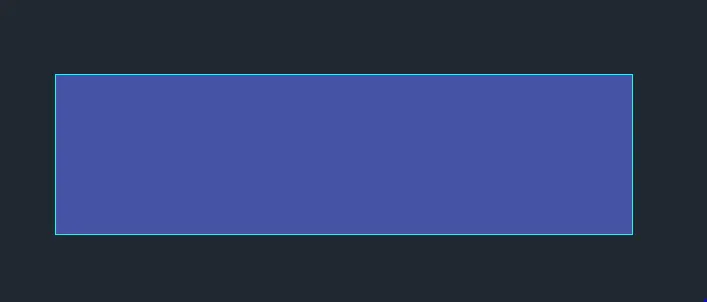
- First we have to enter the rectangle command in the command box.
- Next specify the first corner point (5,0)
- After specifying the corner point as (5,0) then select the dimentios options.
- Then enter the length of the rectangle as 0.9 units in the command box.
- Next specify the width of of the rectangle as 0.25 units.
- After clicking the enter it forms the rectangle.
Step:2
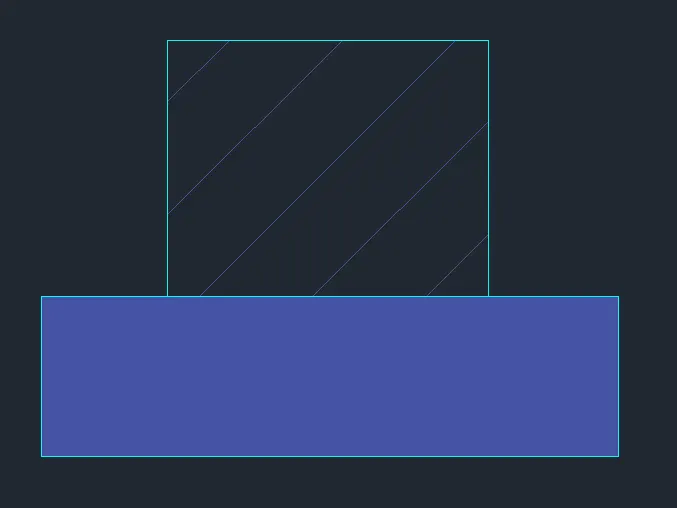
- Next enter the another rectangle command in command box.
- Now there is a dynamic input option, then click on that one and it consists of option that ON/OFF, Then select the ON option.
- Next specify the first corner point from the starting point of triangle which has drawn first.
- And from starting point of first rectangle, Leave 0.2 units from left and right sides of the first triangle we drawin previously.
- Then after click the dimensions in command box.
- Then enter the length and width values as 0.5 units and 0.4 units.
Step:3
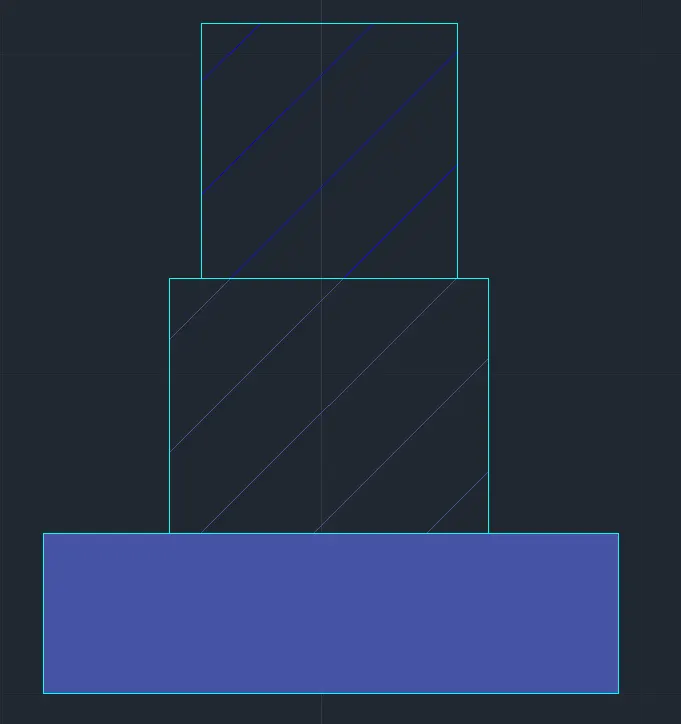
- Similarly,enter the another rectangle command in command box.
- Now there is a dynamic input option, then click on that one and it consists of option that ON/OFF, Then select the ON option.
- Next specify the first corner point from the starting point of rectangle which has drawn.
- And from starting point of first rectangle, Leave 0.05 units from left and right sides of the second triangle we drawn previously.
- Then after click the dimensions in command box.
- Then enter the length and width values as 0.4 units and 0.4 units.
Step: 4
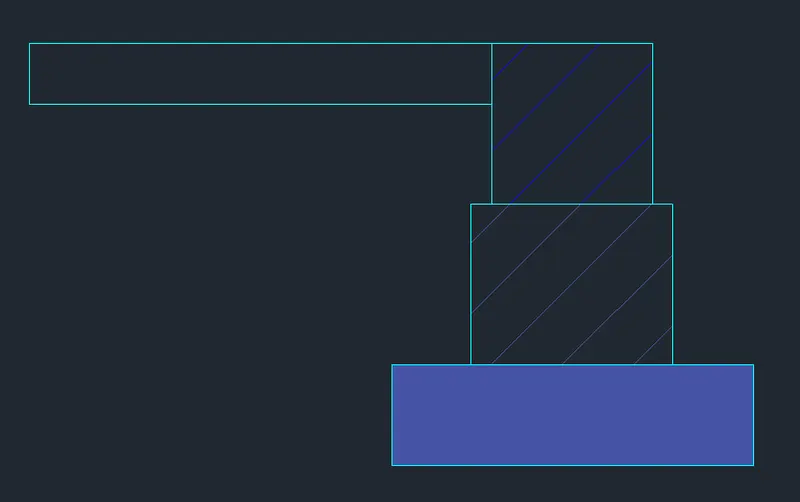
- Next from the starting point of third rectangle, and create the rectangle towards the left using the rectangle command.
- Enter the rectangle in command box, specify starting point towards the left and form a rectangle of length(1.15 units) and width (0.15 units).
- After entering the length and width we get the rectangle attached to the third rectangle which we have drawn previously.
Step:5
- Then similarly, enter the another rectangle command in command box.
- Now there is a dynamic input option, then click on that one and it consists of option that ON/OFF, Then select the ON option.
- Next specify the first corner point from the starting point of rectangle which has drawn first.
- And from starting point of first triangle, Leave 0.05 units from left and right sides of the first triangle we drawin previously.
- Then after click the dimensions in command box.
- Then enter the length and width values as 0.3 units and 0.6 units.
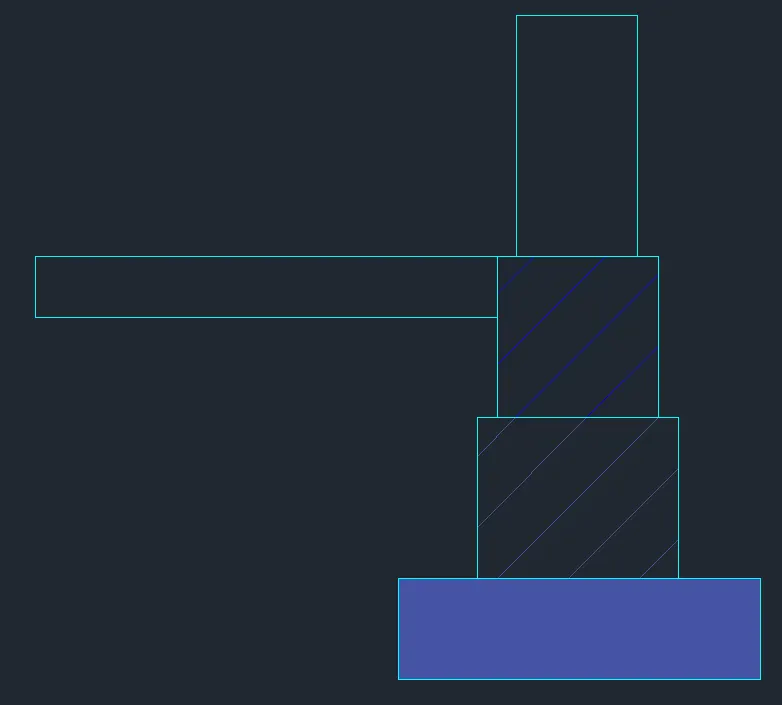
Step:6
- Now from the previous drawn line atteatched to the third rectangle, On the forth rectangle we leave the distance of 0.3 units from the left side.
- And draw a line of 0.15 units vertically and 0.3 units horizontally.
- Then continue this more two times until the 3 steps are created.
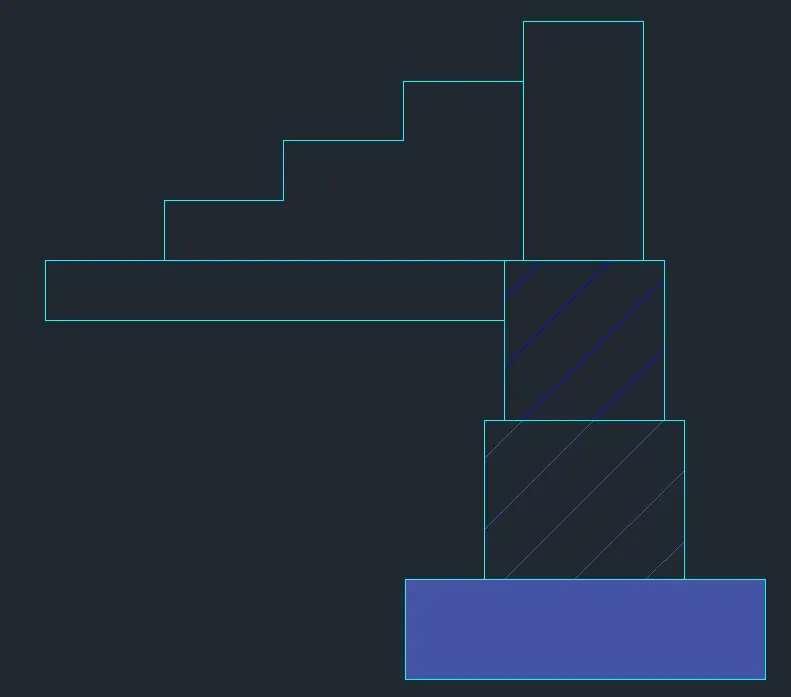
Step:7
- Next Enter the another rectangle command in command box.
- Now there is a dynamic input option, then click on that one and it consists of option that ON/OFF, Then select the ON option.
- Next specify the first corner point from the starting point of rectangle which has drawn first.
- Then after click the dimensions in command box.
- Then enter the length as 0.3 units and width value as 0.05 units.
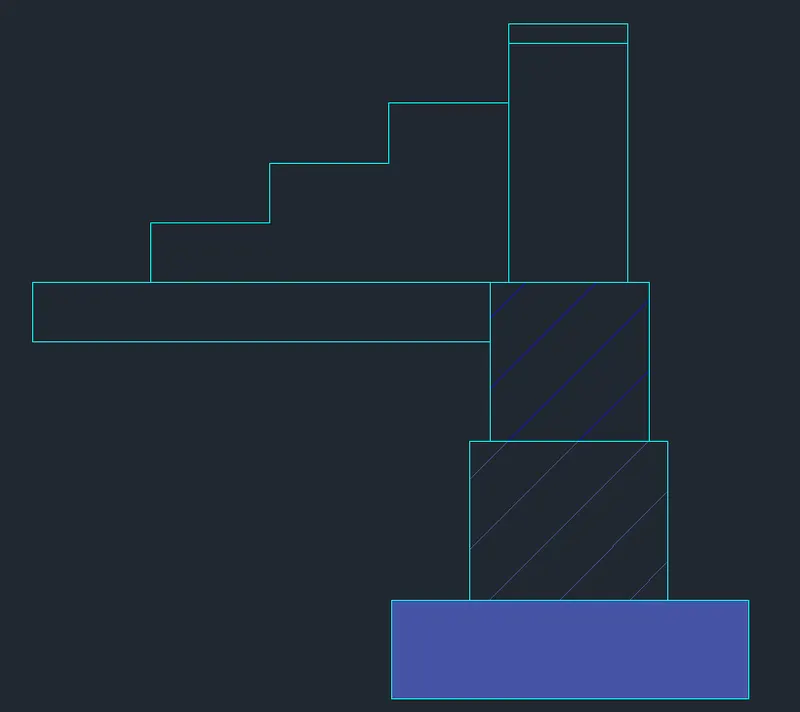
Step:8
- Now Enter the another rectangle command in command box.
- Next specify the first corner point from the starting point of rectangle which has drawn first.
- Then after click the dimensions in command box.
- Then enter the length as 0.3 units and width value as 1 unit.
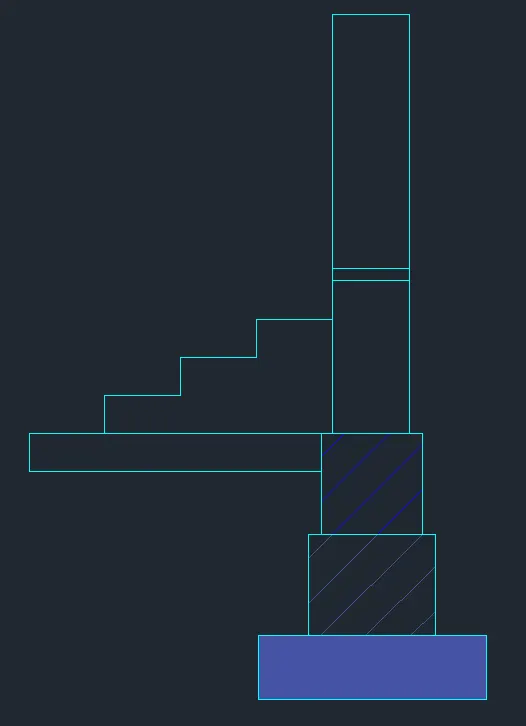
- Then after, put the dimentions for every part in the drawing.
Result:
- The cross section of a load bearing wall over spread footing was drawn successfully.
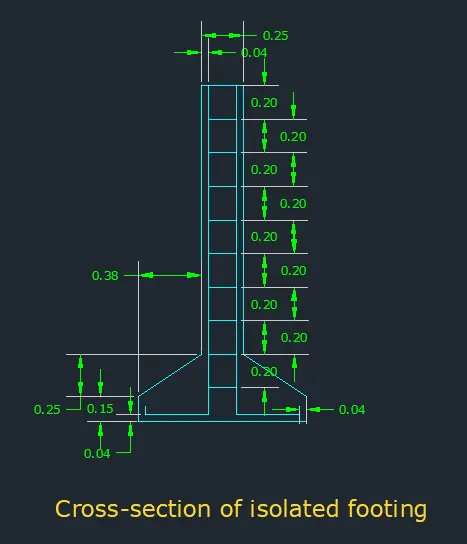
C2: Cross section of a isolated footing:-
Aim: To draw the cross section of isolated footing.
Procedure:
Step:1
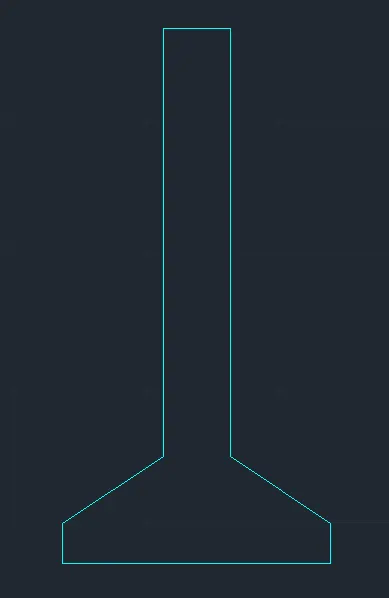
- First take a coordiantes as (5,0).
- Next we have to draw the line of 1 unit with the Line command.
- Next we have to enter the line command and we have to enter the coordinates as (@0,0.15)
- After giving the first coordinate, then enter next coordinate as (@0.38,0.25)
- Next give the coordinate as (@0,1.6)
- Next give the coordinate as (@0.24,0)
- Give the next coordinate as (0,-1.6)
- Next give the coordinate as (@0.38,-0.25)
- Next enter coordiante as (0,-0.15)
Step:2
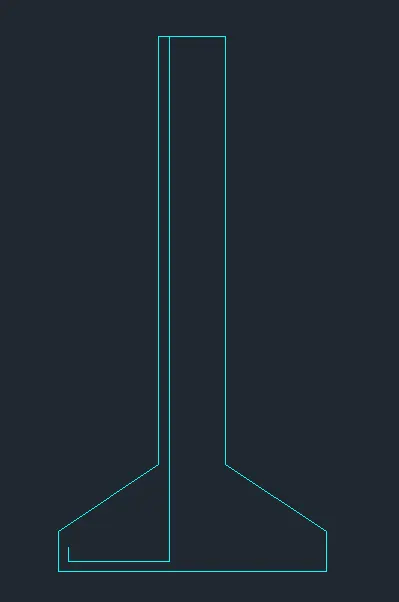
- Next we have to draw the line at a distance of 0.04 from the top using the line command.
- Now there is a dynamic input option, then click on that one and it consists of option that ON/OFF, Then select the ON option.
- After the dynamic input is ON we have to take the of 0.04 and take the coordinates as (@0,-1.96). Then the line will drawn to 1.96 to downwards.
- Next give the coordinates as (@-0.38,) for the second line.
- Next give the coordinates for third line as (@0,0.06)
Step:3
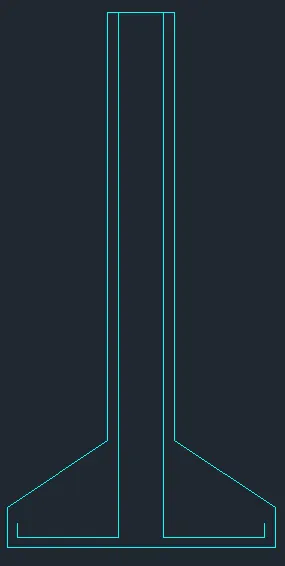
- Next copy the first line by copy command, then click the displacement and enter the value as 0.16 units.
- Then after, copy the second line and move to the desired position.
- Similarly copy third line and drag to the desired position.
Step:4
- Next we have to type the offset command, and select the top line and give the offset value as 0.2 units and offset to downwards.
- Continue the offset lines until the it reach to 9 lines.
- Then trim the unwanted lines.
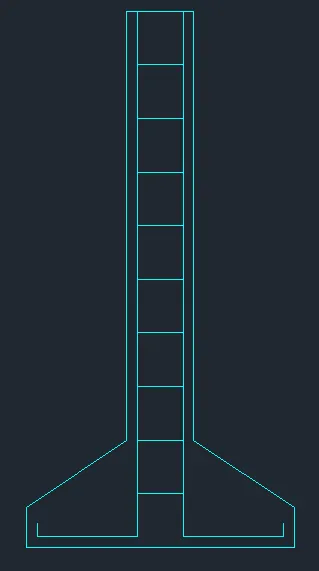
- Finally give the dimensions for every part of a c/s of isolated footing which we have drawn in detail.
Result:
- The cross section of isolated footing is drawn successfully.
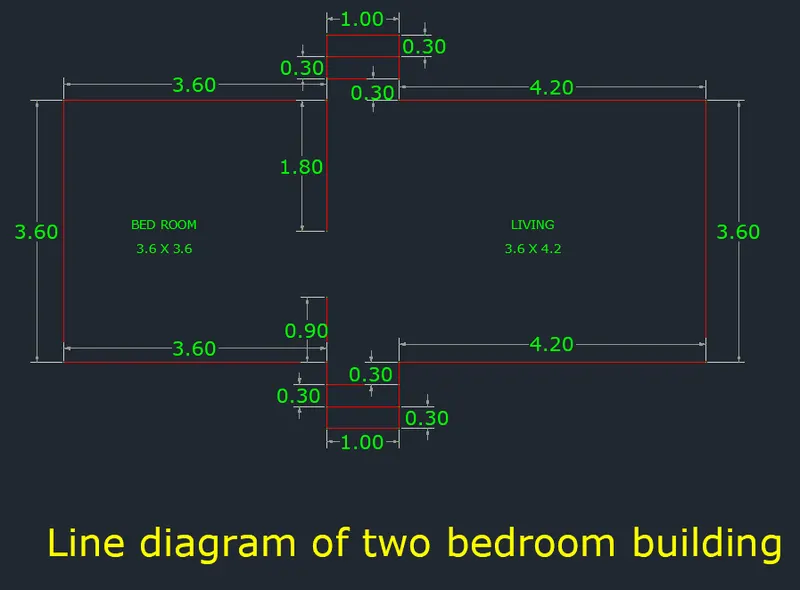
C3: Line diagram of two bedroom building:
Aim: To draw the line diagram of two bedroom building.
Procedure:
Step:1
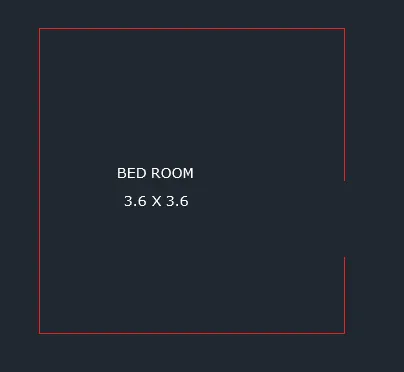
- Here we create the bedroom room of (03.6x3.6) using the polyline command.
- Using the polyline command , click the point and give the coordinates as (@0,-0.9)
- Then after take the coordinates as (@-3.6,0)
- Next we have to take coordinte as (@0,3.0)
- Next we have to take coordinates as (@3.6,0)
- Then after take the coordinates as (@0,-1.8)
Step:2
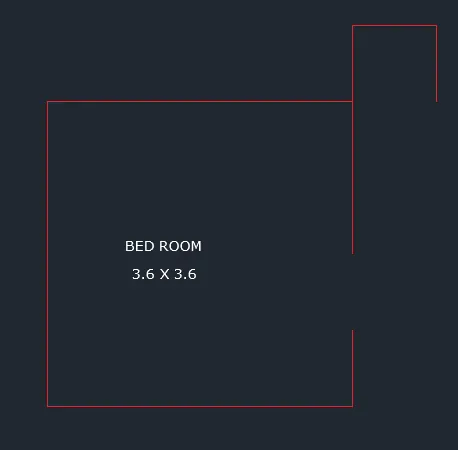
- Then we have to create the stairs using the line command.
- Here from the corner point of the top right side of line we take the coordinates as (@0,0.9), The line goes towards the +y axis.
- Next we take the coordinates as (@1,0), the line goes towards the +y direction.
- Then after we take the coordinates as (@0,-0.9), The line goes towards the -y direction.
Step:3
- Here we draw the living room using the polyline command.
- Now we take the coordinates as (@4.2,0) at the last point of the stairs which we have drawn in the step:2.
- Then after take the coordinates as (@0,-3.6) The line moves towards the -y direction.
- Afterwards we take the coordinates as (@-3.6,0) The line goes towards the -x direction.
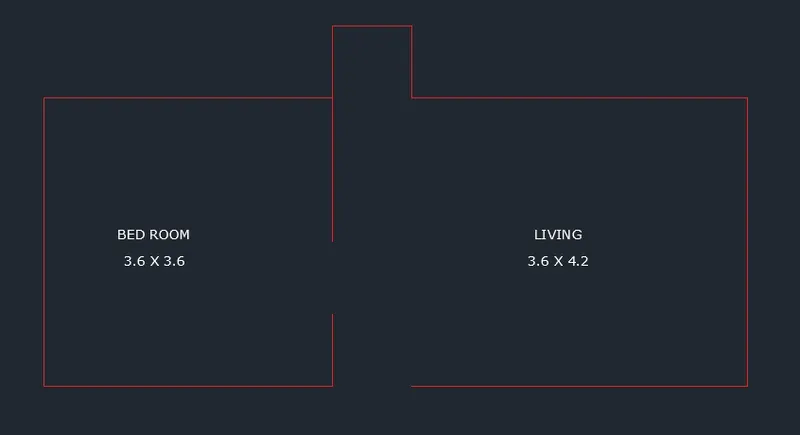
Step:4
- Now we create the stairs as similarly we created stairs in step:2.
- Let us take a point which have drawn at last in step:3.
- At that point we take coordinates as (@0,-0.9) The line moves towards the -y direction.
- Then after we take coordinates as (@-1,0) The line moves towards the -x direction.
- Now take the coordinates as (@0,0.9) The line moves towards the +y direction.
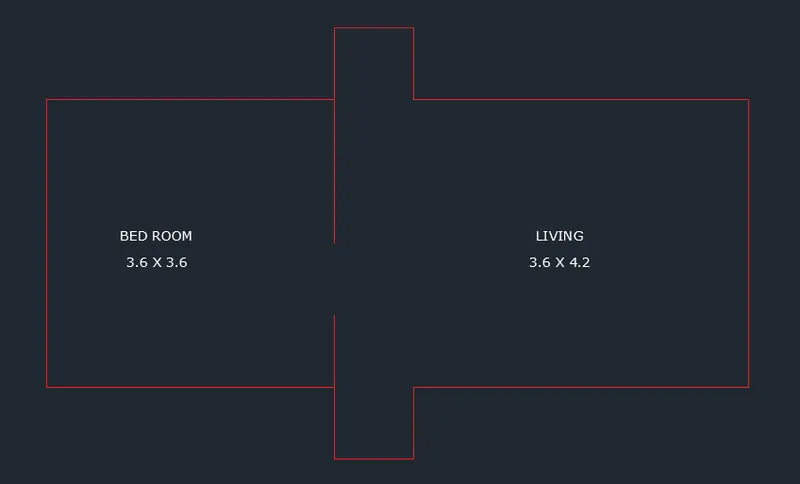
Step:5
- Finally we use offset command for creating the stairs.
- Take the offset command with dimension of 0.3 units, Then select the object for offsetting.
- Do the offset continuously two times for the both sides of the stairs.
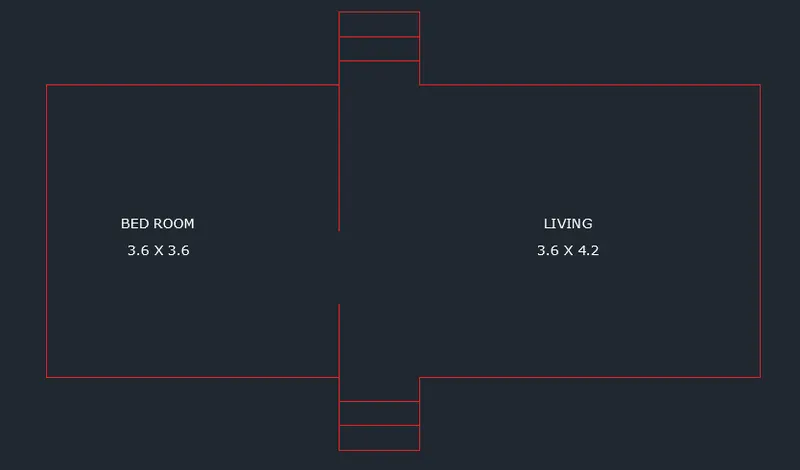
- Finally give the dimensions for all the parts in the drawing.
Result:
- The line diagram of two bedroom building is drawn successfully.
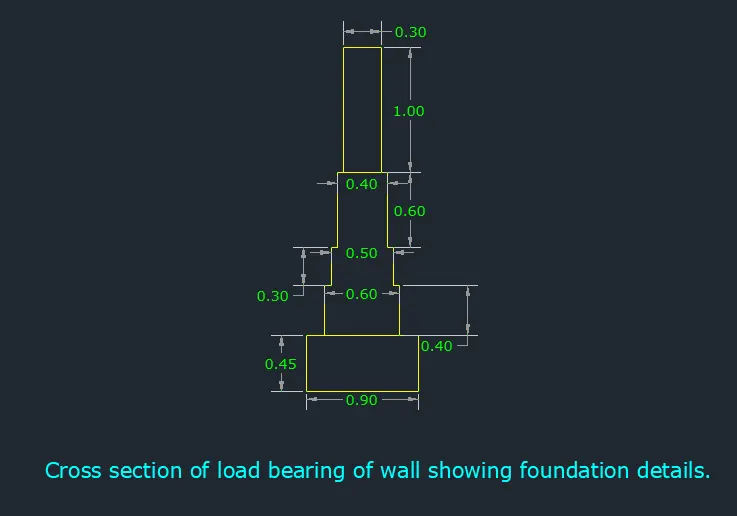
C4: Cross section of load bearing wall showing foundation details.
Aim: To draw the cross section of load bearing wall showing foundation details.
Procedure:
Step:1
- First we have to enter the rectangle command in the command box.
- Next specify the first corner point (5,0)
- After specifying the corner point as (5,0) then select the dimentios options.
- Then enter the length of the rectangle as 0.9 units in the command box.
- Next specify the width of of the rectangle as 0.45 units.
- After clicking the enter it forms the rectangle.
Step:2
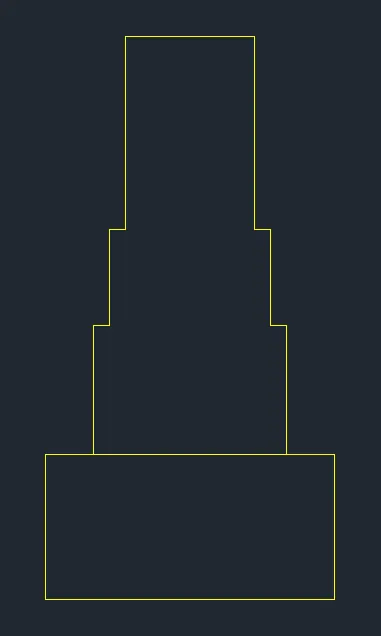
- Next enter the polyline command in command box.
- Now there is a dynamic input option, then click on that one and it consists of option that ON/OFF, Then select the ON option.
- Specify the first point of 0.15 unit from the corner of rectangle.
- Using the polyline command , click the point and give the coordinates as (@0,0.4)
- Then after take the coordinates as (@0.05,0) The line moves towards the +x direction.
- Next we have to take coordinte as (@0,0.3) The line moves towards the y direction.
- Next we have to take coordinates as (@0,0.6) The line moves towards the y direction.
- Then after take the coordinates as (@0.4,0) The line moves towards the +x direction.
- Then after take the coordinates as (@0,-0.6) The line moves towards the -y direction.
- Next we have to take coordinte as (@0.05,0) The line moves towards the +x direction.
- Next we have to take coordinates as (@0,-0.3) The line moves towards the -y direction.
- Next we have to take coordinates as (@0.05,0) The line moves towards the +x direction.
- Next take the coordinates as (@0,-0.4) The line moves towards the -y direction.
Step:3
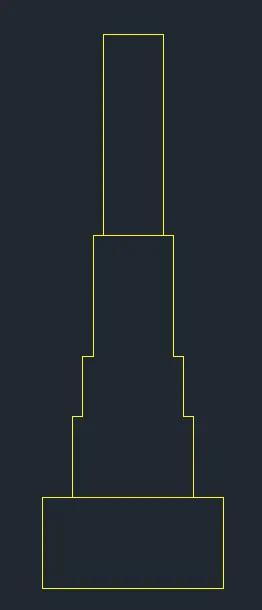
- The top portion is drawn by polyline command.
- Now there is a dynamic input option, then click on that one and it consists of option that ON/OFF, Then select the ON option.
- Specify the first point at a distance of 0.15 unit from the corner which we have drawn last.
- Next we have to take coordinte as (@0,1) The line moves towards the y direction.
- Next we have to take coordinates as (@0.3,0) The line moves towards the y direction.
- Then after take the coordinates as (@0,-1) The line moves towards the +x direction.
- Then after, put the dimentions for every part in the drawing.
Result:
- The cross section of load bearing wall showing foundation details was drawn successfully.
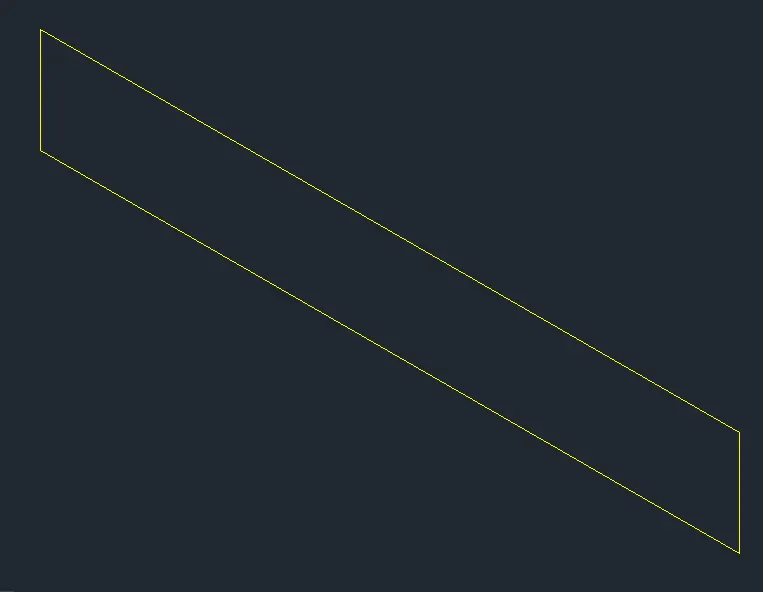
C5: Isometric view of steps.
Aim: To draw the isometric vie of steps.
Procedure:
Step:1
- To draw the isometric view of steps, make sure that turn on the isometric snap in the snap settings.
- And next turn on the ortho mode.
- After selecting the isometric view in the snap settings, select the isoplane left option in the bottom of the command box.
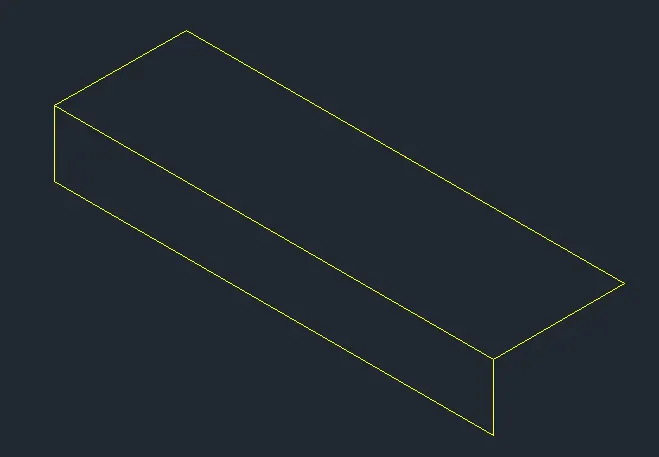
- we have to take coordinte as (@-1,0) The line moves towards the -x direction.
- Next we have to take coordinates as (@0,0.15) The line moves towards the y direction.
- Then after take the coordinates as (@1,0) The line moves towards the +x direction.
- Then after take the coordinates as (@0,-0.15) The line moves towards the -y direction.
Step:2
- Change the isometric drafting to the isometric top option.
- Give 0.3 units from the last point.
- Now we move the curser to the right direction and give 1 unit, and move the cursor to front and give 0.3 units.
Step:3
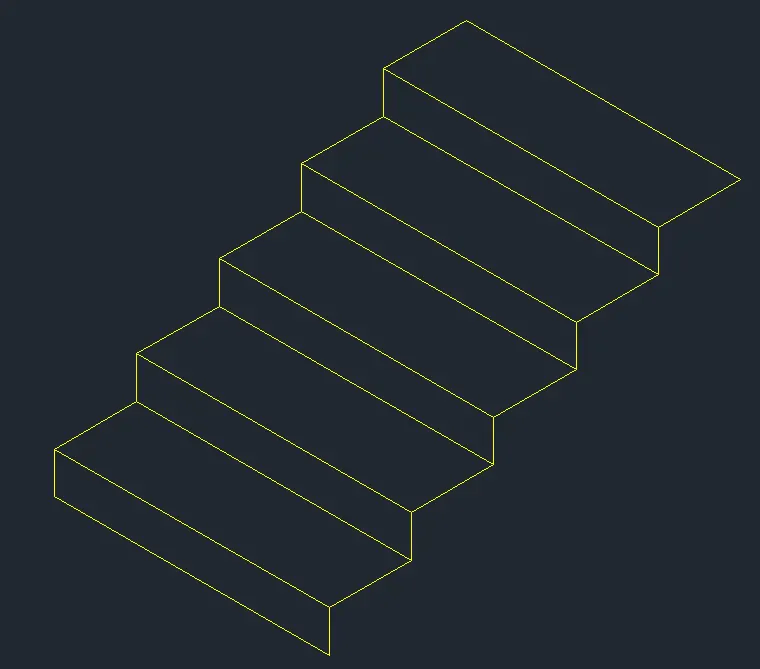
- Now change the isometric drafting to the isometric right option.
- Now turn off the ortho mode and copy the object drawn.
- Next use the copy command and specify the base point and place it to new point.
- Now this can be continued upto four times in which the steps are formed.
Step:4
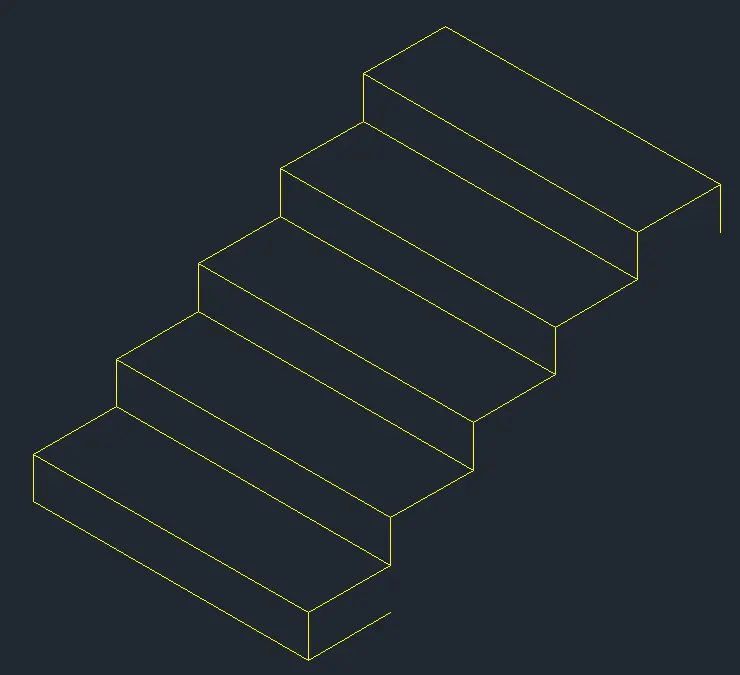
- Now copy the horizontal distance of 0.3 downwards on the starting end of step with isolated right.
- And also copy the vertical distance of 0.15 on the last end of step.
Step:5
- With the isoplane right join the two ends with turning off ortho mode.
- Now use the line command, select the first point as the bottom point.
- And the second point as end point of vertical line.
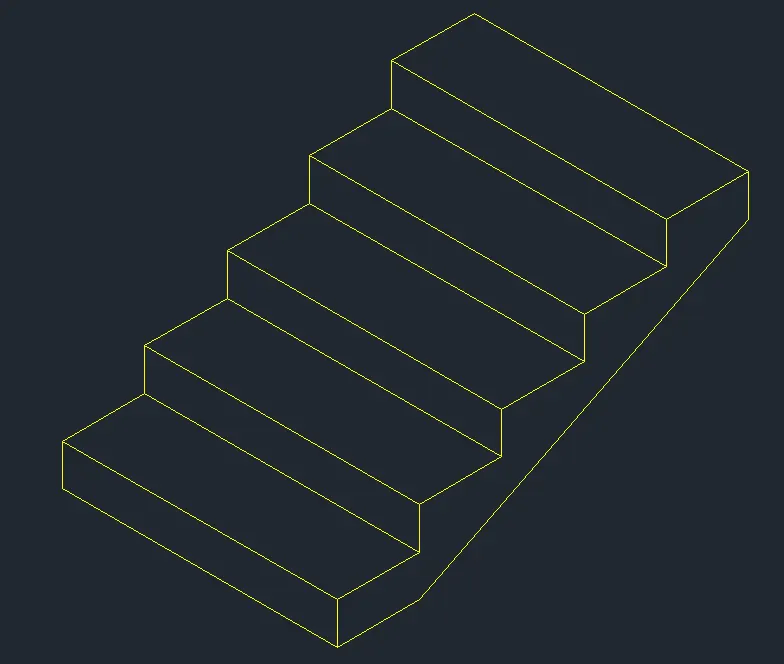
- Finally give the dimensions for every part in the drawing.
Result:
- The isometric view of steps are drawn successfully.
C6: Isometric view of gable wall:
Aim: To draw the isometric viw of gable wall.
Procedure:
Step:1
- To draw the isometric view of steps, make sure that turn on the isometric snap in the snap settings.
- And next turn on the ortho mode.
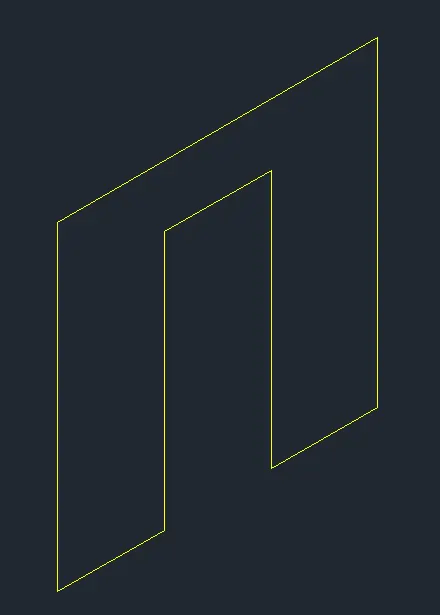
- After selecting the isometric view in the snap settings, select the isoplane right option in the bottom of the command box.
- Here we the line command and moving the cursor to left give 1 units.
- Then the point the cursor upwards gives the 3 units
- And draw the 3 units to right and 3 units downwords.
- In the isoplane right, take the line command and draw line upwards of 2.42 units from the starting point.
- Then draw the 1 unit towards the right and 2.42 units downwards.Click the end point of figure.
- So that a closed figure is obtained in the isometric view.
Step:2
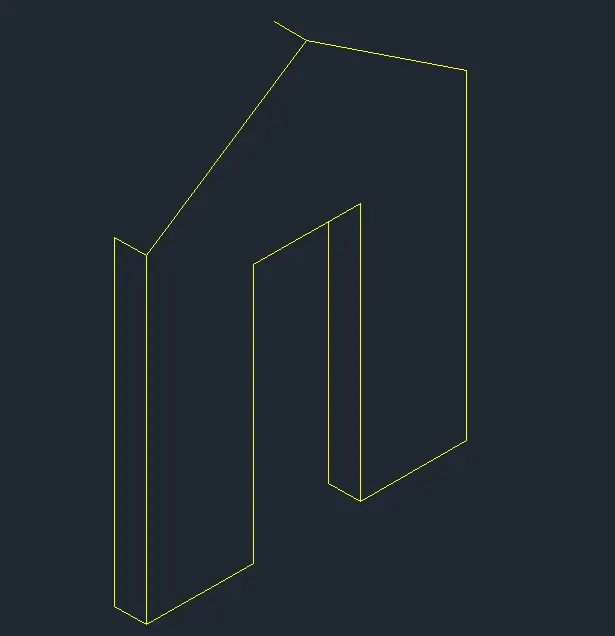
- And then change the isoplane left and take the line command and draw the 0.3 units on the left side of the figure.
- And draw 3 units upwards and join the both.

Step:3
- Here give the thickness of opening isoplane left, and draw the 0.3 units towards left and 2.12 units upwards.
- Now increase the thickness line of opening 1.13 units upwards, upto the 3.25 units from the bottom.
- By turning off the otho mode, we draw a line between the corner of left side and the projected line drawn in step:5.
- Then draw it to the other side also till it meets the right corner.
- We draw the vertical line by turning on the ortho mode, and we draw the centre portion and erase the projected and horizontal lines.
Step:4
- Now copy and join the inclined lines, and we will get the isometric view of the gable wall.
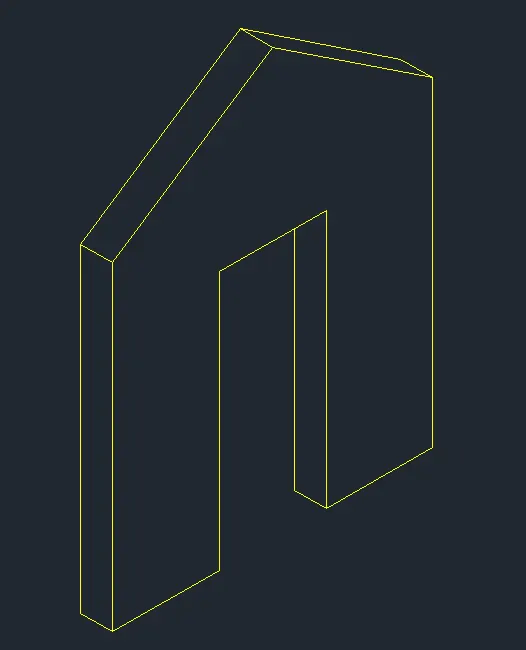
- Finally give the dimensions for every part in the drawing.
Result:
- The isometric view of gable wall is drawn successfully.
FINAL RESULT:
- The given cross sectional drawings are drawn successfully in detailed manner.