Assignment 5-RADIOSS Interfaces & Study of Effect of Notches Challenge
Aim :-
Mesh the given Bumper model with the prescribed element size. Run the simulation for Crash Tube model with different cases as mentioned using HyperMesh RADIOSS.
Case scenario;
- Run the crash tube model as it is.
- Change the Inacti=6 and run.
- Create the type 11 contact and run.
- Remove both notches and remove boundary condition on rigid body node then run.
- Create a new notch in the middle ,select the whole section and run.
- Create a new notch with nodes only from opposing 2 faces and run.
Procedure :-
1. Open the .hm file in Hypermesh with RADIOSS.
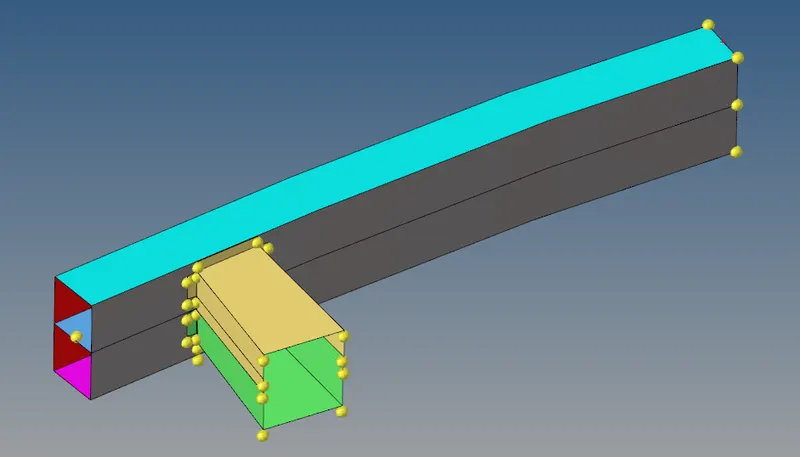
Fig 1 :- Bumper file open in HM
2. Remove the temp nodes by Gepmetry->Temp nodes->clear all. Perform topo for the open edges by Gepometry->Quick Edit->Toggle.
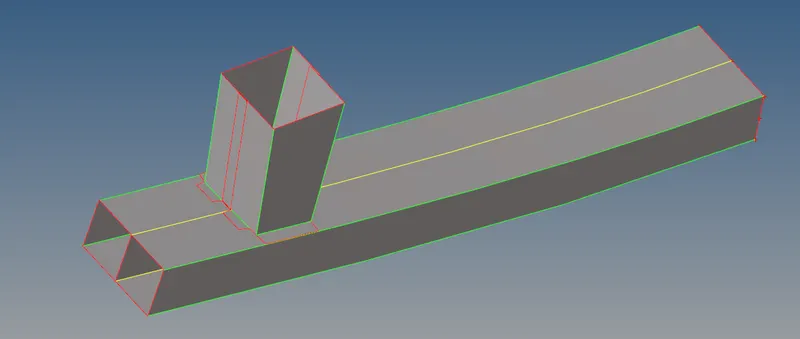
Fig 2 :- Bumper file open in HM
3. Perform 2D meshing for the component by 2D->Automesh->Surface selection->element size = 6->Mesh.
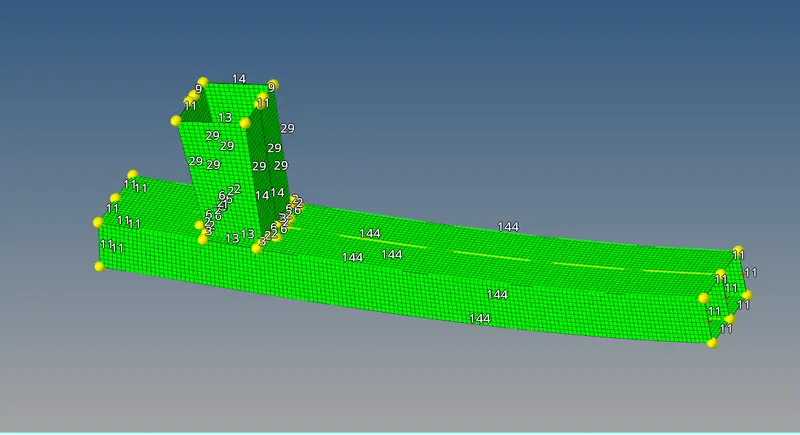
Fig 3 :- 2D meshing process
4. Check for quality criteria and elemental failures by 2D->qualityindex.
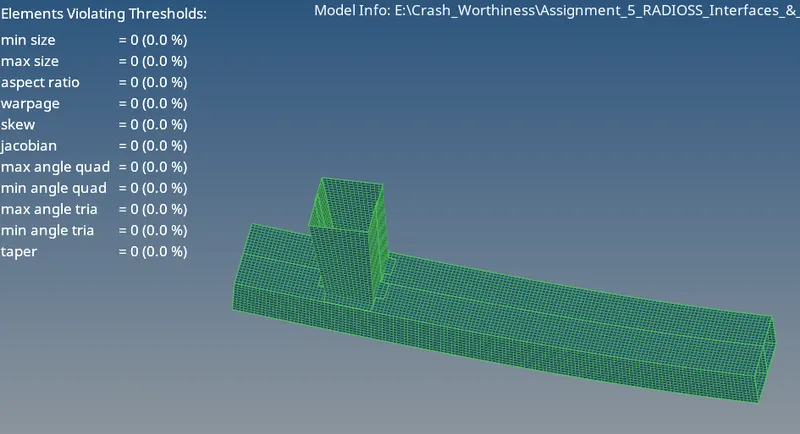
Fig 4 :- Clean Element Meshing
5. Deploy weld connections by 1D->connectors->spot->spot->type=weld->diamenter=2->tolerance=2.5->node selection->component selection->create.

Fig 5 :- 1D Weld component Deployment
Finally the bumper is connectyed by spot welding as shown in the snap below.
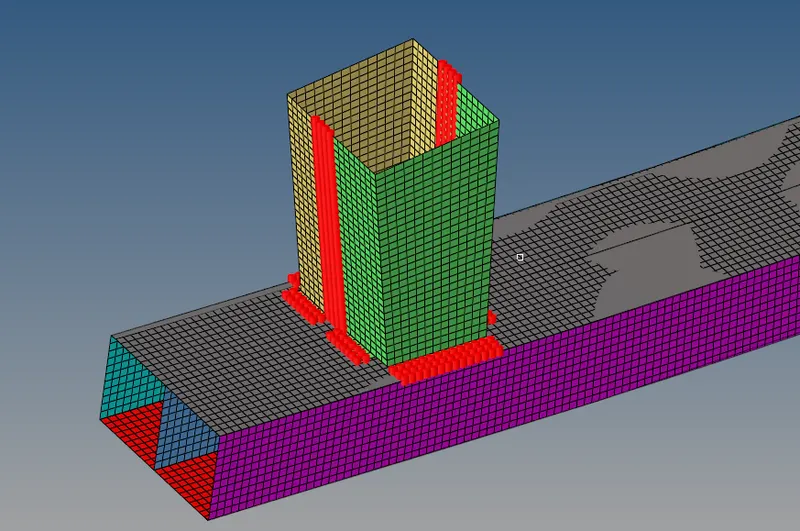
Fig 6 :- Final View of the Bumper
Case 1 :- Run the crash tube model as it is.
1. Import the file to hypermesh by solver deck with RADIOSS.
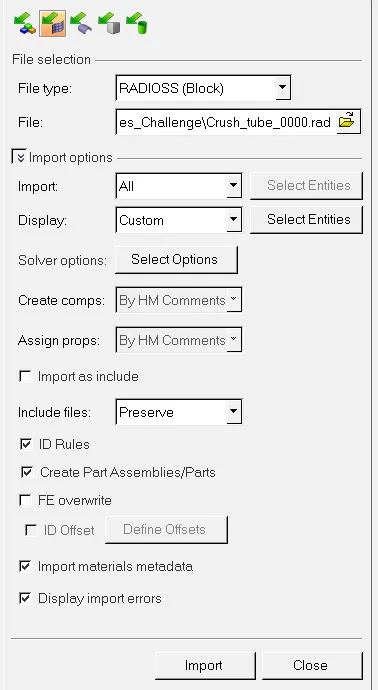
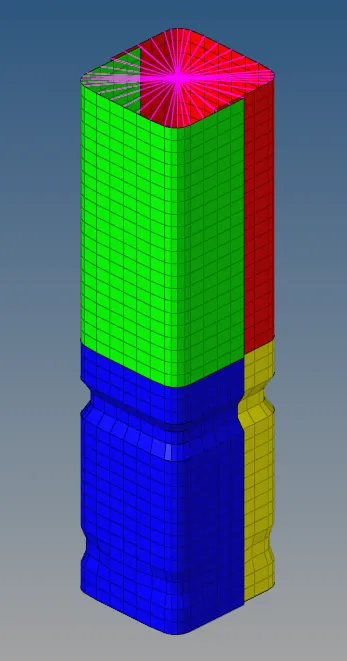
Fig 7.1 :- Solver Deck Fig 1.2 :- Initial Model
2. Run the simulation by Analysis->RADIOSS->save as Case_1.rad->check "include connectors"->enter "-nt 4" in options->Radioss.

Fig 8.1 :- Analysis/Simulation Input
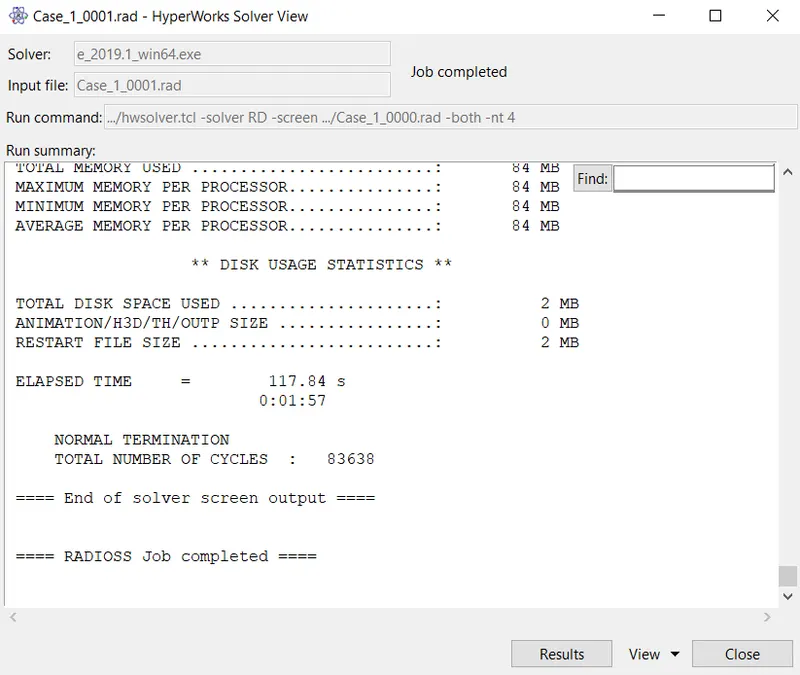
Fig 8.2 :- Analysis Completed for Case 1
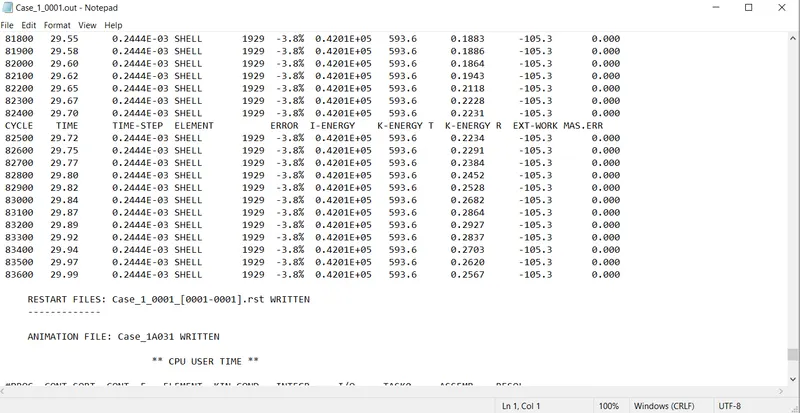
Fig 8.3 :- Energy error & Mass error for Case 1
3. Click on Results after the analysis is completed, it diverts to Hyperview.
Choose Displacement in Coutour and apply.
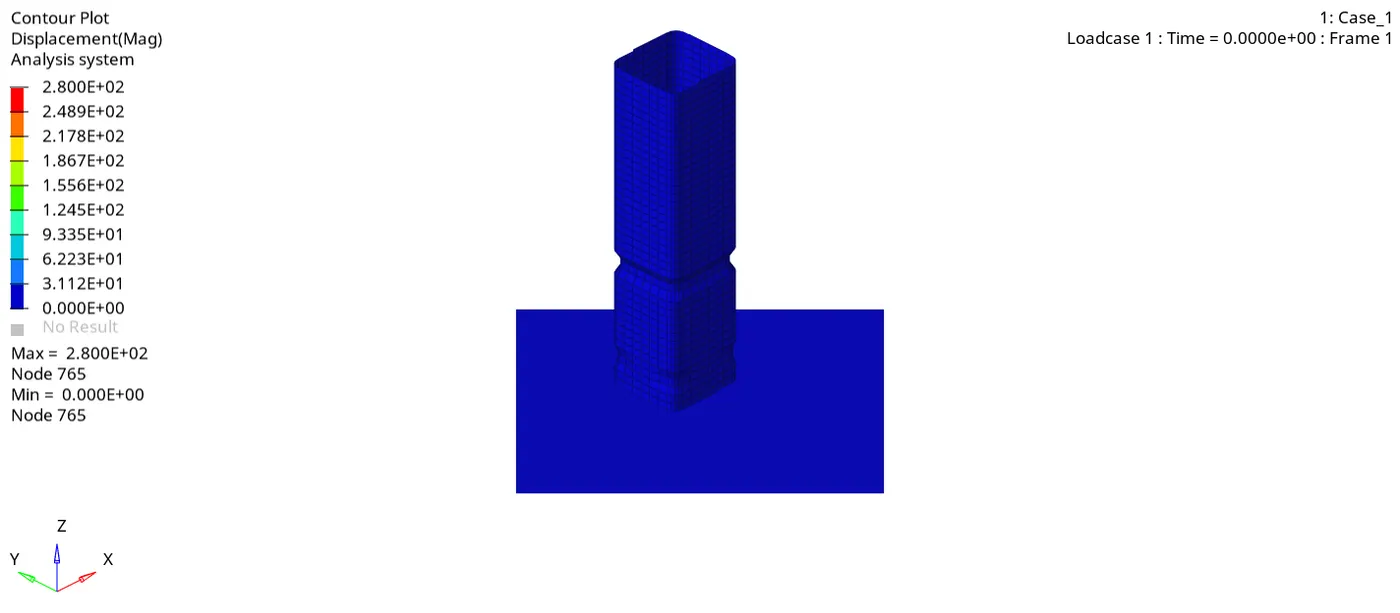
Fig 9.1 :- Displacement for Case 1
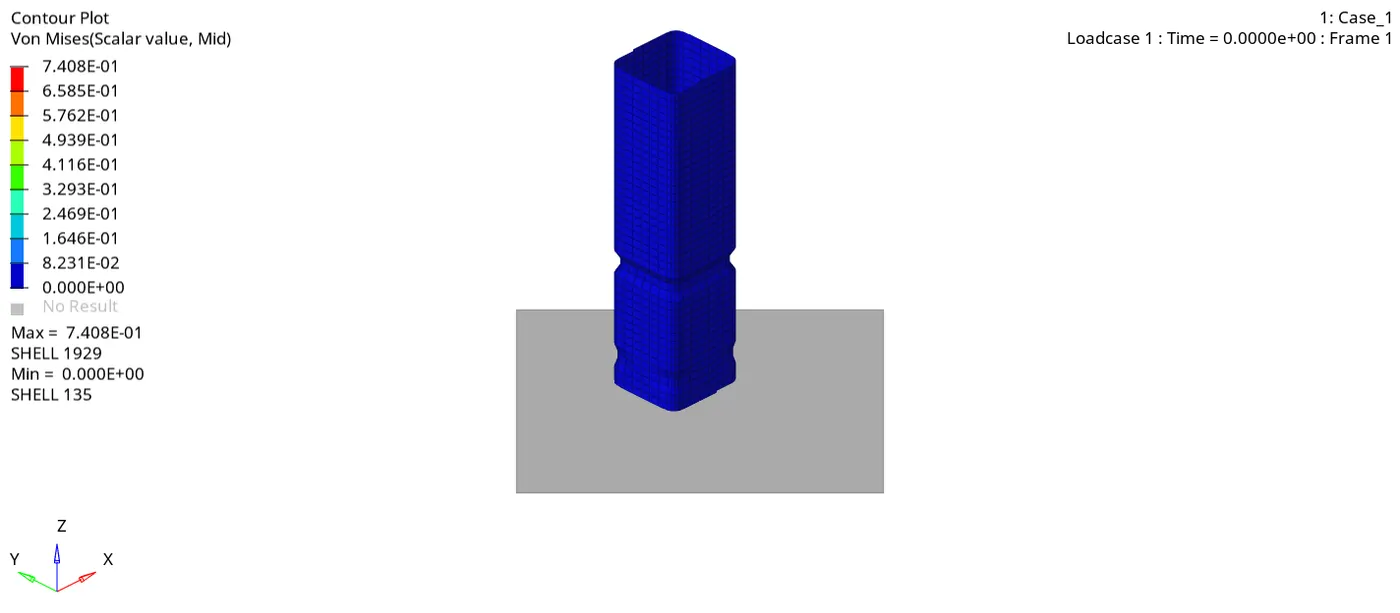
Fig 9.2 :- Von Mises for Case 1
4. Switch to Hypergraph 2D, Select the Case_1.T01 file and apply.
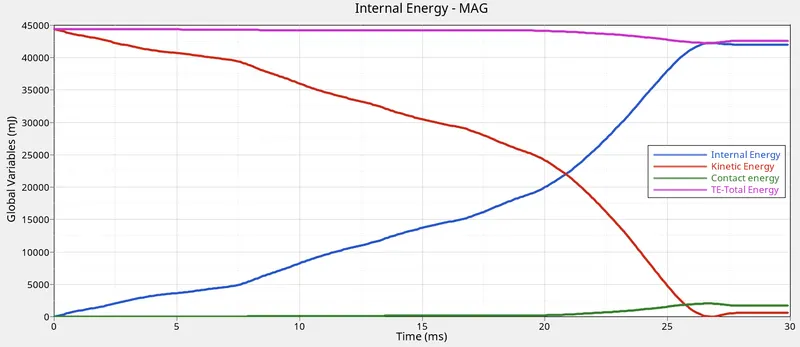
Fig 10.1 :- Energies for Case 1
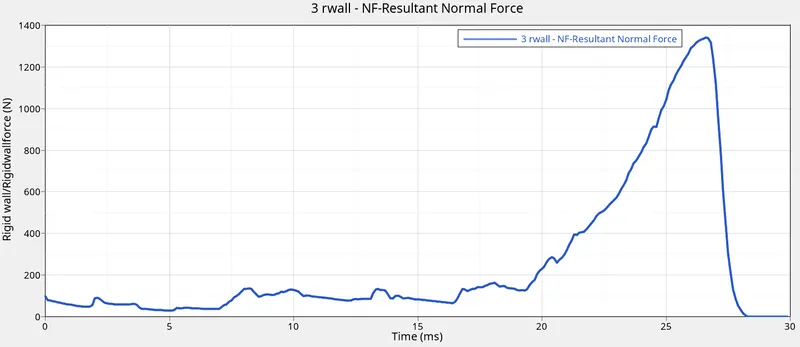
Fig 10.2 :- Resultant Forces for Case 1
It is observed that once the body strikes the wall, deformation start at the middle notch due to the applied velocity.
After the mid notch deformation, the other notch near the rigid wall will start deforming as the thickness is very less at the bottom of the component.
Where ever notch is present, Stress concentartion occurs at the point.
Case 2 :- Change the Inacti=6 and run.
1. Import the Crush_tube_0000.rad file to hypermesh by RADIOSS profile. Change the Inacti value by switching to solver deck->INTER->Type7->Inacti=6.
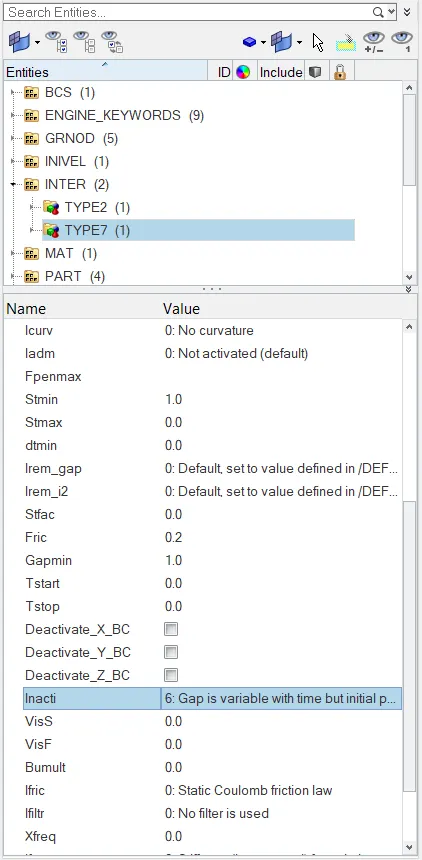
Fig 11 :- Update TYPE7 Property
2. Run the solver with updated attribute. Analysis->RADIOSS->save as Case_2.rad->check "include connectors"->enter "-nt 4" in options->Radioss.
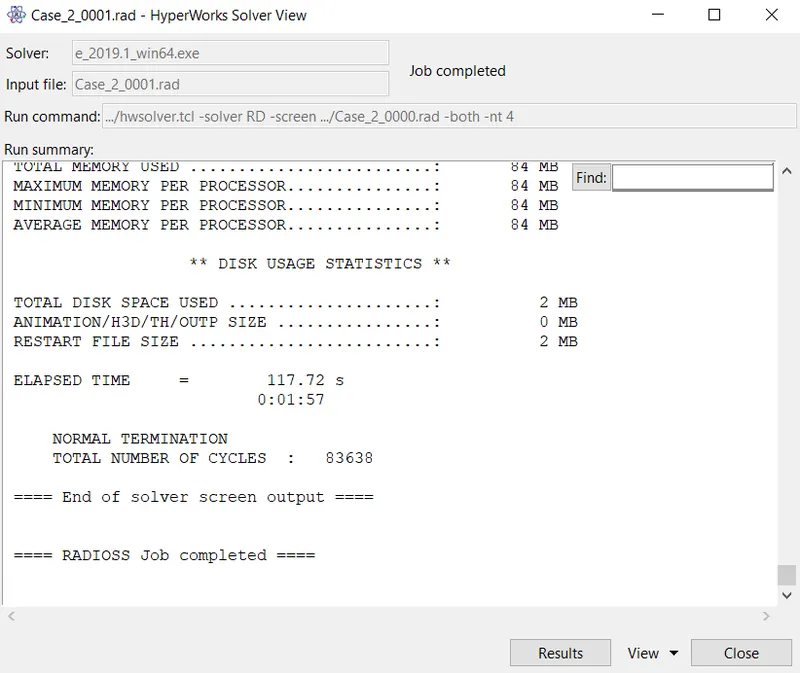
Fig 12.1 :- Analysis Completed for Case 2
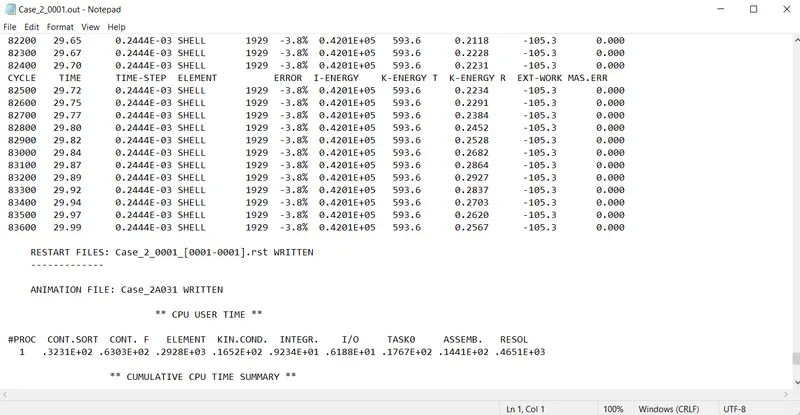
Fig 12.2 :- Energy error & Mass error for Case 2
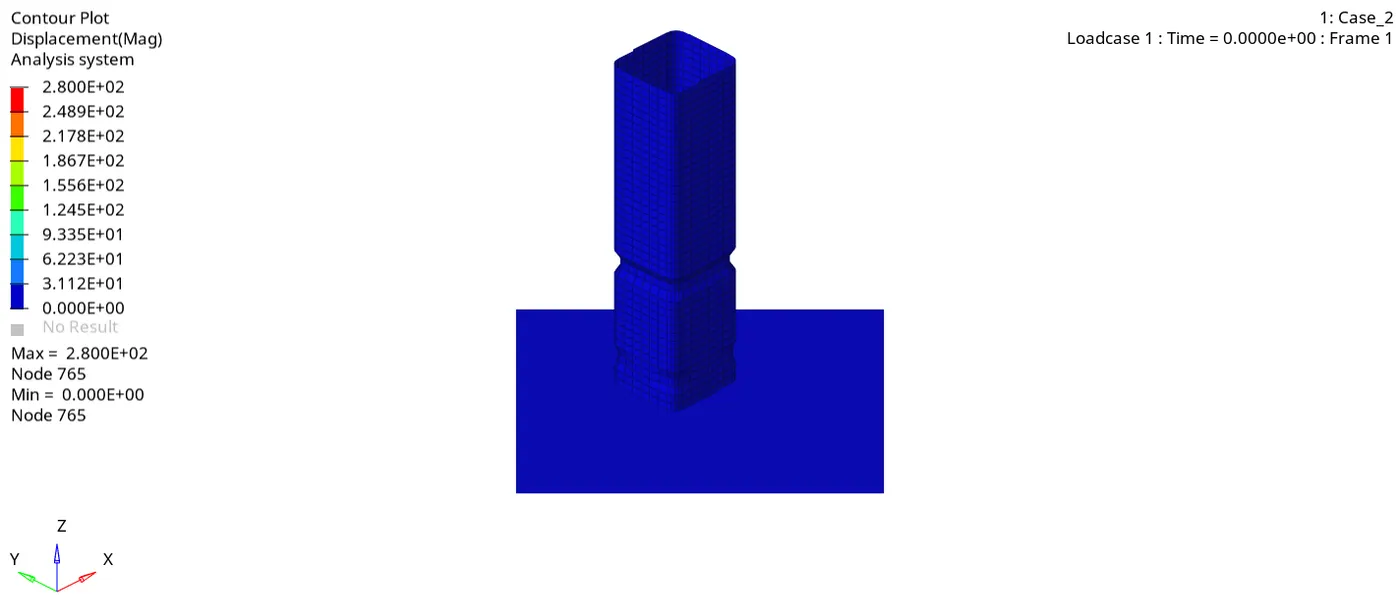
Fig 12.3 :- Displacement for Case 2
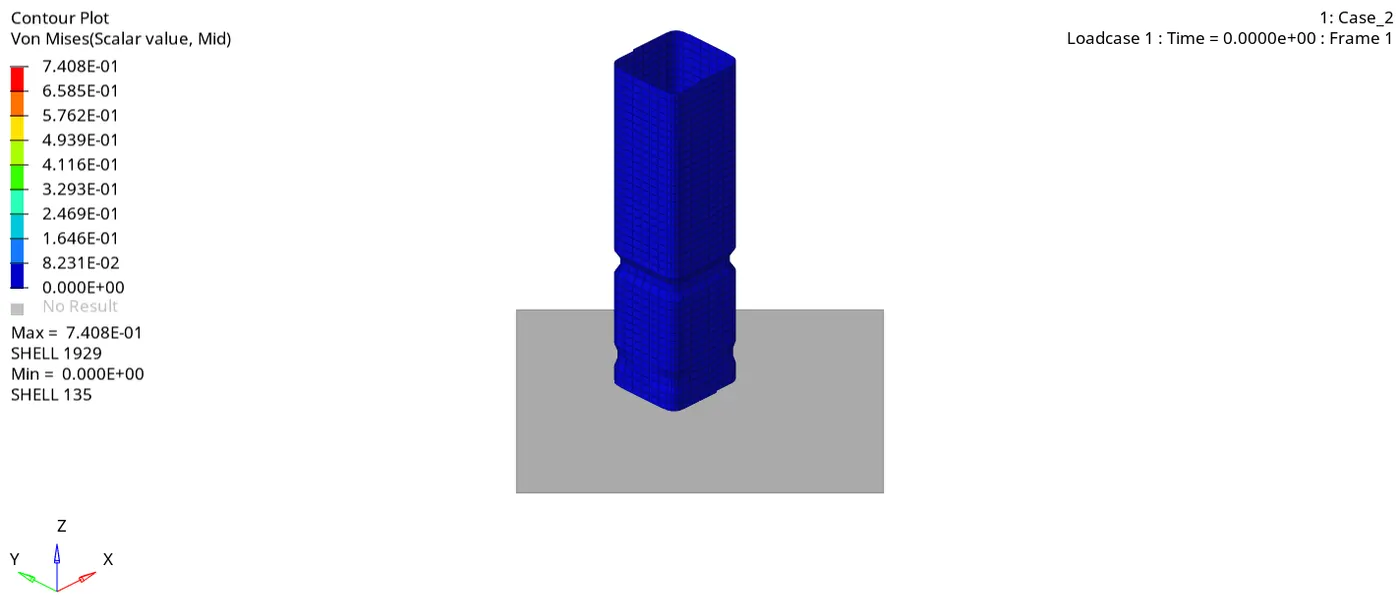
Fig 12.4 :- Von Mises for Case 2
3. Switch to Hypergraph 2D, Select the Case_2.T01 file and apply.
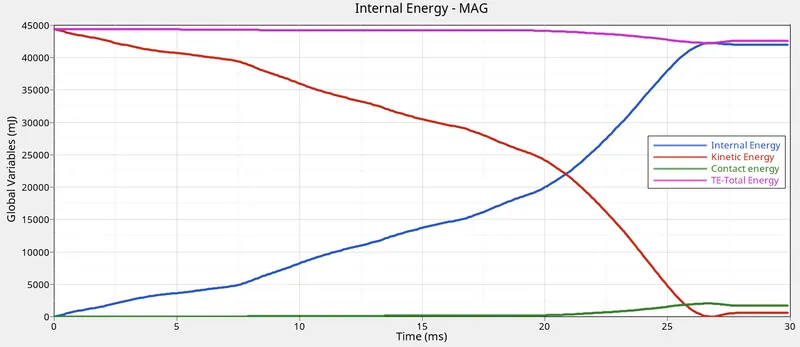
Fig 13.1 :- Energies for Case 2
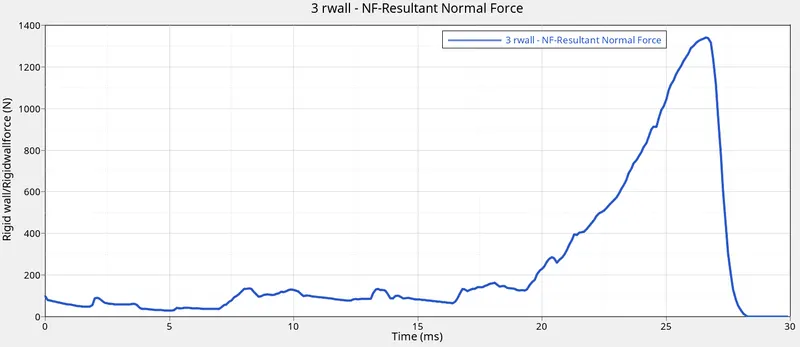
Fig 13.2 :- Resultant Forces for Case 2
There is no much difference between Case 1 & Case 2. The value remains same.
Case 3 :- Create the type 11 contact and run.
1. Create a new contact using Hypercrash. Import the Crush_tube_0000.rad file into Hypercrash and go to Loadcase->Contact interface->Right Click Create->Edge to Edge (type 11).
Type 11 Attributes are specified as shown in the below snap.
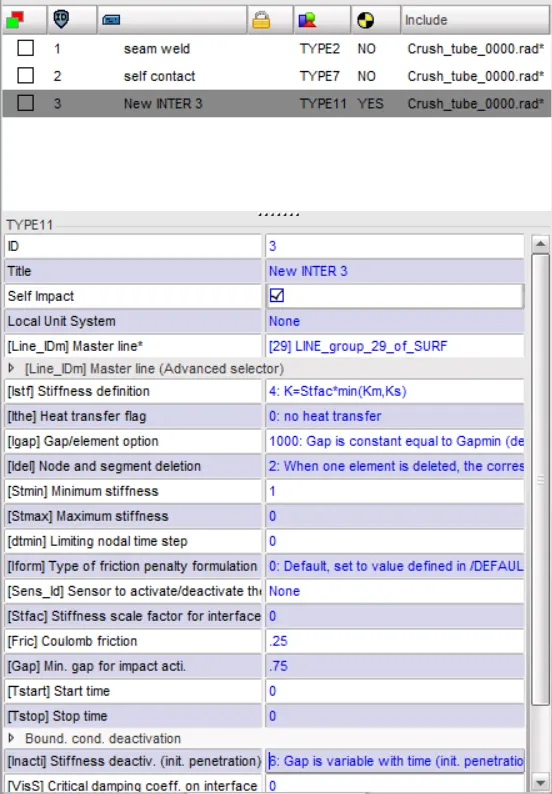
Fig 14 :- Type 11 Attributes
2. Run the solver with updated attribute. Analysis->RADIOSS->save as Case_3.rad->check "include connectors"->enter "-nt 4" in options->Radioss.
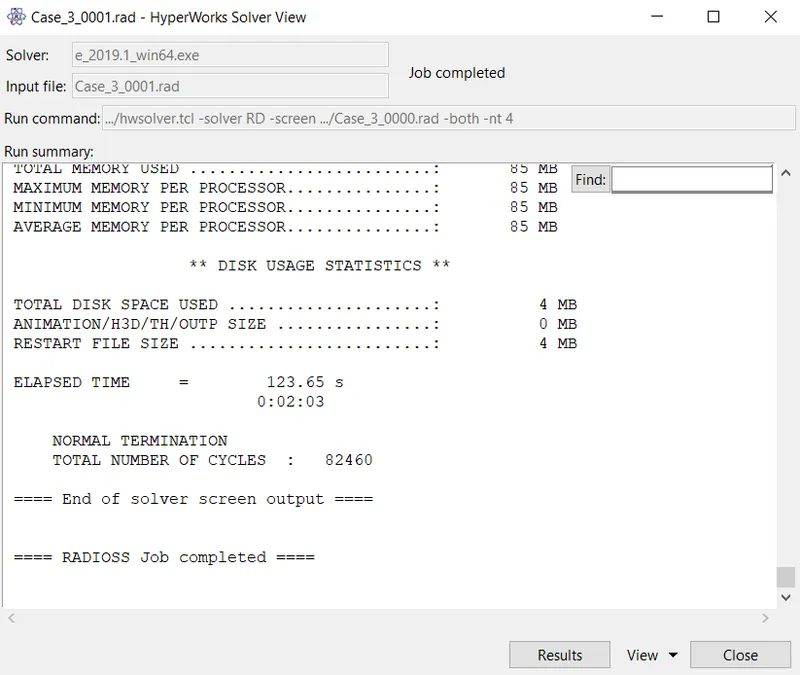
Fig 15.1 :- Analysis Completed for Case 3
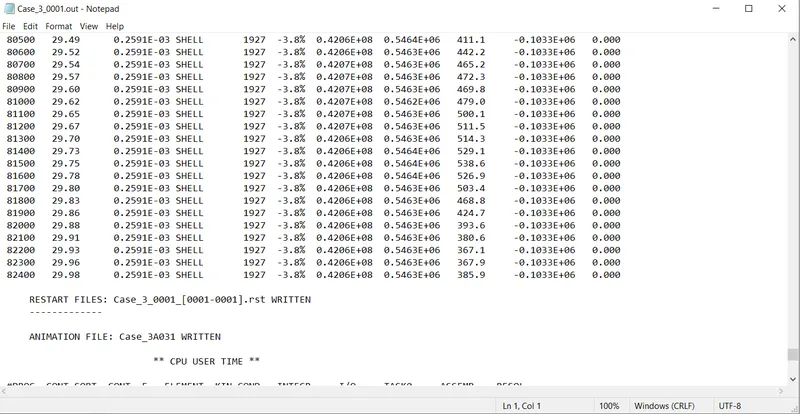
Fig 15.2 :- Energy error & Mass error for Case 3
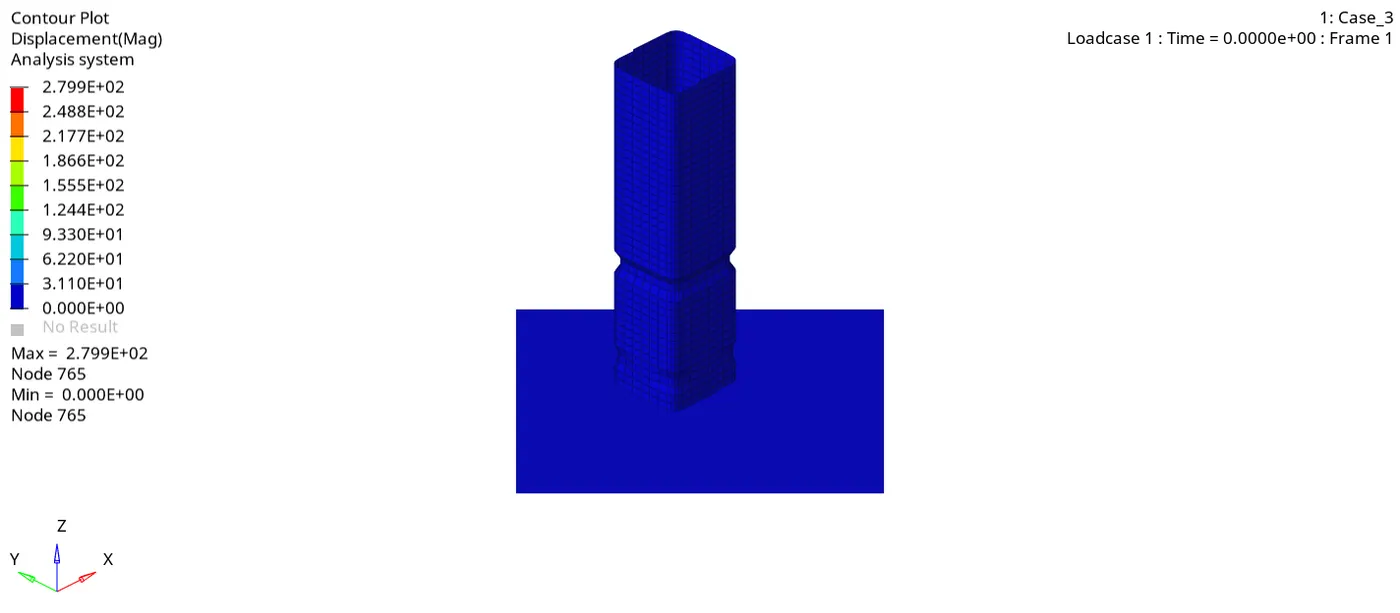
Fig 15.3 :- Displacement for Case 3
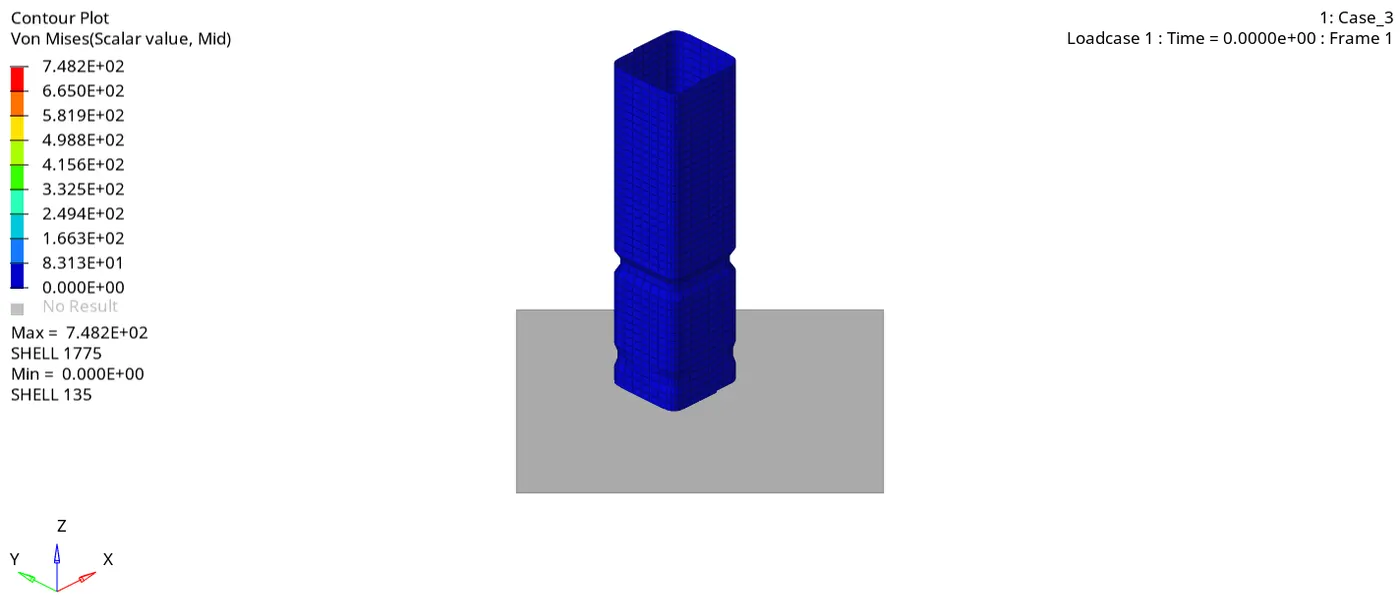
Fig 15.4 :- Von Mises for Case 3
3. Switch to Hypergraph 2D, Select the Case_3.T01 file and apply.
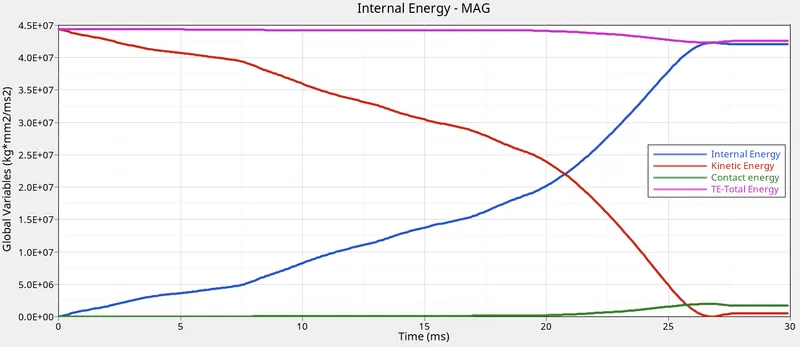
Fig 16.1 :- Energies for Case 3
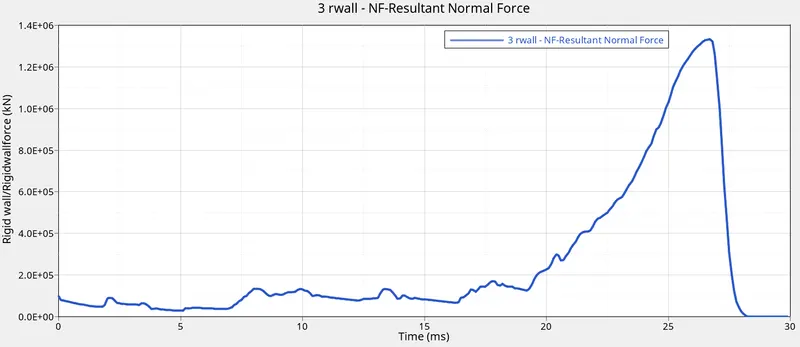
Fig 16.2 :- Resultant Forces for Case 3
By observating the simualtion, deformation occurs at the middle of the component at the beginning as there is very less resistance.
Case 4 :- Remove both notches and remove boundary condition on rigid body node then run.
1. Boundary conditions can be removed by 2 methods (Hypercrash & Hypermesh), we shall remove in Hypermesh.
Import the Case_3.rad file into Hypermesh, Go to Solvers->BCS->rbody_12345->uncheck all the boxes.
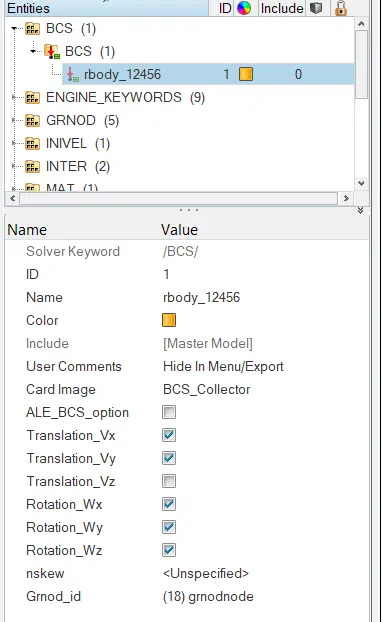
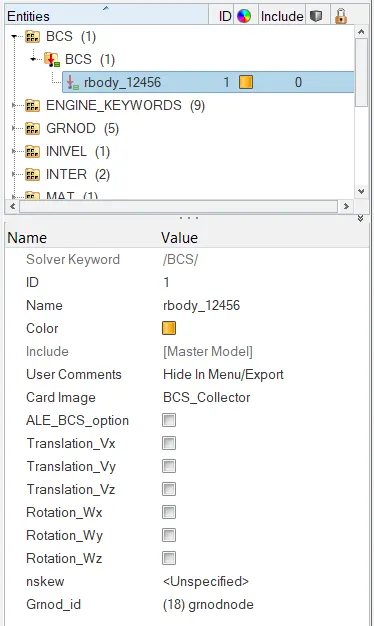
Fig 17.1 :- Boundary Condition Default Fig 17.2 :- Boundary Condition Removed
2. Remove the notches by aligning them to the straight surface elements by Geometry->Node Edit->Align node->Select end nodes->Select aligning nodes->Align.

Fig 18.1 :- Node Alignment
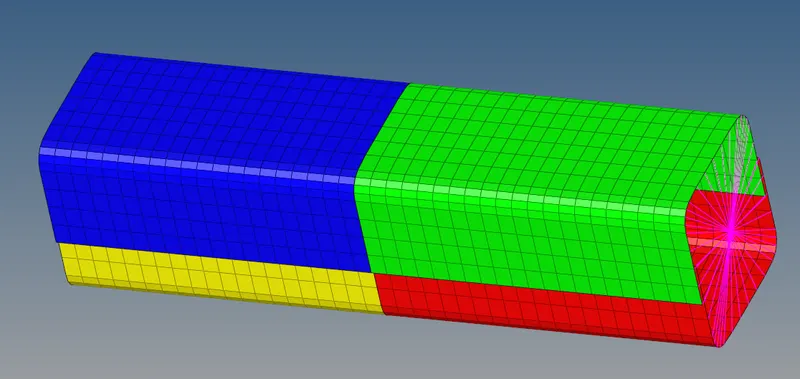
Fig 18.2 :- Notch Removed from the model
3. Run the solver with updated attribute. Analysis->RADIOSS->save as Case_4.rad->check "include connectors"->enter "-nt 4" in options->Radioss.
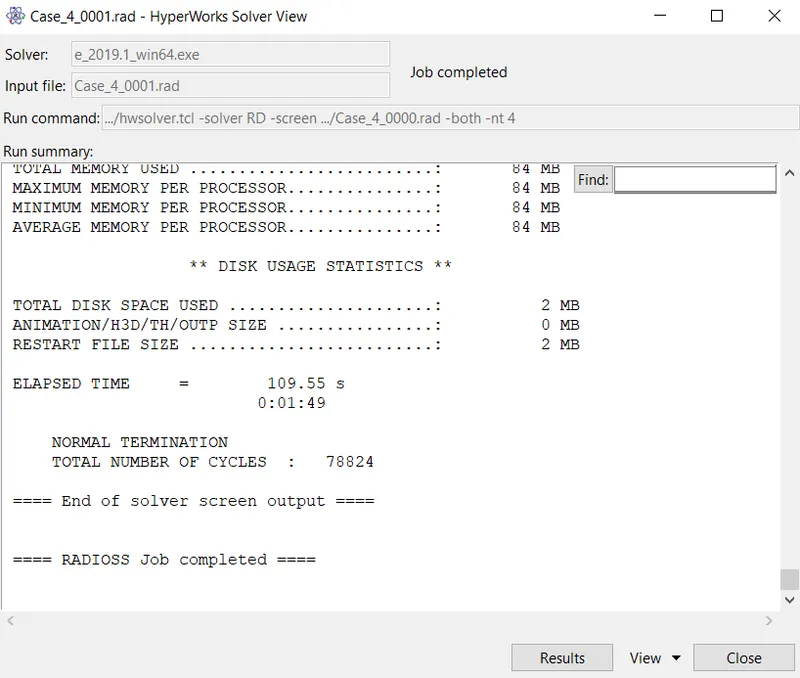
Fig 19.1 :- Analysis Completed for Case 4
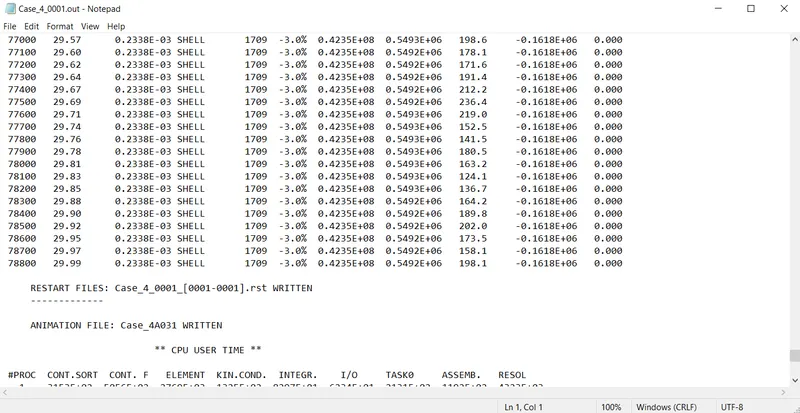
Fig 19.2 :- Energy error & Mass error for Case 4
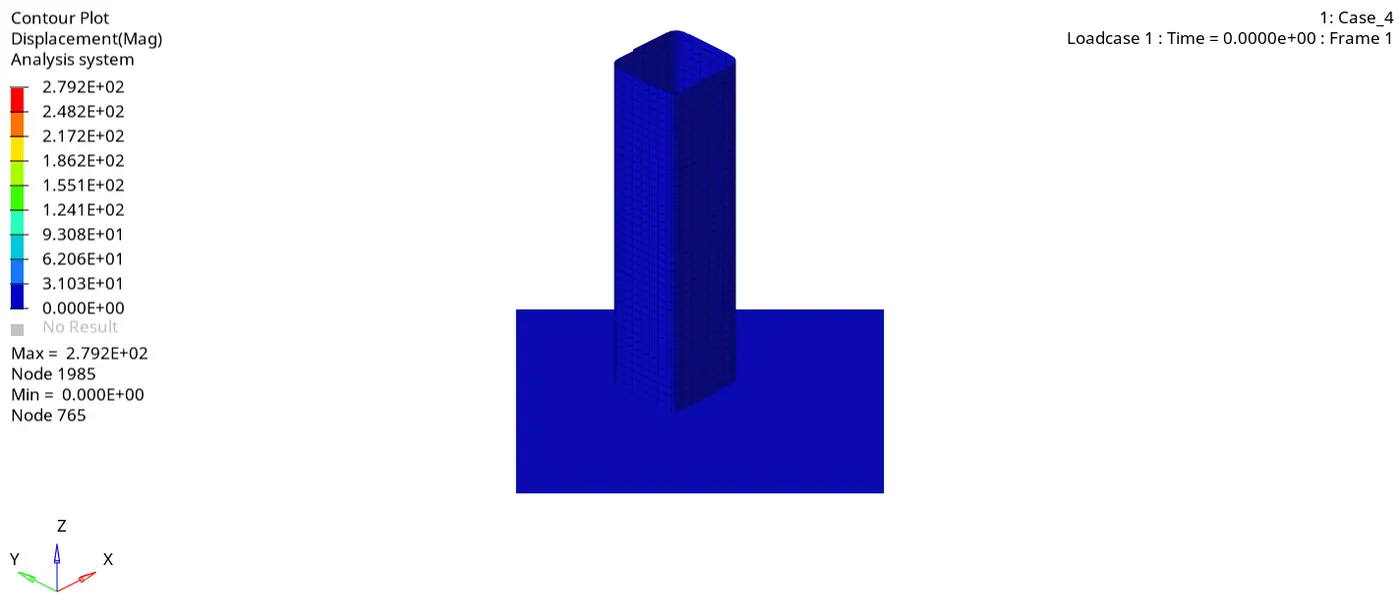
Fig 19.3 :- Displacement for Case 4
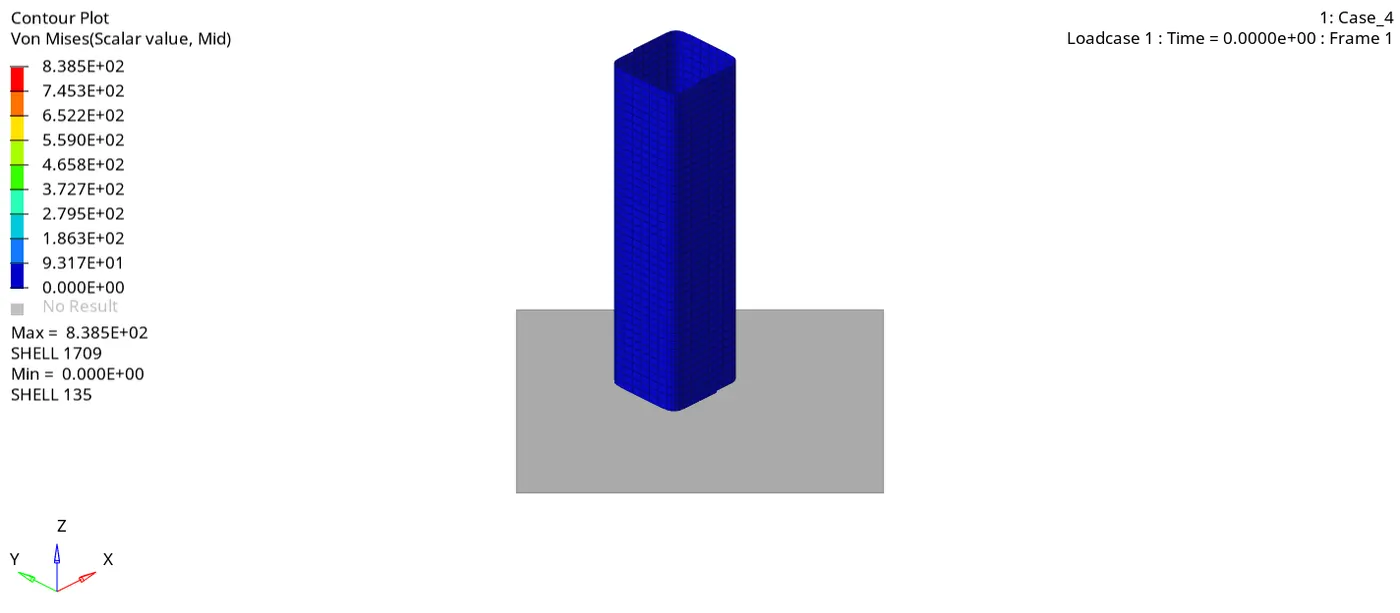
Fig 19.4 :- Von Mises for Case 4
4. Switch to Hypergraph 2D, Select the Case_4.T01 file and apply.
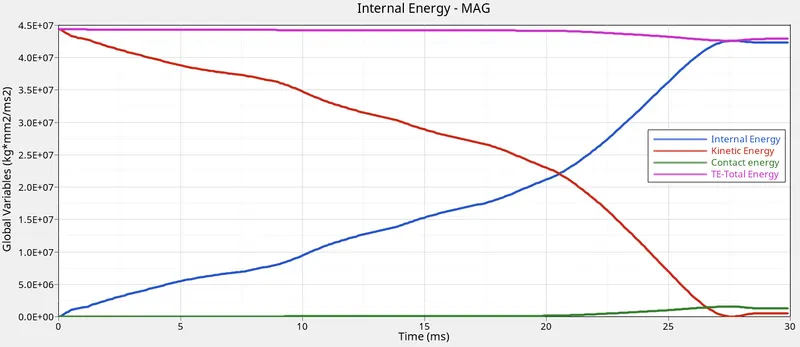
Fig 20.1 :- Energies for Case 4
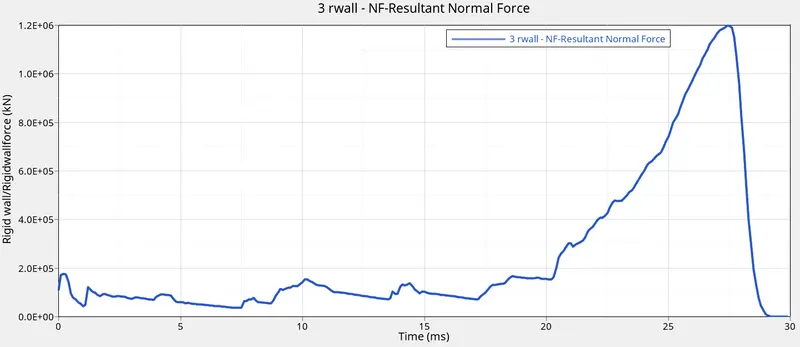
Fig 20.2 :- Resultant Forces for Case 4
As the notches are removed, the deformation travels from lower end to the top end with no stress concentartion.
Case 5 :- Create a new notch in the middle ,select the whole section and run.
1. Import the Case_4.rad file into Hypermesh, craete a notch at the middle of the component by Tools->Translate->Node Selection->Select N1 N2 N3->Set Magnitude = 4->Translate.

Fig 21.1 :- Node Translation
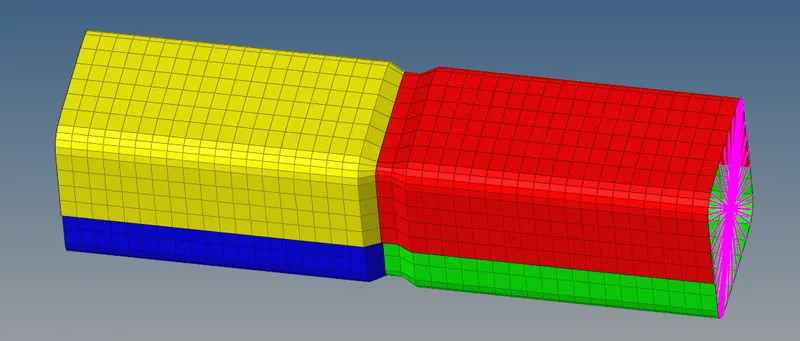
Fig 21.2 :- Notch Added at the Middle
2. Run the solver with updated attribute. Analysis->RADIOSS->save as Case_5.rad->check "include connectors"->enter "-nt 4" in options->Radioss.
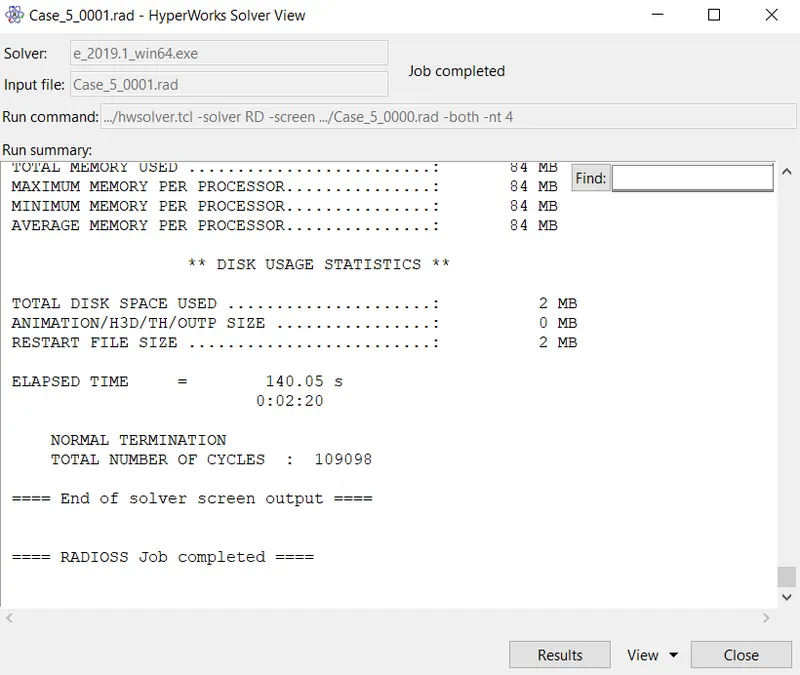
Fig 22.1 :- Analysis Completed for Case 5
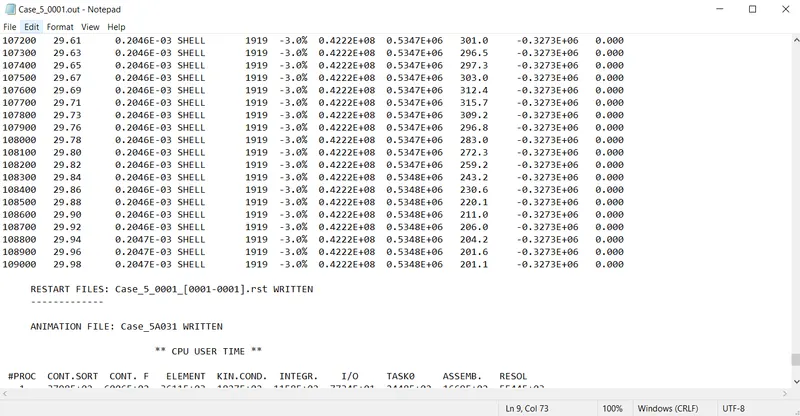
Fig 22.2 :- Energy error & Mass error for Case 5
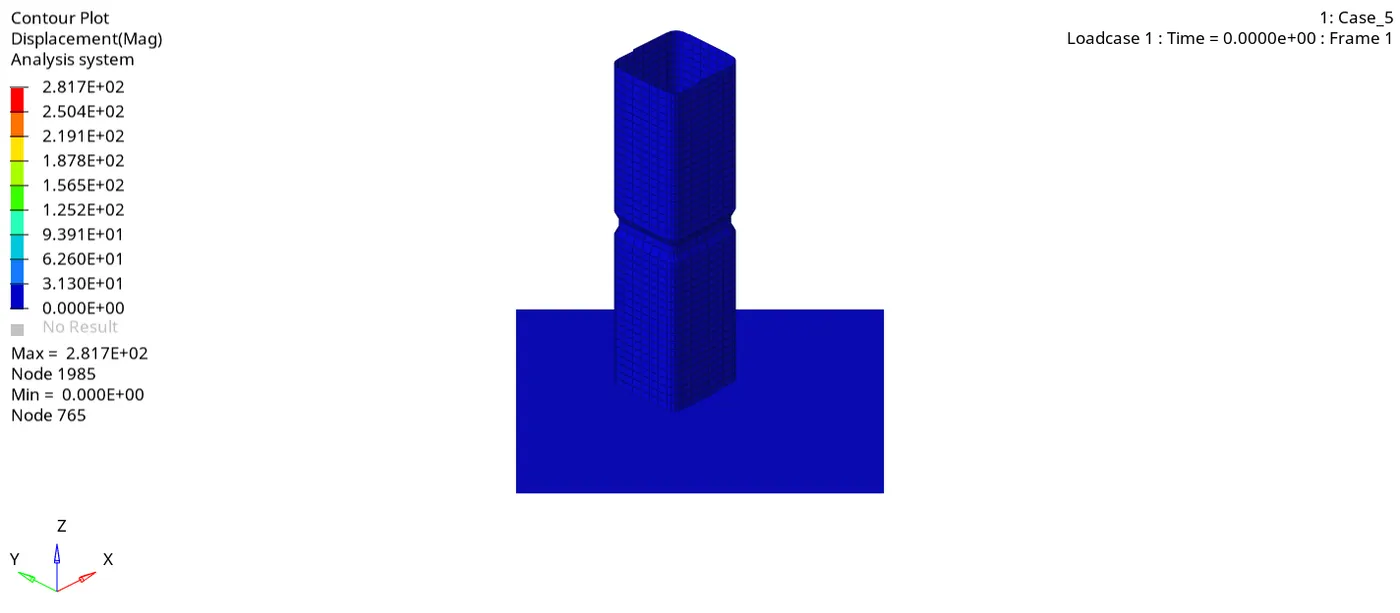
Fig 22.3 :- Displacement for Case 5
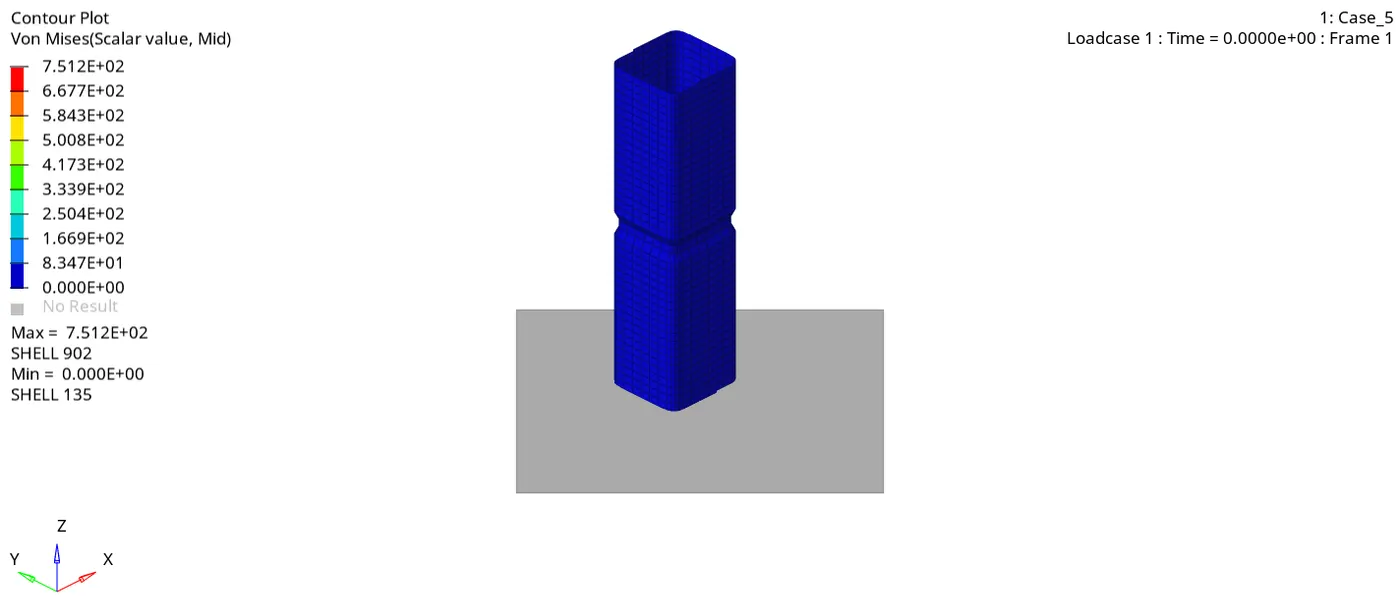
Fig 22.4 :- Von Mises for Case 5
3. Switch to Hypergraph 2D, Select the Case_5.T01 file and apply.
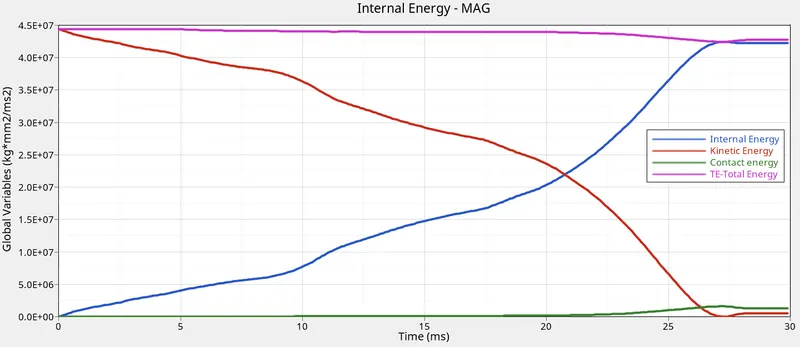
Fig 23.1 :- Energies for Case 5
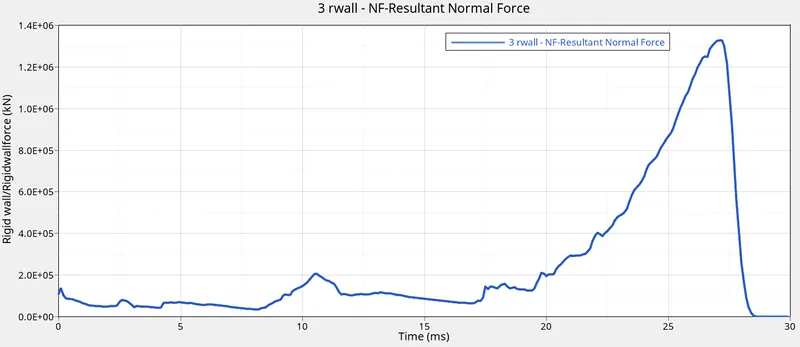
Fig 23.2 :- Resultant Forces for Case 5
As there is notch in the middle of the component, deformation is observed at the middle section initially.
Case 6 :- Create a new notch with nodes only from opposing 2 faces and run
1. Import Case_5.rad file into Hypermesh with RADIOSS profile. Create notches on the opposite sides as shown in the below snap.
Translate the nodes to create notch, by Tools->Translate->Node Selection->Select N1 N2 N3->Set Magnitude = 4->Translate.
Fig 24.1 :- Node Translation
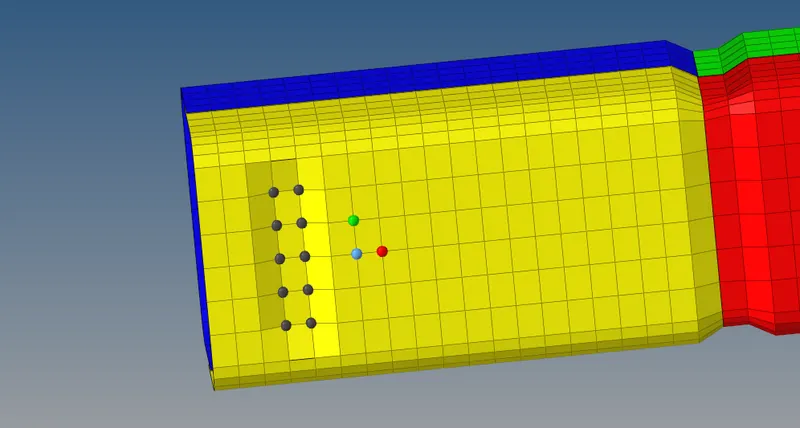
Fig 24.2 :- Notch Creation on both faces
2. Run the solver with updated attribute. Analysis->RADIOSS->save as Case_6.rad->check "include connectors"->enter "-nt 4" in options->Radioss.
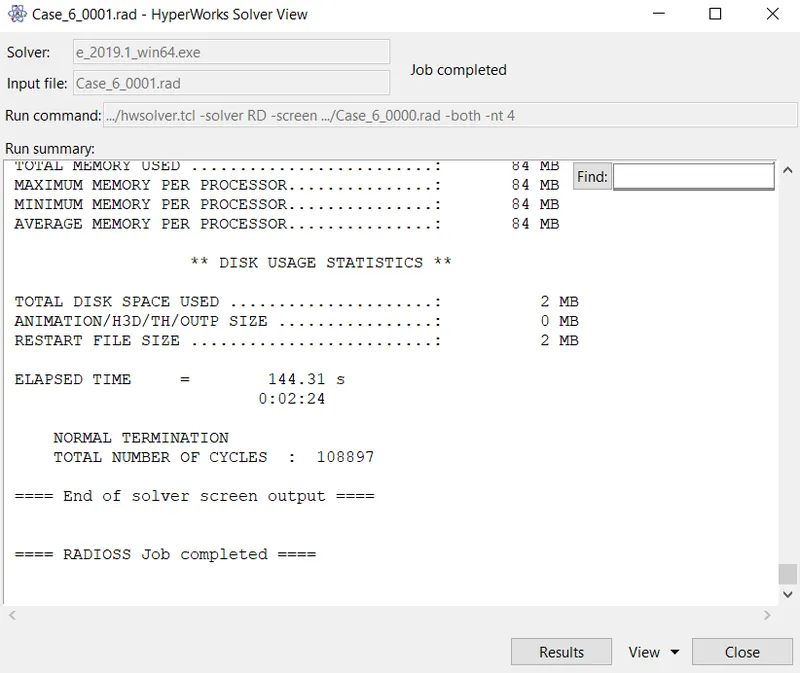
Fig 25.1 :- Analysis Completed for Case 6
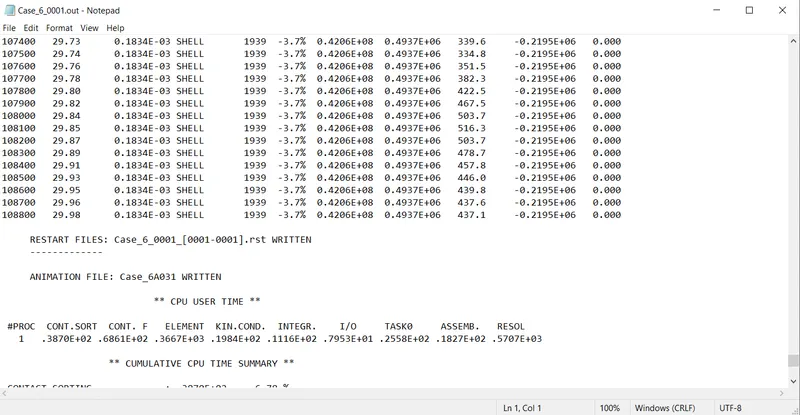
Fig 25.2 :- Energy error & Mass error for Case 6
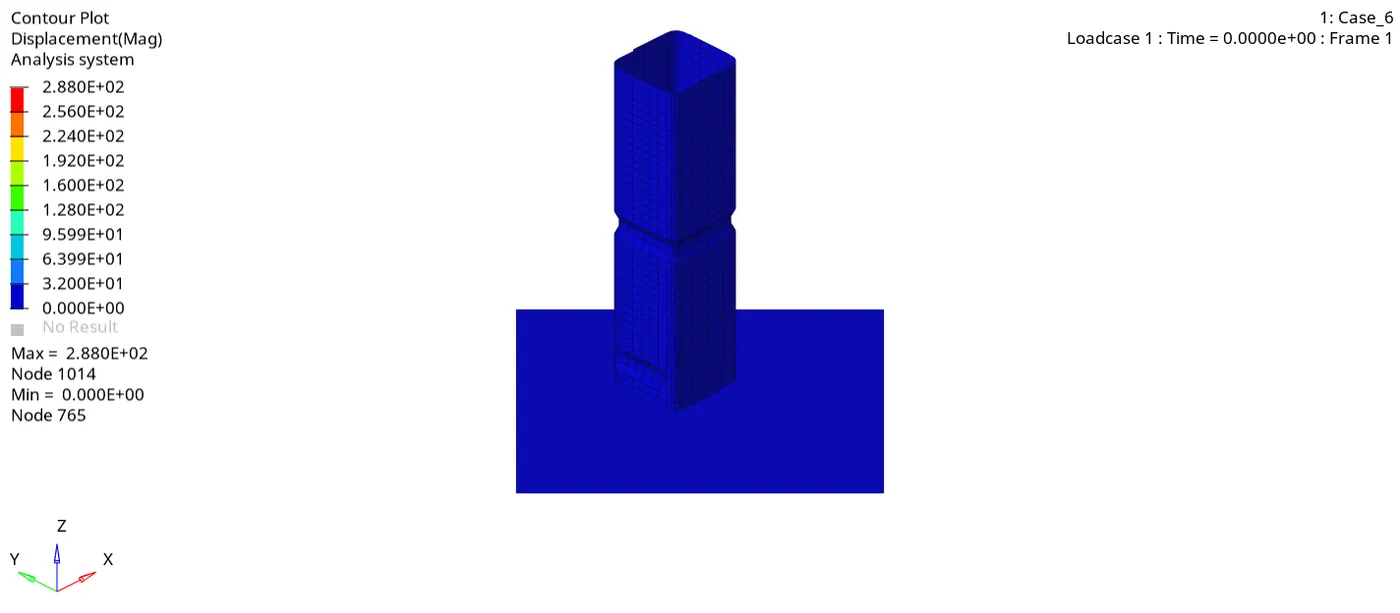
Fig 25.3 :- Displacement for Case 6
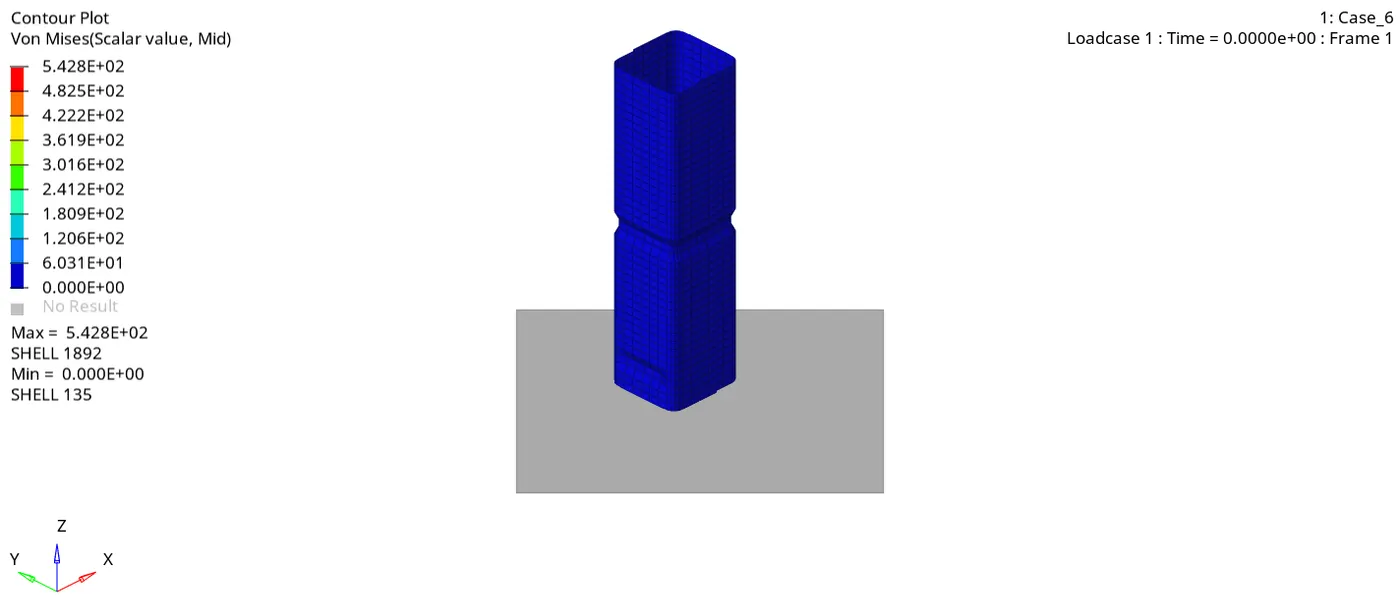
Fig 25.4 :- Von Mises for Case 6
3. Switch to Hypergraph 2D, Select the Case_6.T01 file and apply.
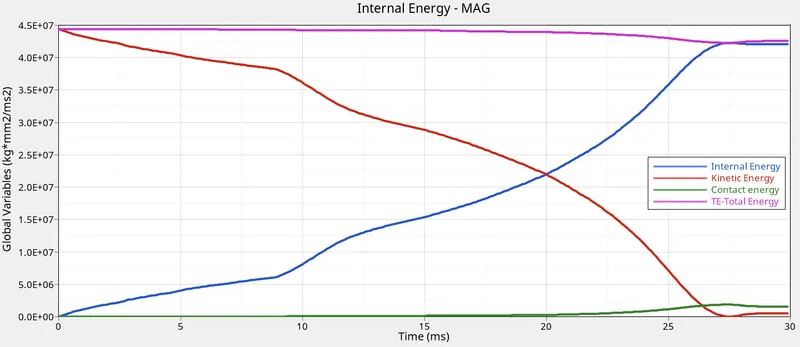
Fig 26.1 :- Energies for Case 6
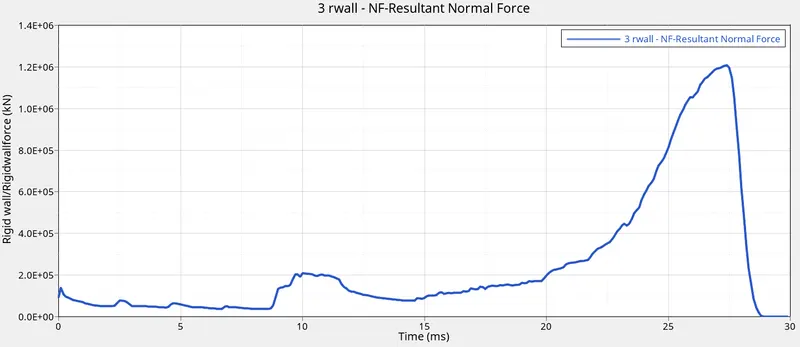
Fig 26.2 :- Resultant Forces for Case 6
As seen in the previous cases, deformation starts at the notch region and goes on.
Observation :-
| Parameters | Contact Interface Type | Model Changes | Energy Error | Mass Error | Simulation Processing Time in Seconds | Maximum Stress in KN/mm2 |
| Case 1 | Type 7 | Defalut (No Changes) | -3.8 % | 0.000 | 117.84 | 7.40E+02 |
| Case 2 | Type 7 | Change Inacti = 6 | -3.8 % | 0.000 | 117.72 | 7.40E+02 |
| Case 3 | Type 11 | Create Type 11 with recomanded parameters | -3.8 % | 0.000 | 123.65 | 7.42E+02 |
| Case 4 | Type 11 | Remove all Notches | -3.0 % | 0.000 | 109.55 | 8.38E+02 |
| Case 5 | Type 11 | Create a Notch in the middle of the component | -3.0 % | 0.000 | 140.05 | 7.5E+02 |
| Case 6 | Type 11 | Create notches on the opposite faces | -3.7 % | 0.000 | 144.31 | 7.5E+02 |
Results :-
The given Bumper model is meshed with the prescribed element size.
The Crash tube model is simulated for 6 different case scenerios and the results are tabulated above.