Advanced Sheet Metal Design Using NX Cad Challenge_7_ Metal bracket-II
METAL BRACKET USING NX SHEET METAL APPLICATION:
OBJECTIVE:
This is a project to learn the step by step procedure to create a Bracket with a gusset from the given 2D drawing.
INTRODUCTION:
A bracket is a connecting element used to secure one part to another. The weight is supported by it. The shape of brackets might vary greatly; in this case, we are building an L-shaped bracket.
The size and shape of your bracket will depend on the item it is supporting, as well as on the load carrying capacity and manufacturing simplicity. Bear in mind that metal bracket design strength factors are not solely functions of the bracket shape rather than the material thickness. The bracket can be made significantly stronger by adding particular features since it is a metal part. The two metal part designs below are both the same thickness, but the first one will be more stronger because of the gusset (a little triangular piece) that is welded to the bracket. This is a useful feature for making a powerful bracket while maintaining a low profile for the bracket.
The metal component can also be strengthened by adding extra profile. As you can see below, the Pan Type bracket's design makes it substantially stronger than a L bracket of equal thickness.
DESIGN METHODOLOGY:
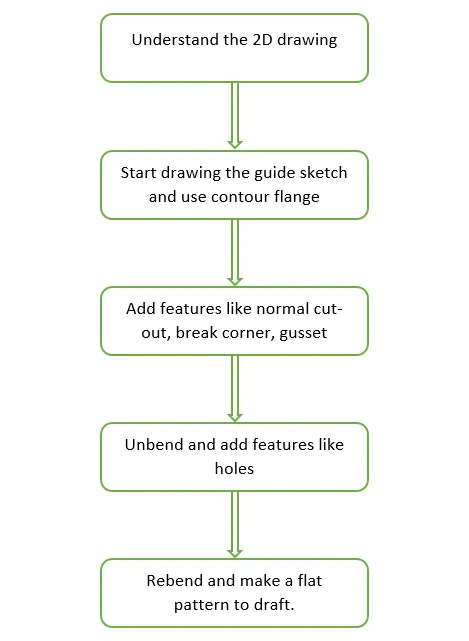
SHEET METAL MODELING:
Features and Tools:
- Contour Flange: Creates a base feature by extruding the sketch along a vector or add material by sweeping the sketch along an edge.
- Break Corners: This feature makes sharp edges to smooth round shape or to chamfer shape.
- Normal Cut-Out: It helps to cut material by projecting a sketch onto the model, cutting perpendicular to the face.
- Unbend: This feature helps to unbend the bent shapes to a flat pattern. In sheet metal the other features like cut-outs and holes needed to be created over the flat configuration. So that feature applied will be normal to a flat surface.
- Hole: Cut or remove the material with thread pattern on it. For applying the hole feature there should be a specific point, which will be the center of the hole.
- Rebend: This command helps to rebend the previously unbent sheet and have a component in its original form.
- Advanced Flange: Add a flange along an edge using a bend angle or a reference face. The edge and reference face can be curved.
- Gusset: Creates a stiffening gusset on the part.
- Flat Pattern: It is used to represent the whole component in 2D form. This flat pattern also shows entire features with dimensions.
- Drafting: Drafting is creating a technical drawing into a sheet, communicating about the dimensions and view of components. The draft helps the manufacturing and production department to know about the product design in a 2D format.
Procedure:
- Sketch the drawing for the contour flange on XZ plane with a width of 158mm.
- Using normal cut-out remove unwanted material by checking the 2D drawing.
- Use break corners to give a smooth curve to the corners according to the 2D drawing available.
- Unbend the model and cut out the shapes needed in the model.
- Rebend the model.
- Use advanced flange and select the upper edge with a flange length of 5mm.
- Unbend the model again and give holes at the bottom of the part according to the drawing.
- Use normal cut-out by sketching the shape between two bends. Then use advance flange on the same sketch.
- Rebend the model and apply the gusset feature at the bend as shown in the drawing.
RESULT:
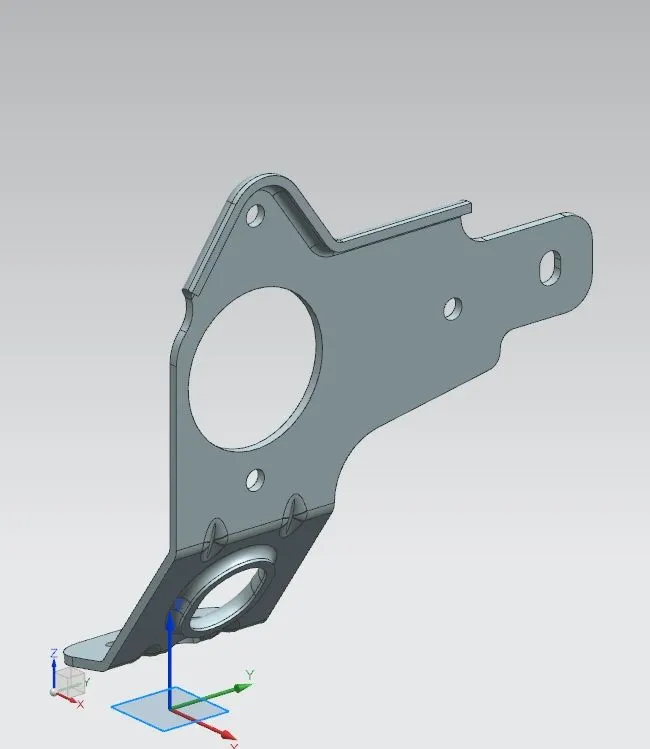
FIG: Isometric View
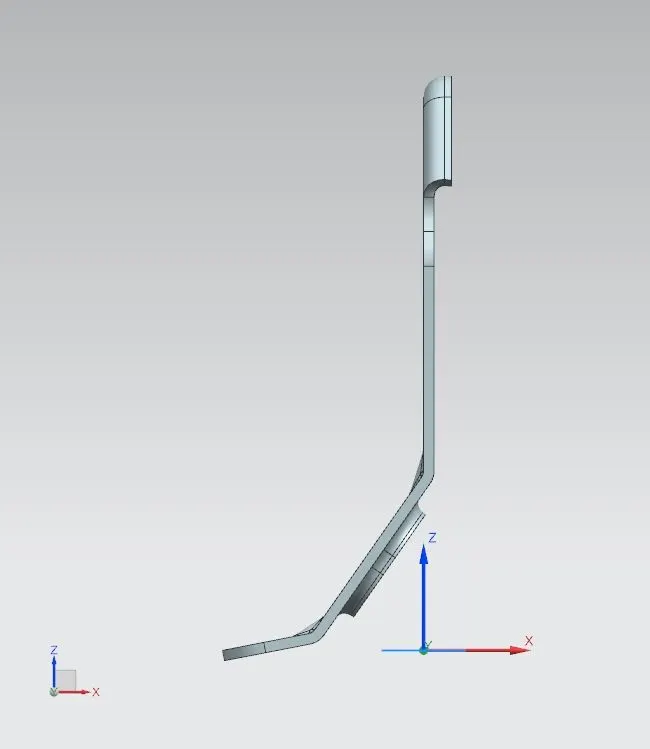
FIG: Front View
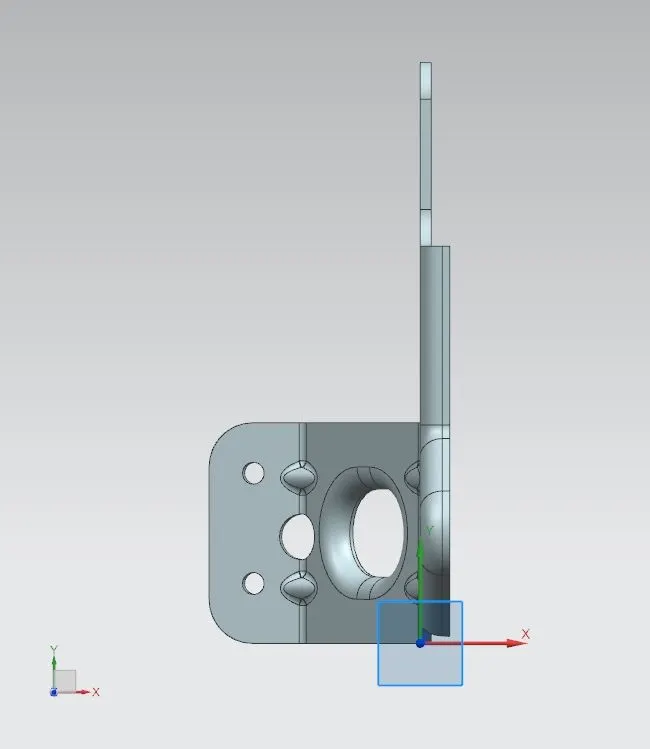
FIG: Top View
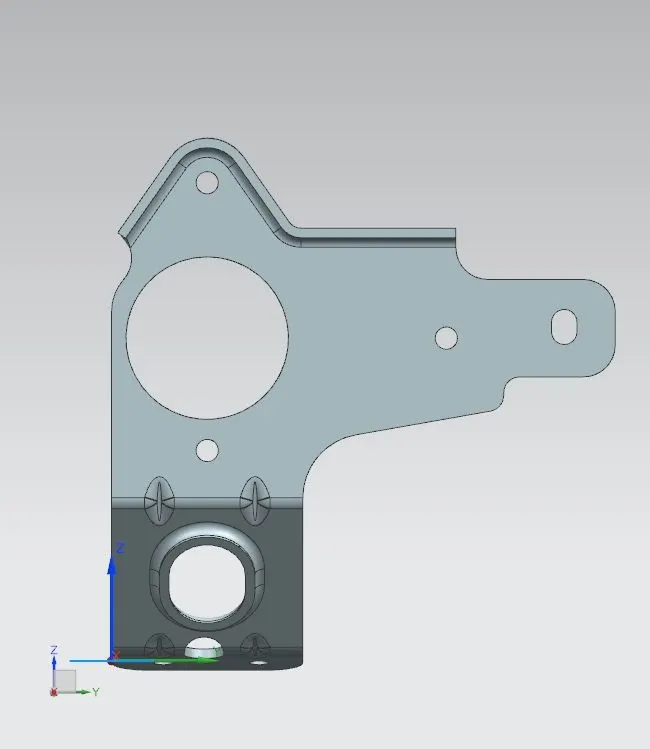
FIG: Side View
FIG: Detailed Drawing
CONCLUSION:
Sheet metal bracket is designed successfully using NX Cad application. From this project, we get to understand advanced flange and gusset features.