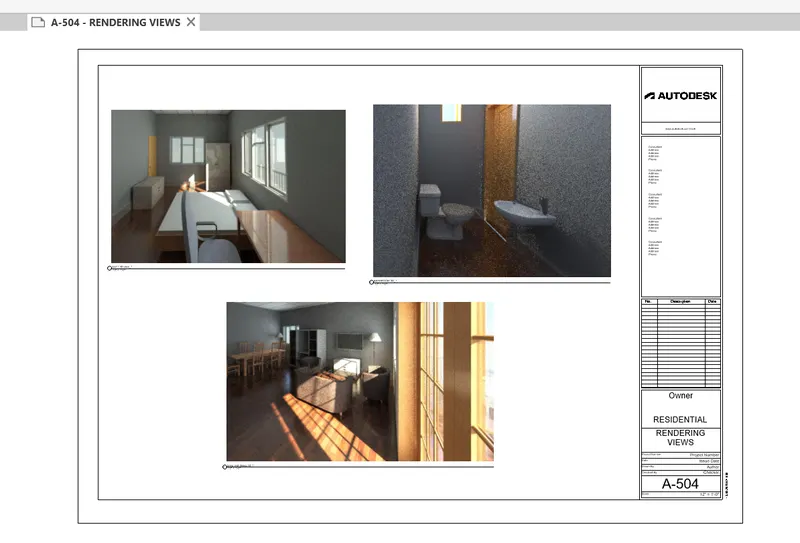
3D Creation of Ceiling, Roof, Architectural plan, Structural plan, Sectional view, Elevation view and Camera specific view for a house plan using REVIT
AIM-3D Creation of Ceiling, Roof, Architectural plan, Structural plan, Sectional view, Elevation view and Camera specific view for a house plan using REVIT
1. To Model a Ceiling-
To create ceiling
- Open your REVIT software > next open the week 3 challenge existing file.
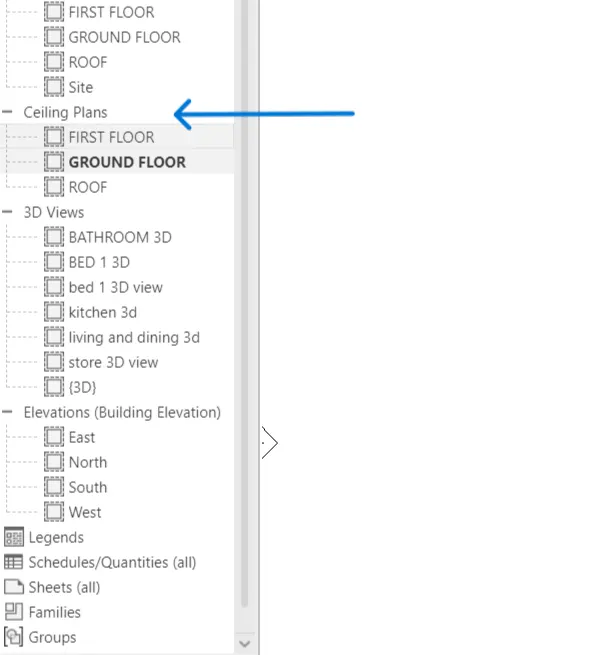
- Go to project browser > click on ceiling plan > select the floor for ceiling.
- Now using the dedicated tool CEILING in the architecture tab > click on ceiling
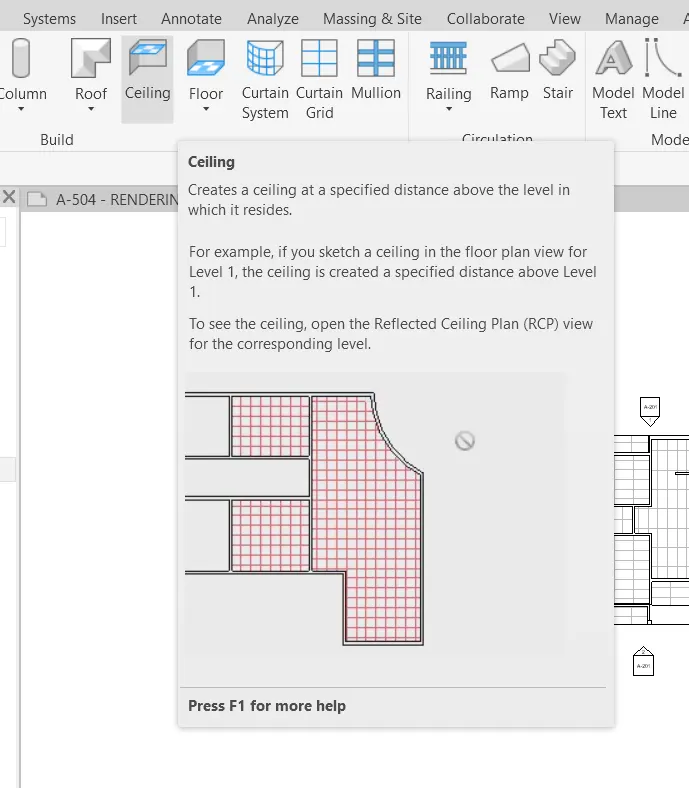
- Using the modify tool >select the boundary line> place the boundary line > click on finish modify.

- You can modify the ceiling properties using the properties browser.
- the below image showing the created ceiling for ground floor-
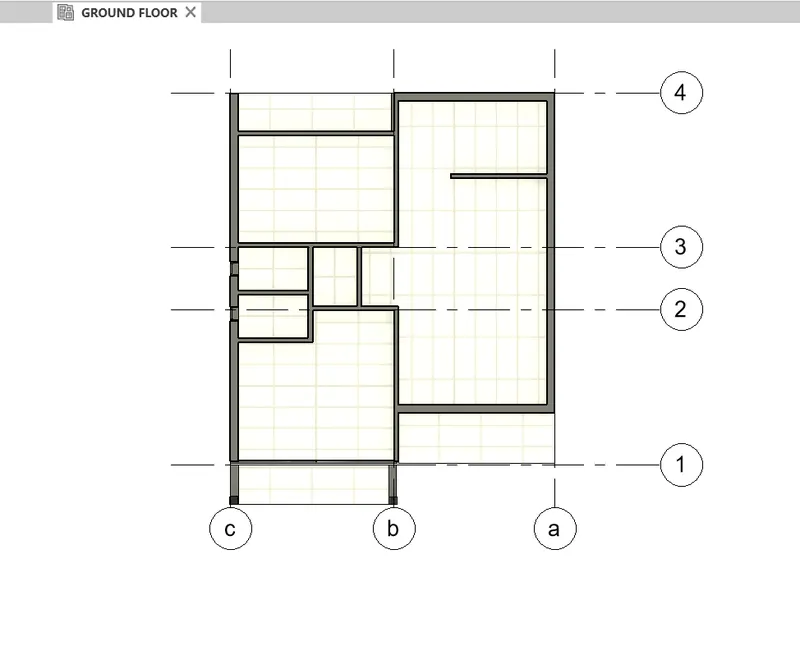
2. Model a roof above the ceiling by selecting the footprints of the ceiling-
to create a roof-
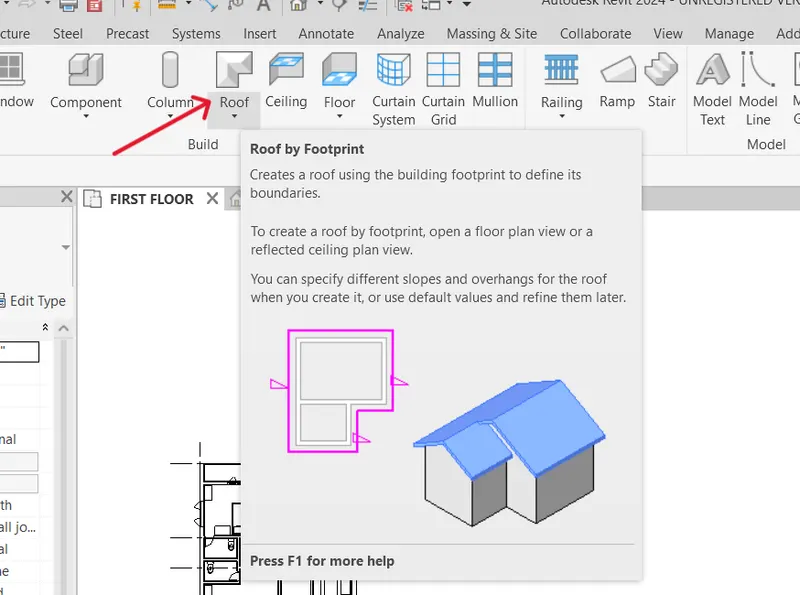
- Go to dedicated roof tool in the architecture toolbar
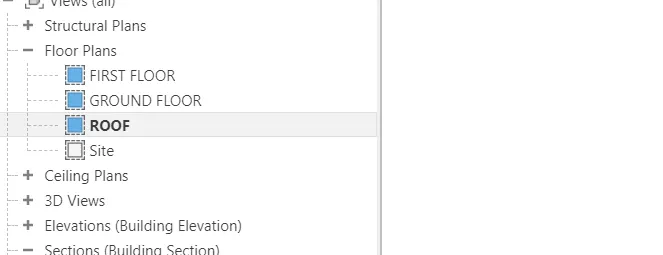
- Next select the floor plan for roof
- Click on roof > place the boundary line using the modify toolbar
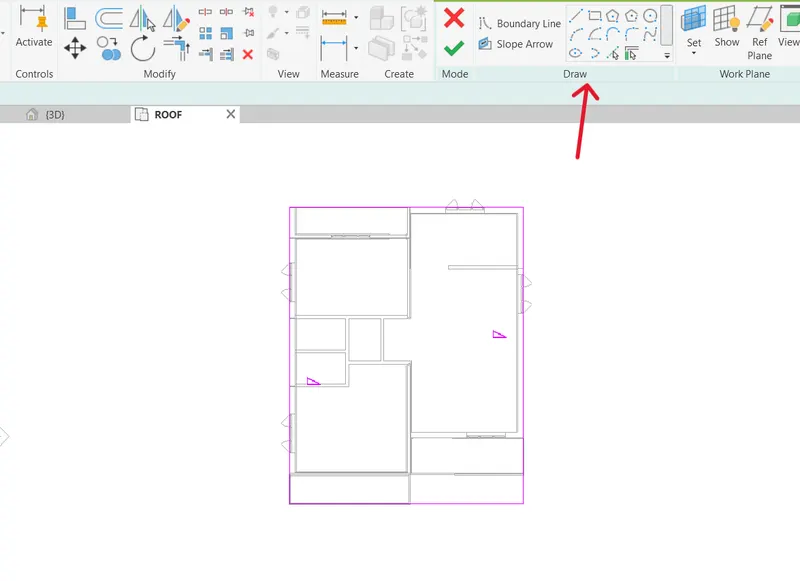
- After placing the boundary just finish the modify
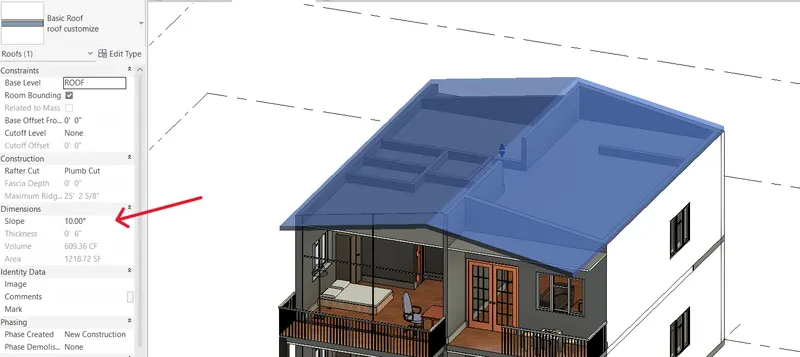
- Next to edit the properties of roof go to the properties browser
- Using the adjustment toolbars appearing on-screen adjust the roof slope to 10 degrees.
3. Create plan views for ground floor level and first-floor level including all the walls, floors, and components. Separating them to architecture and structural plans
Architecture plan -For the architecture plan views> go to VIEW tool> click on FLOOR PLAN (For architectural plan)
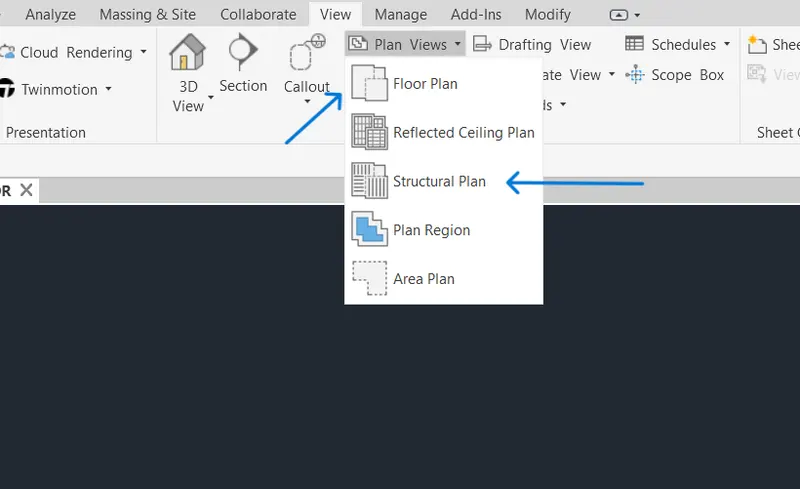
- Select the floor to view> click ok
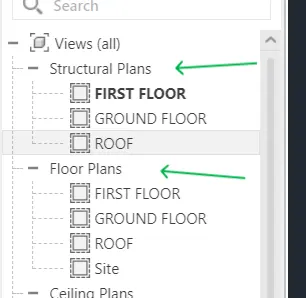
- images of the ARCHITECTURAL FLOOR PLANS-
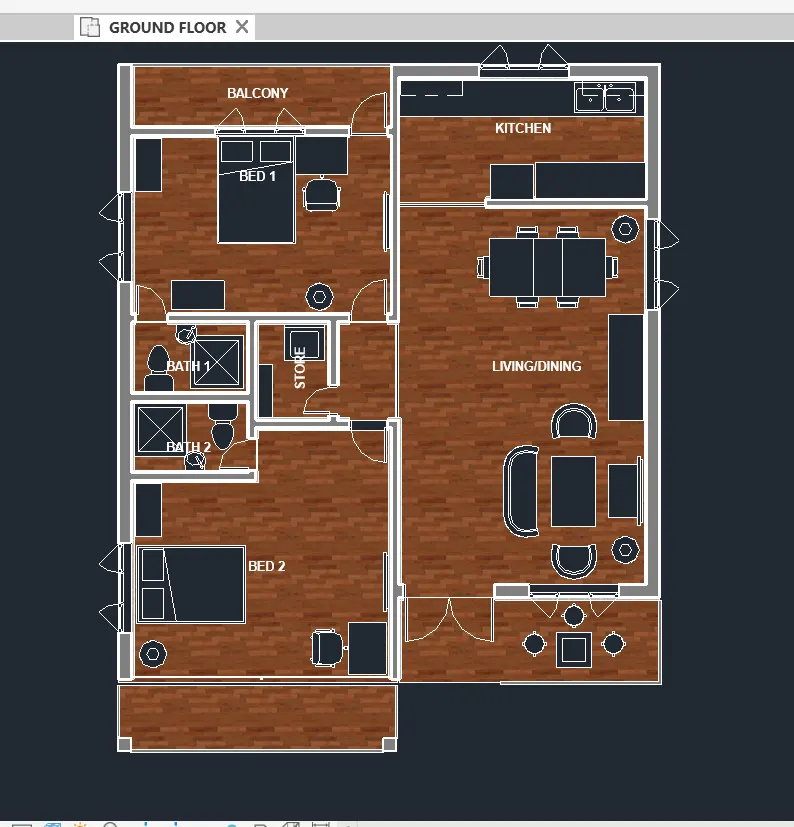
GROUND FLOOR(ARCH FLOOR PLAN)VIEW
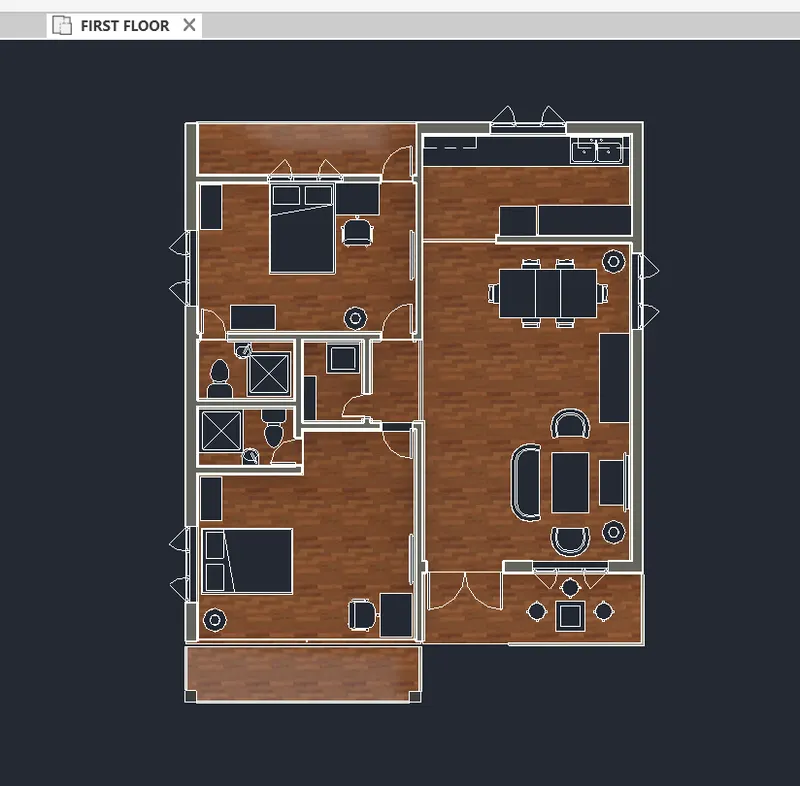
FIRST FLOOR(ARCH FLOOR PLAN)VIEW
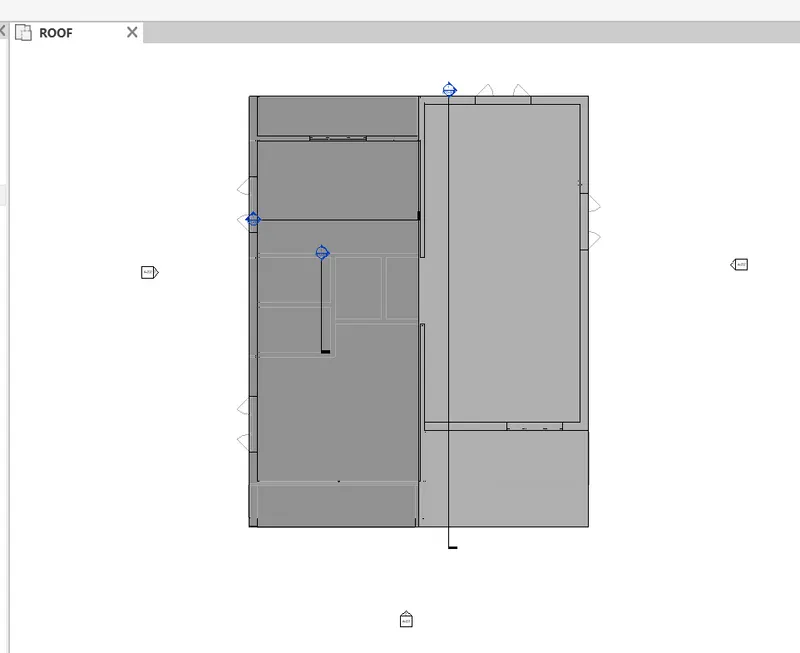
ROOF PLAN VIEW
- Note- architectural plan must have walls, floors, and all the components placed within the building.
Structure plan-
- Same as architectural plan view> go to VIEW tool > next click on structural plan(for showing structural plan view)
- Next select the floor in the properties browser to view plans.
- Note that structural plan must have details of only walls, floors, and columns.
- IMAGES OF STRUCTURAL PLAN
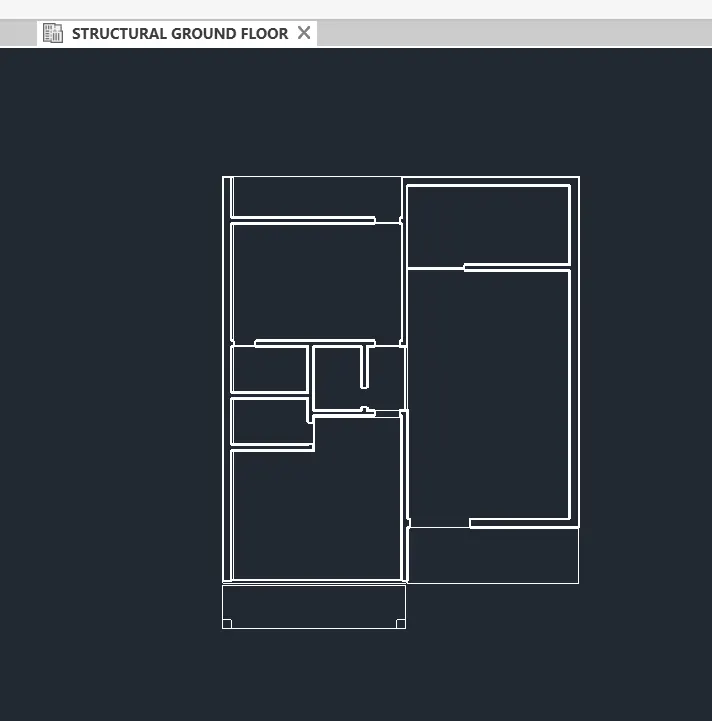
STUCTURAL GROUND FLOOR PLAN VIEW
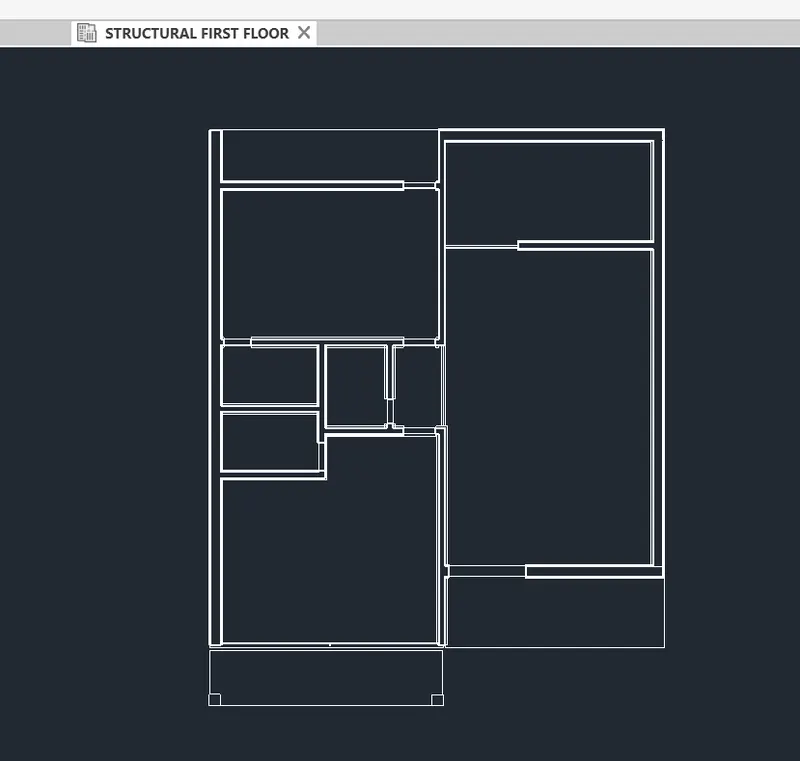
STRUCTURAL FIRST FLOOR PLAN VIEW
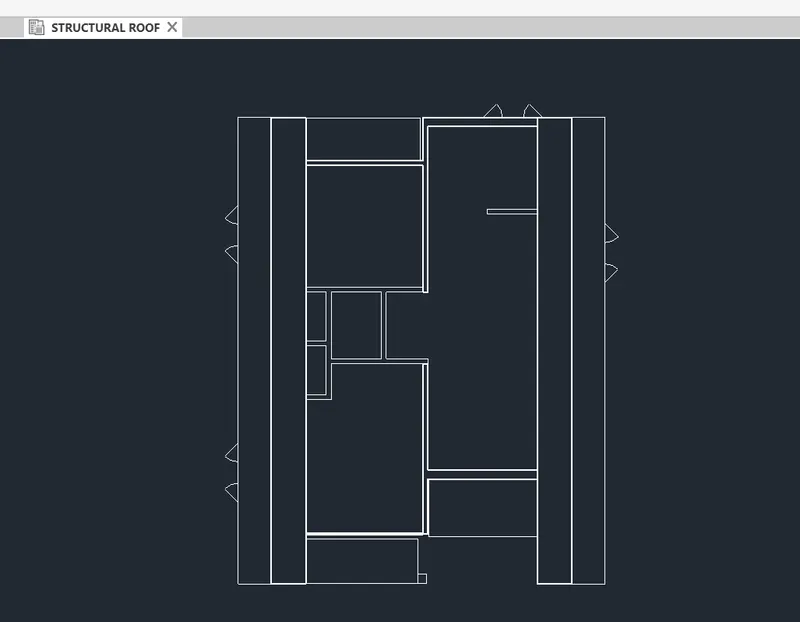
STRUCTURAL ROOF PLAN VIEW
4. To add dimensions to all the walls and floors
The architecture plan dimensions-
- to add dimension to the walls and floors > go to the annotate tool > select dimension type
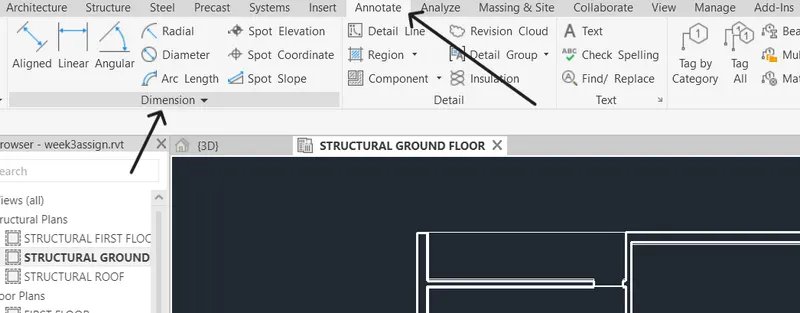
- next select all the walls and floors
- RESULT- the image shown below (architectural floor plan dimension)
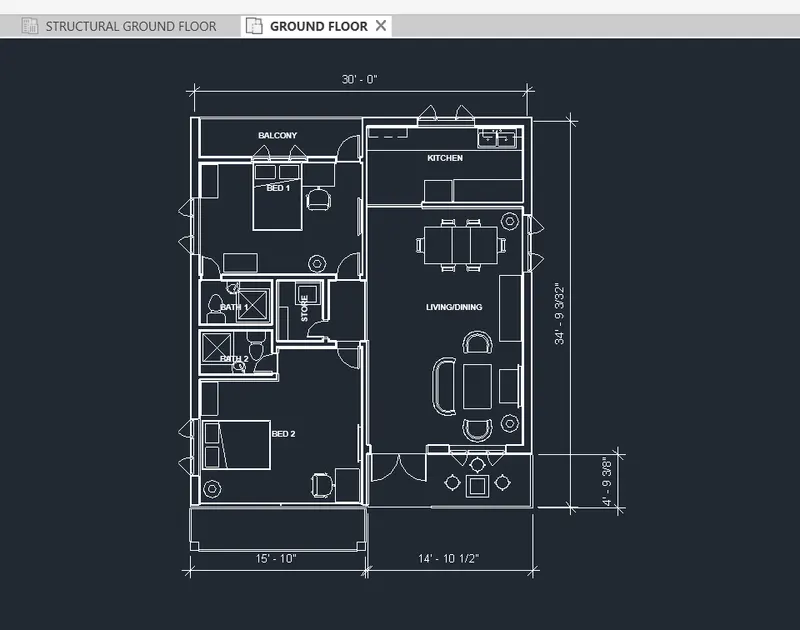
The Structure plan dimensions-
- using the same process as the architecture plan dimensions follow the same for structure plan also.
- Select the structural plan and give all the required dimension
- image shown the dimensions of structural ground floor.
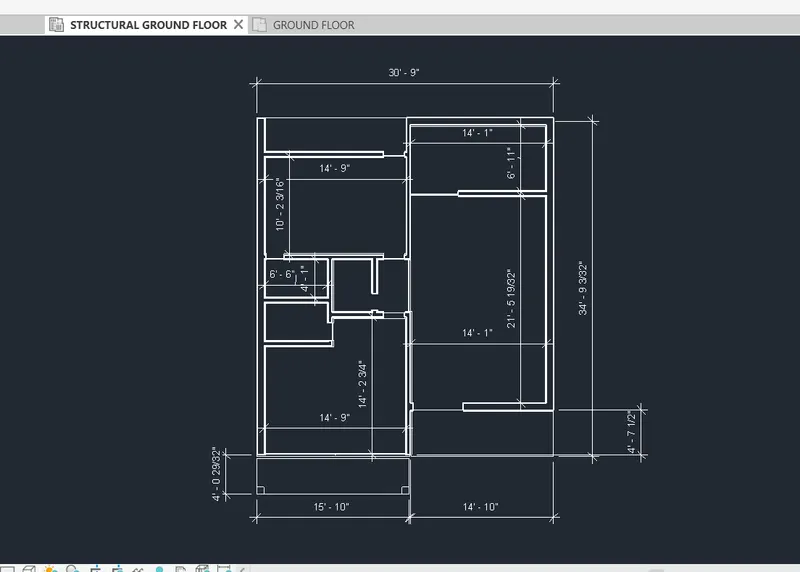
5.To Create a sheet template and adjust the parameters on the sheet to add appropriate views.
To create a sheet template –
- Open your revit software > open your model file
- Next go to view tab > click on sheet
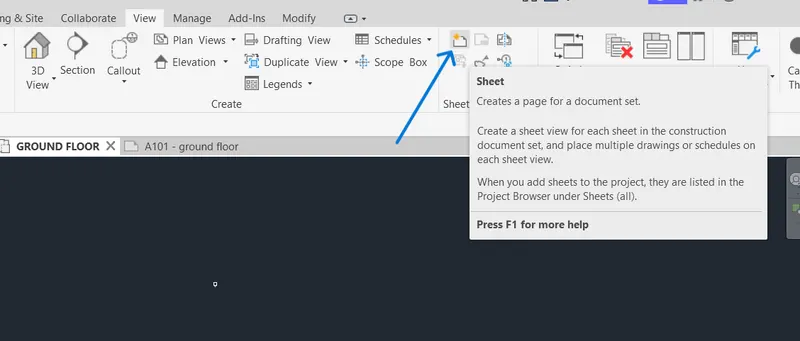
- A dialogue box will appear > here select the new template paper size> click on ok
image showing new created template sheet.
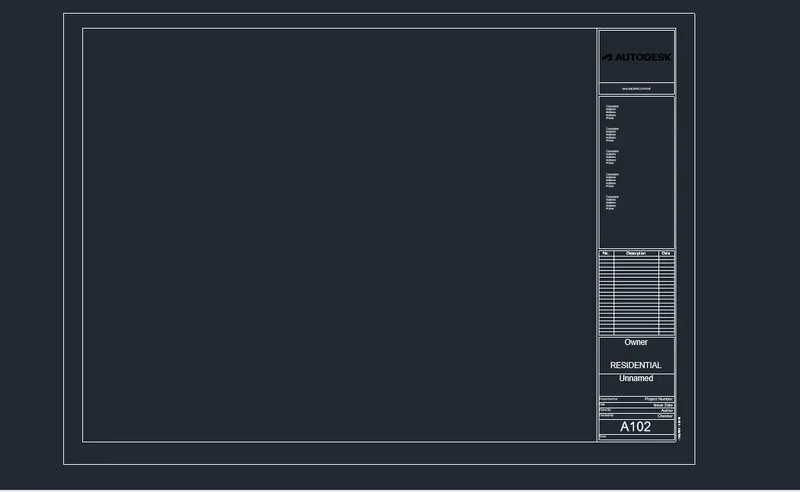
- Next to add the view plans use the project browser and drag the selected view in the sheet template you have created. Also by using place view, you can add the views.
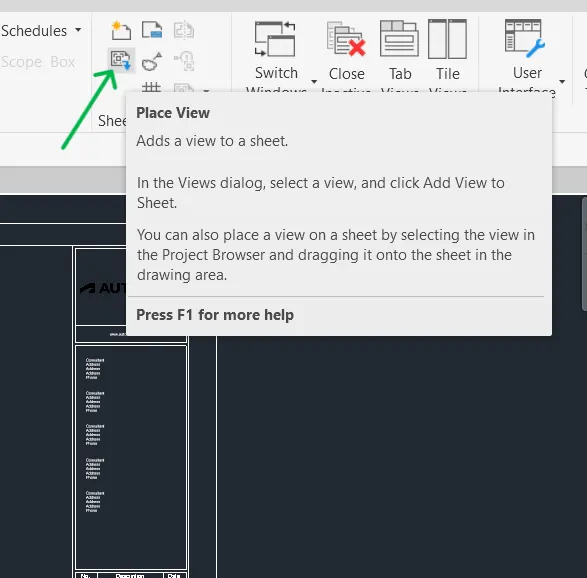
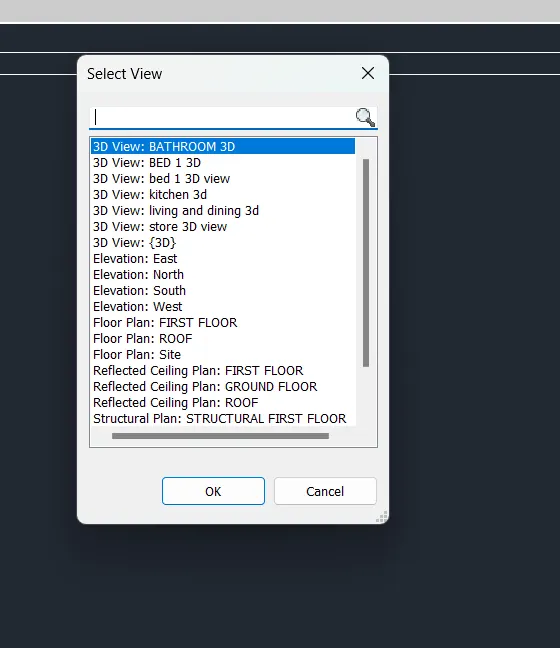
- Next adjust the parameters on the sheet by using the properties browser.
below image showing properties browser of sheet created
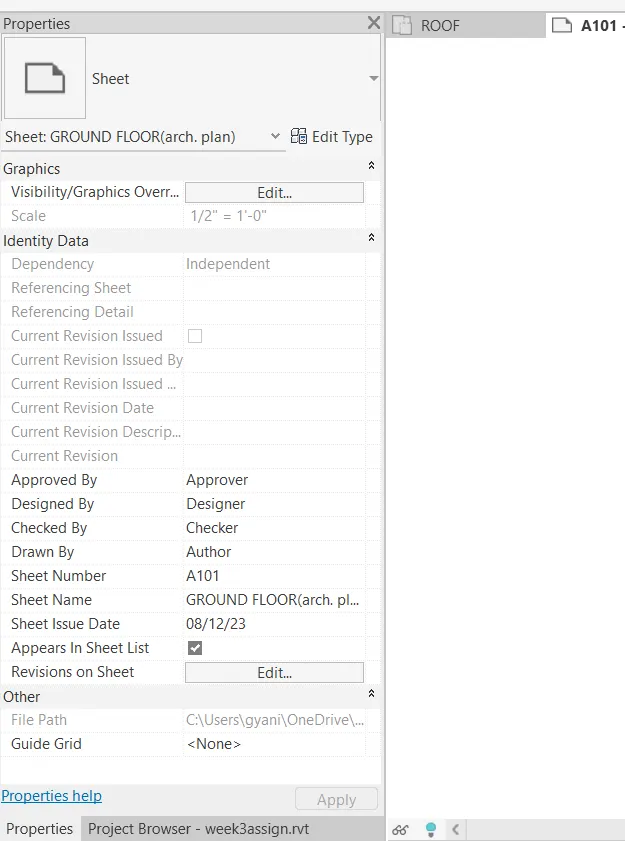
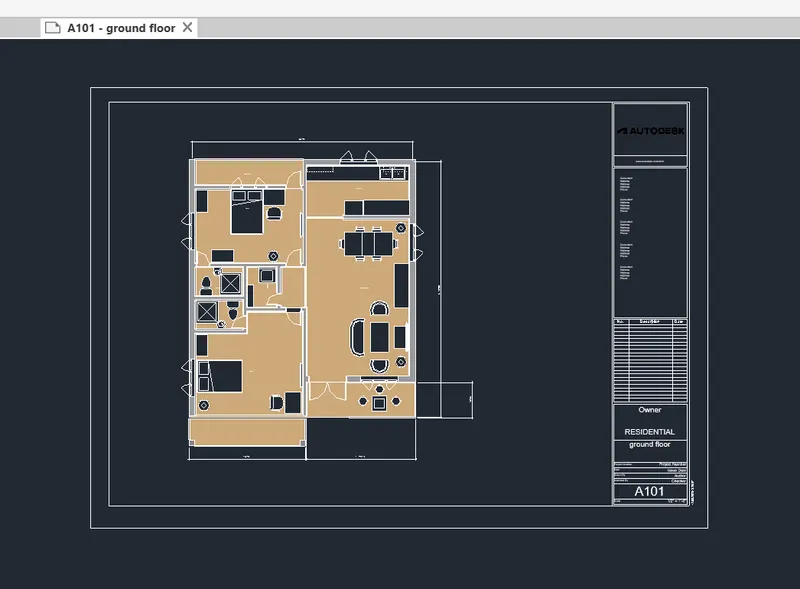
- Create a sheet template from the view tab and adjust the parameters on the sheet to add appropriate views
below image showing sheet of ground floor plan view
6. Using Elevation tab create the elevation views, looking at the building from East, North, South, and West.
- Note – revit provides you elevation by default in your model project
- To create your own elevation view >Open your model project > go to view tab> next click on elevation tab
- Place the elevation in each direction and name rename them east, west, north and south.
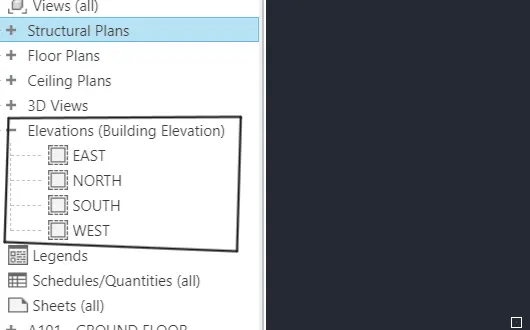
- After creating the elevation view, click on each elevation to see the views.
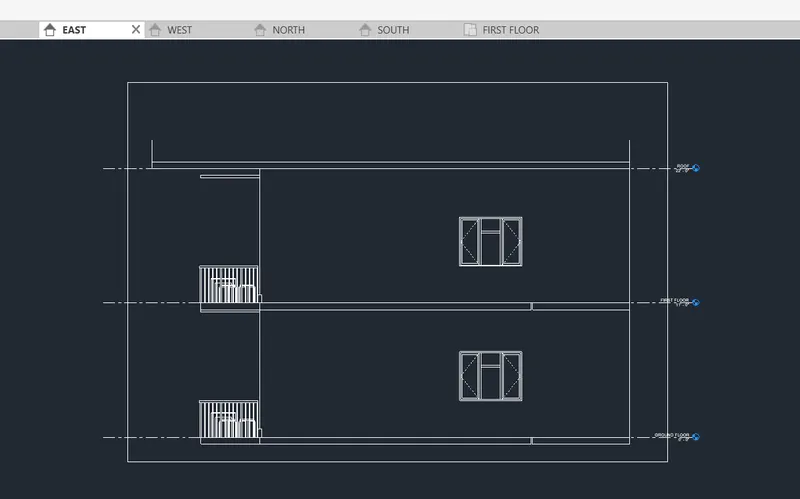
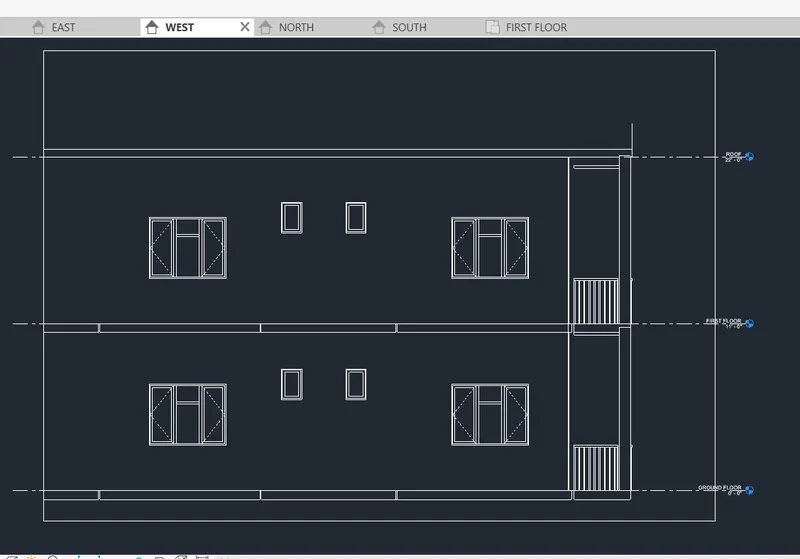
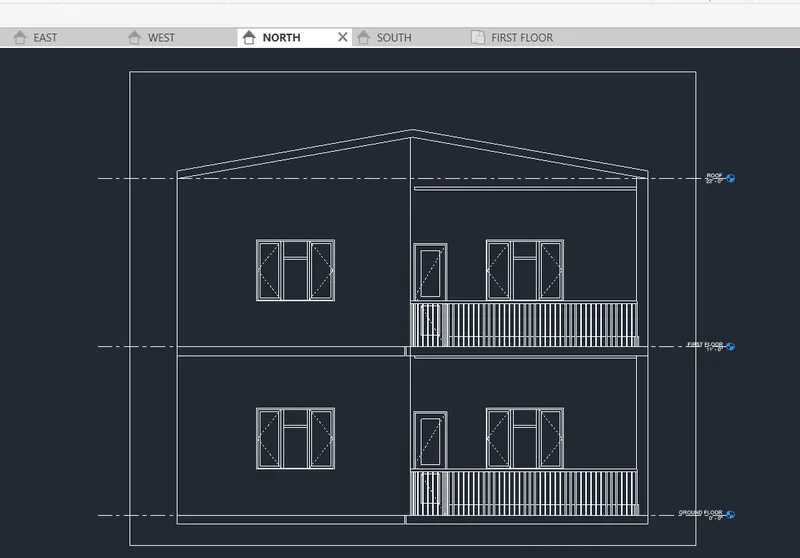
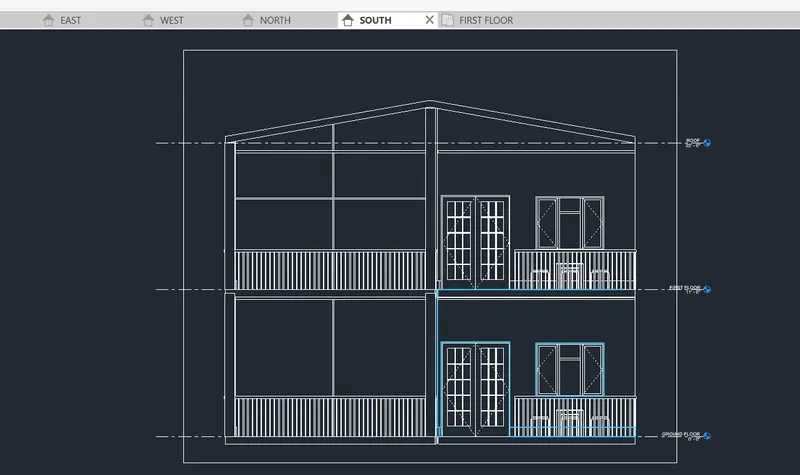
- the below images showing all the elavation created
EAST ELEVATION VIEW-
WEST ELEVATION VIEW-
NORTH ELEVBATION VIEW-
SOUTH ELEVATION VIEW-
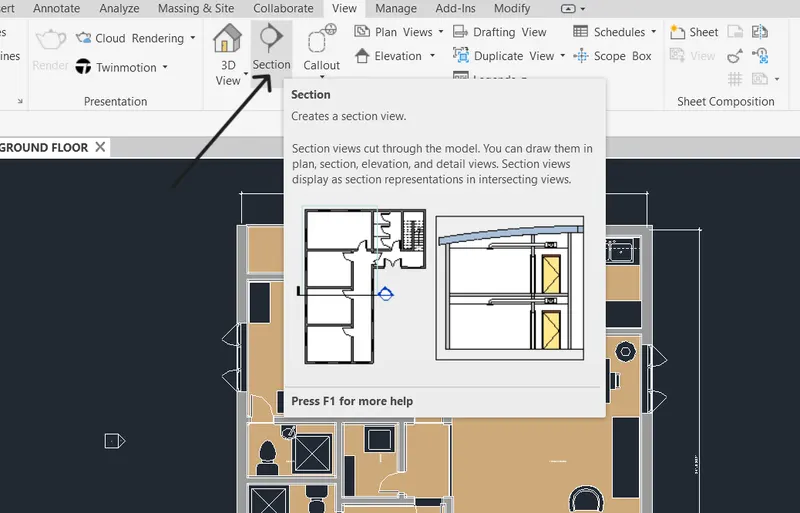
7. To Produce section cut
to create section cut for the rooms
- Select the view tab> now click on section tab
- Next click to specify the first point and second point of any room (longitudinally and transverse)
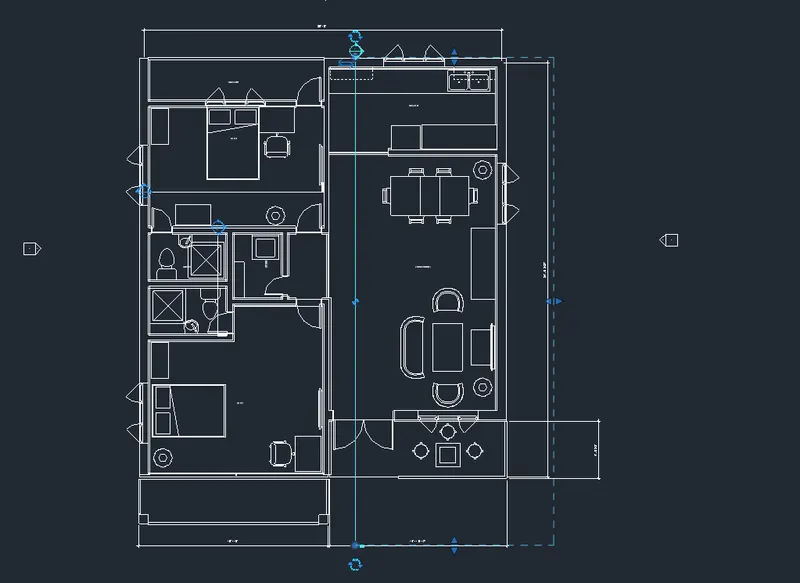
- Now you will see a section view in the project browser
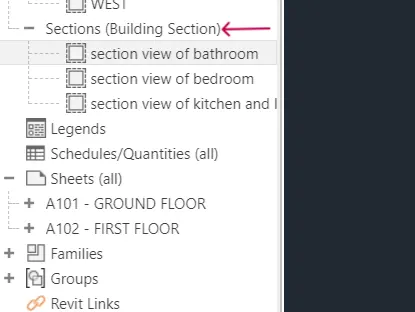
- Rename all the section view with appropriate name for better understanding
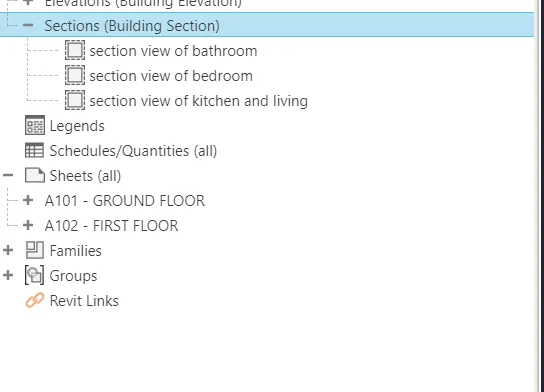
- All the section view you have created will be saved in Section view in the project browser.
- Next to view the section just click on the section views.
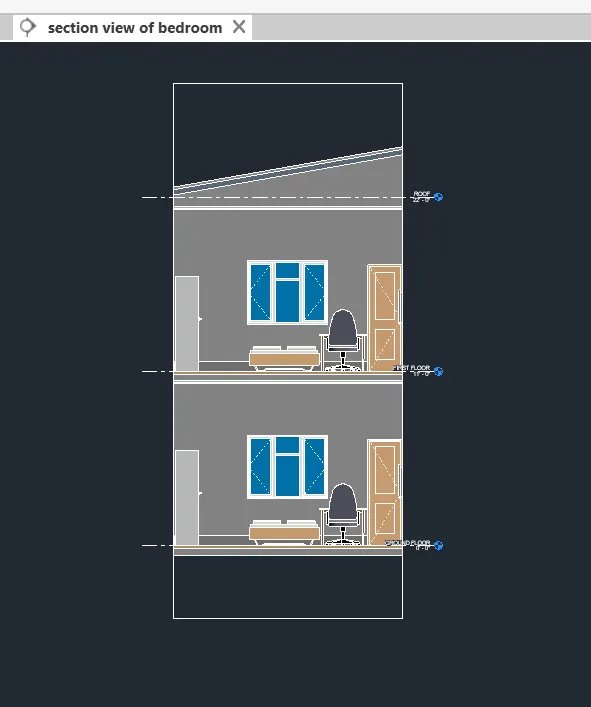
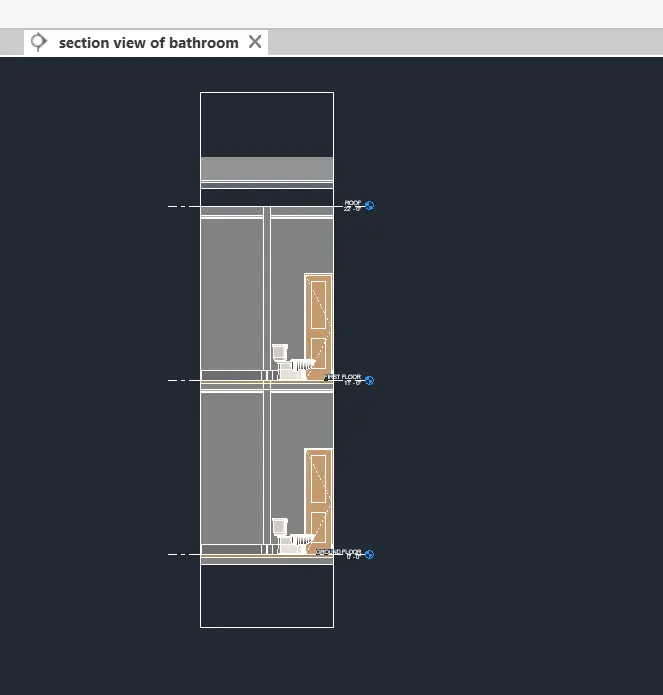
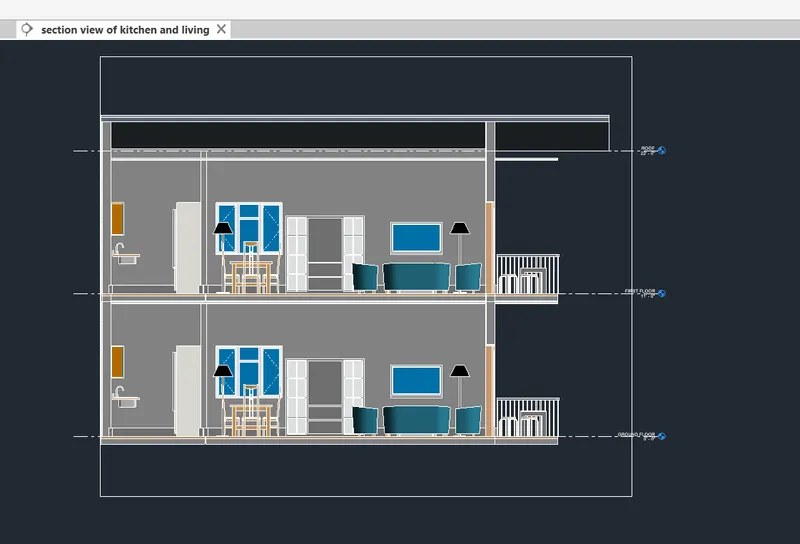
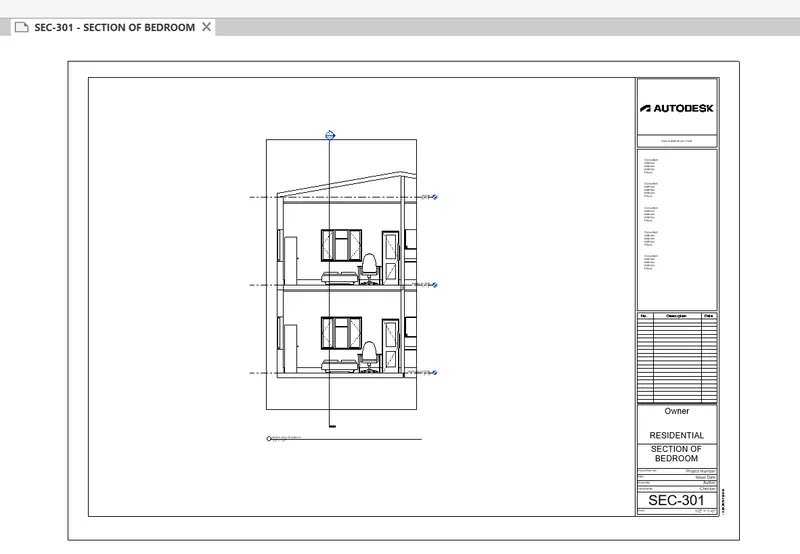
- the below images showing section views of different rooms.
-section view of bedroom-
-section view of bathroom-
-section view of kitchne and living room
8.
To Classify the views, Plan Views, Section Views, and Elevation views
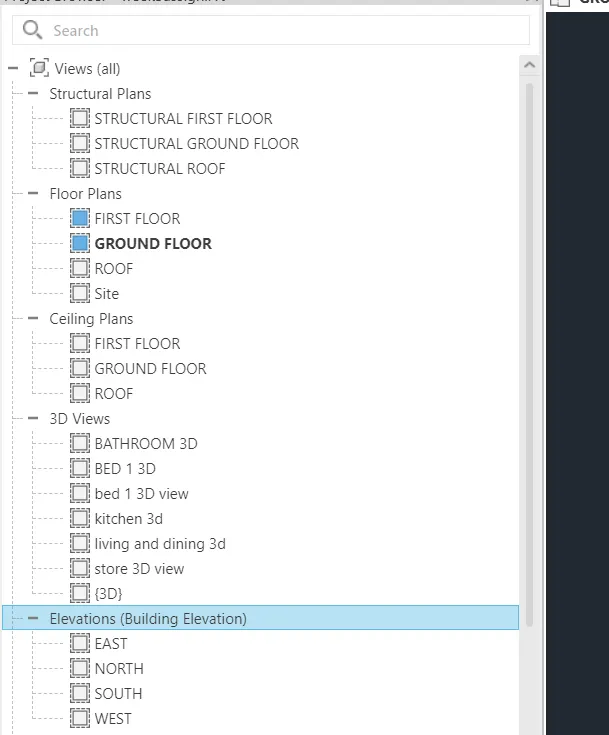
- To classify the views> click on project browser
or type PB to activate project browser
- By default, all the views can be seen in the browser
- Just create any type of views, it will save automatically in the legends on project browser.
- As shown in the below images
9.
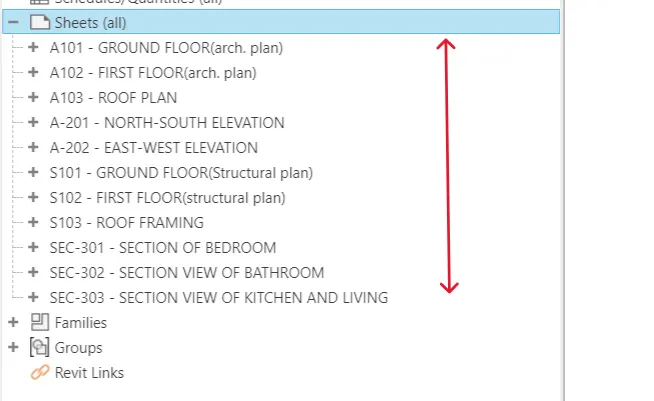
To create multiple sheets as -
- A 101- Ground Floor Architecture Plan
- A 102- First Floor Architecture Plan
- A 103- Roof Plan
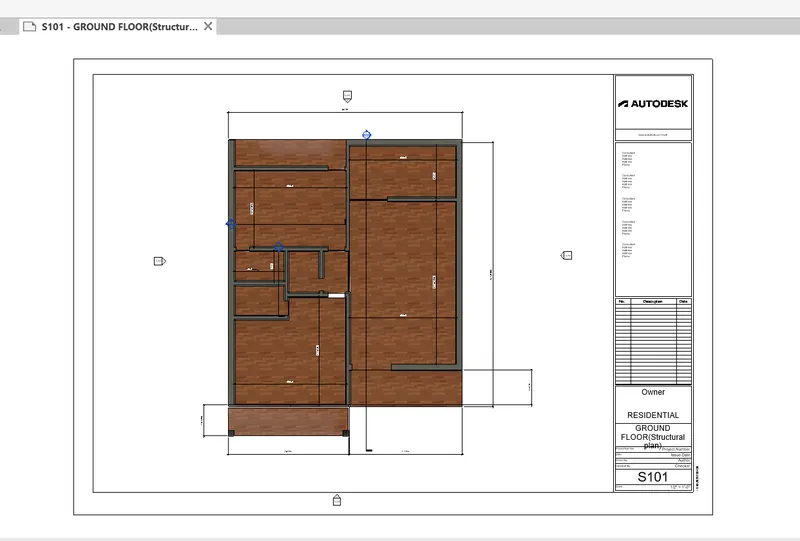
- S 101- Ground Floor Structural Plan
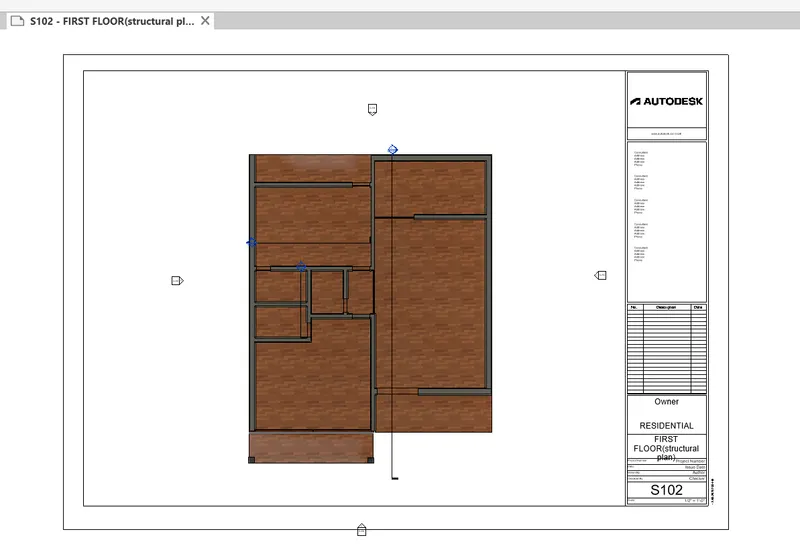
- S 102- First Floor Structural Plan
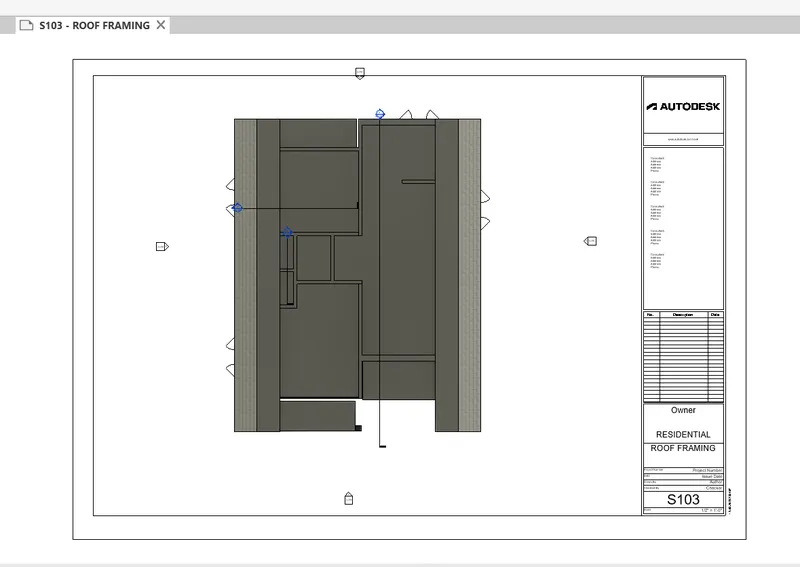
- S 103- Roof Framing Plan
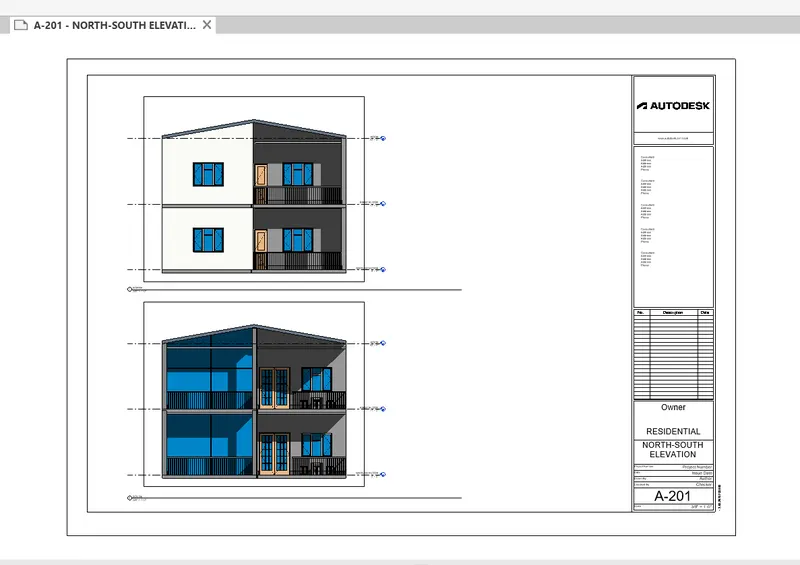
- A-201- North-South Elevations
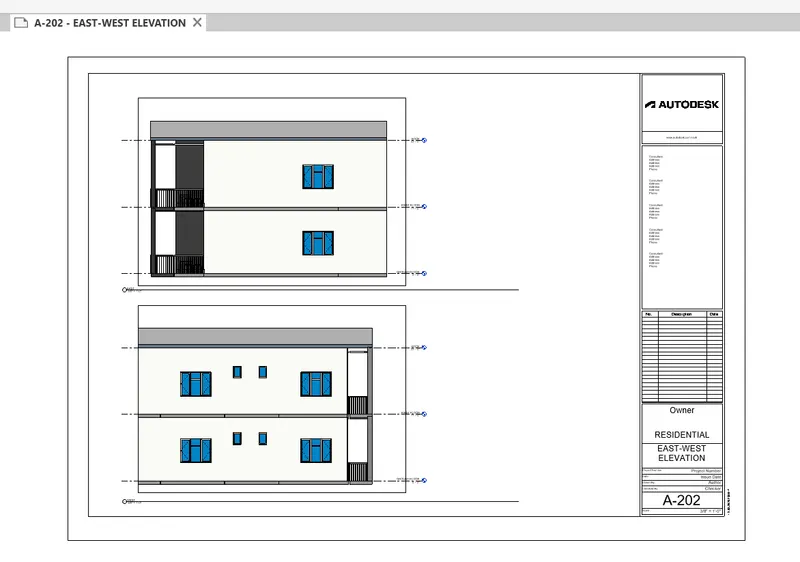
- A-202- East-West Elevations
Add additional sheets based on the sections created in your Revit file
- Step 1: go to view tab> click on sheet > create multiple sheet and name them as given in the question using properties browser or in the sheet itself.
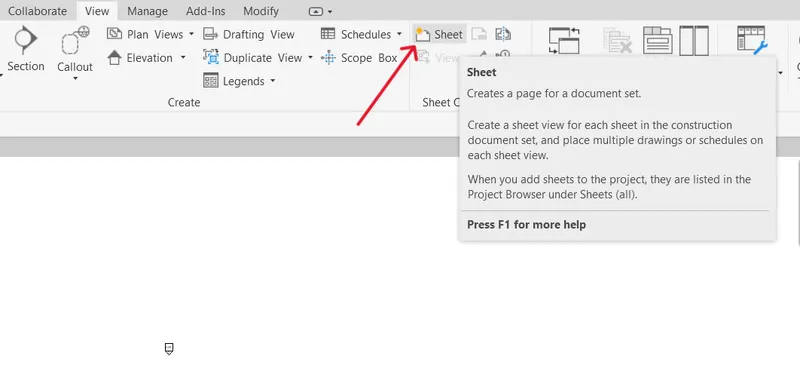
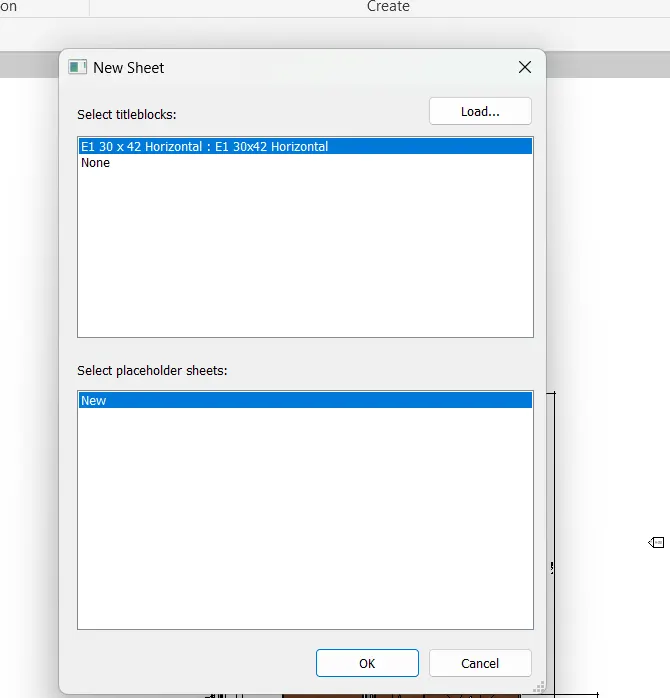
-image showing multiple sheets created-
- Step 2: next add the views in the sheets using the place view tab or just drag it from project browser.
- Step 3: using the properties browser also adjust the views in the sheet with appropriate size and all the information.
-properties browser-
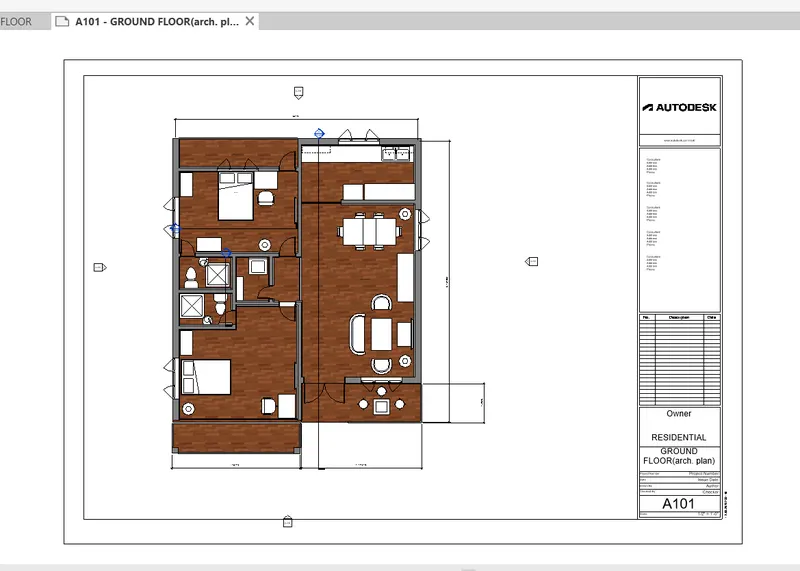
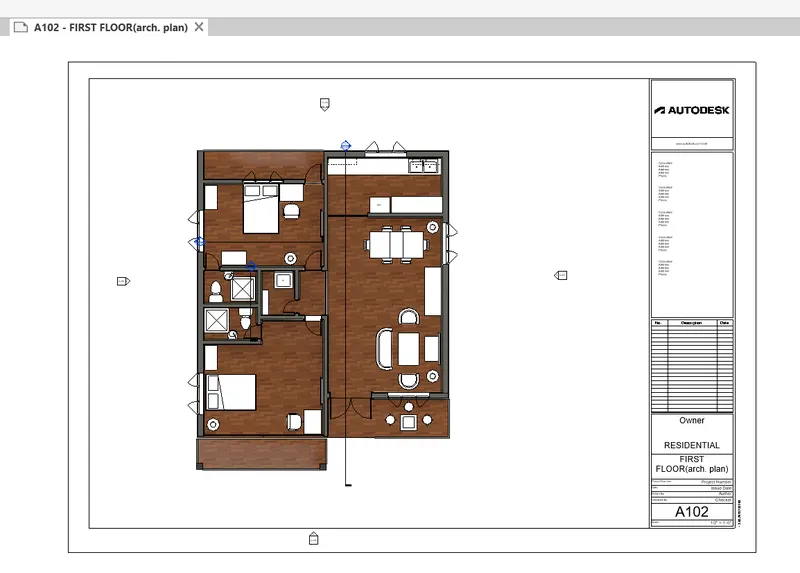
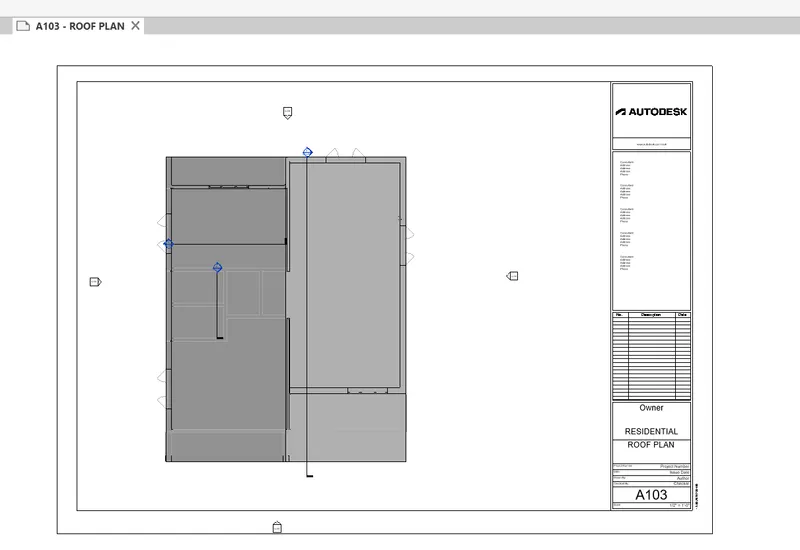
- result- the below images showing different sheets created in the model-
- ARCHITECTURAL PLAN VIEW SHEETS-
- STRUCTURAL PLAN VIEW SHEETS-
- ELEVATION VIEW SHEETS-
- SECTION VIEW SHEETS-
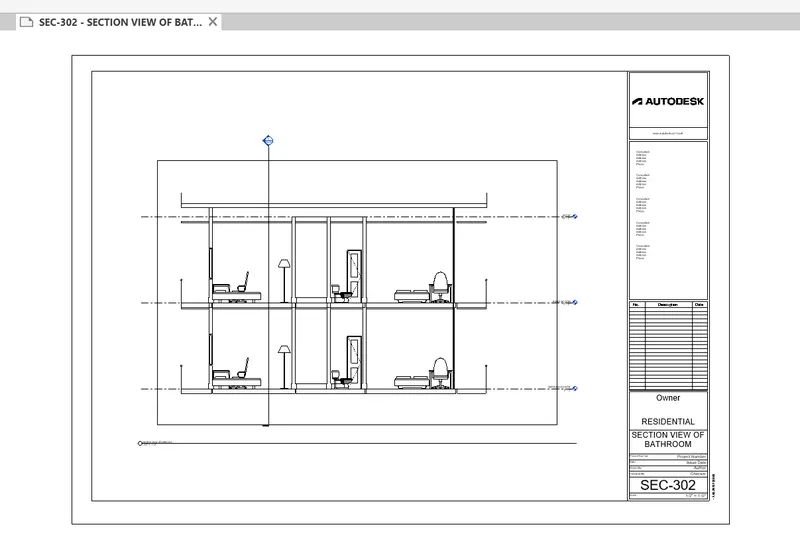
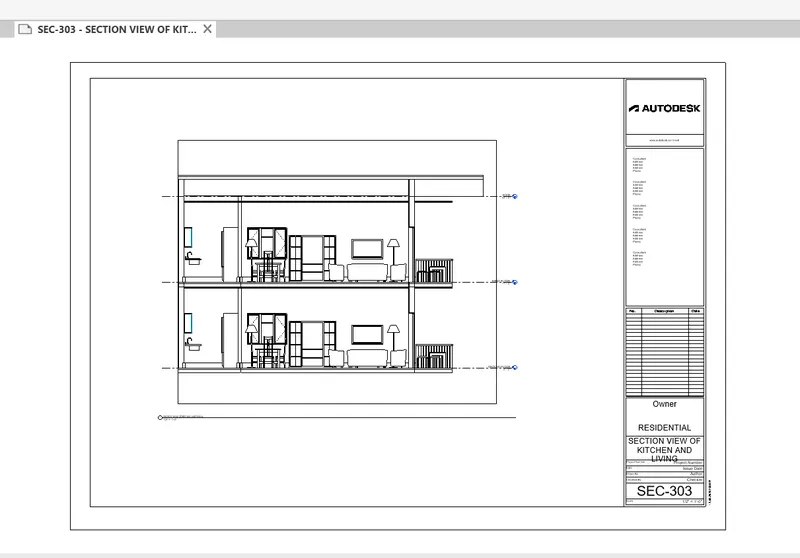
10: To Create a camera-specific view or a 3D view in each room (living, dining, bedroom). Based on the views create a new set of sheets
Step 1: creating 3D views-
- To create 3d view in each room > go to view tab > click on 3Dview
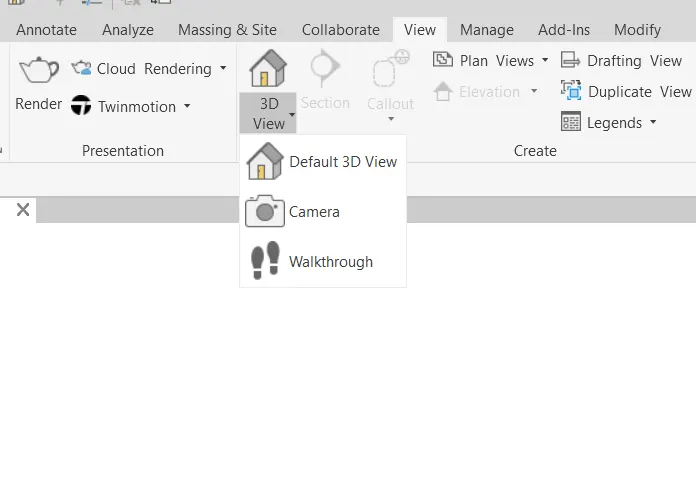
- Next select the camera> placed the camera in any room and specify the view direction.
- Now next save the view with given name.
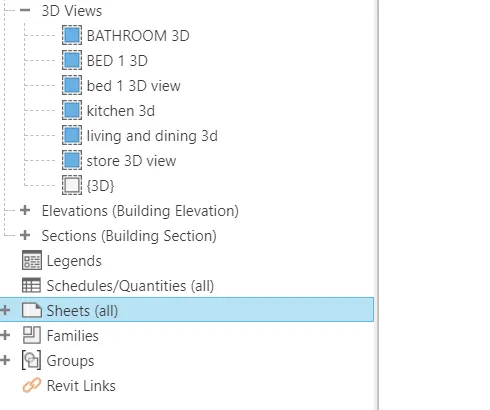
- next open the saved view and adjust using the 3D navigation wheel.
- Using the same step create multiple views for each rooms.
Step 2: creating sheets based on views-
- go to view tab> click on sheet > create multiple sheet and name them as given
- add the views in the sheets using place view or drag the views from project browser.
- the created sheets of 3D VIEW shown below-
3D view of each room(bedroom, kitchen, living, store and bathroom):
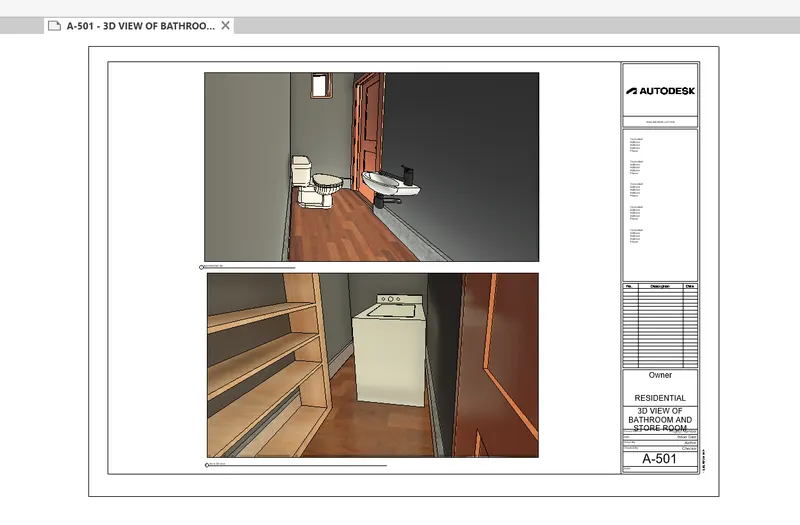
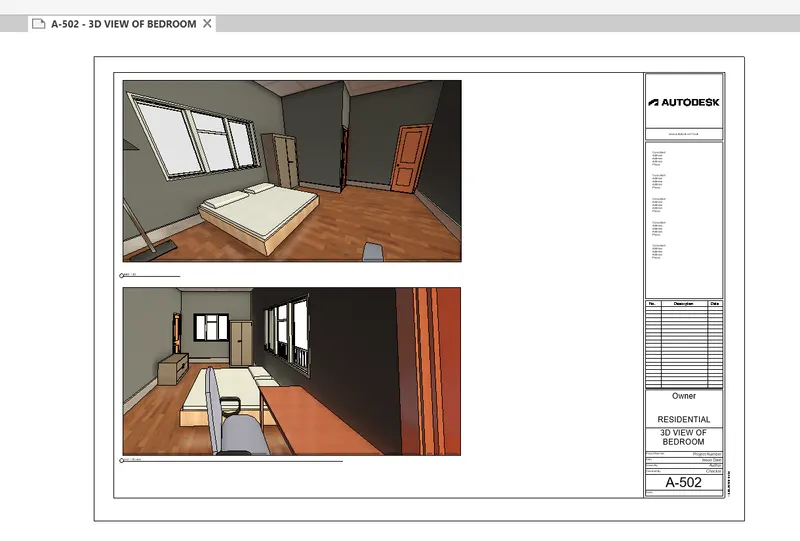
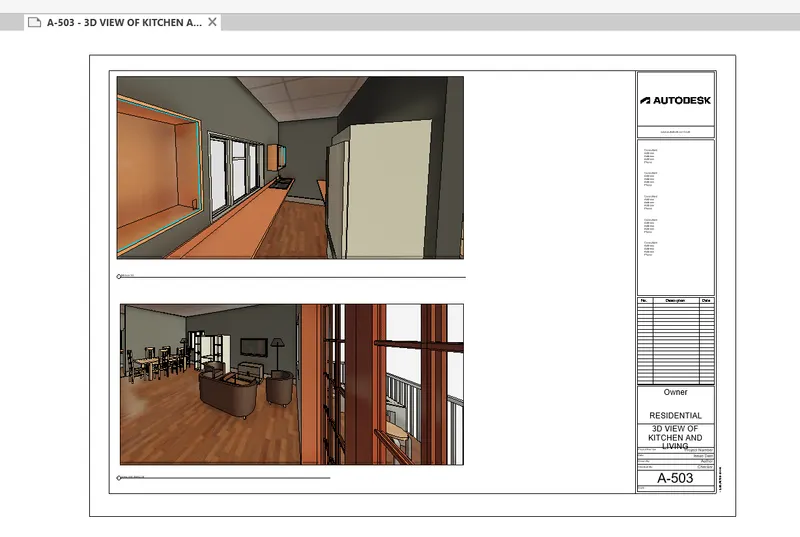
RENDERED VIEWS SHEET-