2D Finite Element meshing over plastic component (Bottle cap)
Aim:- To check for the geometrical errors and mesh plastic (casting) component using 2D mesh followed by the given element Quality criteria. After meshing assigned thickness to the respective component.
Basic Steps
1) Import component and Go for Length option from the mesh module to find out the actual geometry of a model
2)perform topo on it. As the model is too distorted after importing from different software.
3) After understanding the geometry we can go for mid surfacing,
4) After mid-surfacing we can go for 2D meshing by setting the Quality criteria.
5) Solve the Quality issues generated during meshing and move forward.
6)Assing property to each section.
7) In the end, just assign the thickness.
I had imported the given component as known as Bottle-cap. This was actually a plastic component and as we all know the plastic components have different thicknesses through its whole geometry.
As you can see that the geometry is in bad shape and its hard to figure out the actual geometry/shape of the component.
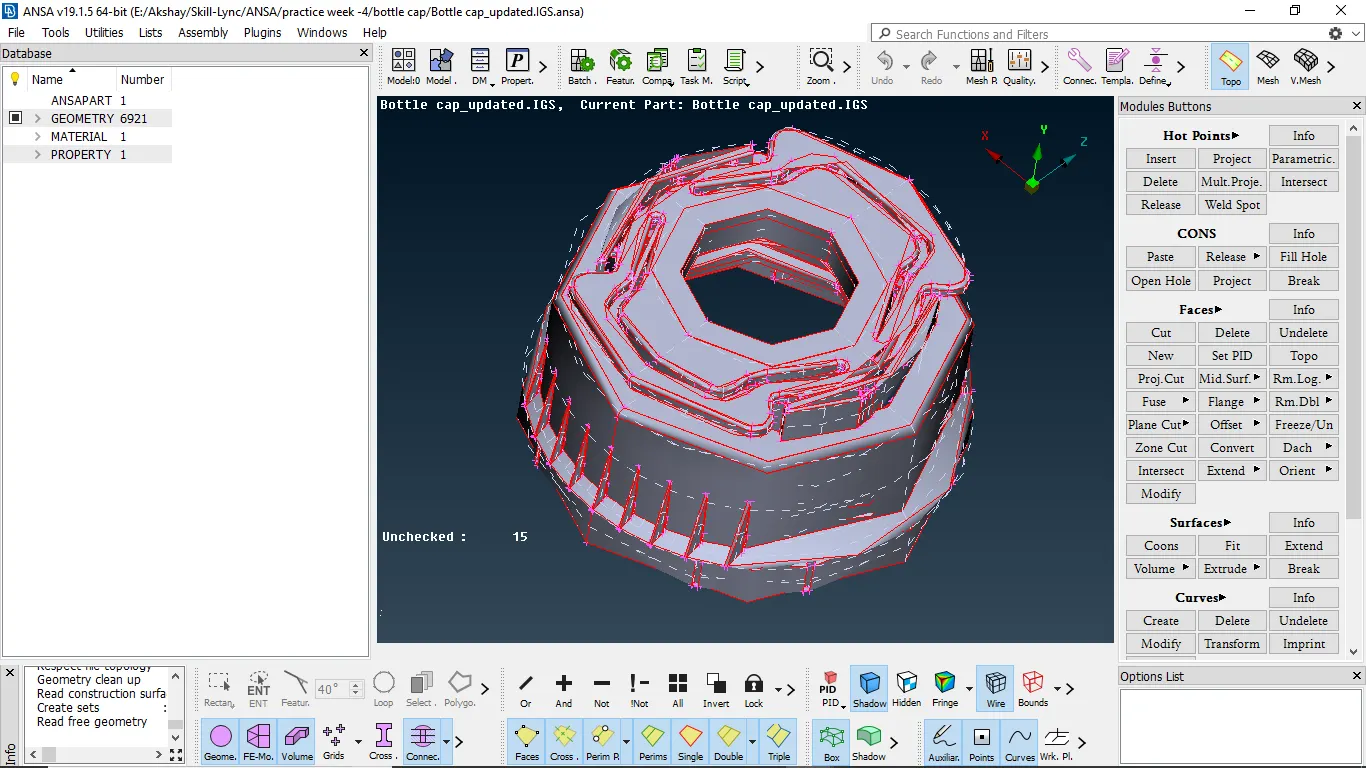
So the first thing we can do here is understanding the geometry by going for the Mesh module in which there is an option of Length. Lenth option set the perimeters node distance minimum to get a better picture of actual geometry.
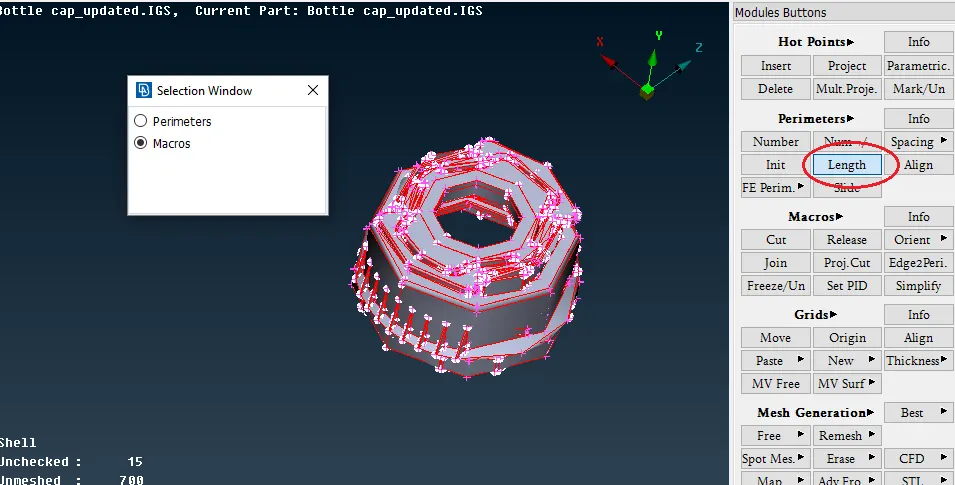
By performing the length and set it to 1 we can manage the distance between the adjacent node to 1mm to get a more clear picture of the model itself.
As you can see in the below image After performing the length option and set it to mm I get the result like this.
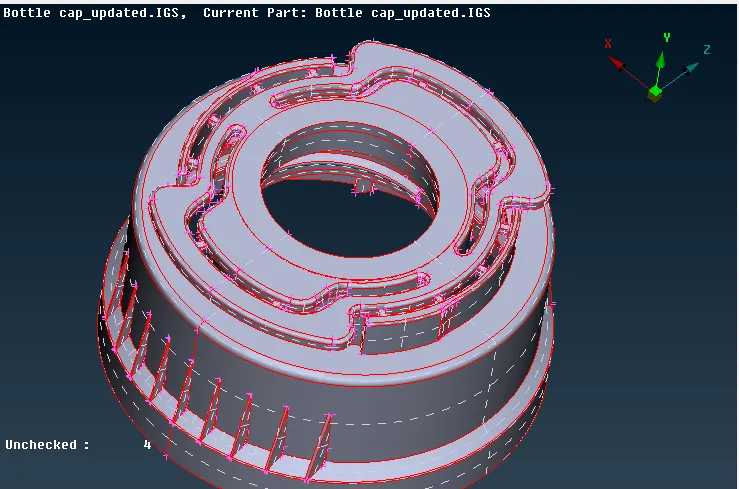
The next thing I did was performed Topo operation from the topo Module. What Topo did was it basically connects the all adjacent surfaces/ singe cons and completes the geometry.
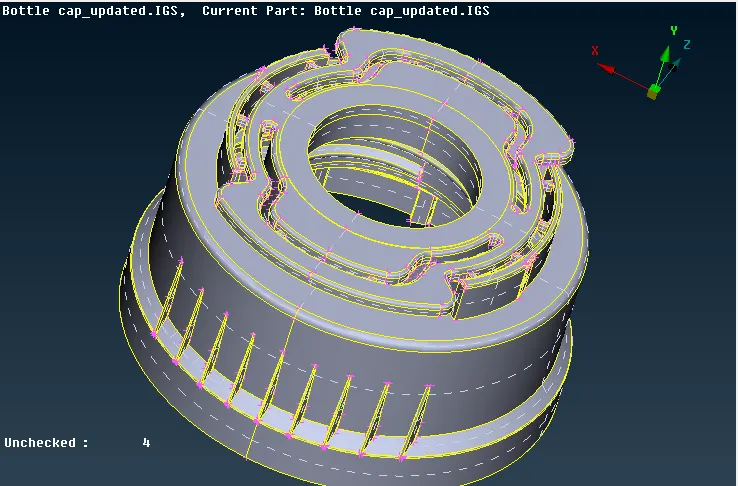
After that, I had performed a Geometry check on it.
One thing I noticed here was During the Geometry check I checked the "Sharpe edge" option and the ANSA gave me Concave CONS error which was the fare in plastic component as it consists of closed and compact complex geometry.
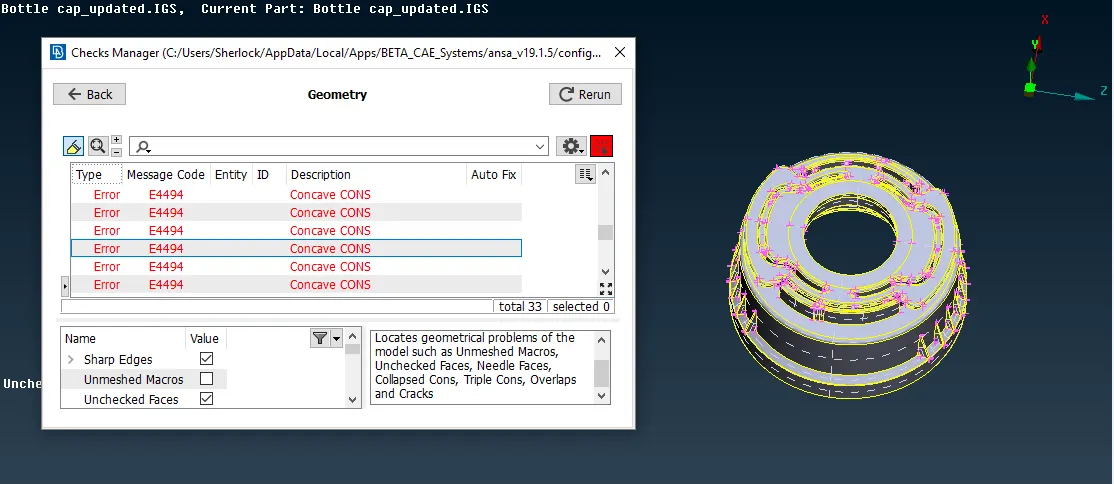
So I just unchecked that sharp edge and move forward with geometry checkup, this time it won't show me such error. The only errors were triple cons, single cons, needle faces, and unchecked faces.
most of the errors I had removed by the auto-fix option because it was more convenient and time-saving. For some errors, I had to go with manual fixing
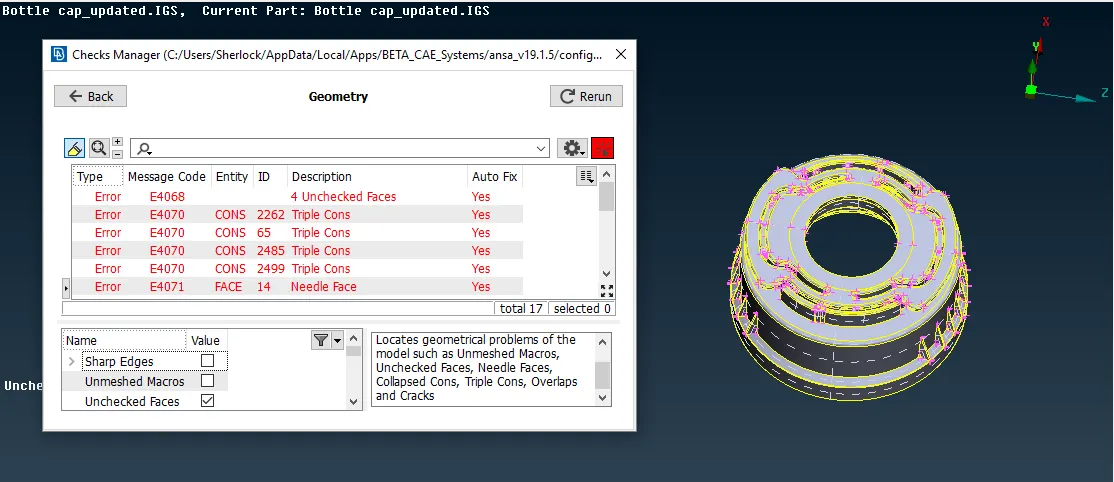
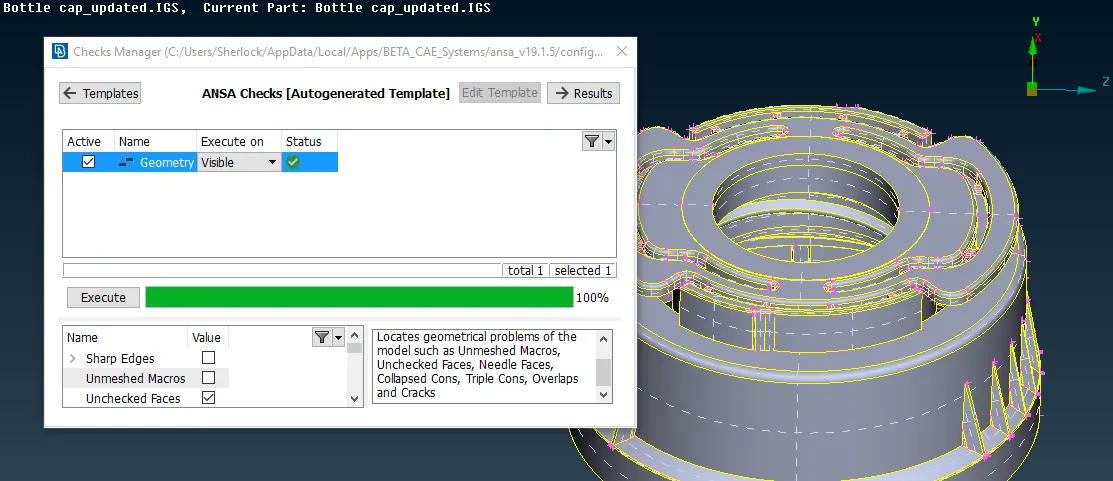
After cleaned the geometry, I had moved to the mid surfacing. For that Part I had gone for the surface by surface as at the different stages of the model thickness was varying.
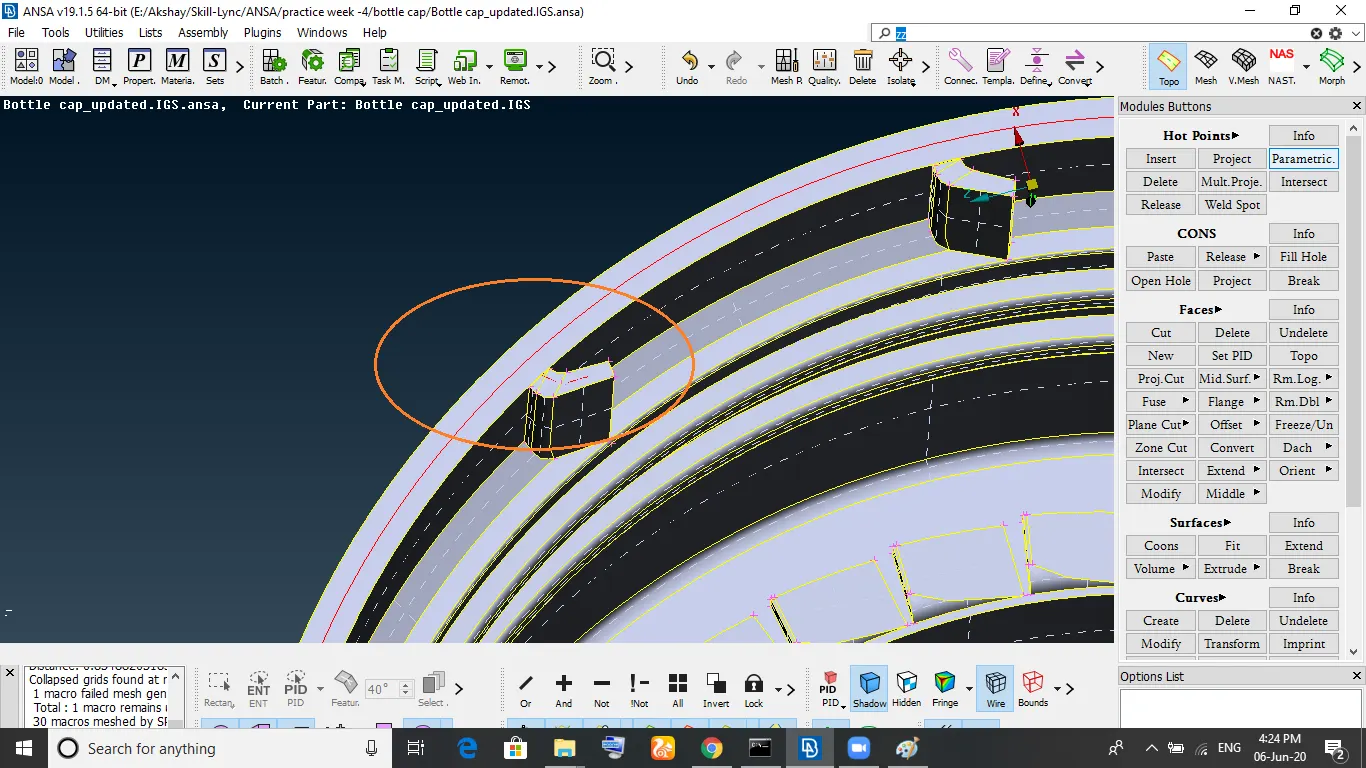
Here I faced problems as you can see in the above image the feature I highlight had a tapered body means its thickness was changing over its length.
I capture this feature by the projecting curve and then divided it into 2 elements. Assing different PID for each element.
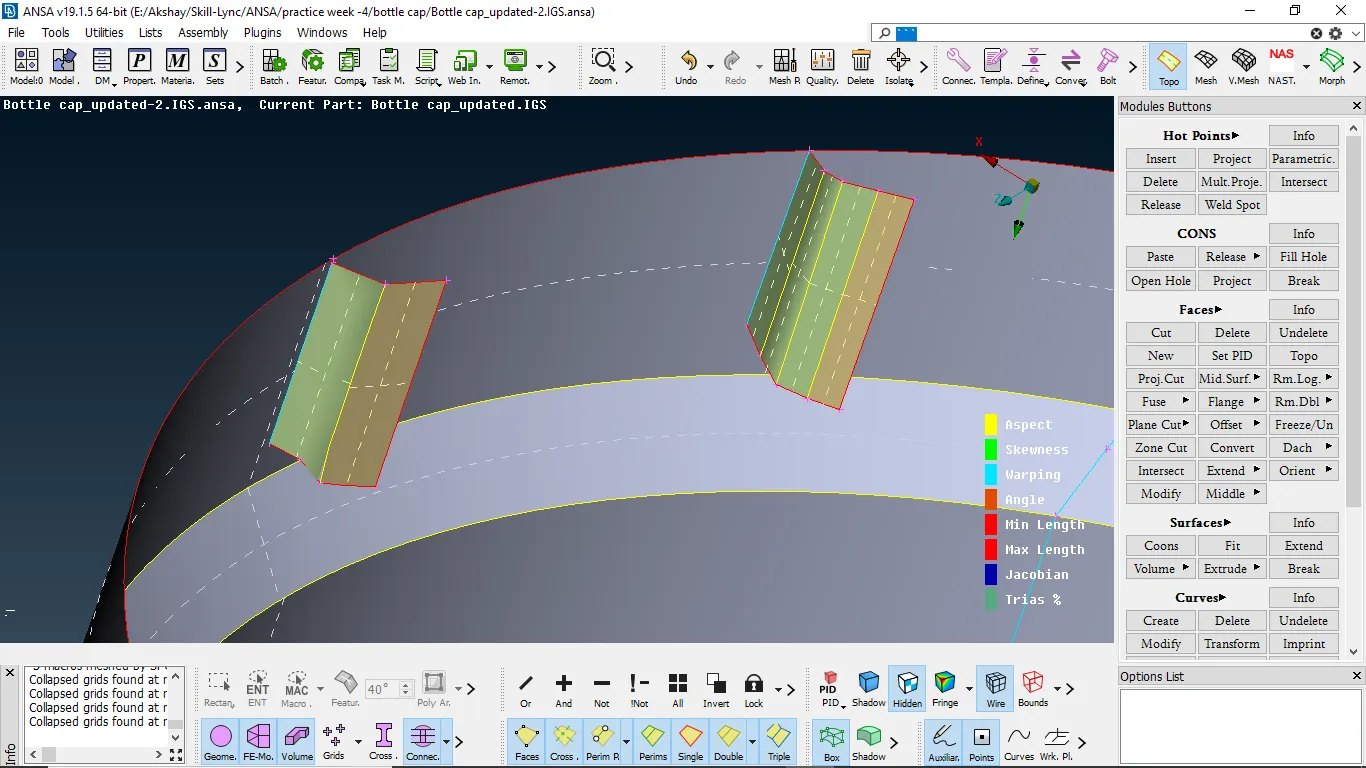
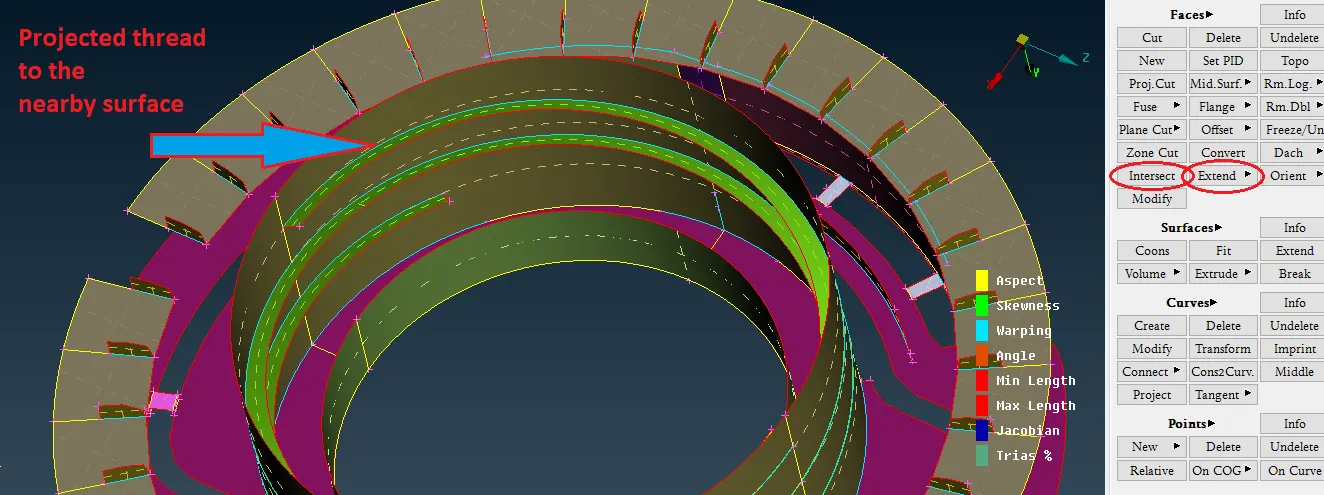
After copied the geometry of that feature and pattern it over the periphery of the cap I moved forward with the extend and intersect option from the topo module to connect the feature to its adjacent surface and chop out the extra surface.
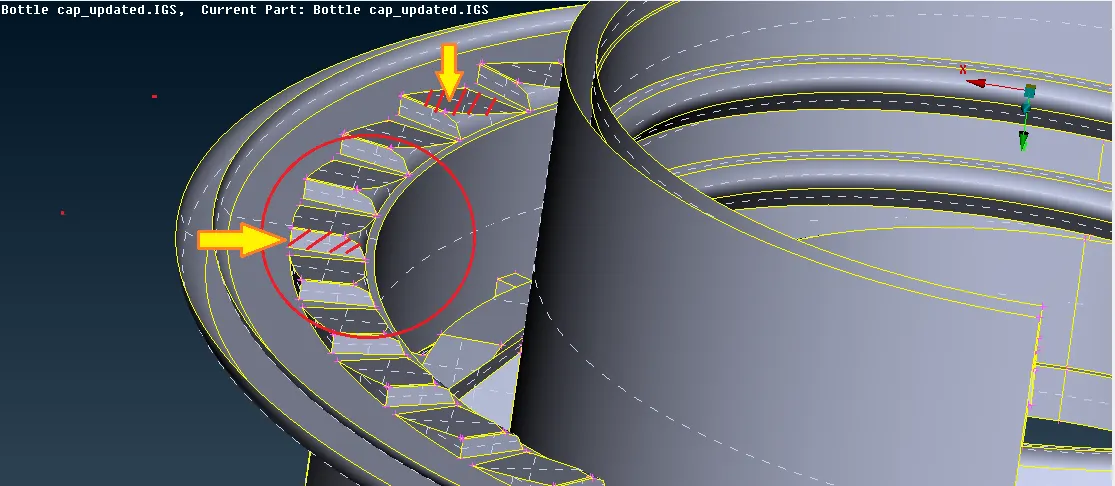
The second feature where I had to do compromise was the bellow one. It was hard to capture as it has a more challenging shape. three sides straight and one side curved.
For better understanding and find out a better way to take mid of this surface I went with two methods.
I took the mid from the top side and front side.
I get the following results, The black marked are one whos mid was taken from the top and the red marked was from the front face.
You can clearly see the difference as when I take mid from top I was able to replicate the feature shape but unable to joint it to it's adjacent surface. There is a rule in ANSA that at least one side of the projected mid should be connected to the surface.
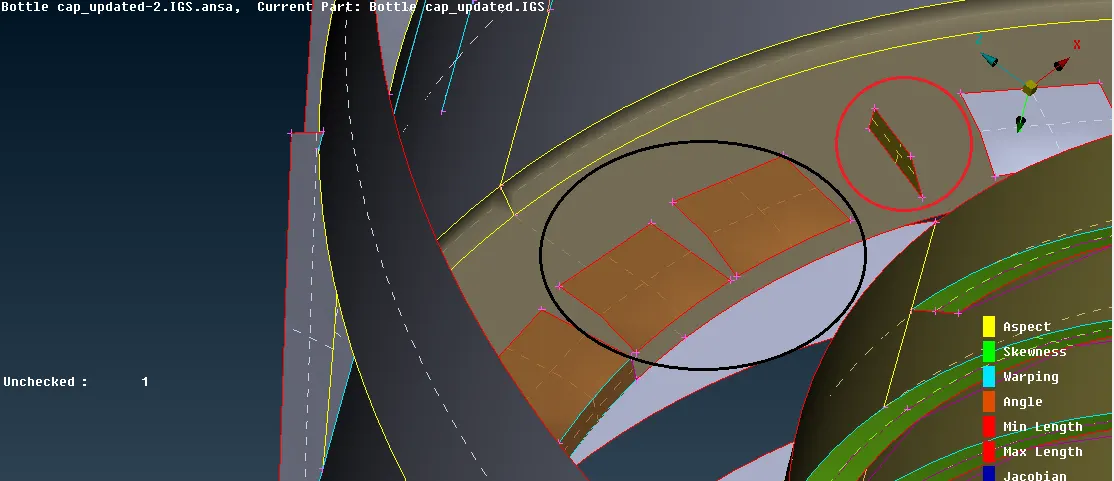
With the second red-marked method, I was able to easily project that surface on the bottom face and obtain feature geometry.
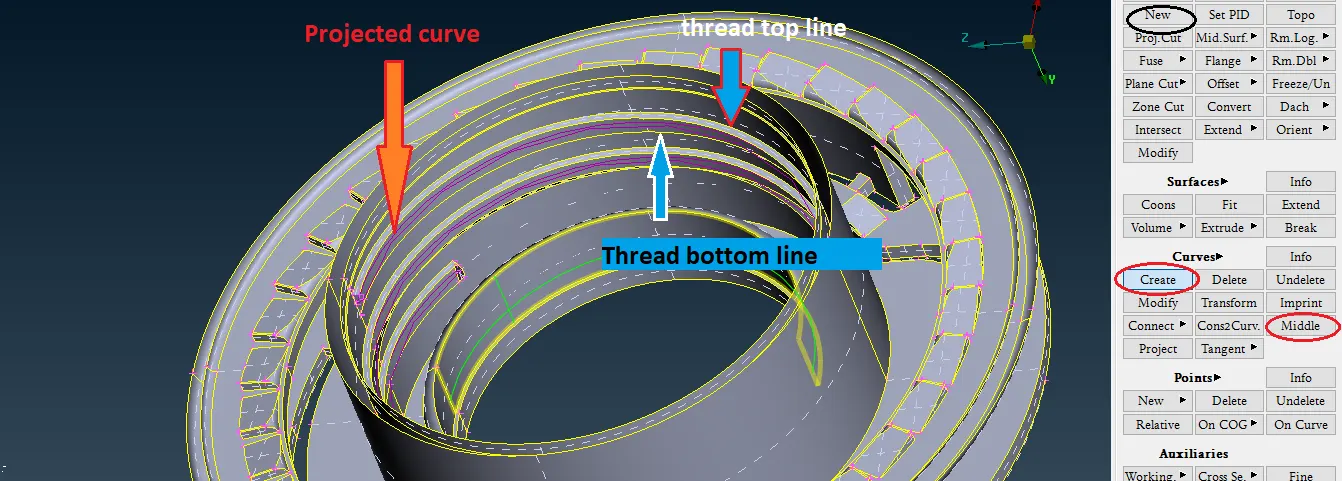
To capture the threads, I used a curve option. Used 'Create' and 'middle' curve options that the instructor introduced during the video lecture. With these two options, I first projected the mid of the thread's top and bottom line then joint them together with 'create' curve option.
this way I got the complete closed thread geometry. later with help of 'Face --> New' option I created a new face using that project curve. after that used extend option to attach it to the nearby surface.
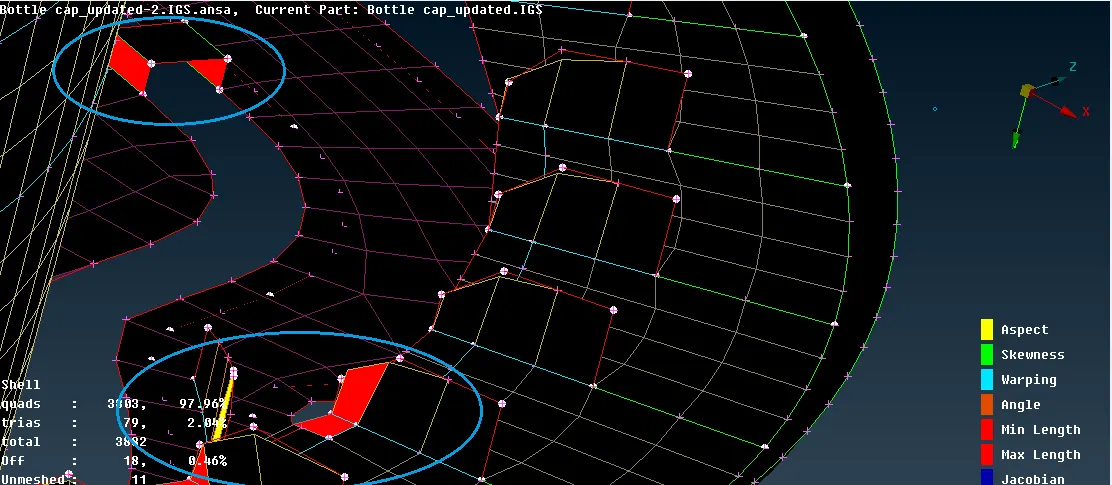
Here is some Quality issue I faced which I had later cleared by 'reconstruct' and 'smooth' operations.
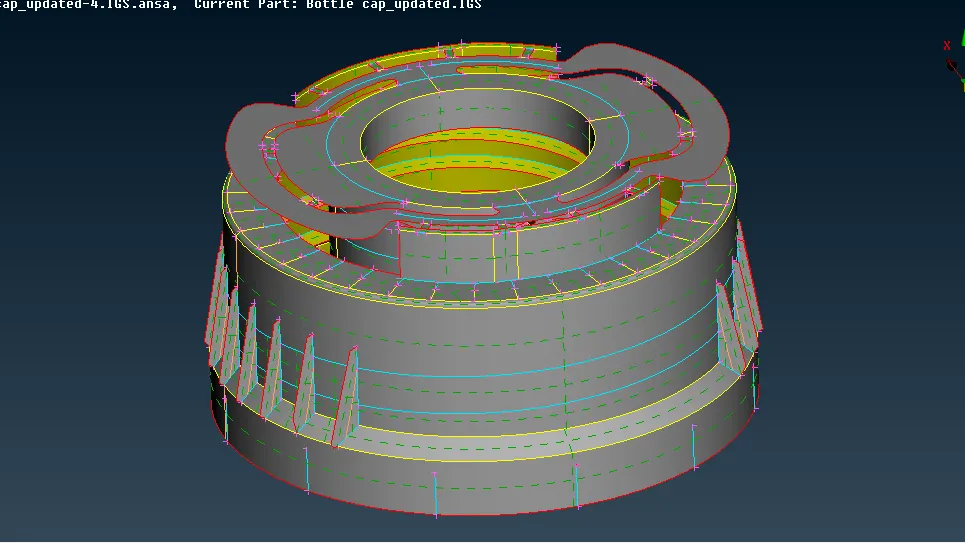
Final Result.
Mid Surface
Meshed Mid surface
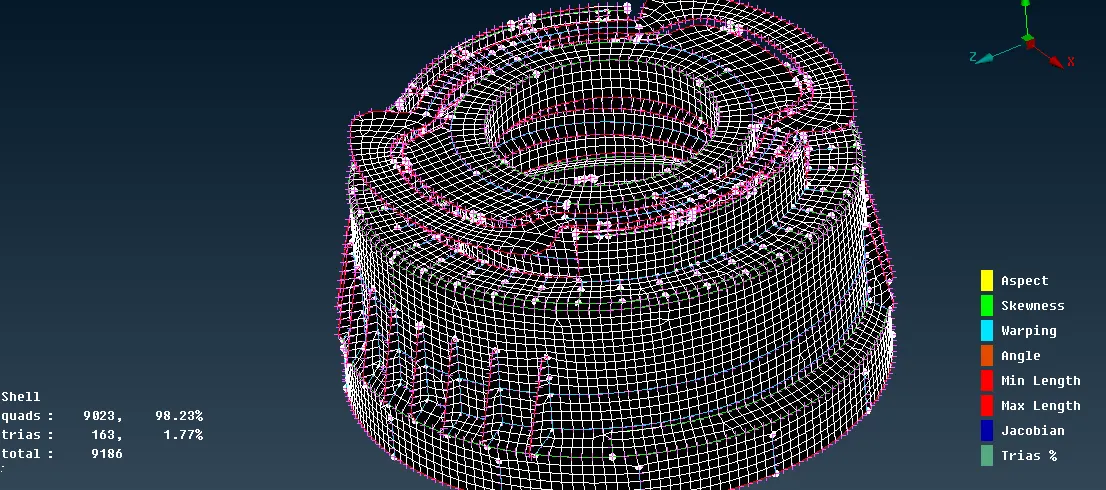
After applying thickness
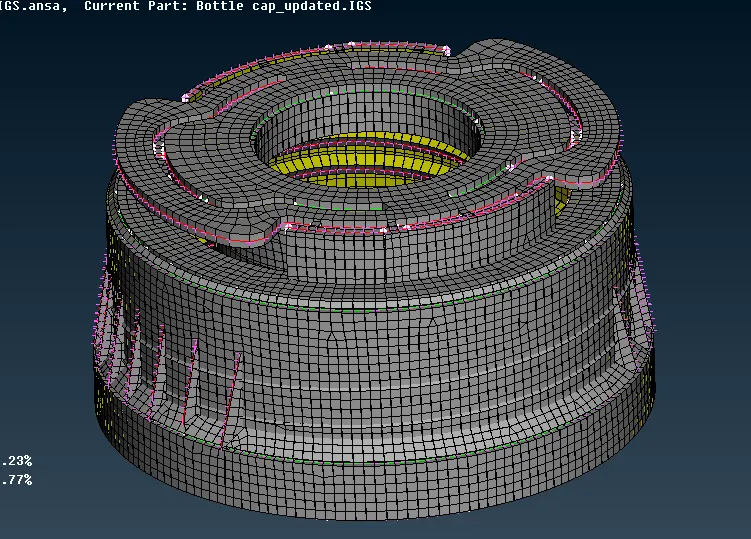
# Here Are some other plastic components I had worked on:
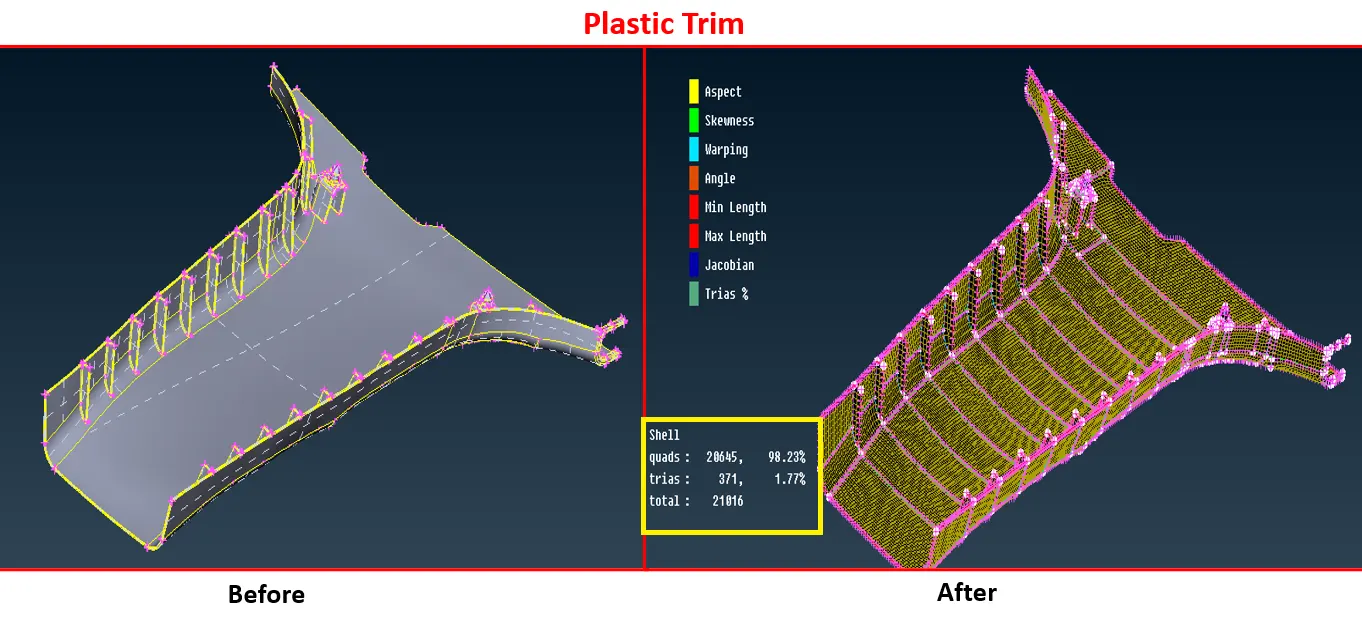
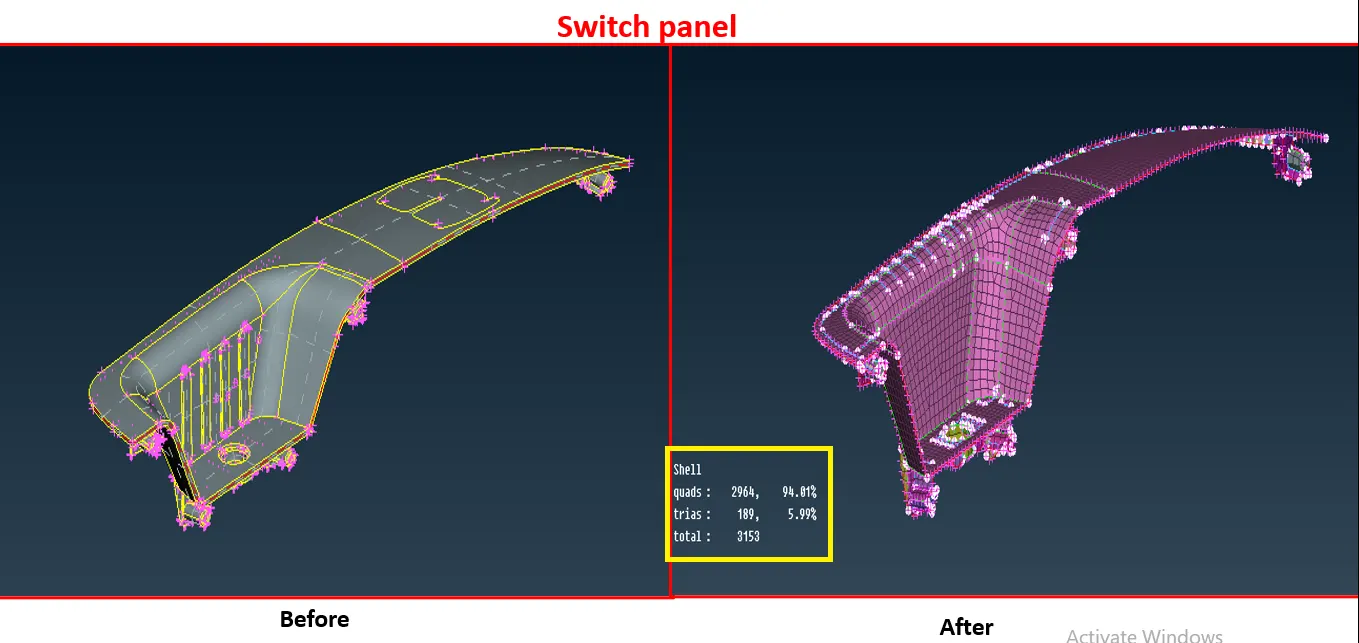
-Although the competent geometry is different the methodology to extract is surface and deploying 2d Mesh is the same. The Quality criteria may differ but the feature capturing and PIDs set up procedure the same as these two components are also plastic components.
Learning Outcomes:-
1) Learned about the 'Curve' option and different sub-options under the Curve like Create curve, middle, cons2curv, connect, etc. With the help of these keys, we can easily create a curve or mid curve. with these options, we could convert the cons into a curve and connect them for a smooth transition.
2) Also, I came across two keys inside the Faces option Extend and Intersect. Extend key primarily used to extend the surface and connects to its nearby element and Intersect is to eliminate the overgrown/ overextended surface due to the Extend command used.
3) Understood the right approach while taking the mid surface of a plastic model.
Conclusion
- It is difficult to extract the Mid surface in the plastic model because of its overall uneven thickness.
- Because of the complex geometry of the plastic component, it will take more time for meshing also.
- Unlike sheet-metal, Triple cons are important when the working component is of plastic/casting one.
-Deployment of thickness under an appropriate PID is an important task because of the thickness distribution on the overall model. we have to identify the thickness and save is as per the thickness in different PIDs.