Week 9 - Attachment Feature Creation (Ribs & Screw Boss) - Challenge 1
AIM :- To create the attachment features Rib and Screw Boss for the Drill Handle.
Given :-
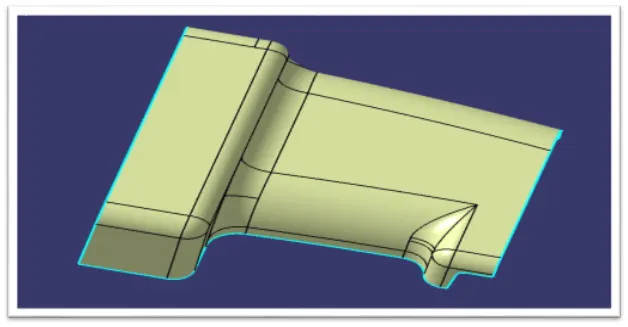
CLASS A SURFACE –
The A-surface or the styling surface is first checked for any gaps and other issues in its surfaces. This Surface acts as the input surface so any correction to be done should be with approval from the styling team or done by them. A- perfect surface is the one when a boundary is created, the lines are only on the edges of a component.
CREATION OF TOOLING AXIS –
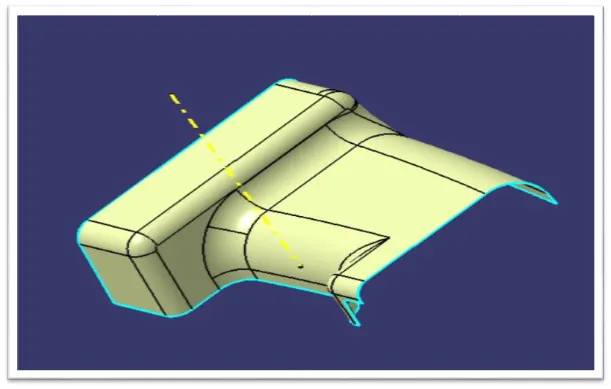
Tooling axis is the direction in which a core or cavity of mold opens. This Axis is very important to determine the orientation of the component in mold, core and cavity design.
The tooling axis is created by taking line normal to class A surface.
DRAFT ANALYSIS ON CLASS A SURFACE –
Draft analysis of the surface is carried to check if the surface or part can be manufactured with the required draft angle.
Draft angle is needed for the component to clear the core and cavity surface as it would have shrunk towards the center while cooling.
The draft angle in this design is 3 degrees. As A surface is a single surface there won't be much difference in color. The draft analysis of A-surface is shown below.
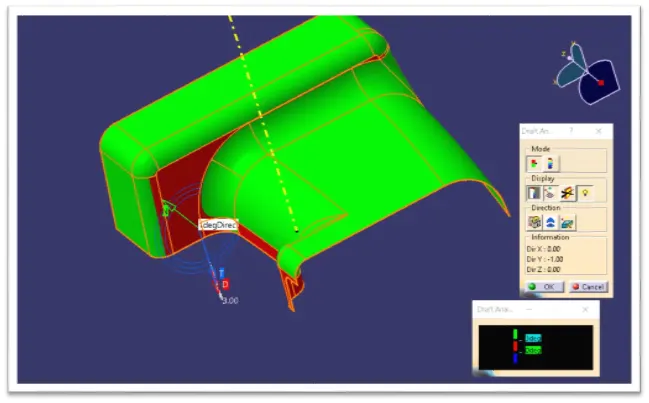
From above draft analysis we noticed that some surface area is not clearing required minimum draft angle (3 degree). For that we have to informed to Class A surface styling team.
CREATION OF CLASS B SURFACE :-
For creating class B surface we have to offset class A surface by 2.5 mm. The offseted surface is shown below.
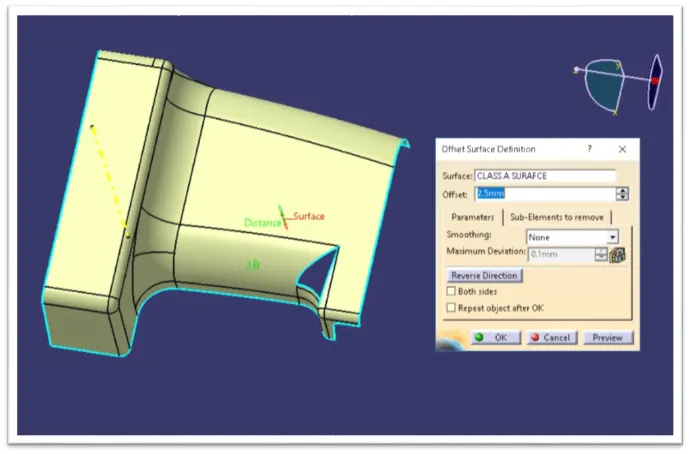
While offsetting the class A surface , some surface area are not get offset. For this missing area we have to use some surface creation feature such as fill , extrapolate , Trim etc. The final class B surface is shown below.
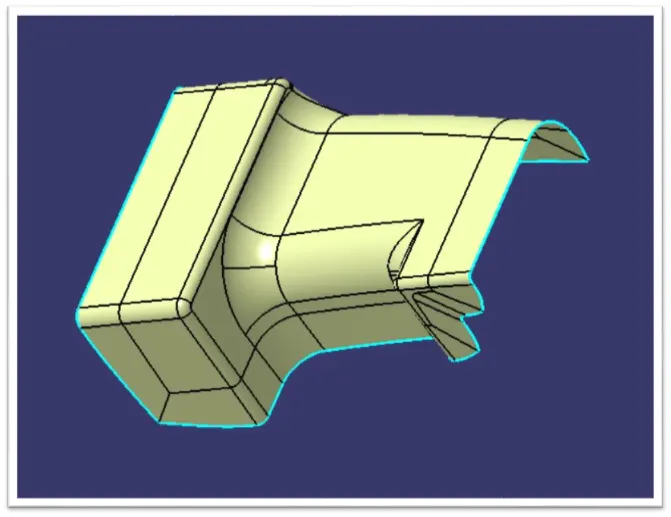
CREATION OF CLASS C SURAFCE –
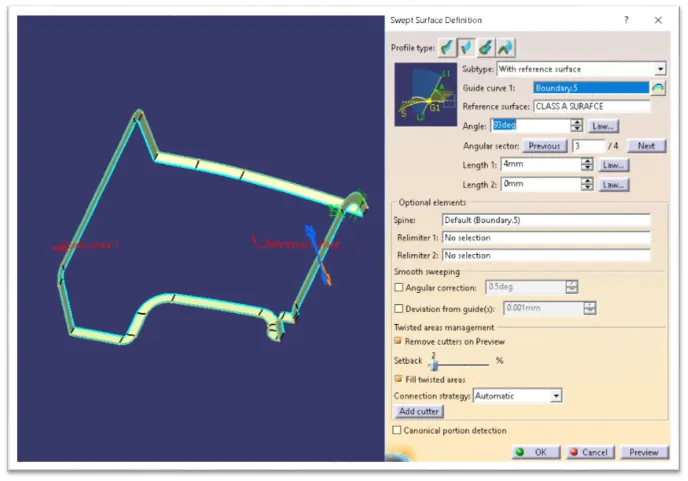
The A and B surfaces are connected by another single surface which is called the C surface.
It is created by using sweep with A surface acting as the reference surface and curve created from the boundary of the same surface.
Sweep with draft direction is also used to create C-surfaces.
The class C surface is shown below.
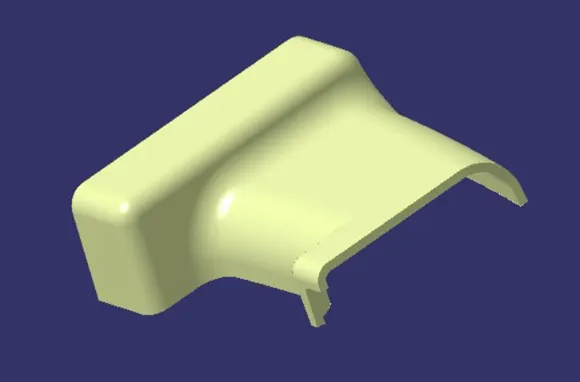
CREATION OF CLOSE BODY -
All the surfaces (A,B,C) are joined together to form a closed body.
CREATION OF RIB : -
Ribs are thin wall protrusions that extend perpendicularly from a wall or plane. They are usually found in clusters offering support to a plane that would have otherwise been too thick, but can also be stand-alone support for a single wall. They are commonly used to provide additional support and strength to a part. Thickness and location are essential to rib design.
First, the base surface where the rib has to be created is extracted using the Extract command. A positioned sketch is created and the profile for the rib is drawn.
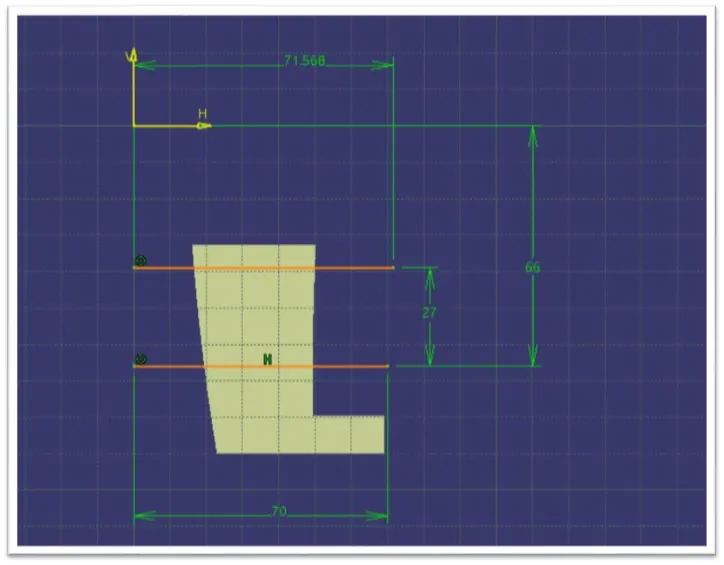
For creating rib for drill handle we have to considerd following rule.
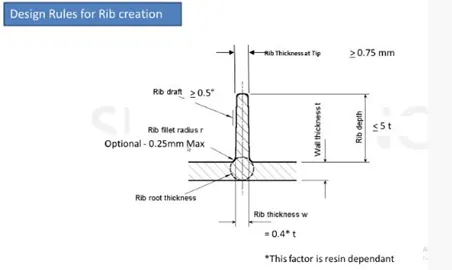
I have created rib by following above design rule.
Next, the profile is extruded, to find the height,
h=Wall thickness * 5
=2.5*5
= 12.5 mm
Therefore, the height is 12.5 mm
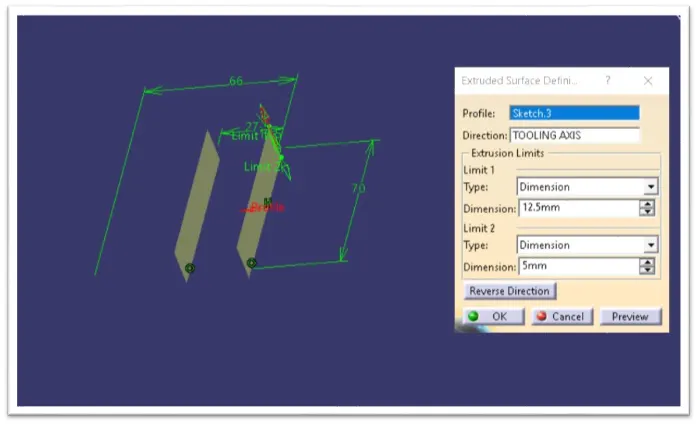
Then extruded surface is thickened,
Thickness,w=0.4*t
=0.4 2.5
=1mm
Therefore, the thickness of the rib is 1 mm.
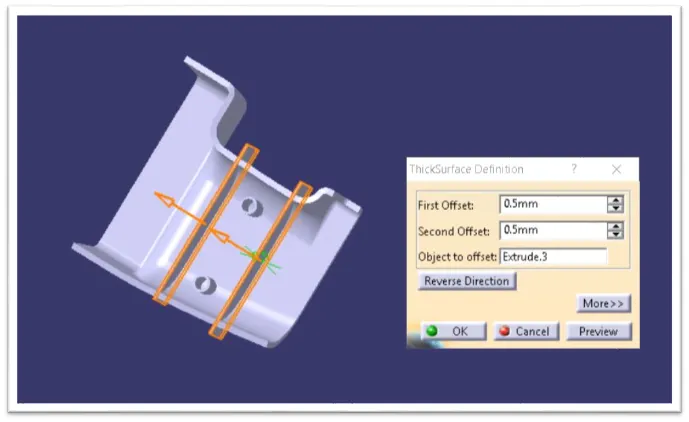
The draft is applied to the sides of the ribs. As per the design rule, the ideal draft angle is 0.5 deg.
Now, we have to check for the Rib root thickness.
To check for the Rib root thickness, We have to take an Intersection with a plane and the Drill Handle component. Once we get to the intersection we have to create a tri-tangent circle at the rib area and measure it. The value must be within 30% greater of the wall thickness.
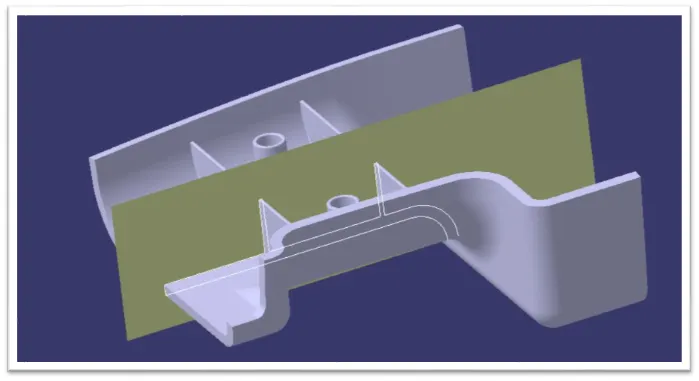
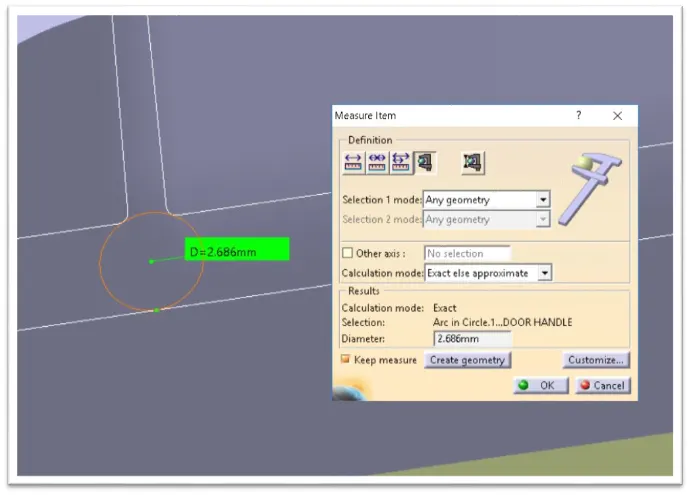
CREATION OF SCREW BOSSES :-
Screw Boss features are commonly found in injection molding designs. They are used to aid in the assembly of molded parts by providing a channel for a screw. Their primary use is to strengthen holes or slots in the surface present in the part model.
Design rules consider while creating a screw boss
- Draft – 0.5 degrees on walls of boss
- Thickness – Typically 40% of the nominal wall at base
- Height to Diameter Ratio – 3:1
- Radii – 0.25 max radii
The construction process of creating the screw boss is explained below:
For thickness, the design rule is as follows,
Thickness,w=0.6*T
=0.6*2.5
=1.5 mm
Therefore, the thickness of the boss can be 1.5 mm per side.
In this case, we have considered the size of the screw boss as M06.
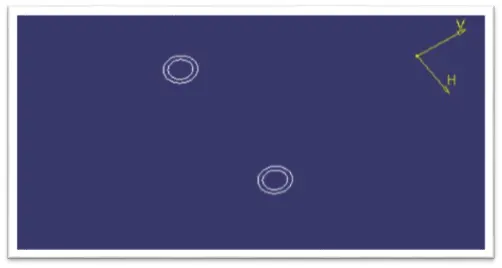
Once the sketch is completed, then it is padded using the Pad command. The height to diameter ratio can be 3:1.
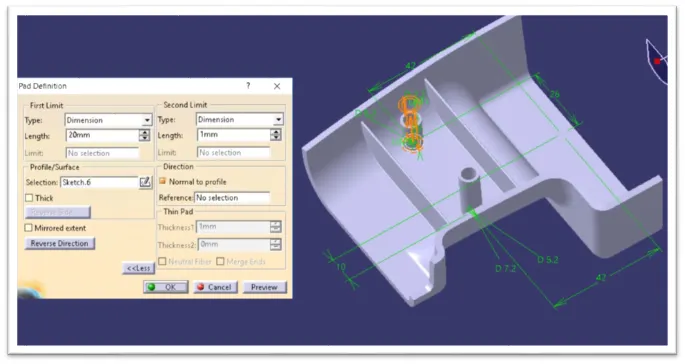
Next, the draft is given to the boss. As per the design rule, the draft given for screw boss is 0.5 deg. Then fillet is applied to the faces of the rib. As per the design rule, the fillet can be 0.25 mm.
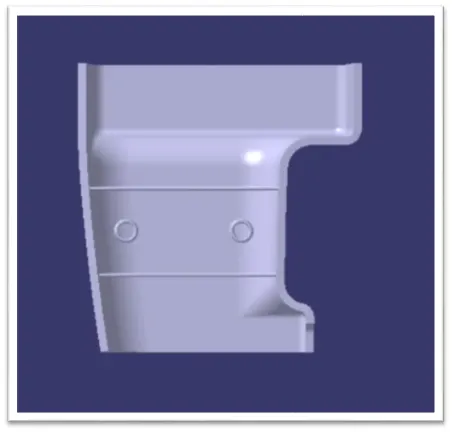
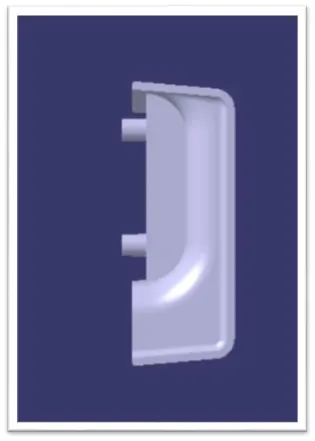
The final component is shown in following images.
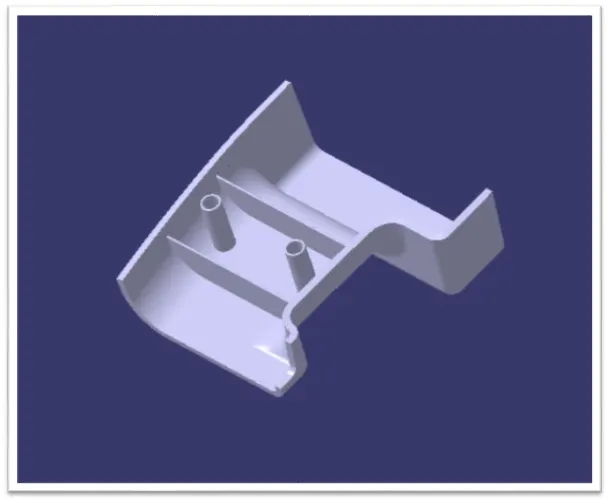
DRAFT ANALYSIS ON FINAL COMPONENT :-
The following image shows the draft analysis of component from cavity side.
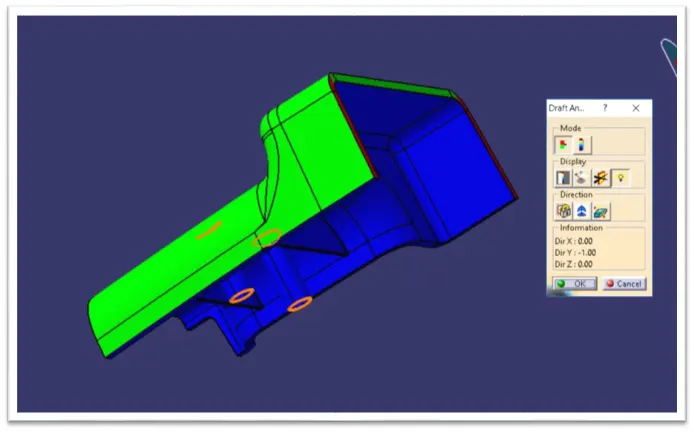
The final solid part body has to be analyzed using Draft analysis. This is done to check if all the areas of the body are satisfying the draft angle which is 3 degrees.
A draft angle is a taper applied to the vertical walls of the injection-molded component to assist with releasing the part from the mold.
Draft angles are a required feature of injection-molded custom parts. A functional part for injection molding has to have draft angles that face both the cavity and core sides. This will reduce the risk of damage to the parts and ensure that they can be ejected from the machine.