Week 9 - Attachment Feature Creation - Challenge 2
AIM :
To create the DOG HOUSE in door trim with following the design rules
Objective:
- Create the Tooling axis
- Design the class-B and class-C surfaces and join them.
- Use the Close Surface feature to make a solid body from the surface.
- Design the required dog house and analysis them.
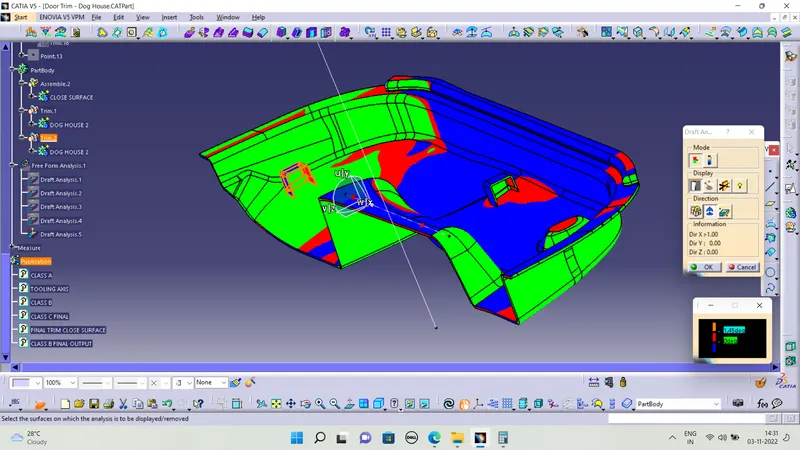
- Perform the Draft analysis for the final component
TOOLING AXIS:
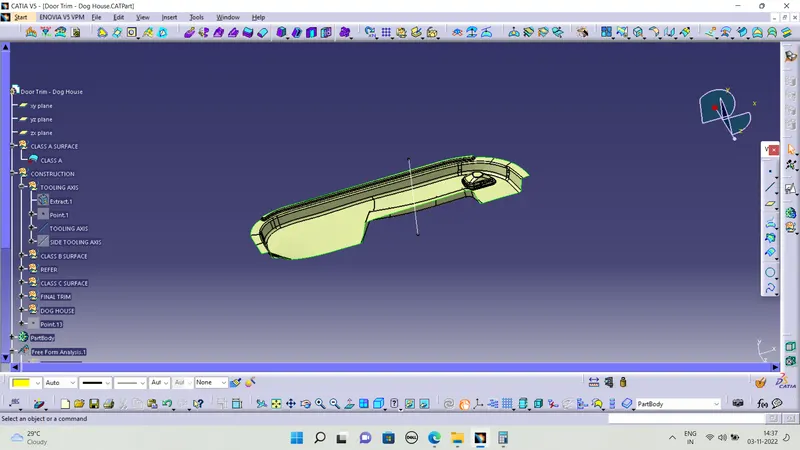
To create the tooling axis first we have to check the best suitable direction for tooling by using the compass. the y direction is suitable for creating the tooling axis because in the y direction most of the surfaces are clearing while performing draft analysis. Generally tooling axis is created using bisecting line method but here A line normal to the surface is created in the y direction and considered the tooling axis
DRAFT ANALYSIS IN CLASS A SURFACE :
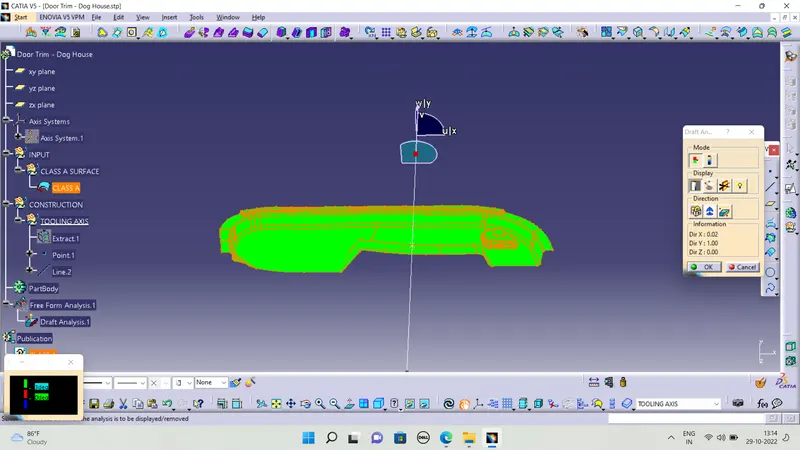
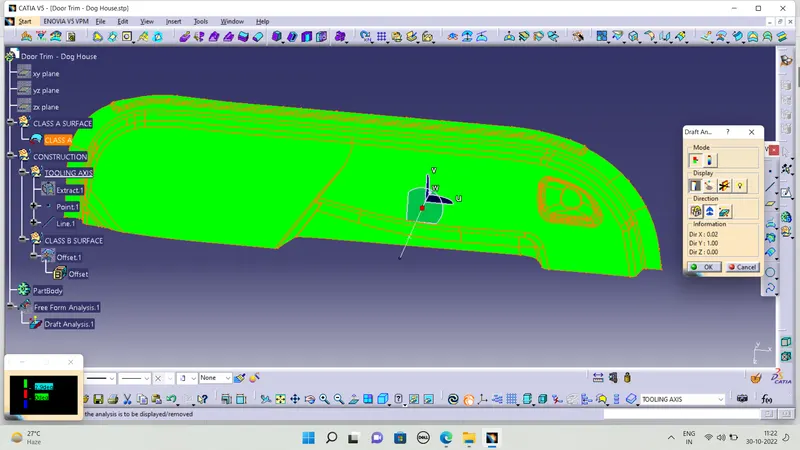
First we need to check the if class a surface in clear in draft analysis in 3 degree
CREATING CLASS B SURFACE :
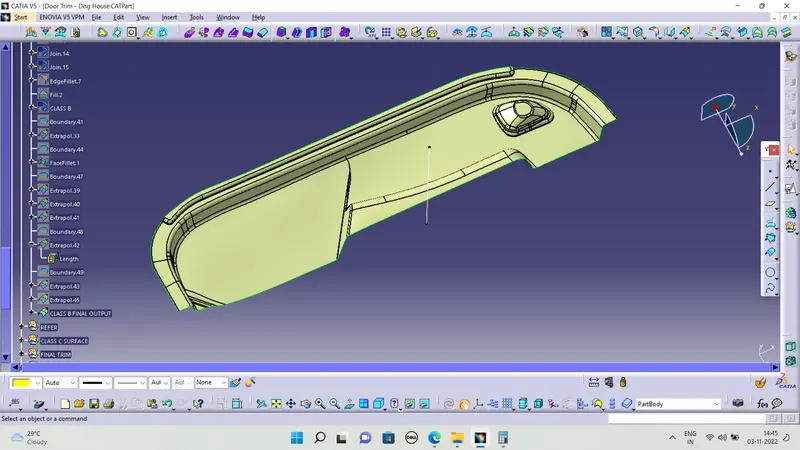
We need to creat the class b surface i offset the class a surface in y direction and we offset the surface we found the some missing patches in class b surface we need to work on it i using two types of using to fill the patches one is extrapolte and trim the surface and another one is using multi section aommand in some areas and weget the final class b surface
CREATING CLASS C SURFACE :
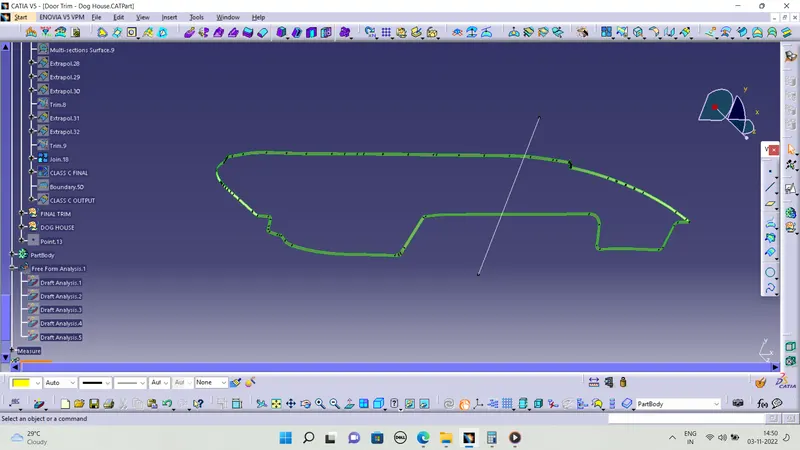
In that creating the class c surface we know the two concept the dreating class c surface one is if the class c surface is parallel to the tooling axis we give the draft direction my dirction is is my tooling axis and another one is if the class c is perpendiculer with tooling axis we use the with referance surcae inthat case we use with draft dirction but i mistankely made the class c is using with referance surafce but i know yhe concept if some ares doesnt clear with draft please dont reduce my grade
CLOSE SURFACE :
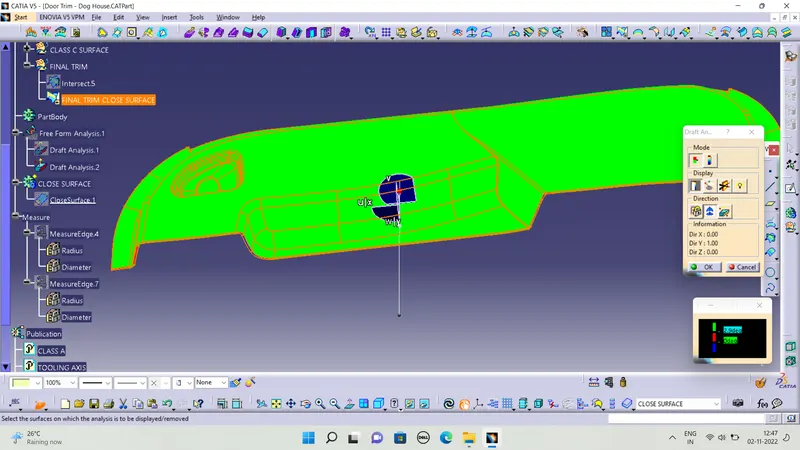
Then we performed to make the close surafec and creating the body then goes to part workbench then using close surface to close the close body
DRAFT ANALYSIS FOR CLOSE BODY :
CREATING DOG HOUSE :
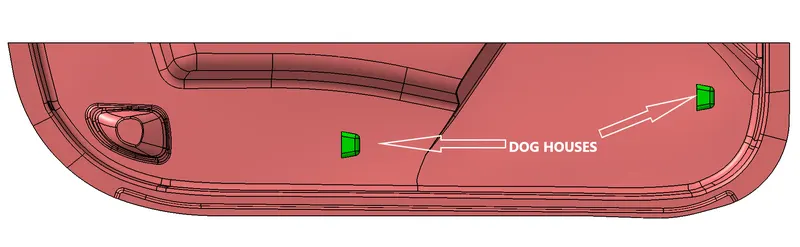
Dog house: Dog house is an engineering feature used in the plastic trim design. Dog houses are used as supporting features. Sometimes other engineering features like snaps; locators, etc. are mounded on them to increase their strength. Dog house and other engineering Features are built on B-surface.
Design rules for Dog house creation
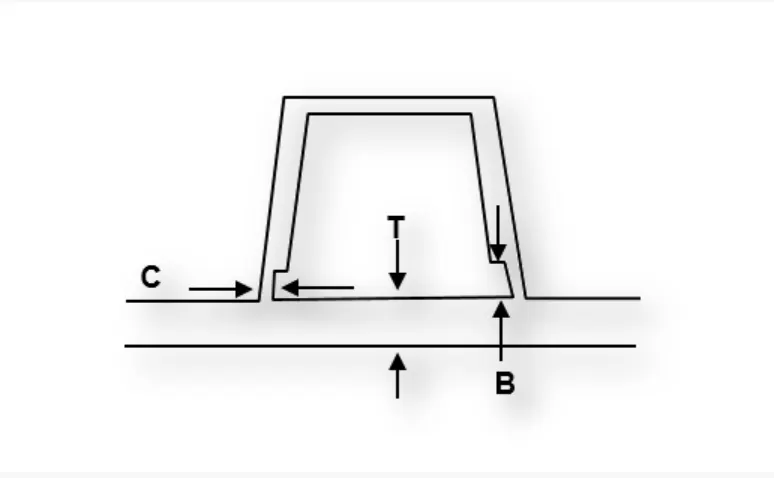
"C" is where the doghouse contacts the backside of the surface
Doghouse wall thickness at the intersection of the part wall ( C ) should be 40% or less than the main wall stock ( T ).
The height of ( B ) should be between 3.0 – 6.0 mm
Dog house design procedure by considering the design rules:
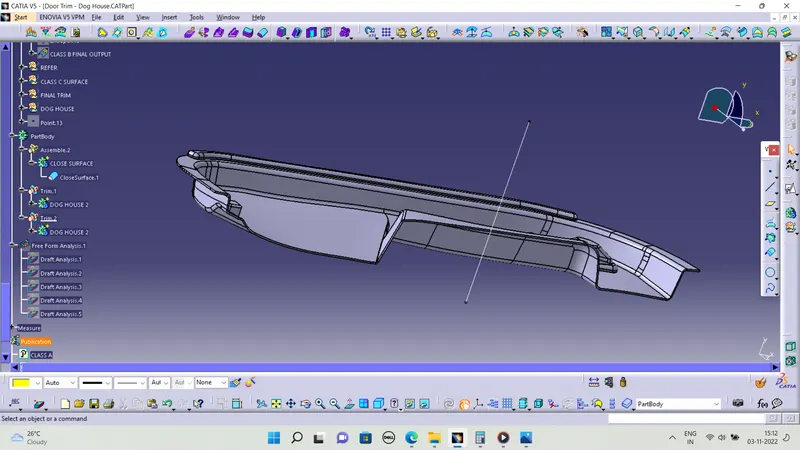
First we need to create the plane in the surface because ddor trim is not a flat surface we didnt create the sketch here so we need to create the plane go to sketch creating sketch then comes out using extrude commande create the surface i give the extrude in 20mm and create the body and thick the extrude surface 2mm then give the draft the outer dog house in 1.5 degree and then creating the side tool axis to clear the inside the dog house creating the side tool axis give the inside the draft 0.5 degree then we need to cut the bottom c and b surface to follow the design rules to create the bottom dog house then give the fillet values in outside 3mm and inside 0.5 mm defaultand finally check the draft analysis to clear the draft
I DIDNT TAKE THE INDIVIDUAL SCREENSHOT IN DOG HOUSE AND I ASSEMBLE ALL IN CLOSE BODY
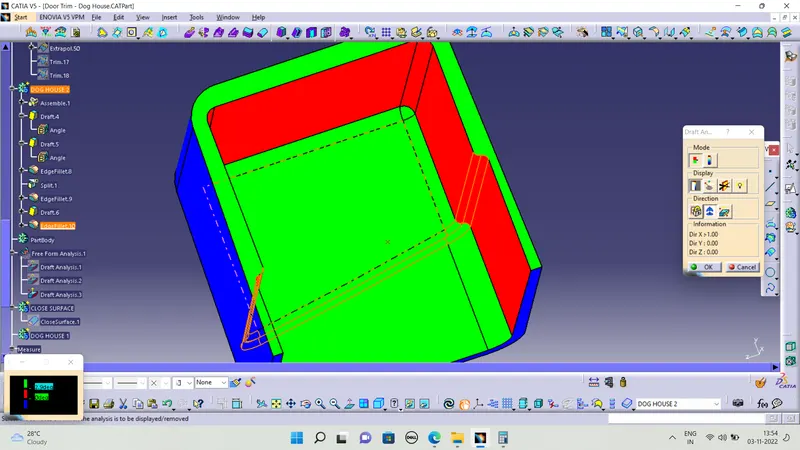
DOG HOUSE DRAFT ANALYSISI INSIDE:
The draft analysis for inside the dog house using side tooling axis in 0.5degree
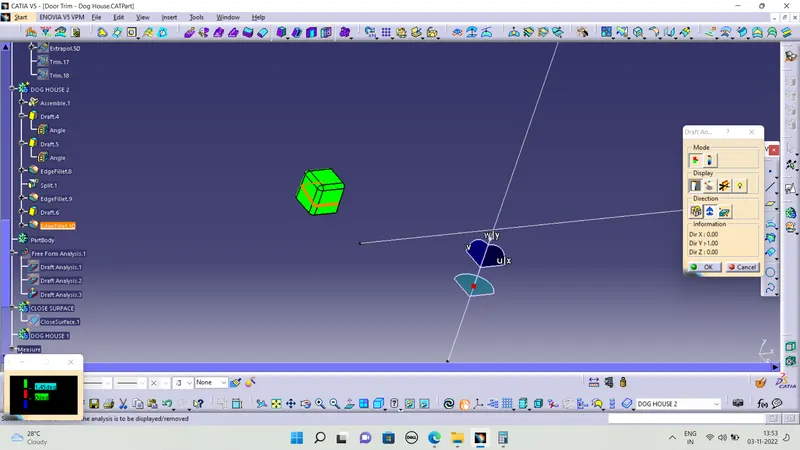
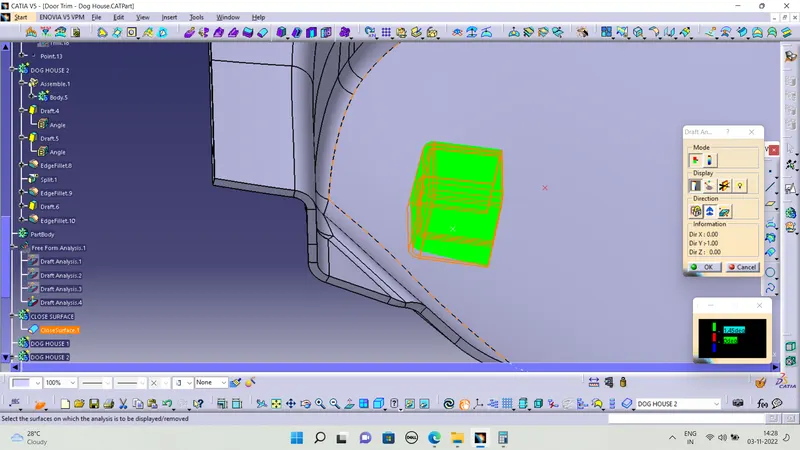
DRAFT ANALYSIS FOR OUTSIDE DOG HOUSE:
The draft for outside dog house to chcke 1.5 degree
FINAL DRAFT ANALYSIS :
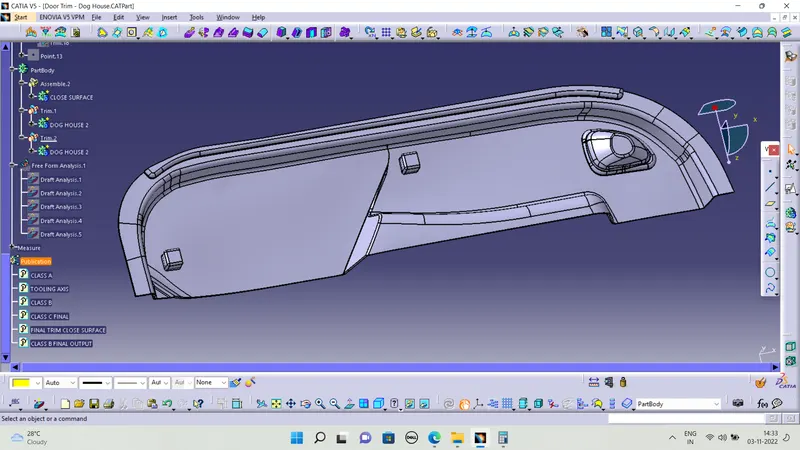
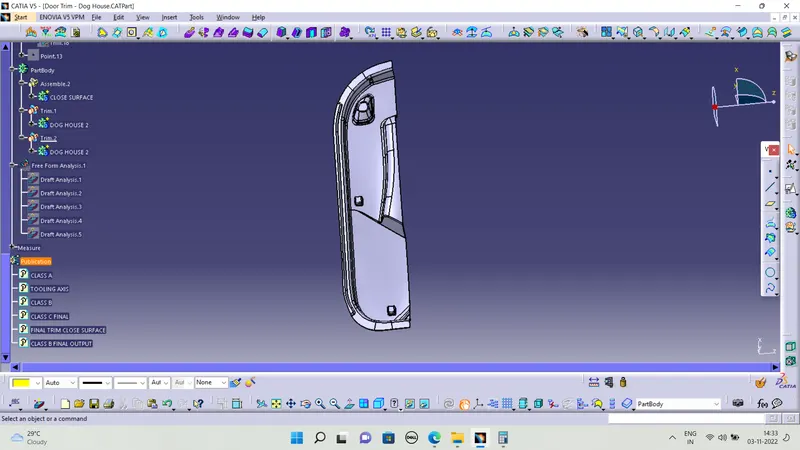
FINAL CLOSE BODY OUTPUT :
REFERANCE IMAGE :
CONCULSION :
Hence, the dog house for the door trim was created by considering the design rules, and the Draft analysis performed on the final component is successfully done.