Week 8 - Challenge 1 - Base Bracket Design
AIM :- To create the Base Bracket Plastic component through the given Class-A surface. To begin with, the tooling axis for the given Class-A Surface should be created meeting the requirements of the draft angle and at the end perform the Draft analysis on the model.
Given Data :-
CLASS A SURFACE -
As we know in automotive industry there are complex products that we have to design but this is not possible with simple sketches for that we need Class A Surface.
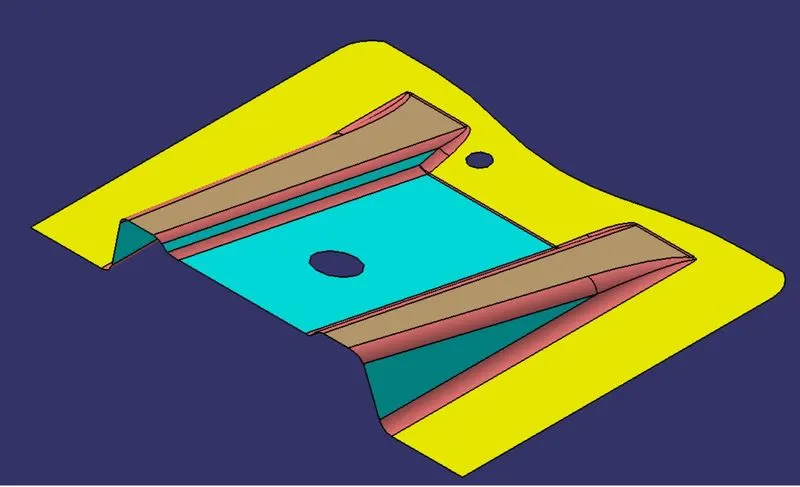
Thickness of Plastic Part - 2.5 mm
We have to create solid part from given surface A for that we have to follow some automotive industry rule.
Rule 1 - Ensure all the surfaces of class A are connected ,there is no gap.
We can check the quality of Class A surface by visual inspection or by using boundary command. Ensure there is no discontinuvity in given class A surface.
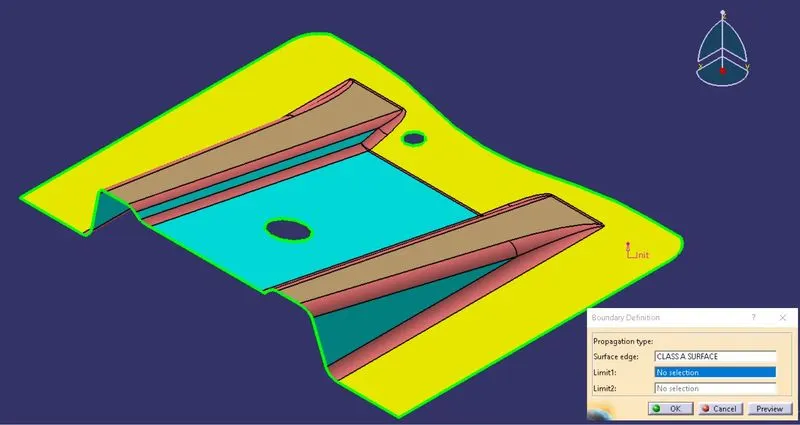
Rule 2 - Find the Tooling Axis of component.
Tooling axis is the direction in which a core or cavity of mold opens. This Axis is very important to determine the orientation of the component in mold, core and cavity design.
The tooling axis is created by using various method. In this challenge We used Bisecting Method.
Creation of Tooling Axis by Using Bisecting Method -
First step while creating tooling axis is to decide the best possible tooling direction. For considering tooling direction we considerd various aspects. For given Class A surface Z-direction is best possible tooling direction. After that we have to check the tooling axis is clearing all surfaces or not. For that we create dummy tooling axis and check it along Y and X-direction.Then we have to create Y and X-direction clearing line.
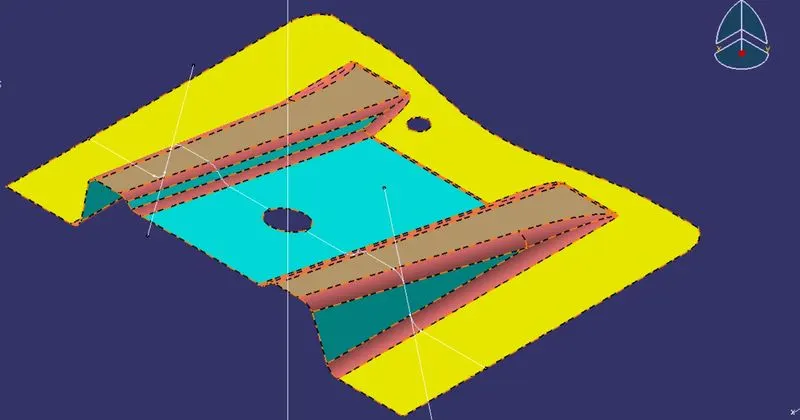
In given Surface its clear X-direction there is no any surface that making trouble for tooling axis ,but for Y- direction we found two surfaces that may make issue . For that we have taken intersection along Y-direction and drawn lines along confusing surfaces and then by using Bisecting line method we found main tooling axis.
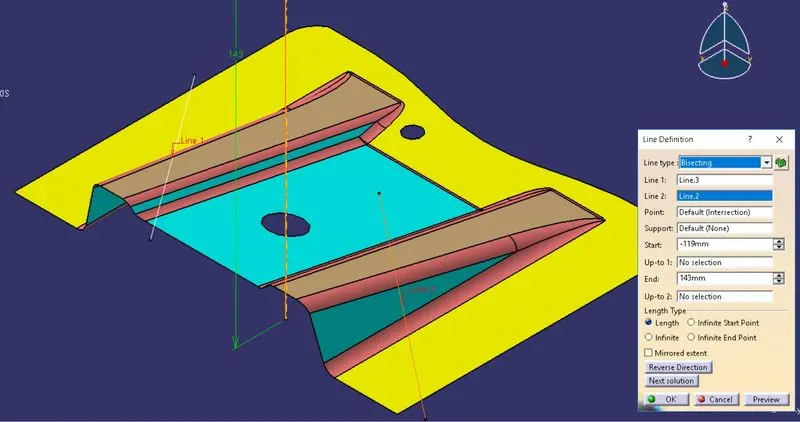
Rule 3 - Do Draft Analysis of Class A surface.
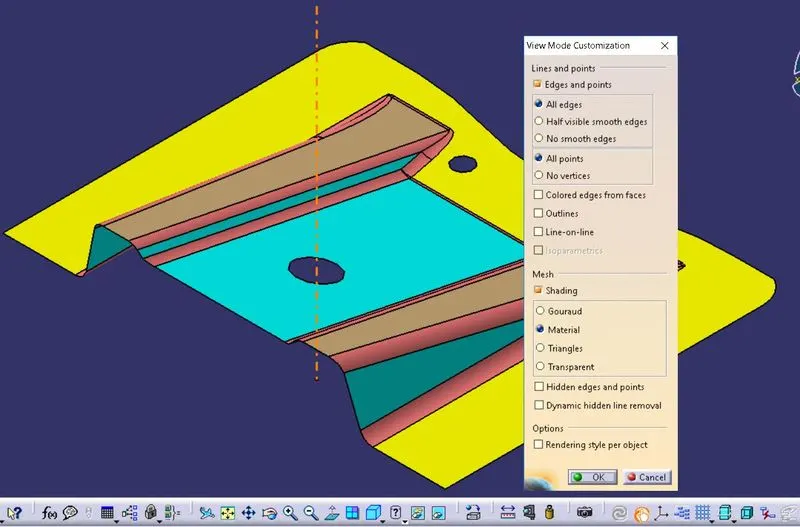
For that first we have to put 'Material' option active inside 'Customize View' to see the analysis result.
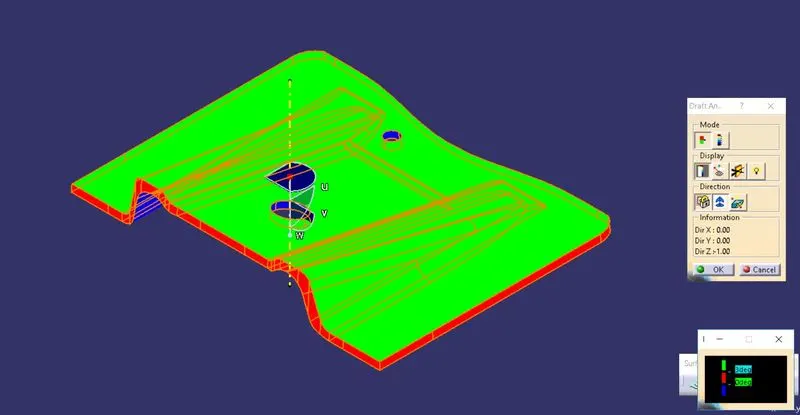
In draft analysis first use the compass to define the new current draft direction. Place compass red dot on tooling axis . W of compass should be inline with tooling axis. After that click on 'Lock' symbol then click on Class A surface . Then we get Draft Analysis in colour code.
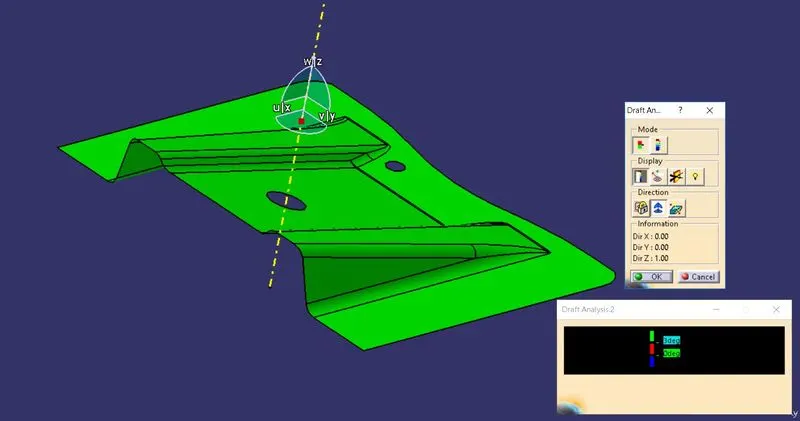
In above Draft Analysis , Green colour showing draft is above the minimum draft angle provided (Here 3 degree).
Creation of Class B Surface -
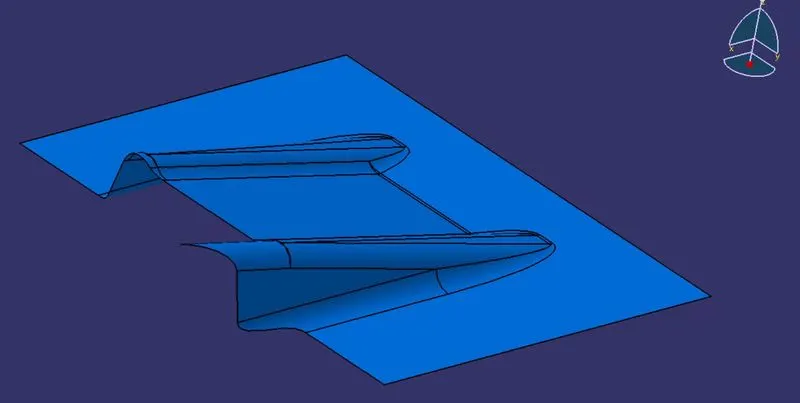
Intially extracting the right side rib using extract option from Class A surface. Then perform Extrapolate inorder to increase the length. Now trim the surfaces to required surfaces.Then Offset the surface inorder to get the required thickness. Similary create the left side rib. Now Similarly get the slanted as well as the flat surface and offset it to desired value. And now trim inorder to get the required surface. Now fillet the surface to required amount.
Creation of Class C Surface -
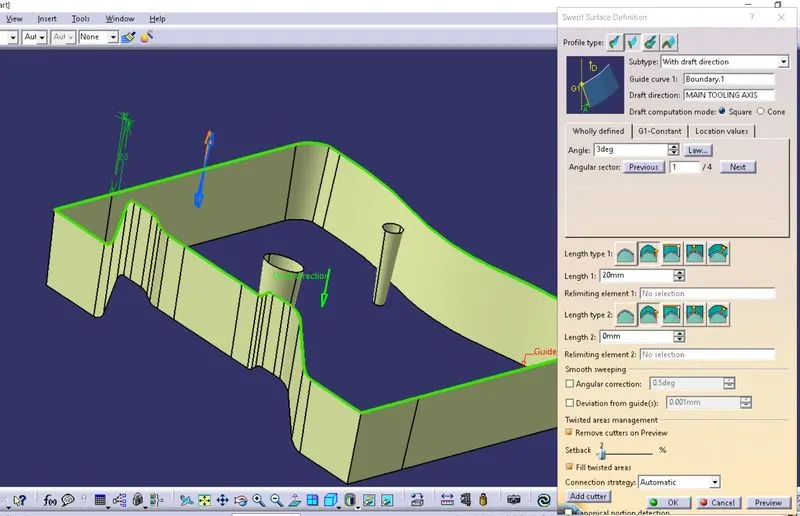
C surface is the connecting surface of Class A and Class B surface. By using Sweep we created the Class C surface. For that first we have to extract Class A boundary and then with draft direction at angle 3 degree we have sweep the class A extracted boundary. And we get the Class - C surface.
After that we have to join Class A ,B and C surfaces by Using join and Trim command.
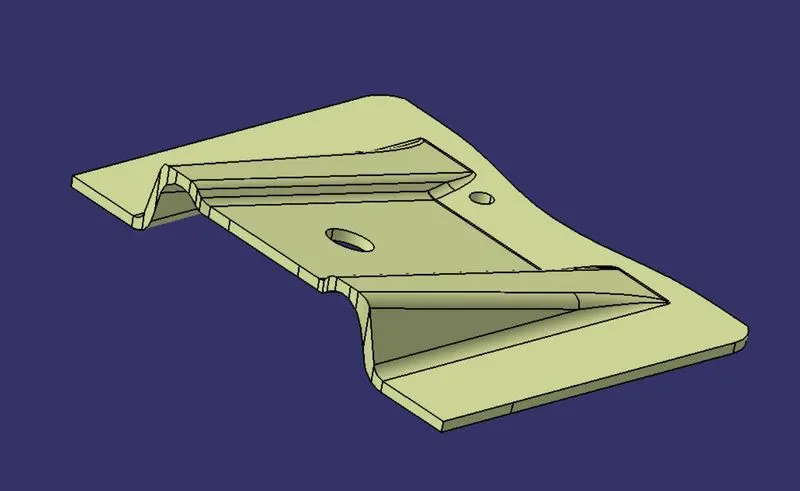
Then we use the ' Close Surface' feature for creating solid body from surface body.
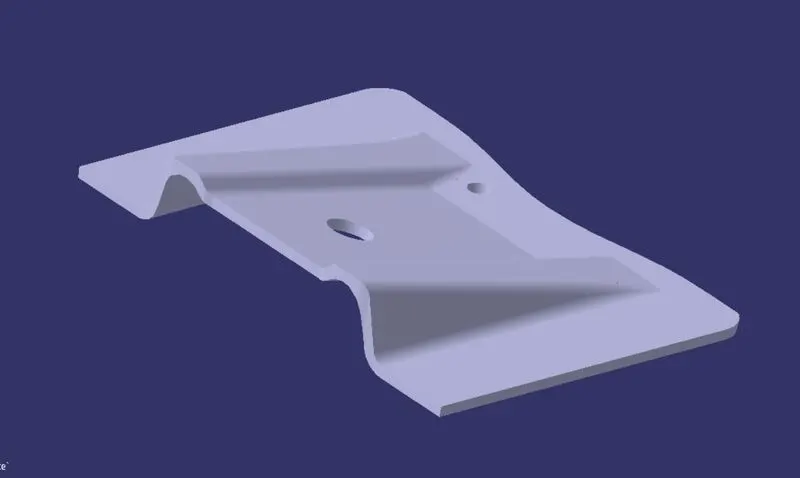
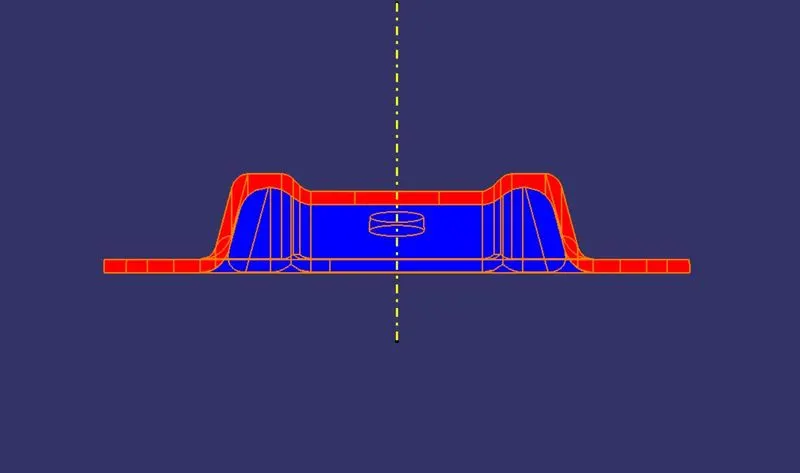
Draft Analysis Result on Solid Body -
Isometric View-
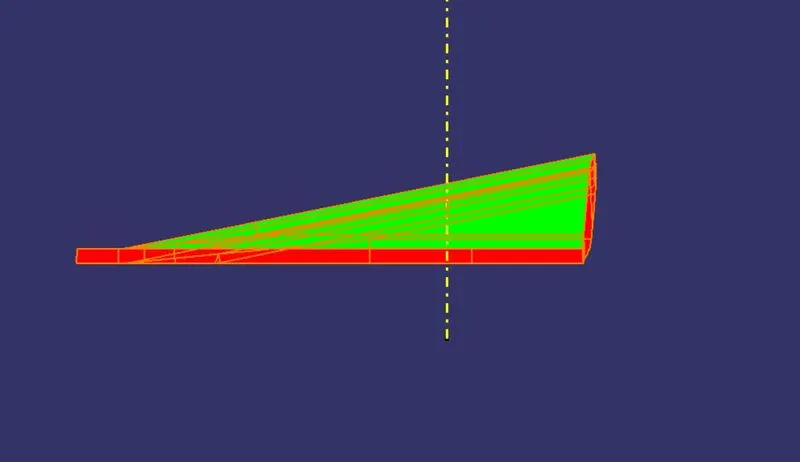
Side View-
Front View-
Top View-
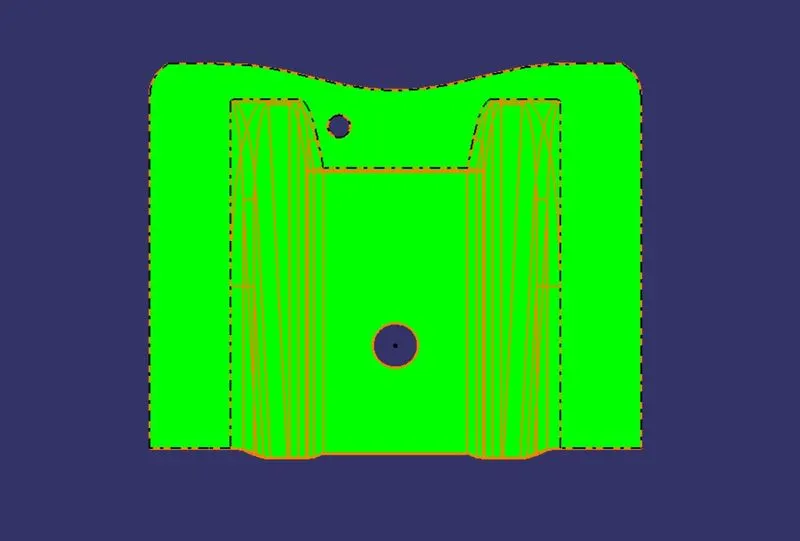
From above result we found that there is green colour on upar side because there is draft angle is more than 3 degree. And Side surface is red in colour because there is draft provided is 3 degree and bottom side is in blue colour there is negative draft.