Week 6
Objective: Create Different Connections for Automotive Reardoor in NASTRAN deck for NVH simulation
Aim: To create different 1d Elements as connectors in NASTRAN deck for NVH simulation of Automotive RearDoor.
Procedure:
- Import CAD FE model in ANSA since Mesh is already performed on CAD model of Automotive Reardoor
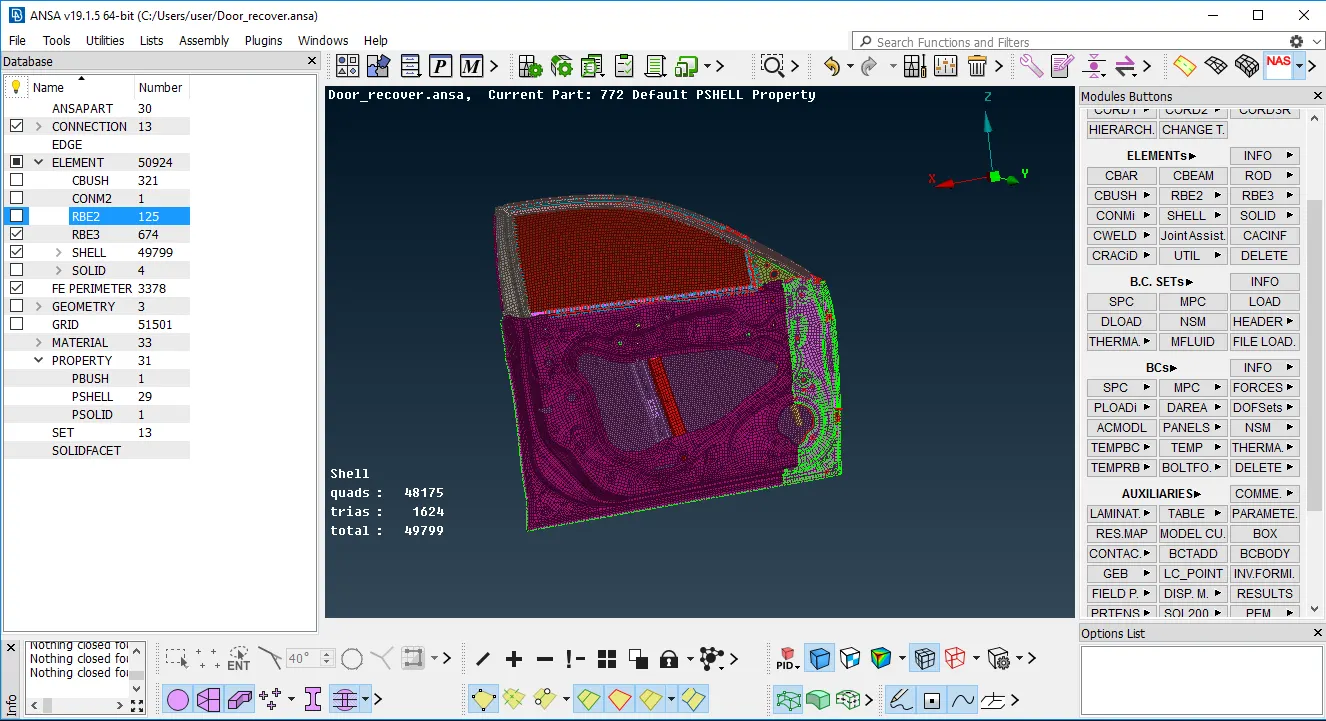
Image of Imported CAD model with FE
- Different 1d connections such as RBE2 with Bolt , Bush , Spot welds ,CONMASS etc were created for our model
- In order to give bolts as 1d elements we use RBE2 elements in NASTRAN DECK MODULE. If two different parts are to be bolted but dont have bolt representation in CAD model, we use cluster Rbe2 elements to represent it as bolt. In cluster Rbe2 , we select the desired nodes or elements as slave node and one middle click ANSA itself produces Master node for it and then after giving middle click Cluster RBE2 element is created and use for representing bolt for two different parts.
- If there is a single hole or bolt in model, we basically create Cluster RBE2 element with zone cut. A zone cut with width is created to give proper representation of bolt or a hole.
- If in CAD model BOLT representation is done and two parts are bolted then we use RBE2 element zone cut and stem representation. Part having bolt is generally represented with zone cut or washer with cluster RBE2 , Part with nut is basically represented with Cluster RBE2 only while stem of BOLT is presented by connecting two master nodes with two noded RBE2 element.
- For Door hinge portion we constrain all DOFs except Rotational Z direction which is represented by 6 as door will open rotationally along z direction.
- Below are some images of RBE2 connections:
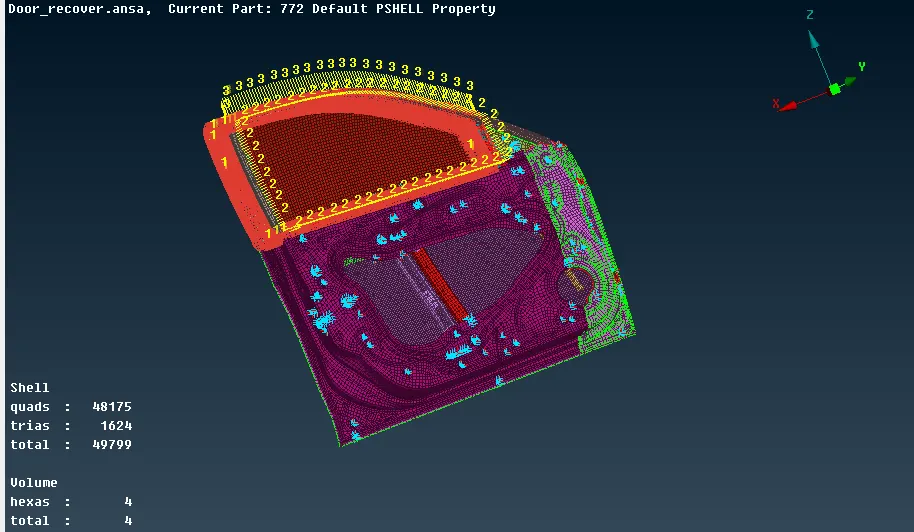
Image of some RBE2 elements created for Reardoor
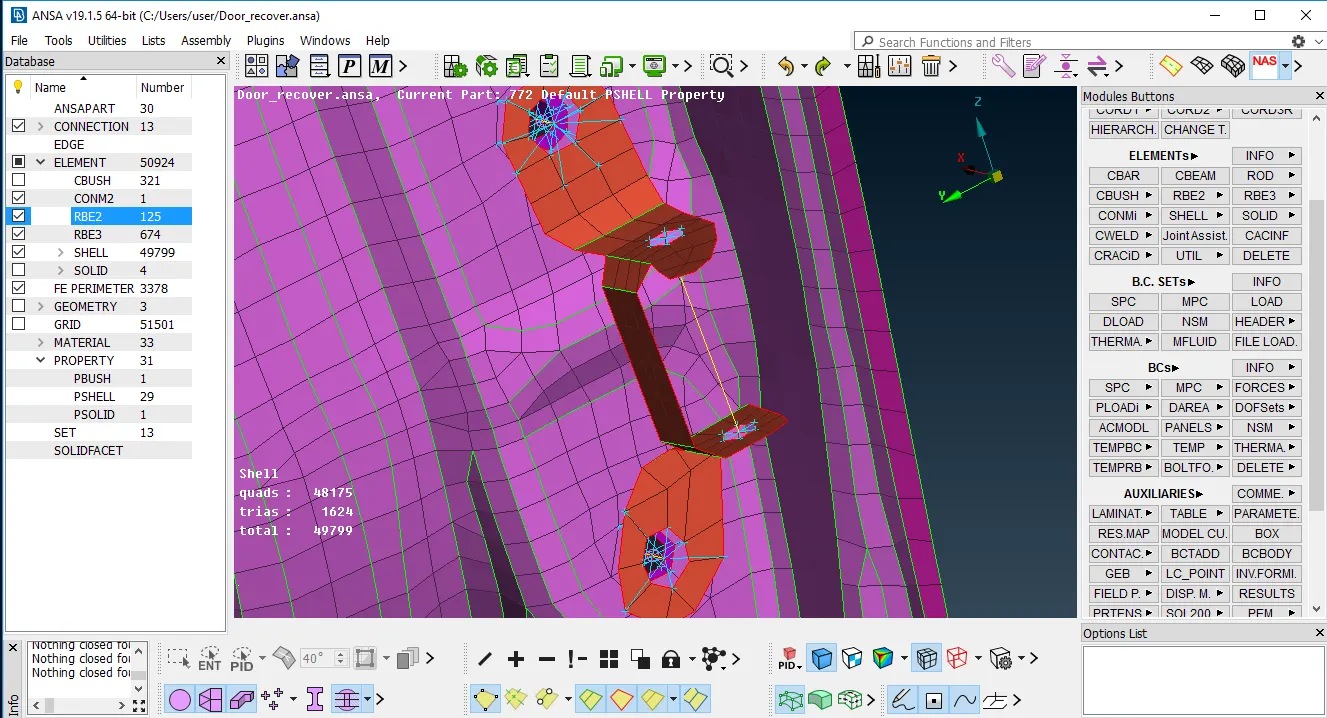
Image of Door hinge with RBE2 represented for Reardoor
- After RBE2 creation for Bolts and holes , CONMASS is represented for Door handle with CONMASS2 having mass of 1e-4 Tonnes. In order to create CONMASS we basically use Master node created by connecting two different parts with two noded RBE2 element. CONMASS2 is selected and assigned on Master node of Door handle.
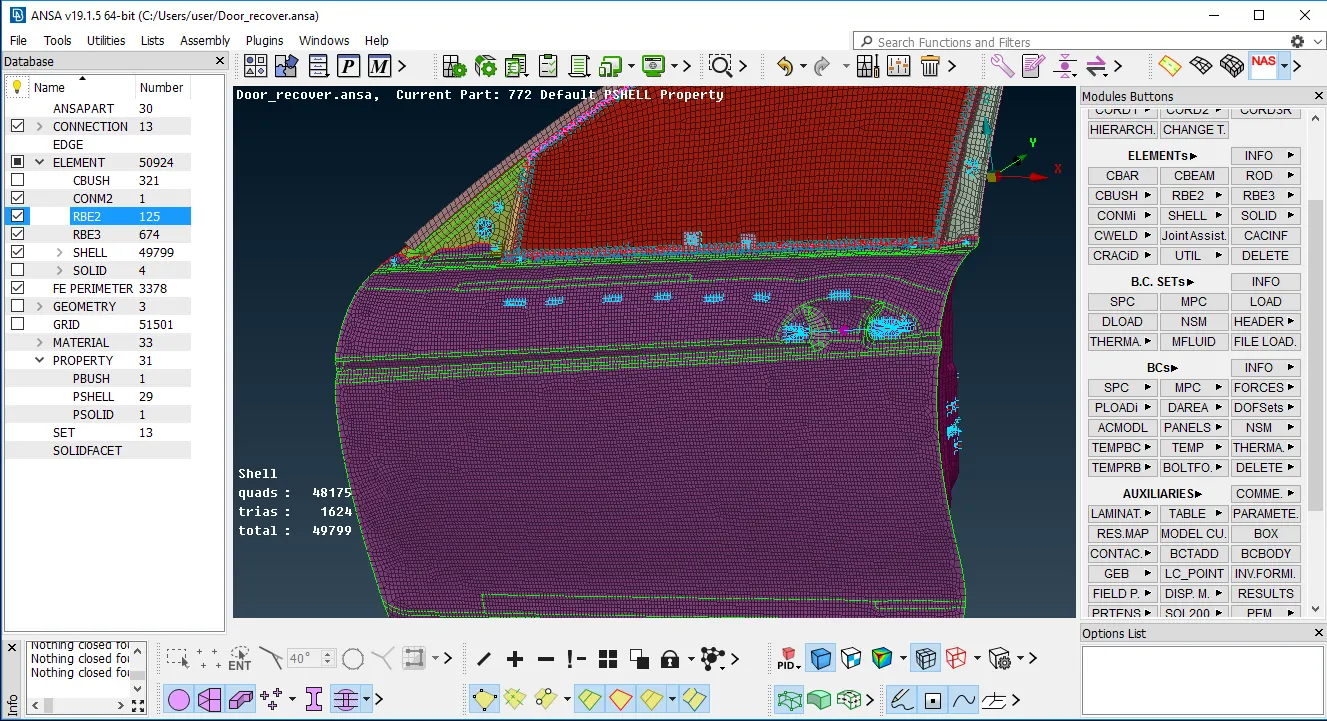
Image of CONMASS created on Door handle
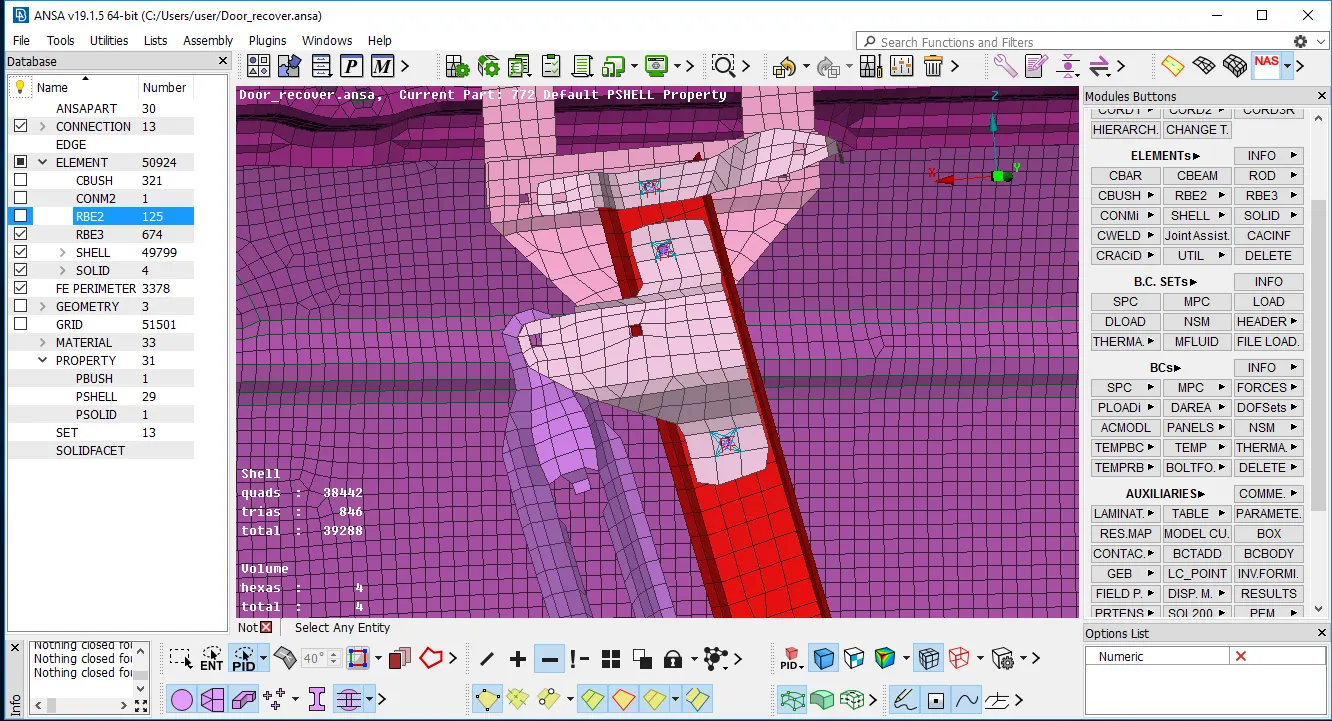
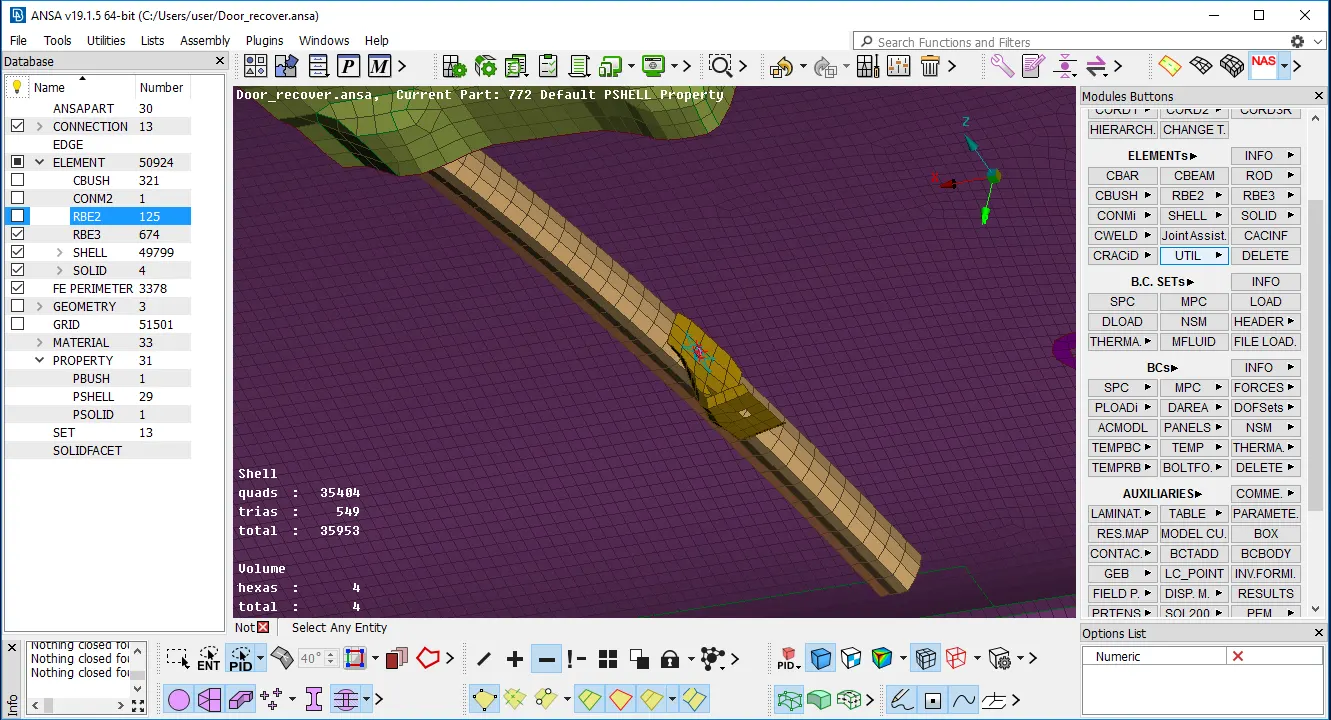
- Now after creating connections for bolts , hinge, holes, door handle , Spot welds are craeted for Mirror guide and mirror mechanism. In order to create spot weld , we create 3D point on parts that are to be welded then we go to assembly tab convert this 3D point in spotweld point. After that go to connection manager and select FE type as RBE3-HEXA-RBE3 which is represenattion of Spot weld in ANSA . Now select P1 , P2 , Enter search distance create PSOLID card and assign in Weld ID then click on Apply and Realize connection.
- Below are images of Spotwelds created :
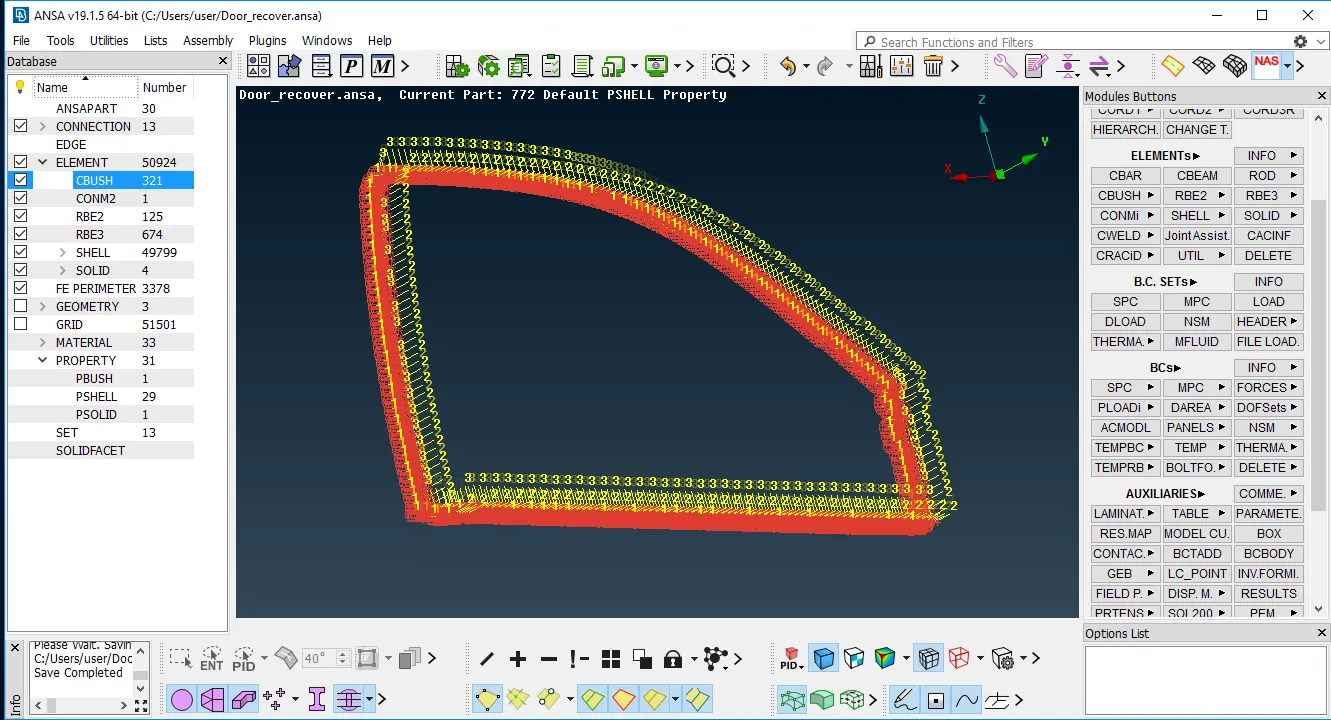
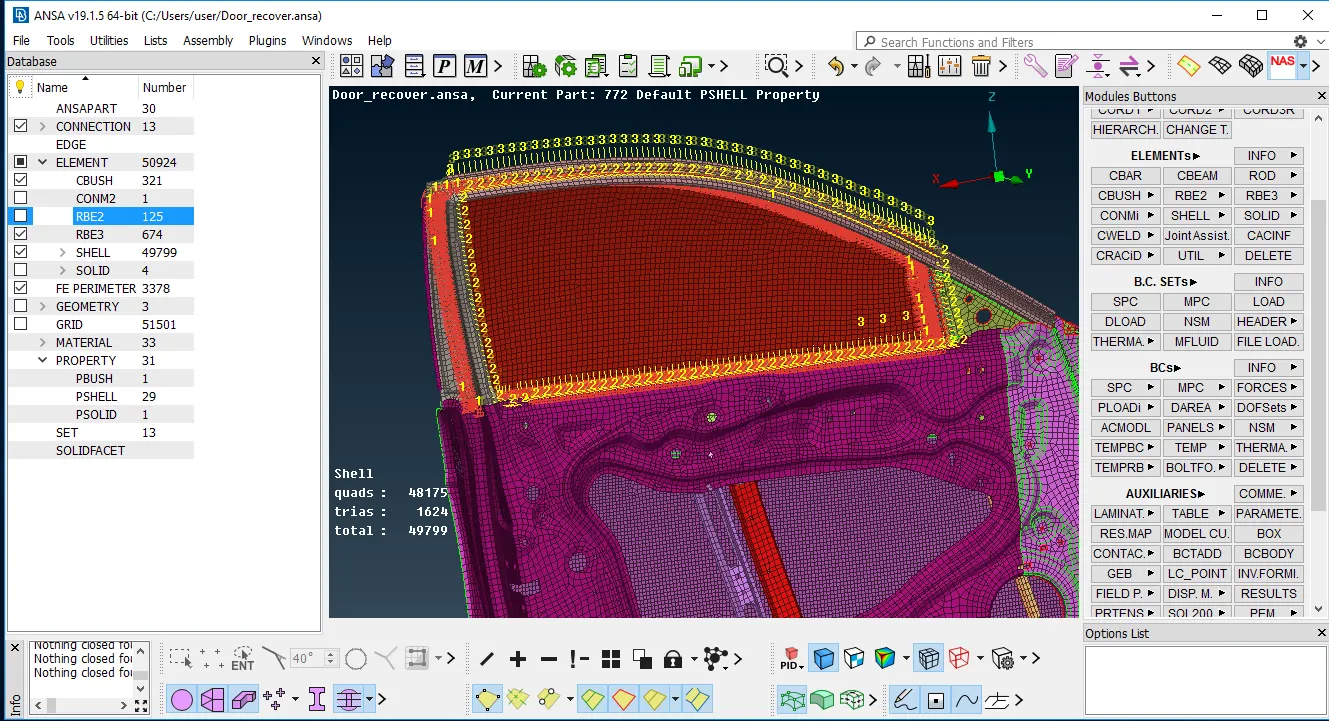
- Rubber Bush is created on attached between glass and door. In order to create Bush element , we need to go to Mesh module>perimeter>feature2curve> Select the edges and middle click. Edge is converted to curve . Now go to convert> curves>select curves>middle click > Spotwelds. Go to connection manager select the spotweld curve and then enter S as 10 , assign P1 P2 , Select FE type as RBE3-CBUSH-RBE3 enter search distance , create PBUSH ID and assign it then go to Apply and Realize.
- After creating BUSH elements make sure to change CID to Global cor-ordinate direction by selecting All BUSH elements >open PBUSH in property tab>select Orient and CID >Right click on tab and modify> Change Orient and Co-ordinate and select CID enter 0 Value > ok. All cordinates of Bush elements are converted to Global cordinates direction.
- Below are images of BUSH elements created:
Learning Outcomes:
- Got knowledge of how to create different connections for different parts alonwith its requirements.
- Got knowledge of using NASTRAN DECK
- Knowledge gain in Spotweld, RBE2 BOLT, CONMASS , BUSH elements
Conclusion:
Different Connections for different parts present in Reardoor were created successfully.
Image of Connections created on Reardoor
- Madhanraj RHi Abanish, I think it's not Rear Door, It's the Front door which was given as a Model.