Project 2 - V&V SW Analysis II
PROJECT-2
1: Perform Static Code Review Analysis for “C:\**\LDRA_workarea\Examples\C_Testbed_examples\Testrain\Testrain.c” Generate Code review reports and upload them.
Ans:
Static Code Review Analysis:
Static analysis, also called static code analysis, is a method of computer program debugging that is done by examining the code without executing the program. The process provides an understanding of the code structure and can help ensure that the code adheres to industry standards. Static analysis is used in software engineering by software development and quality assurance teams. Automated tools can assist programmers and developers in carrying out static analysis. The software will scan all code in a project to check for vulnerabilities while validating the code.
Static analysis is generally good at finding coding issues such as:
- Programming errors
- Coding standard violations
- Undefined values
- syntax violations
- Security vulnerabilities
The static analysis process is also useful for addressing weaknesses in source code that could lead to buffer overflows a common software vulnerability.
How is a static analysis done?
The static analysis process is relatively simple, as long as it's automated. Generally, static analysis occurs before software testing in early development. In the DevOps development practice, it will occur in the create phases.
Once the code is written, a static code analyzer should be run to look over the code. It will check against defined coding rules from standards or custom predefined rules. Once the code is run through the static code analyzer, the analyzer will have identified whether or not the code complies with the set rules. It is sometimes possible for the software to flag false positives, so someone needs to go through and dismiss any. Once false positives are waived, developers can begin to fix any apparent mistakes, generally starting from the most critical ones. Once the code issues are resolved, the code can move on to testing through execution.
Without having code testing tools, static analysis will take a lot of work, since humans will have to review the code and figure out how it will behave in runtime environments. Therefore, it's a good idea to find a tool that automates the process. Getting rid of any lengthy processes will make for a more efficient work environment.
Types of static analysis:
(1): Control analysis:
Focuses on the control flow in a calling structure. For example, a control flow could be a process, function, and method.
(2): Data analysis:
Makes sure defined data is properly used while also making sure data objects are properly operating.
(3): Fault/failure analysis:
Analyzes faults and failures in model components.
(4): Interface analysis:
Verifies simulations to check the code and makes sure the interface fits into the model and simulation.
White box Testing:
White box testing techniques analyze the internal structures the used data structures, internal design, code structure, and the working of the software rather than just the functionality as in black box testing. It is also called glass box testing, clear box testing, or structural testing. White Box Testing is also known as transparent testing or open box testing.
White box testing is a software testing technique that involves testing the internal structure and workings of a software application. The tester has access to the source code and uses this knowledge to design test cases that can verify the correctness of the software at the code level.
White box testing is also known as structural testing or code-based testing, and it is used to test the software’s internal logic, flow, and structure. The tester creates test cases to examine the code paths and logic flows to ensure they meet the specified requirements.
Features of White Box Testing:
(1): Code coverage analysis:
White box testing helps to analyze the code coverage of an application, which helps to identify the areas of the code that are not being tested.
(2): Access to the source code:
White box testing requires access to the application’s source code, which makes it possible to test individual functions, methods, and modules.
(3): Knowledge of programming languages:
Testers performing white box testing must know programming languages like Java, C++, Python, and PHP to understand the code structure and write tests.
(4): Identifying logical errors:
White box testing helps to identify logical errors in the code, such as infinite loops or incorrect conditional statements.
(5): Integration testing:
White box testing is useful for integration testing, as it allows testers to verify that the different components of an application are working together as expected.
(6): Unit testing:
White box testing is also used for unit testing, which involves testing individual units of code to ensure that they are working correctly.
(7): Optimization of code:
White box testing can help to optimize the code by identifying any performance issues, redundant code, or other areas that can be improved.
(8): Security testing:
White box testing can also be used for security testing, as it allows testers to identify any vulnerabilities in the application’s code.
(9): Verification of Design:
It verifies that the software’s internal design is implemented by the designated design documents.
(10): Check for Accurate Code:
It verifies that the code operates by the guidelines and specifications.
(11): Identifying Coding Mistakes:
It finds and fixes programming flaws in your code, including syntactic and logical errors.
(12): Path Examination:
It ensures that each possible path of code execution is explored and tests various iterations of the code.
(13): Determining the Dead Code:
It finds and removes any code that isn’t used when the program is running normally (dead code).
Black box testing:
Black-box testing is a type of software testing in which the tester is not concerned with the internal knowledge or implementation details of the software but rather focuses on validating the functionality based on the provided specifications or requirements.
Features of black box testing:
(1): Independent testing:
Black box testing is performed by testers who are not involved in the development of the application, which helps to ensure that testing is unbiased and impartial.
(2): Testing from a customer’s perspective:
Black box testing is conducted from the perspective of an end user, which helps to ensure that the application meets user requirements and is easy to use.
(3): No knowledge of internal code:
Testers performing black box testing do not have access to the application’s internal code, which allows them to focus on testing the application’s external behavior and functionality.
(4): Requirements-based testing:
Black box testing is typically based on the application’s requirements, which helps to ensure that the application meets the required specifications.
(5): Different testing techniques:
Black box testing can be performed using various testing techniques, such as functional testing, usability testing, acceptance testing, and regression testing.
(6): Easy to automate:
Black box testing is easy to automate using various automation tools, which helps to reduce the overall testing time and effort.
(7): Scalability:
Black box testing can be scaled up or down depending on the size and complexity of the application being tested.
(8): Limited knowledge of application:
Testers performing black box testing have limited knowledge of the application being tested, which helps to ensure that testing is more representative of how the end users will interact with the application.
As per our project, we are using only one .c file namely Testrain.c (path: Documents-> LDRAEE ->LDRA_workarea\Examples\C_Testbed_examples\Testrain\Testrain.c) for testing.
Here I am going to perform the static code review analysis under both the Black Box and White Box Tests:
1. Used SoftEther VPN and skill-lync remote desktop connection to access the LDRA tool.
2. 10.0.3 version of LDRA Tool is used.
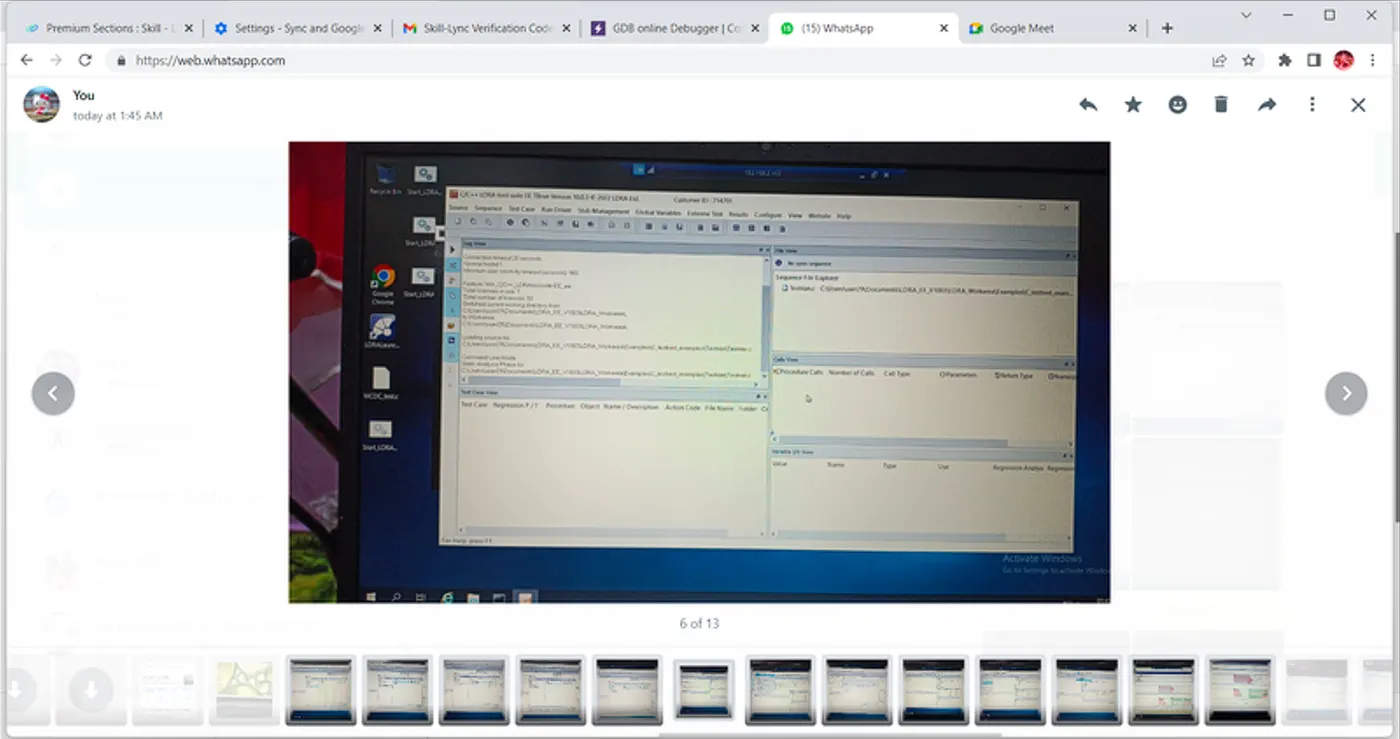
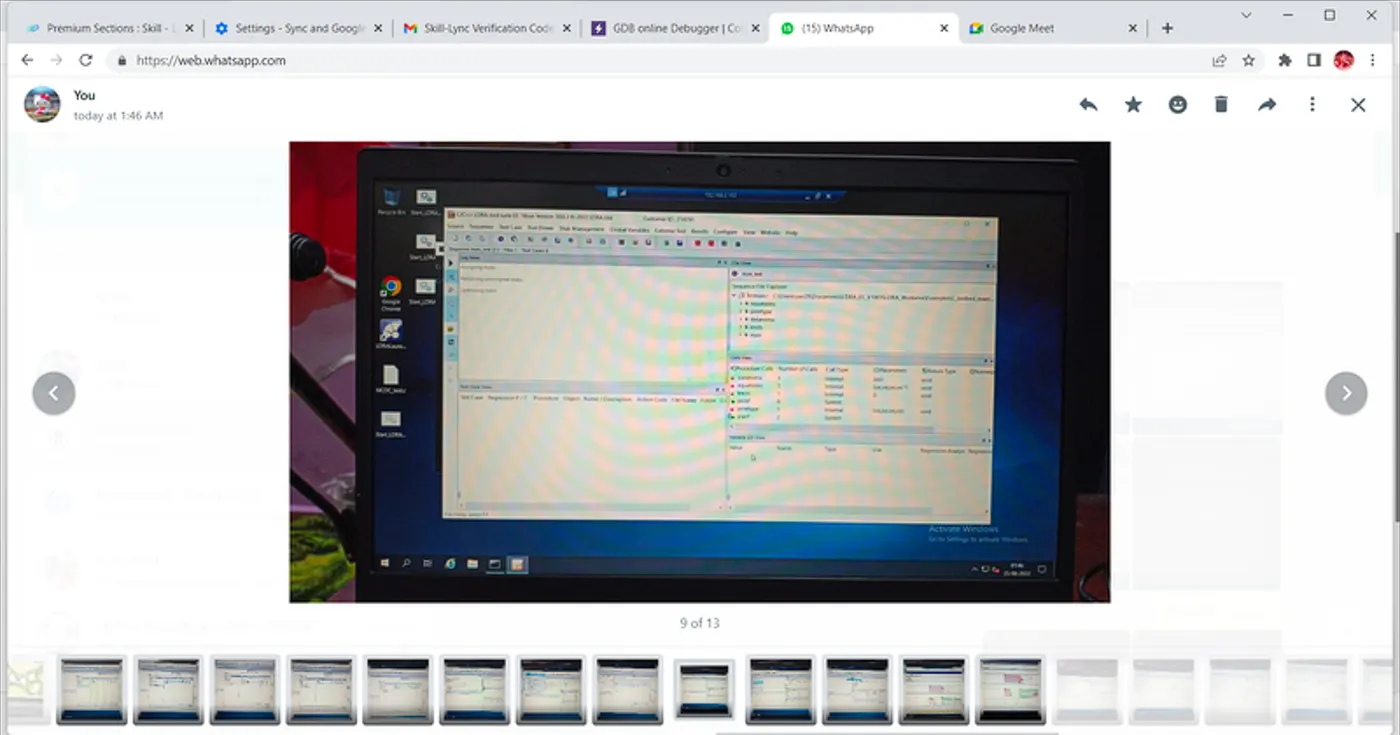
3. After opening the LDRA tool go with the default setting by clicking on the black triangle at the top of the rightmost border column.
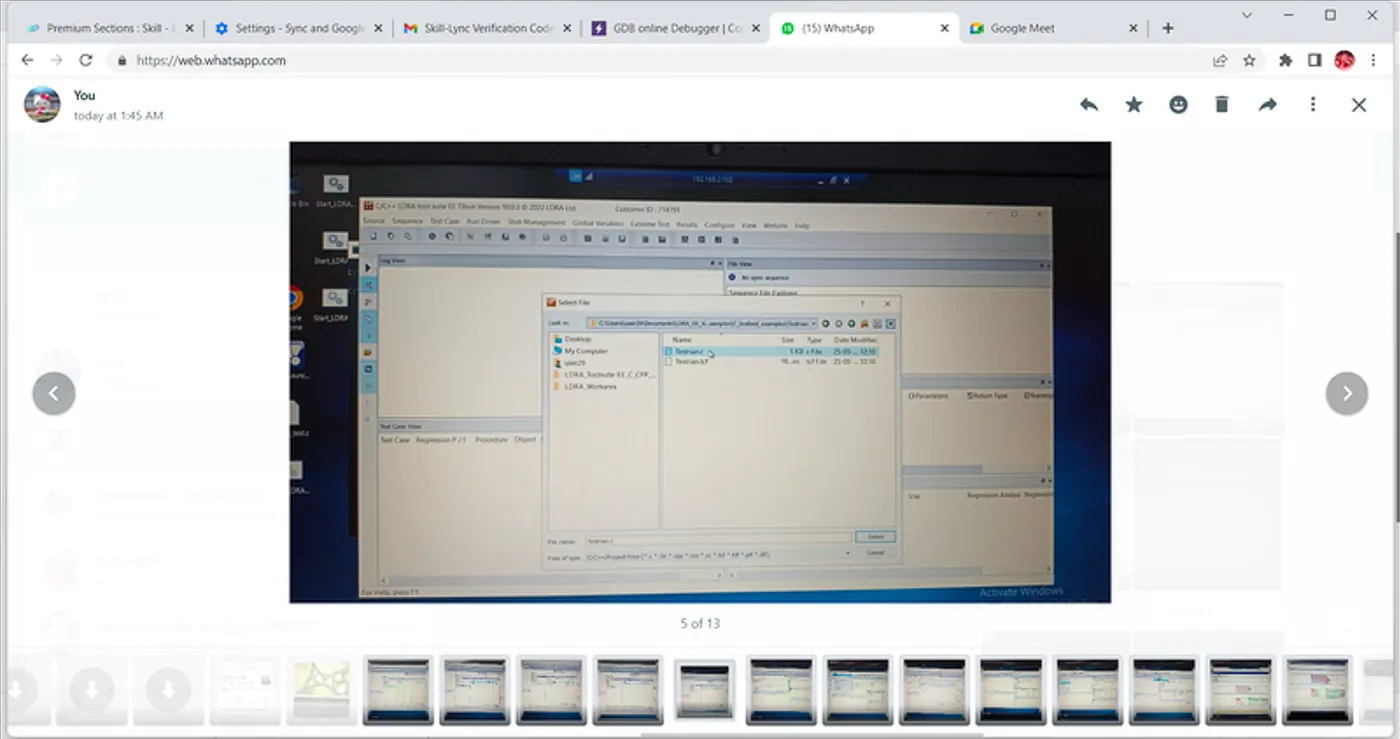
4. Clicking on the Source Tab and choosing the single source file option to select the .c source file to be tested i.e. Testrain.c.
5. Path of selecting the .c source file --> LDRA_workarea\Examples\C_Testbed_examples\Testrain\Testrain.c.
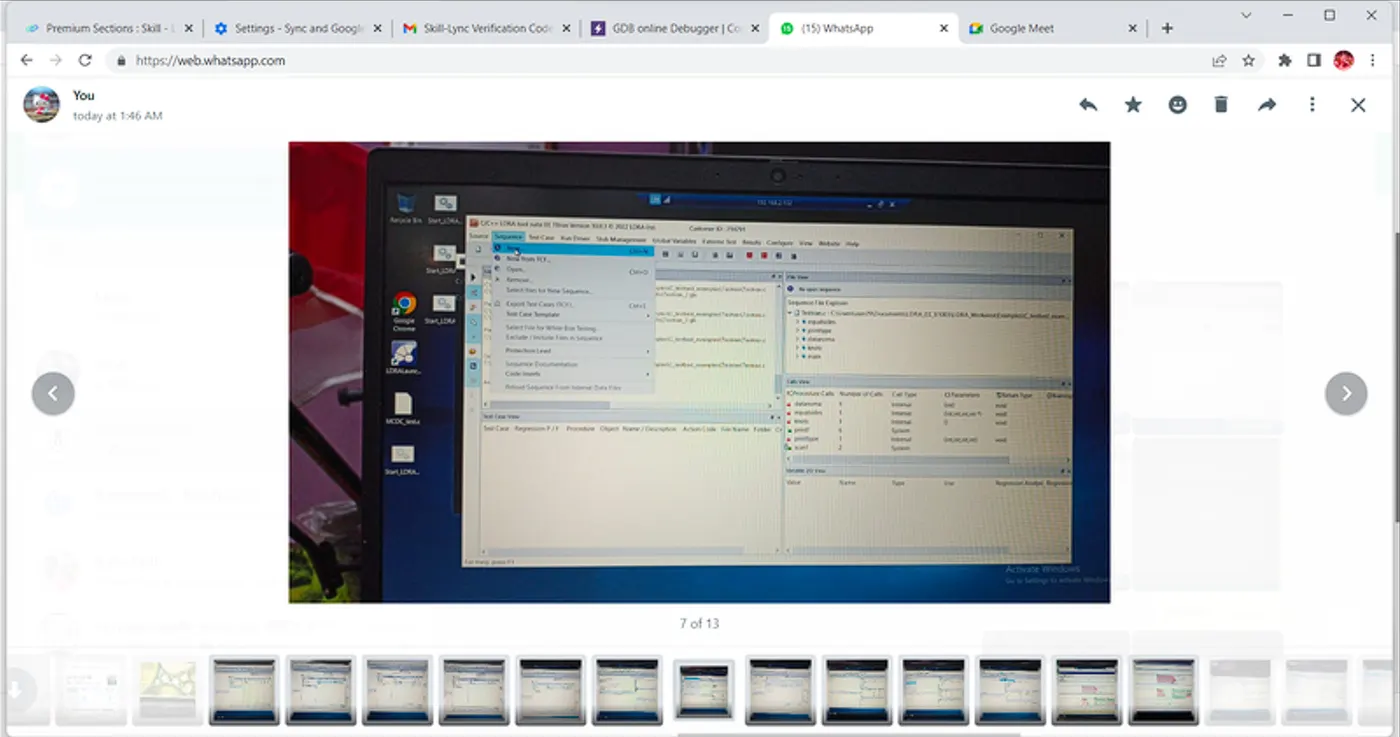
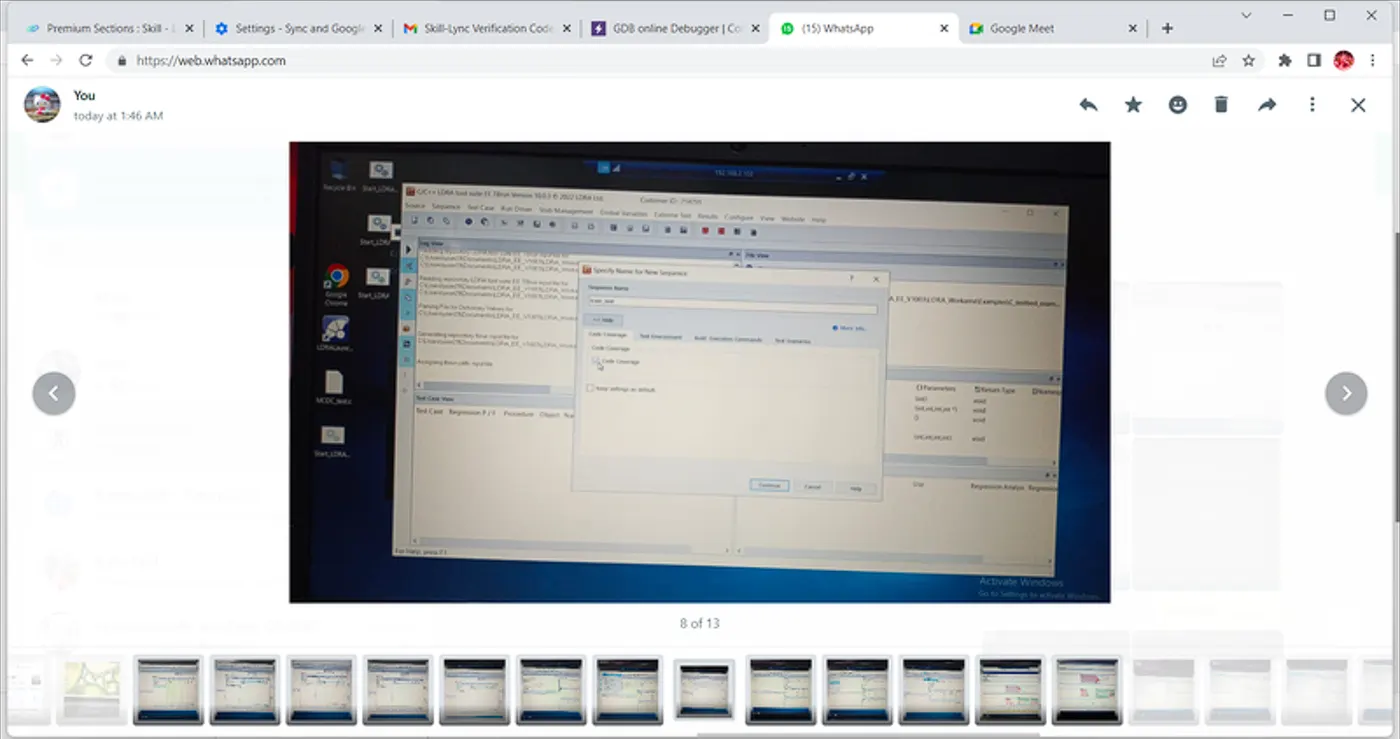
6. Then firstly select the sequence rds by clicking on the Sequence tab and then New sequence.
7. Checking the Sequence box in the Sequence File Explorer under the File View window to be white (or Black) for the White Box Test (or Black Box Test).
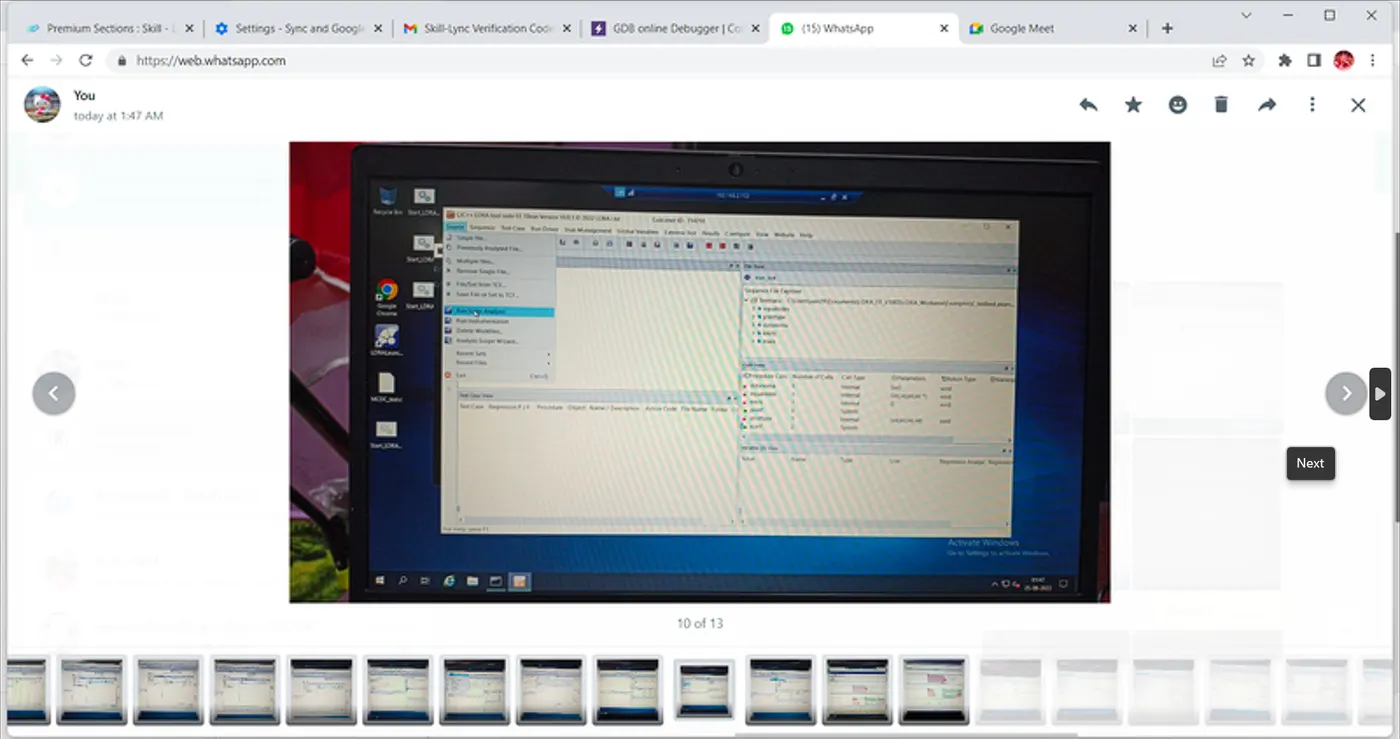
8. Then click on the Source Tab and select the Run Static Analysis for White Box Test (or Black Box Test) to be performed.
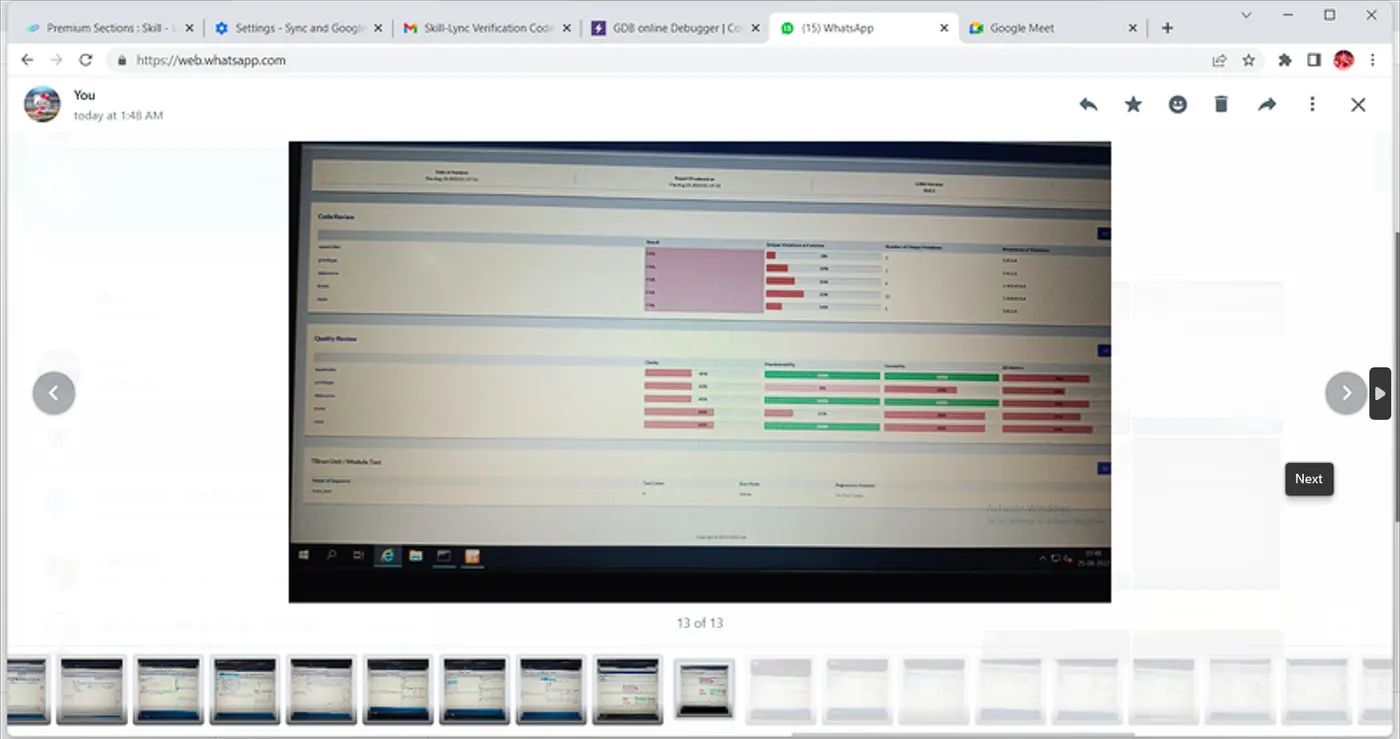
9. Then the White Box Test (or Black Box Test) Report is generated.
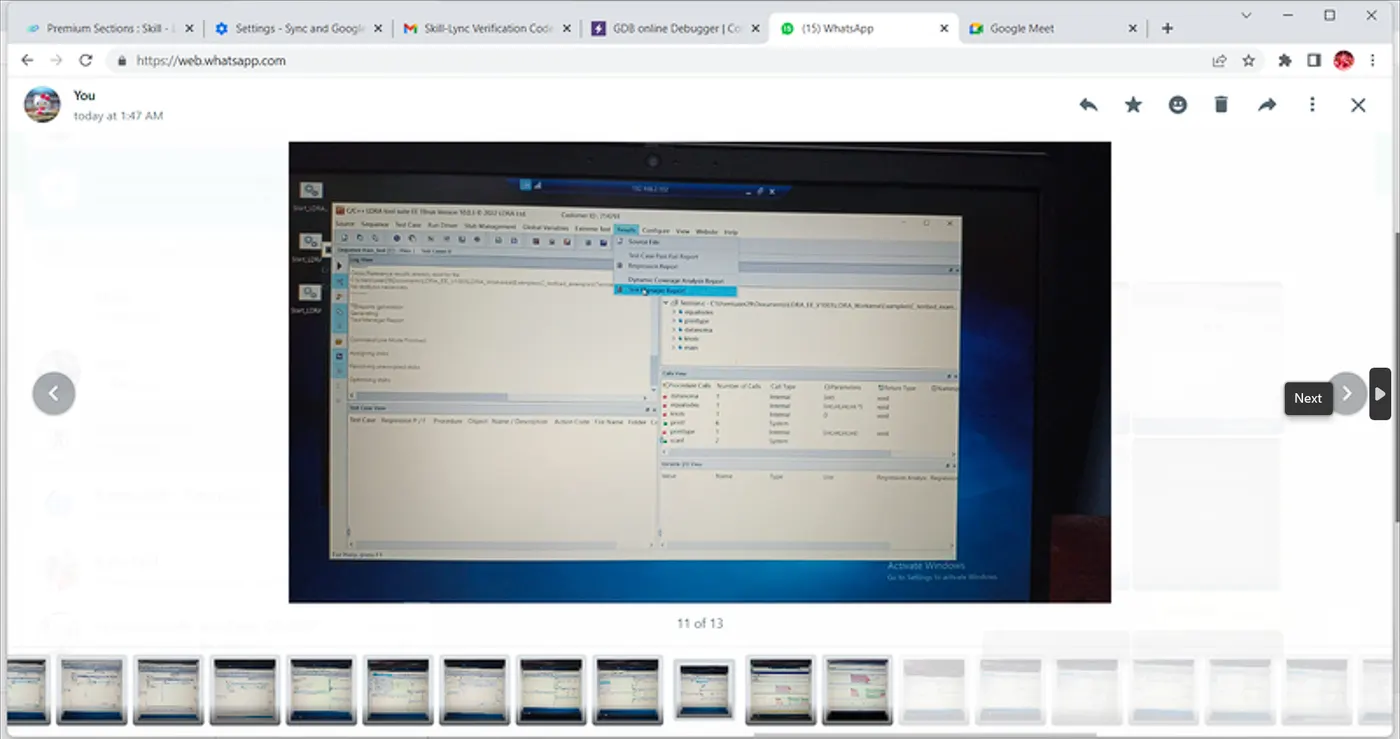
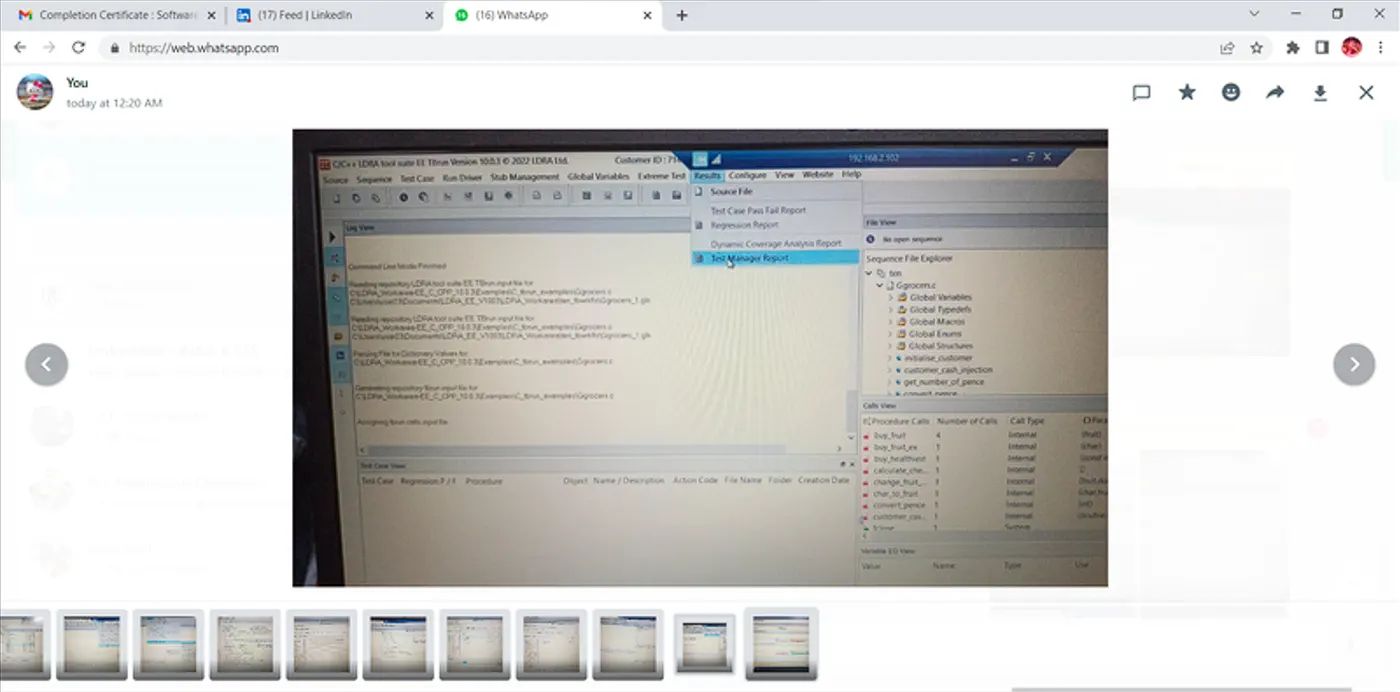
10. The Test Report is collected by clicking on the Results Tab and selecting the Test Manager Report (Report will be popped out).
11. Static White Box test and Black Box test Reports are attached here in PDF format.
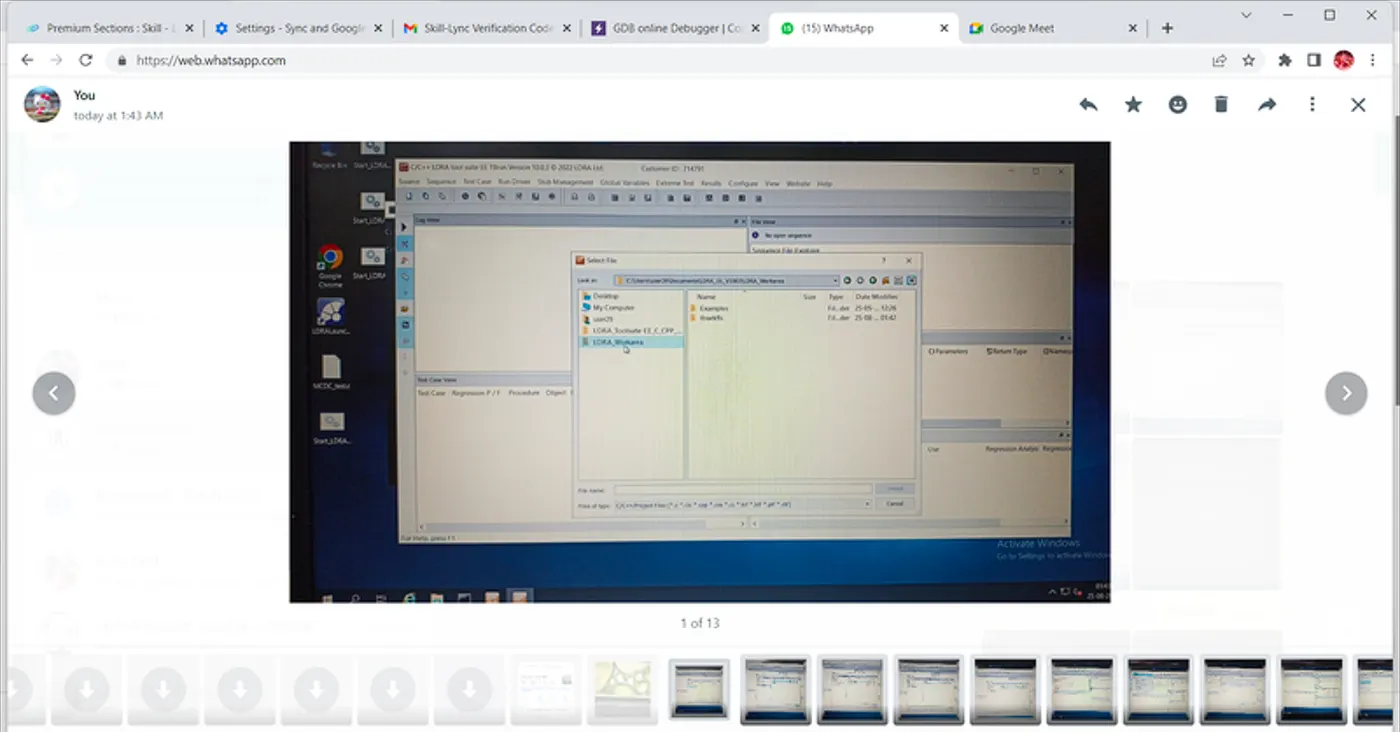
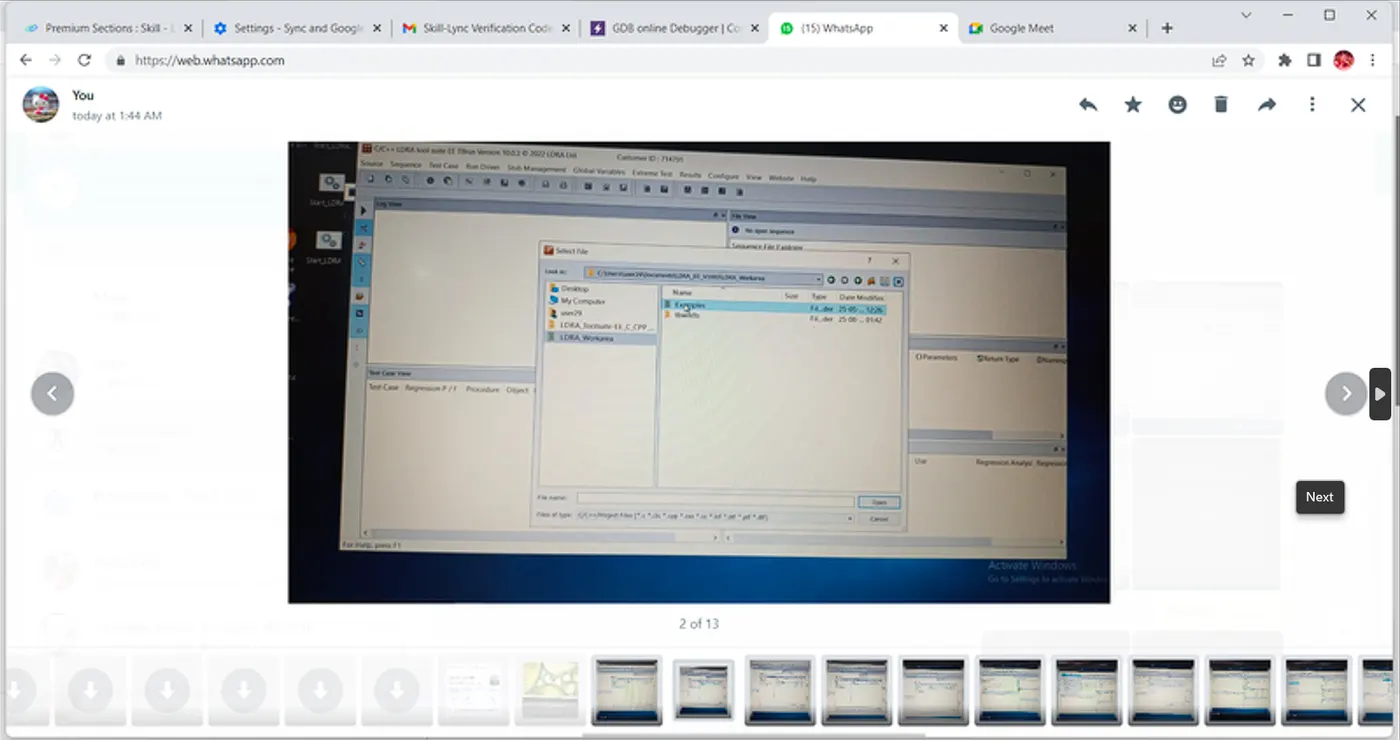
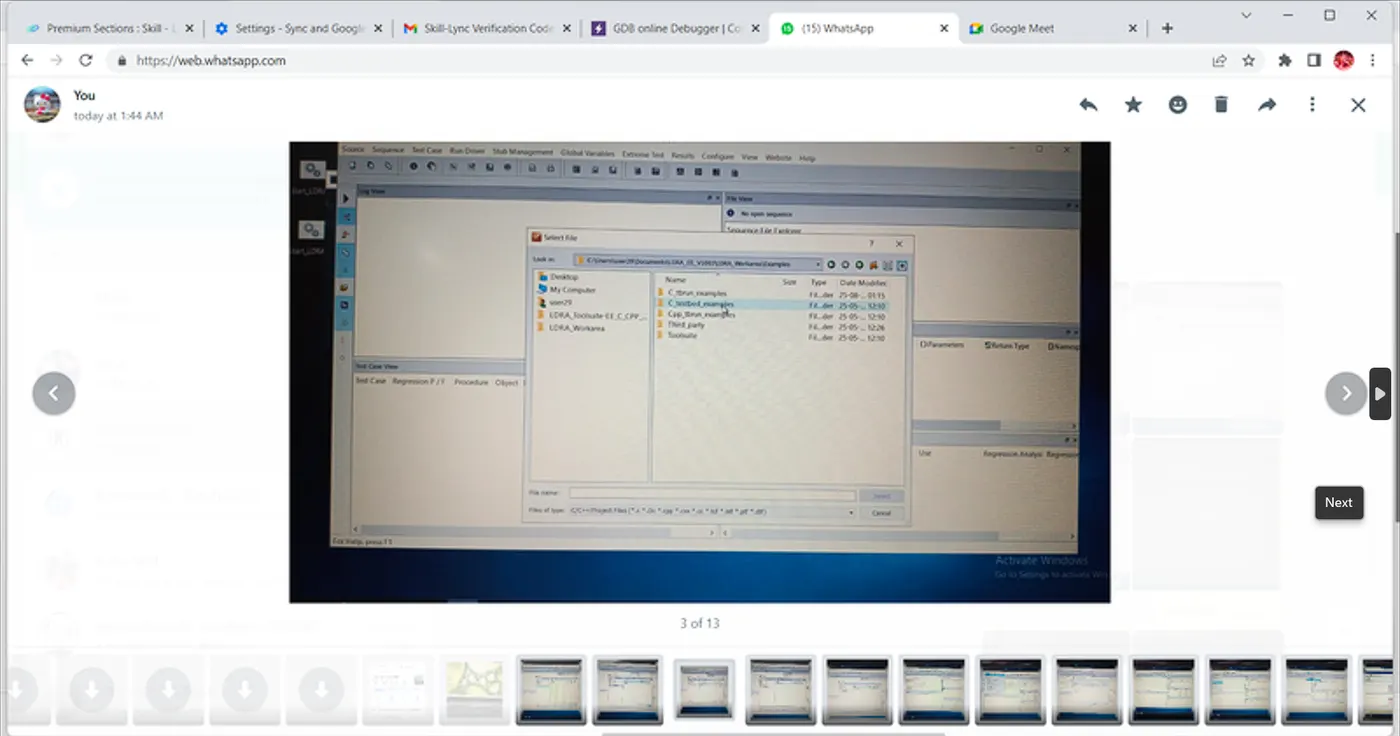
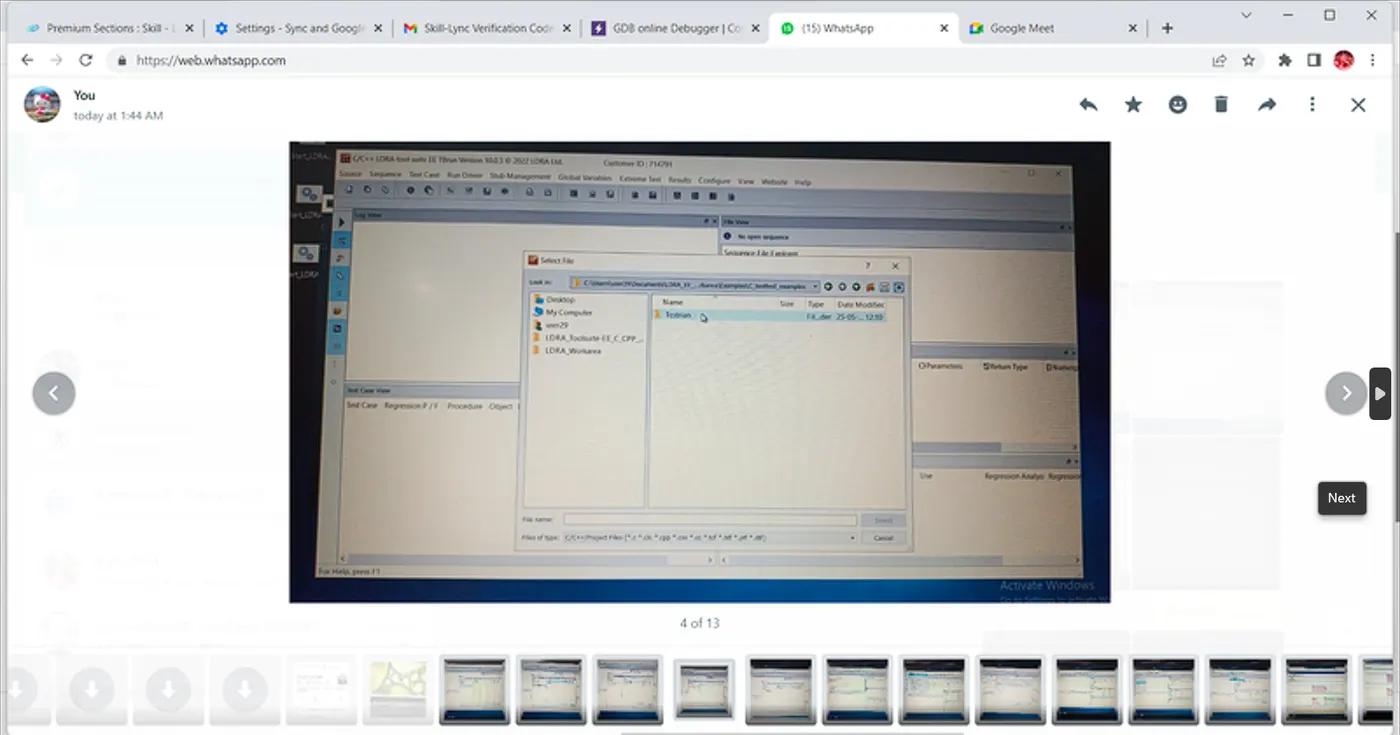
2: Perform Integration testing by including all the .C files available in the folder location C:\**\LDRA_workarea\Examples\Toolsuite\Cashregister_6.0\ **
A)Create the test cases manually as well as automatically using TBExtreme and upload the reports. B)store the test cases as .tcf file. Upload the location image where the .tcf file is stored.
Ans:
Integration Testing – Software Engineering :
Integration testing is the process of testing the interface between two software units or modules. It focuses on determining the correctness of the interface. The purpose of integration testing is to expose faults in the interaction between integrated units. Once all the modules have been unit-tested, integration testing is performed.
Integration testing is a software testing technique that focuses on verifying the interactions and data exchange between different components or modules of a software application. The goal of integration testing is to identify any problems or bugs that arise when different components are combined and interact with each other. Integration testing is typically performed after unit testing and before system testing. It helps to identify and resolve integration issues early in the development cycle, reducing the risk of more severe and costly problems later on.
Integration testing can be done by picking module by module. This can be done so that there should be a proper sequence to be followed.
Integration test approaches:
(1): Big-Bang Integration Testing:
It is the simplest integration testing approach, where all the modules are combined and the functionality is verified after the completion of individual module testing. In simple words, all the modules of the system are simply put together and tested. This approach is practicable only for very small systems. If an error is found during the integration testing, it is very difficult to localize the error as the error may potentially belong to any of the modules being integrated. So, debugging errors reported during Big Bang integration testing is very expensive to fix.
Big-bang integration testing is a software testing approach in which all components or modules of a software application are combined and tested at once. This approach is typically used when the software components have a low degree of interdependence or when there are constraints in the development environment that prevent testing individual components. The goal of big-bang integration testing is to verify the overall functionality of the system and to identify any integration problems that arise when the components are combined. While big-bang integration testing can be useful in some situations, it can also be a high-risk approach, as the complexity of the system and the number of interactions between components can make it difficult to identify and diagnose problems.
Advantages:
- It is convenient for small systems.
- Simple and straightforward approach.
- Can be completed quickly.
- Does not require a lot of planning or coordination.
- May be suitable for small systems or projects with a low degree of interdependence between components.
Disadvantages:
- There will be quite a lot of delay because we will have to wait for all the modules to be integrated.
- High-risk critical modules are not isolated and tested on priority since all modules are tested at once.
- Not Good for long projects.
- High risk of integration problems that are difficult to identify and diagnose.
- This can result in long and complex debugging and troubleshooting efforts.
- This can lead to system downtime and increased development costs.
- May not provide enough visibility into the interactions and data exchange between components.
- This can result in a lack of confidence in the system’s stability and reliability.
- This can lead to decreased efficiency and productivity.
- This may result in a lack of confidence in the development team.
- This can lead to system failure and decreased user satisfaction.
(2): Bottom-Up Integration Testing:
In bottom-up testing, each module at lower levels is tested with higher modules until all modules are tested. The primary purpose of this integration testing is that each subsystem tests the interfaces among various modules making up the subsystem. This integration testing uses test drivers to drive and pass appropriate data to the lower-level modules.
Advantages:
- In bottom-up testing, no stubs are required.
- A principal advantage of this integration testing is that several disjoint subsystems can be tested simultaneously.
- It is easy to create the test conditions.
- Best for applications that use a bottom-up design approach.
- It is Easy to observe the test results.
Disadvantages:
- Driver modules must be produced.
- In this testing, the complexity that occurs when the system is made up of a large number of small subsystems.
- As Far as modules have been created, no working model can be represented.
(3): Top-Down Integration Testing:
The top-down integration testing technique is used to simulate the behavior of the lower-level modules that are not yet integrated. In this integration testing, testing takes place from top to bottom. First, high-level modules are tested, and then low-level modules, and finally the low-level modules to a high level to ensure the system is working as intended.
Advantages:
- Separately debugged module.
- Few or no drivers are needed.
- It is more stable and accurate at the aggregate level.
- Easier isolation of interface errors.
- In this, design defects can be found in the early stages.
Disadvantages:
- Needs many Stubs.
- Modules at lower levels are tested inadequately.
- It is difficult to observe the test output.
- It is difficult to stub design.
(4): Mixed Integration Testing:
Mixed integration testing is also called sandwiched integration testing. Mixed integration testing follows a combination of top-down and bottom-up testing approaches. In the top-down approach, testing can start only after the top-level module has been coded and unit-tested. In the bottom-up approach, testing can start only after the bottom-level modules are ready. This sandwich or mixed approach overcomes this shortcoming of the top-down and bottom-up approaches. It is also called the hybrid integration testing. also, stubs and drivers are used in mixed integration testing.
Advantages:
- A mixed approach is useful for very large projects having several sub-projects.
- This Sandwich approach overcomes this shortcoming of the top-down and bottom-up approaches.
- Parallel tests can be performed in top and bottom layer tests.
Disadvantages:
- Mixed integration testing, requires very high cost because one part has a Top-down approach while another part has a bottom-up approach.
- This integration testing cannot be used for smaller systems with huge interdependence between different modules.
Applications:
(1): Identify the components:
Identify the individual components in the application that need to be integrated. This could include the front end, back end, database, and any third-party services.
(2): Create a test plan:
Develop a test plan that outlines the scenarios and test cases that need to be executed to validate the integration points between the different components. This could include testing data flow, communication protocols, and error handling.
(3): Set up test environment:
Set up a test environment that mirrors the production environment as closely as possible. This will help ensure that the results of our integration tests are accurate and reliable.
(4): Execute the tests:
Execute the tests outlined in the test plan, starting with the most critical and complex scenarios. Be sure to log any defects that encounter during testing.
(5): Analyze the results:
Analyze the results of integration tests to identify any defects that need to be addressed. This may involve working with developers to fix bugs or make changes to the application architecture.
(6): Repeat testing:
Once defects have been fixed, repeat the integration testing process to ensure that the changes have been successful and that the application still works as expected.
Manual Testing:
Manual testing is a type of testing in which we do not take the help of any tools (automation) to perform the testing. In this testing, testers make test cases for the codes test the software, and give the final report about that software. Manual testing is time-consuming testing because it is done by humans and there is a chance of human errors.
- Manual testing is conducted to discover bugs in the developed software application.
- The tester checks all the essential features of the application.
- The tester executes test cases and generates test reports without any help from the automation tools.
- It is conducted by the experienced tester to accomplish the testing process.
When to Perform Manual Testing:
- Functionalities.
- User Interface.
- Website Behavior.
- Application Behavior.
- User Acceptance.
- User Experience.
Manual testing should be conducted when:
(1): Flexibility is required:
With manual tests, QA can quickly test and provide fast feedback.
(2): Short-term projects:
It is not advisable to invest more money and effort to set up short-term projects that focus on minor features because such setup will require huge effort and money that would be too high for such small projects.
(3): When testing end-user usability:
Humans can use their sensibilities to understand the application behavior if the application offers a satisfactory user journey. No machine can perform this task as humans can.
Automation Testing:
Automation testing is a type of testing in which we take the help of tools (automation) to perform the testing. It is faster than manual testing because it is done with some automation tools. There is no chance of any human errors.
- It relies entirely on pre-scripted test which runs automatically to compare actual results with expected results.
- Automation testing helps the tester determine whether the application performs as expected or not.
- It allows the execution of repetitive tasks and regression tests.
- Automation requires manual effort to create initial testing scripts.
When to Perform Automation Testing:
(1): When need to run repetitive tasks:
Automated tests are the best option in scenarios where there is a requirement to run repetitive tests. For example, in the case of regression tests must be executed periodically to make sure that the newly added code does not disrupt the existing functionality of the software.
(2): When human resources are scarce:
Automated tests are viable and the best option to get tests executed within deadlines when there are only a limited number of dedicated testers.
As per our project, we are going to use more than one .c source file for testing, it is known as Integration Testing.
Here integration testing is performed under the Black Box and White Box test conditions:
1. Used SoftEther VPN and skill-lync remote desktop connection to access the LDRA tool.
2. 10.0.3 version of LDRA Tool is used.
3. After opening the LDRA tool go with the default setting by clicking on the black triangle at the top of the rightmost border column.
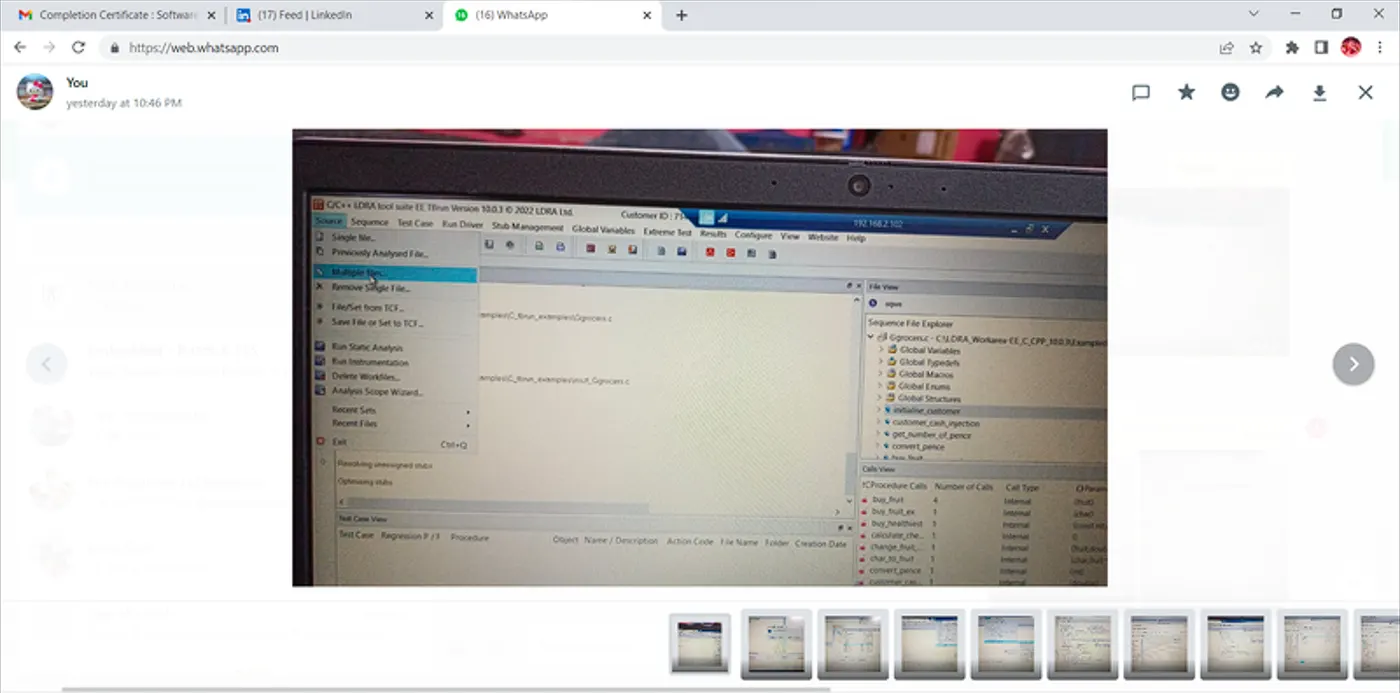
4. Clicking on the Source Tab and choosing the Multiple files... option to create a set or system of more than one .c source files.
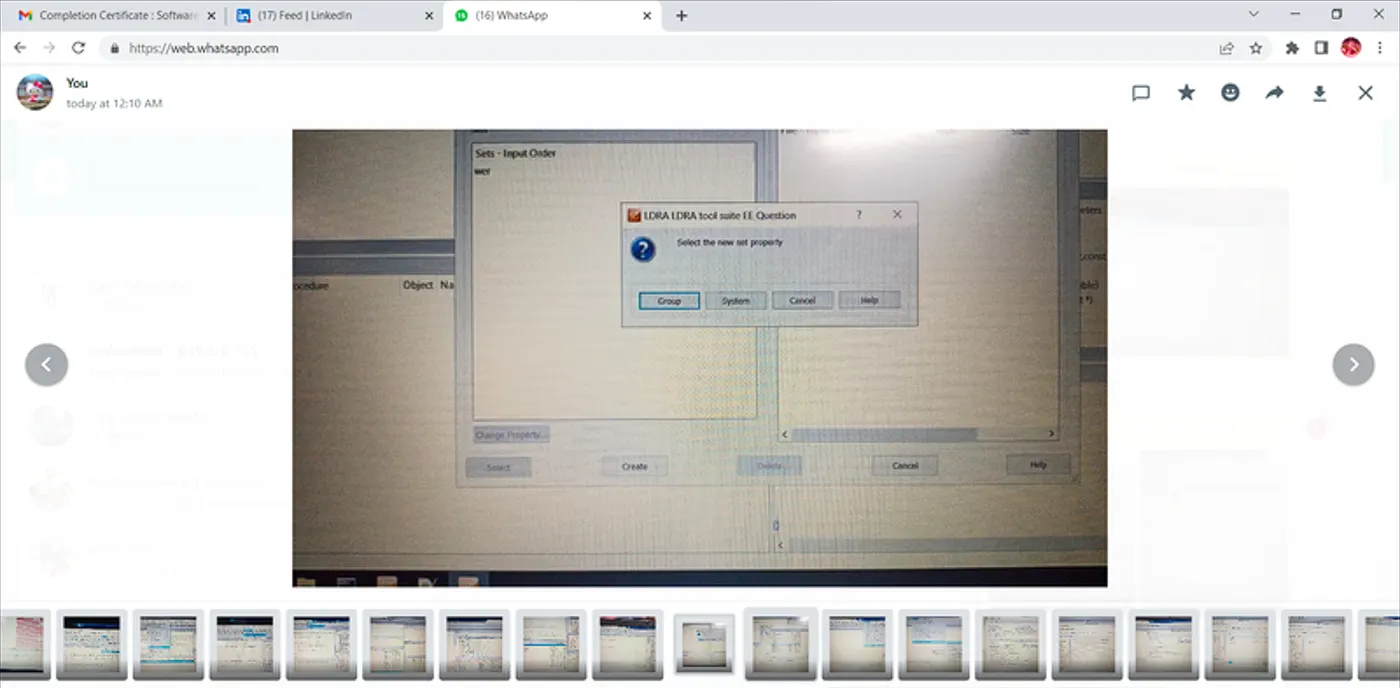
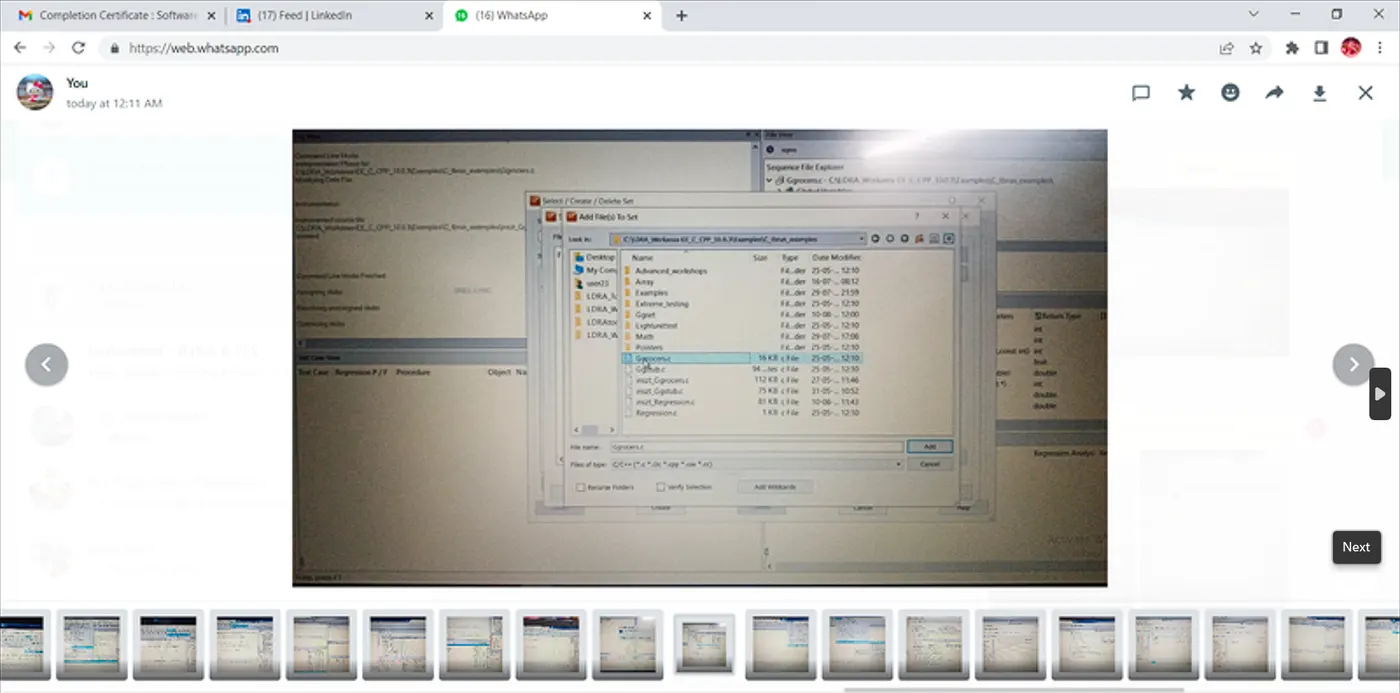
5. Adding the multiple .c source file for integration testing -->C:\**\LDRA_workarea\Examples\Toolsuite\Cashregister_6.0\ **(selecting All files from here) and creating a system.
6. Then firstly select the sequence rds4 by clicking on the Sequence tab and then New Sequence.
7. Checking all the Sequence boxes (because many .c files are there) in the Sequence File Explorer under the File View window to be white (or Black) for White Box Test (or Black Box Test).
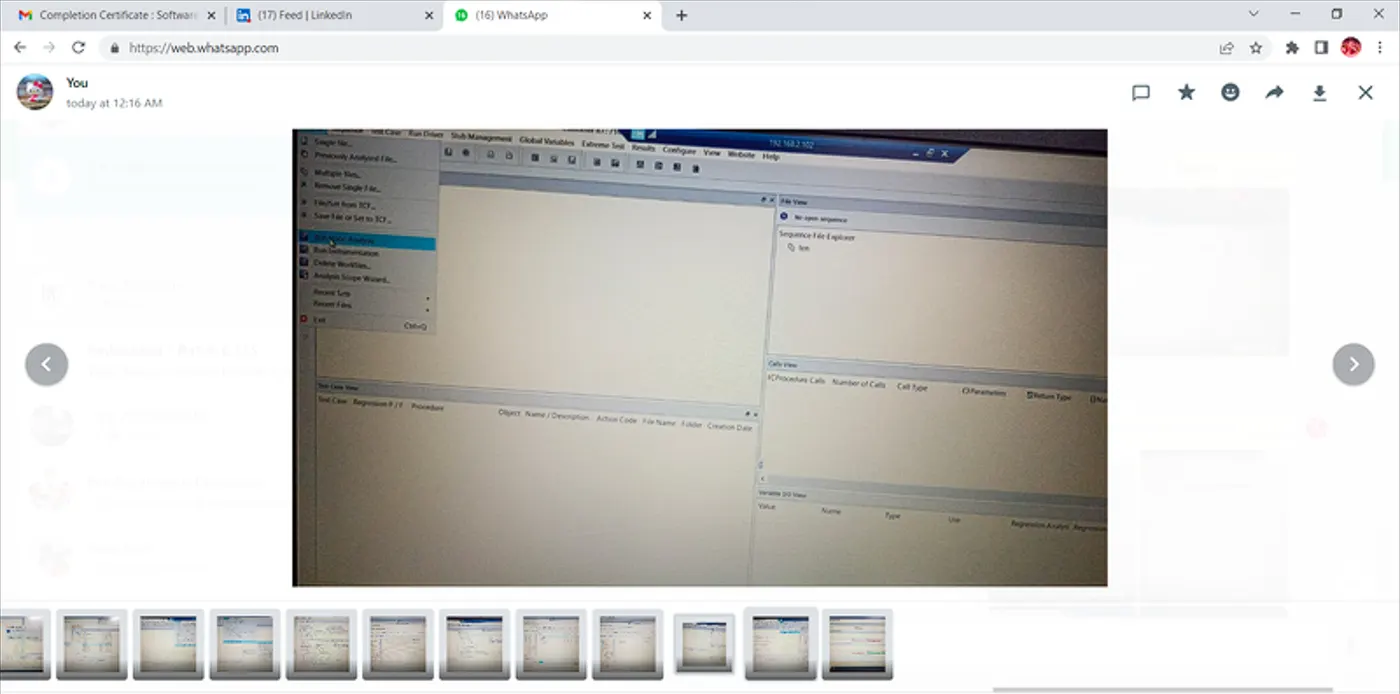
8. Then click on the Source Tab and select the Run Static Analysis for White Box Test (or Black Box Test) to be performed.
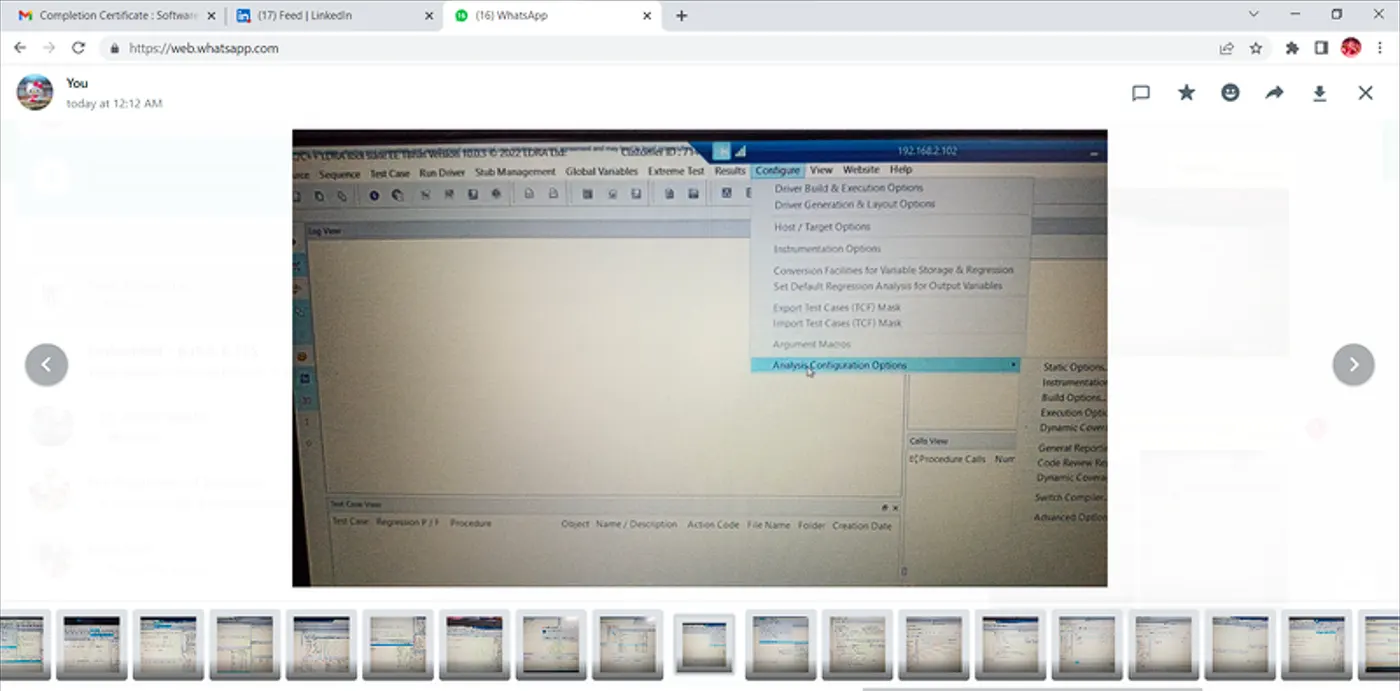
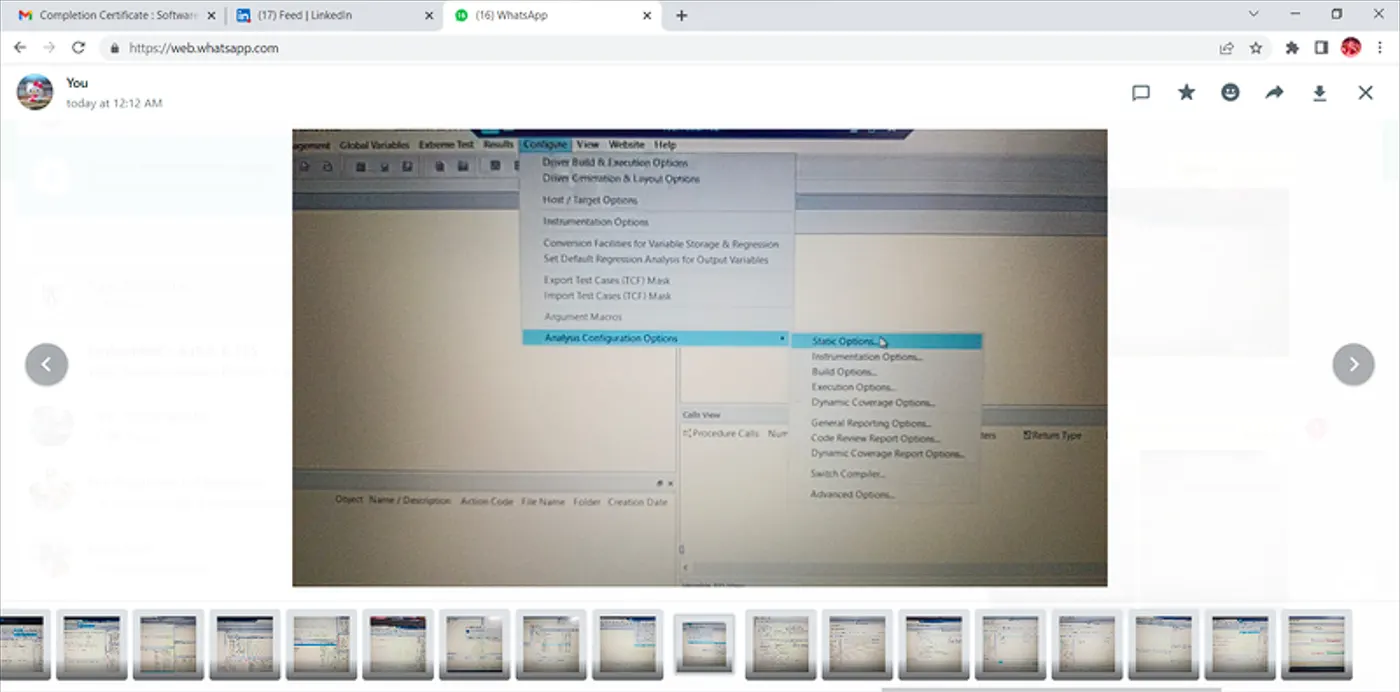
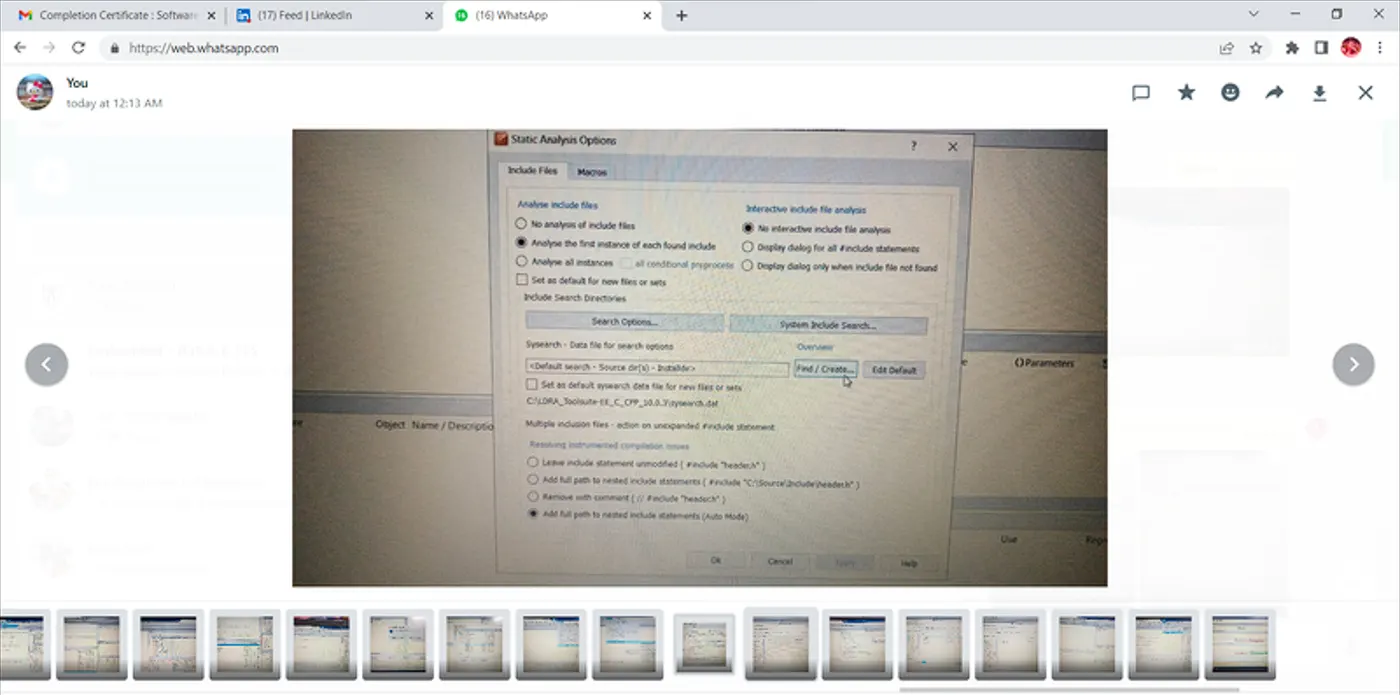
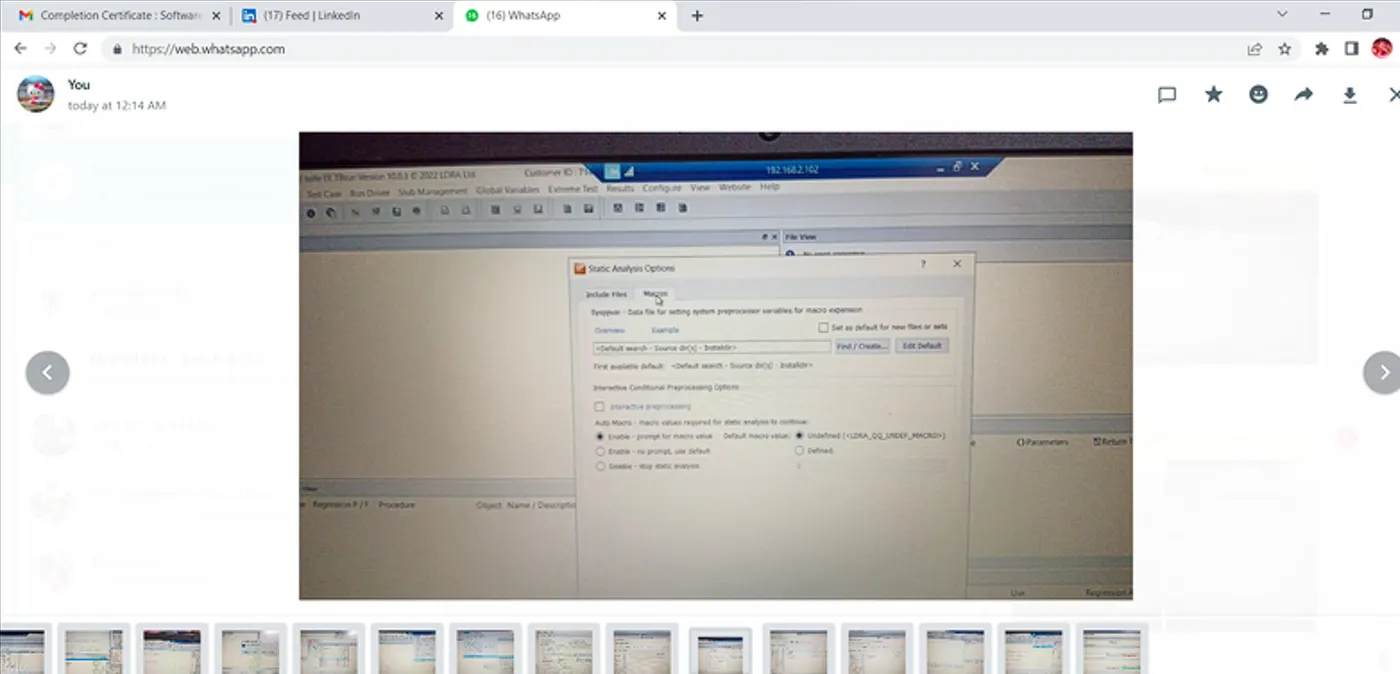
9. Afterwards go to Configure Tab --> Analysis configuration option --> static options--> press Find/create button--> goto the files or folder (Cashregister_6.0) path to create the sysearch.dat file in the selected path/location. The same thing should be done for the Macros tab.
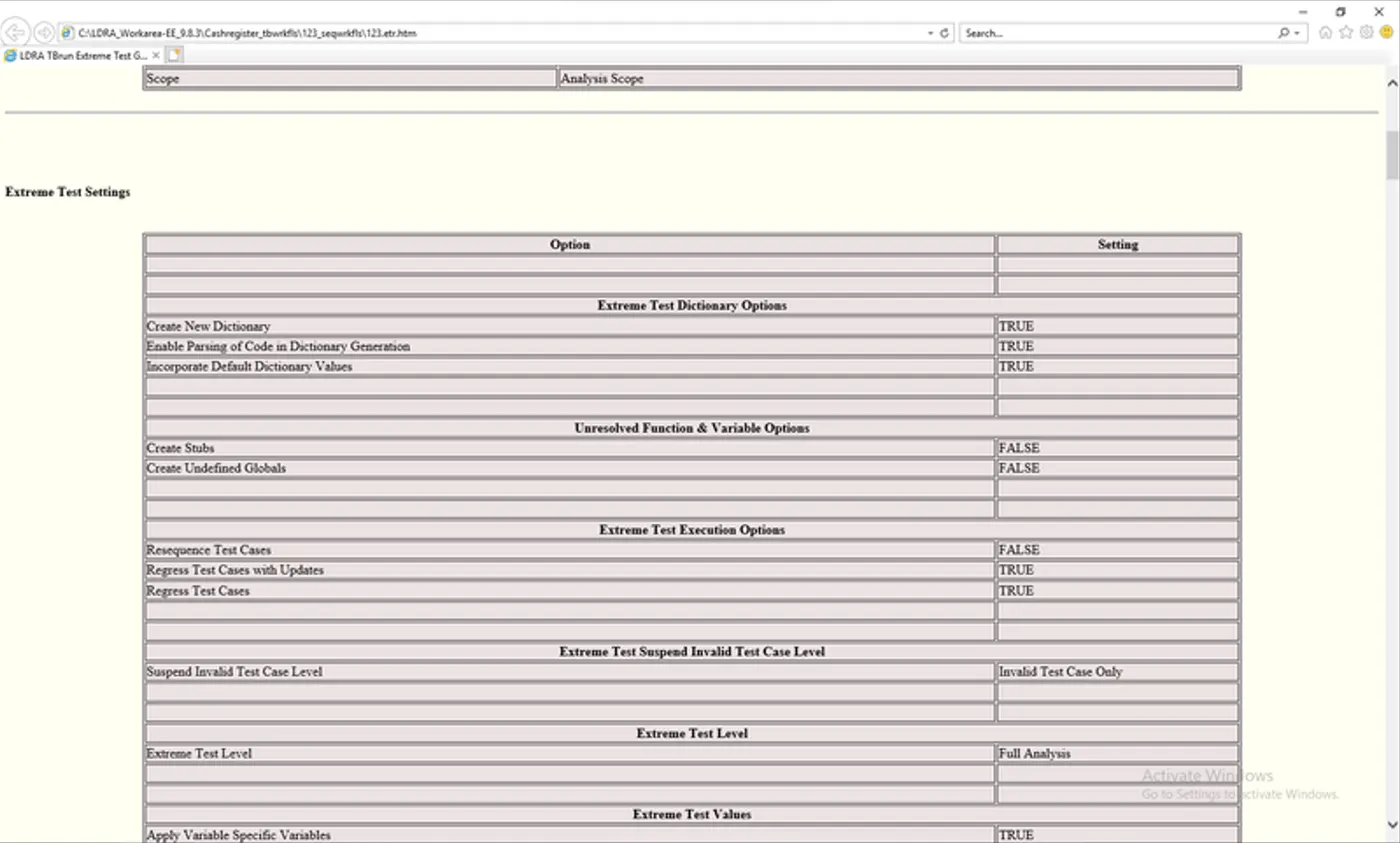
10. Go to the Extreme Test Tab to select the Run Tabular extreme test case for Automation Unit Testing (All Test cases are created automatically. (Performed under both White Box and Black Box ).
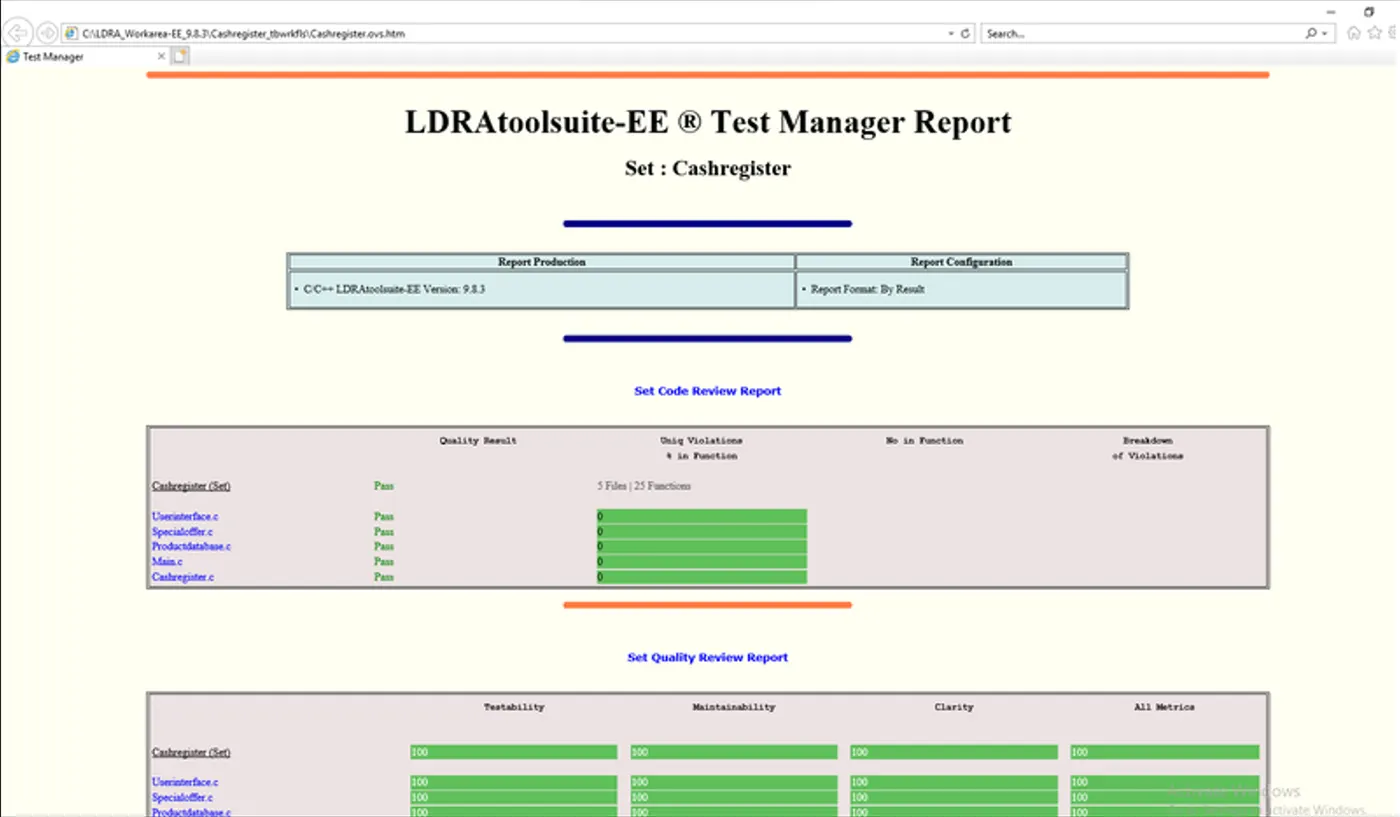
11. The final report of this Automation testing is available on the Results Tab go to the tab to select the Regression report. These Integration Automation Testing Reports are attached here in PDF format.
12. For manual integration testing, restart with step no:8, Test cases are generated by clicking on the Test Case Tab and selecting the Create NewTest Case.
13. Then select the function and complete the important selection per the need.
14. Give the input and output values from the Variable I/O view window and click on the Run Driver Tab for manual testing repeat the process by selecting the different functions.
15. This Manual testing report is available on the Results Tab go to the tab to select the Regression report.
16. To store the test cases in TCF format, go to Source Tab and select the Save File or set to TCF...then give the path or location with the file name to the test cases set (filename.tcf). The file is attached here in .tcf format.
Uses of the project:
(1): Software Quality Assurance:
By conducting static code review analysis and integration testing, the project ensures the quality of the software being developed. It helps identify programming errors, coding standard violations, security vulnerabilities, and other issues early in the development process.
(2): Bug Detection and Prevention:
Static code review analysis helps detect bugs and issues in the source code before the software is executed. Integration testing ensures that individual software components work together as expected, preventing integration issues and bugs in the final product.
(3): Compliance and Standards Adherence:
Static code analysis ensures that the code adheres to industry standards and coding guidelines. This is essential for compliance with regulatory requirements and maintaining code quality across the development team.
(4): Risk Reduction:
By identifying and addressing issues early in the development lifecycle, the project reduces the risk of critical bugs and security vulnerabilities making their way into the final product. This ultimately leads to a more stable and reliable software application.
(5): Efficiency and Productivity:
Automation of testing processes, such as integration testing, using tools like LDRA, improves efficiency and productivity by reducing the manual effort required for testing. It allows developers and testers to focus on more critical tasks while automated tests run in the background.
(6): Documentation and Reporting:
The project generates detailed reports and documentation of the static code review analysis and integration testing results. These reports provide valuable insights into the quality and performance of the software, facilitating decision-making and future improvements.
(7): Continuous Improvement:
By continuously integrating testing into the development process and analyzing the results, the project promotes a culture of continuous improvement. Developers can learn from identified issues and optimize their coding practices to prevent similar issues in the future.