Project 1 - Create a new microservice for allowing customers to getInsurance policy from your banking app
Project 1 - Create a new microservice for allowing customers to get insurance policies from your banking app
Overview of the Project: (5 to 6 lines)
Once you have finished the challenge for week 6, enhance the same project by creating a new microservice for the Insurance department of the bank (called “insurance”), which will display the list of insurance policies held by a customer, on passing a customer Id as a request body query to the API (similar to cards & loans microservices)
Goals (2 to 3 points)
Also, ensure to perform the following tasks for this insurance microservices:
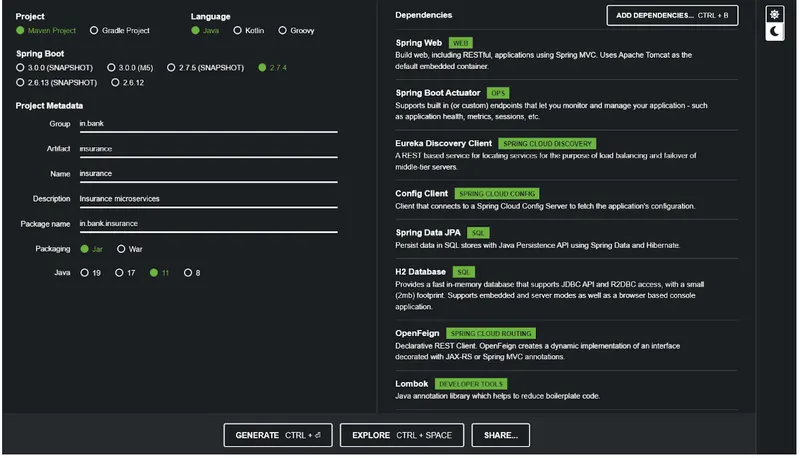
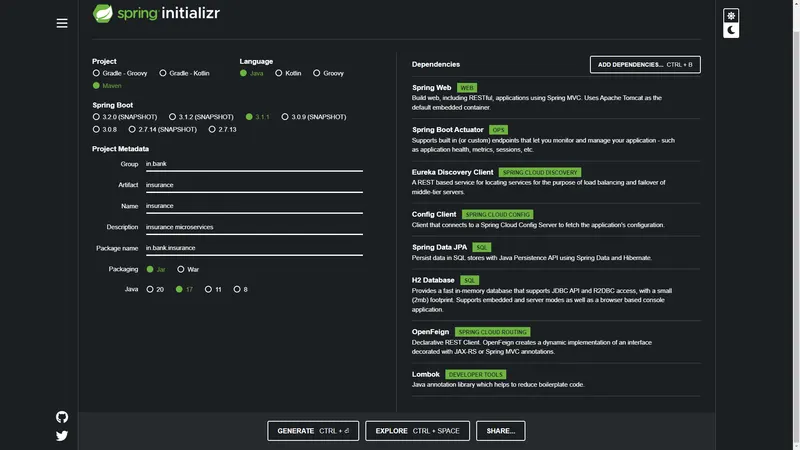
1. The configuration/dependencies and other setup for insurance will be similar to the accounts/cards/loans microservices created so far. Since we now know what are the dependencies (eg. Config client, eureka client etc) to be added to the insurance project for this assignment, (read the future points carefully, select all of these dependencies while creating the insurance project in the start.spring.io to avoid adding all the dependencies later in pom.xml
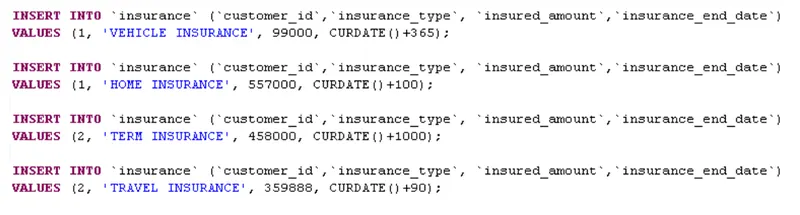
2. Create a data.sql for the insurance microservices to have some test data for insurance microservices for customerId 1 and 2. Refer to the API sample response given in the next point and create the database columns & its data type. “insurance_number should be an auto incrementing primary key column. You may insert these test data in your data.sql file to keep the result consistent with the expectation
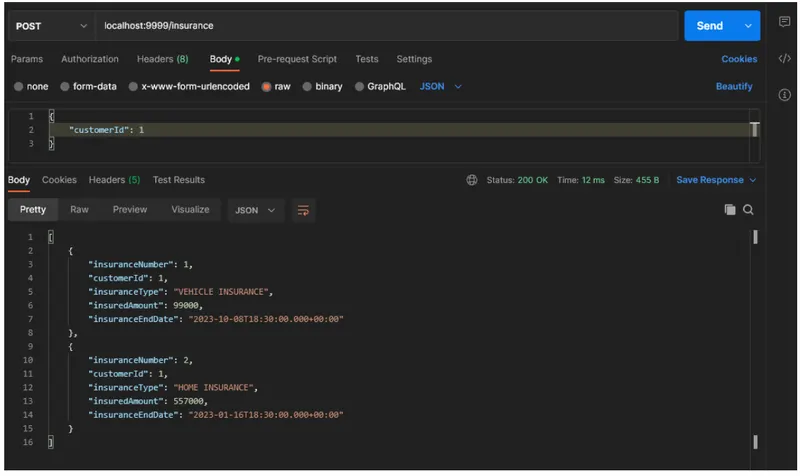
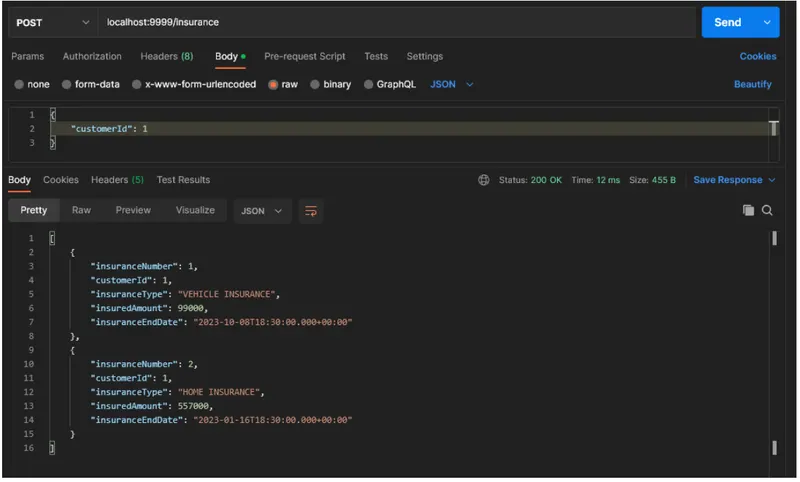
3. Create a POST API (localhost:9999/insurance) for insurance microservices, running on 9999 port which will accept a request body of customerId ({“customerId”:1}) and return the following response, based on the available test data:
4. Add insurance microservices to the config-server, so that its able to read its configuration from the GitHub repository and start automatically. Ensure to create 3 config files for the insurance in your personal GitHub repository (for dev, default & prod profiles). You can add server.port=9999 only in the GitHub repo config files and not in application.properties (similar to loans config files)
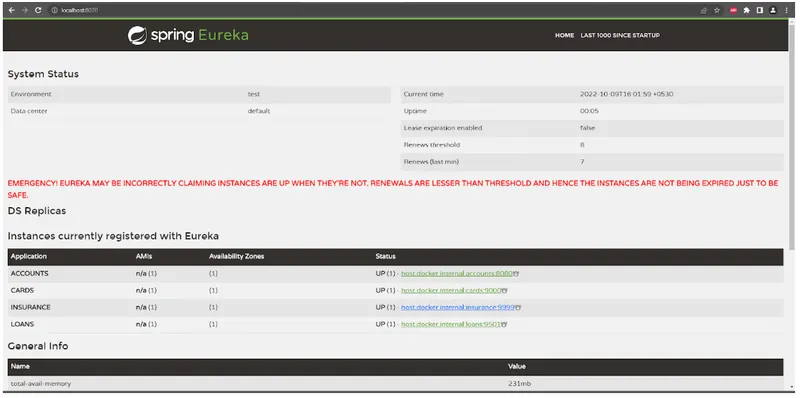
5. Add insurance microservices to the eureka server to register for the service discovery and registration.
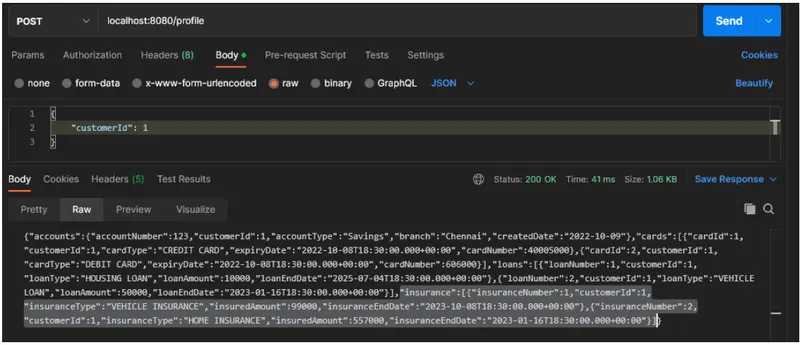
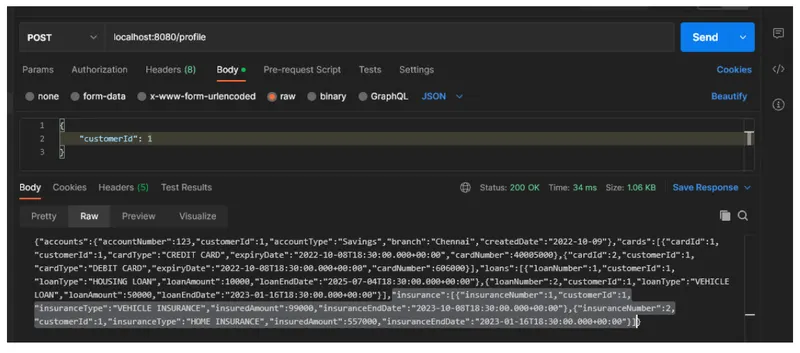
6. Add Insurance FeignClient in Accounts microservices for localhost:8080/profile API, so that we are able to query insurance API as well and return the data for the records matching the queries customerId as follows
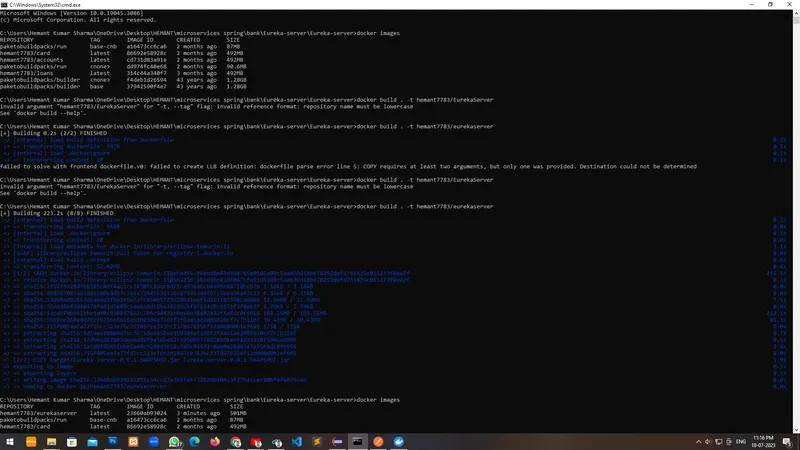
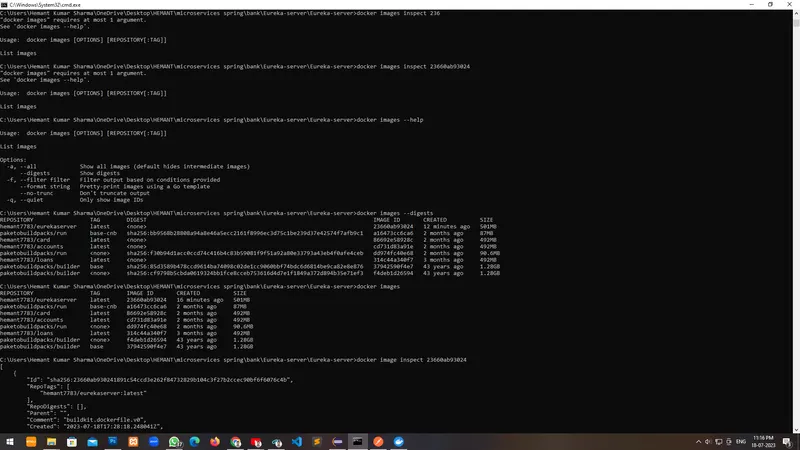
Ensure to create the Docker image for the insurance project and add it to your personal Docker hub repository. You can do by the buildpack approach (update the necessary configuration in pom.xml and then create the docker build image through the maven build configuration in Eclipse)
7. Also update the docker-compose.yml file for accounts microservice, so that the config server , eureka server and other properties of the insurance microservices is added to docker-compose.yml file.
8. Executing docker-compose up command from the accounts microservices path in command prompt, should now start insurance microservices as well and all other microservices which we had created so far (config-server, eureka server, accounts, cards and loans)
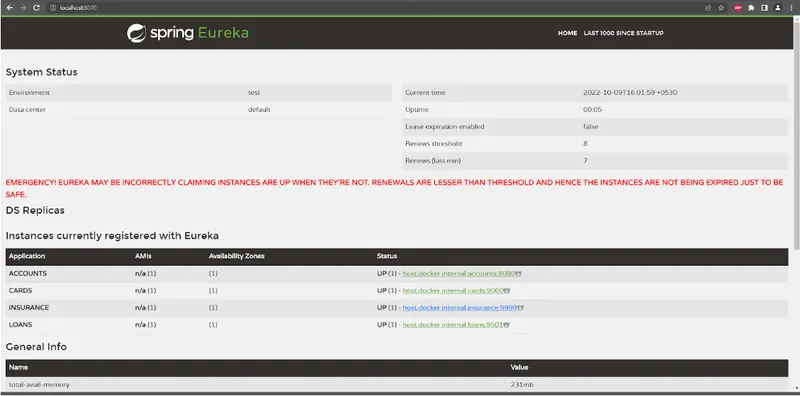
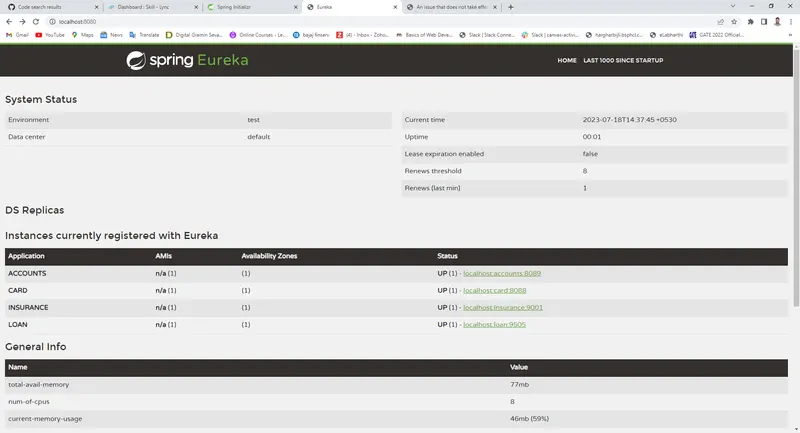
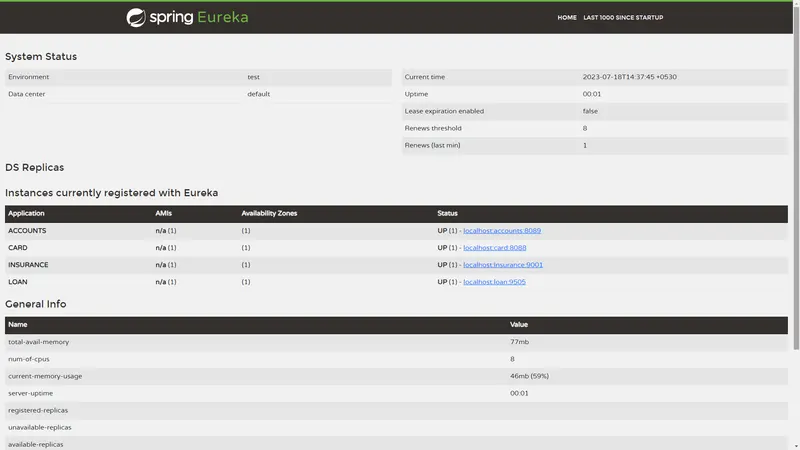
9. Attach the screenshot of the Eureka server, once all the instances of accounts, cards, loans & insurance are up as follows:
Key Highlights of the Project: (4 to 5 point)
- This project will revise all the key steps to create microservices, configuring config server, Eureka server and also creating Docker images and updating docker-compose.yml configuration
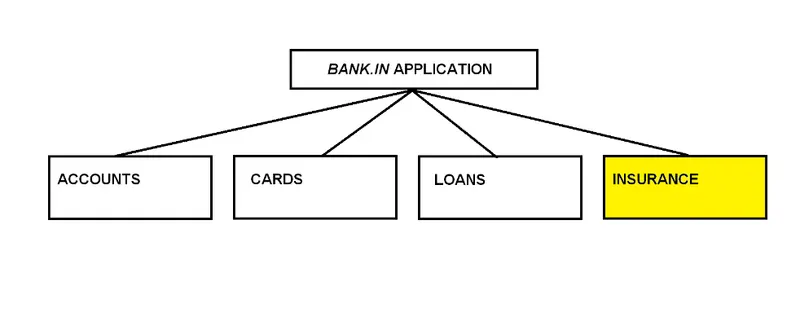
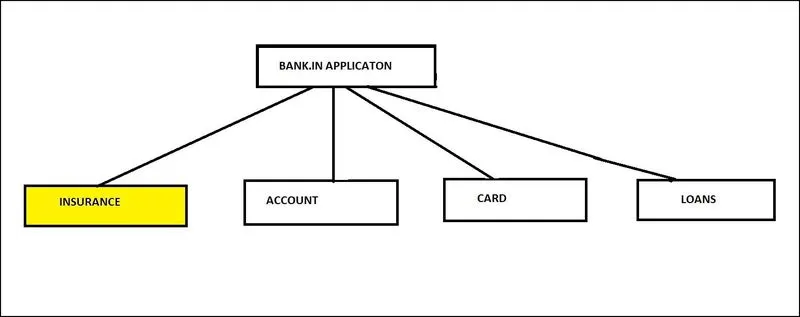
- We will be expanding on the last challenge for week 6 and creating insurance project, so that now we will have 4 individual microservices in our application.
- localhost:8080/profile will now also return data for insurance microservices as well.
Expected Outcomes: (4 to 5 points)
Insurance microservices should be able to service request on localhost:9999/insurance URL and also able to integrate with the config server and eureka server which we had created earlier.
Output Reference for the Technical Support Team:
Working code similar to one attached in the drive.)
Steps to create are similar to how we did for loans/cards microservices which we did in previous challenges and in class demo)
Screenshot of the dependencies while creating insurance project
localhost:9999/insurance output test from POSTMAN
localhost:8080/profile test from POSTMAN to see if insurance data is also coming: (highlighted the insurance data below for reference due to lack of vertical space)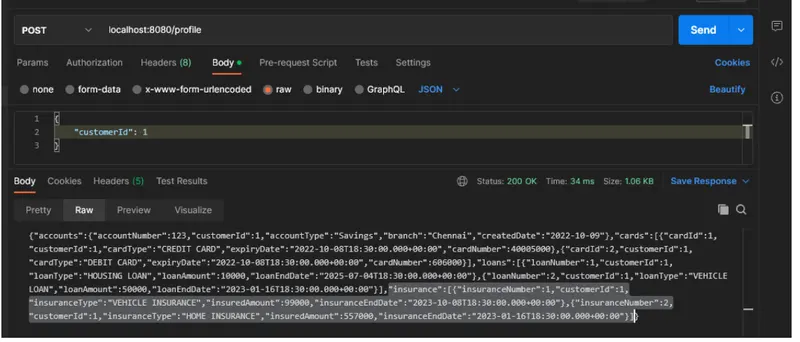
Eureka dashboard screenshot once all the servers are up (localhost:8070)
Docker hub repository reference screenshot:
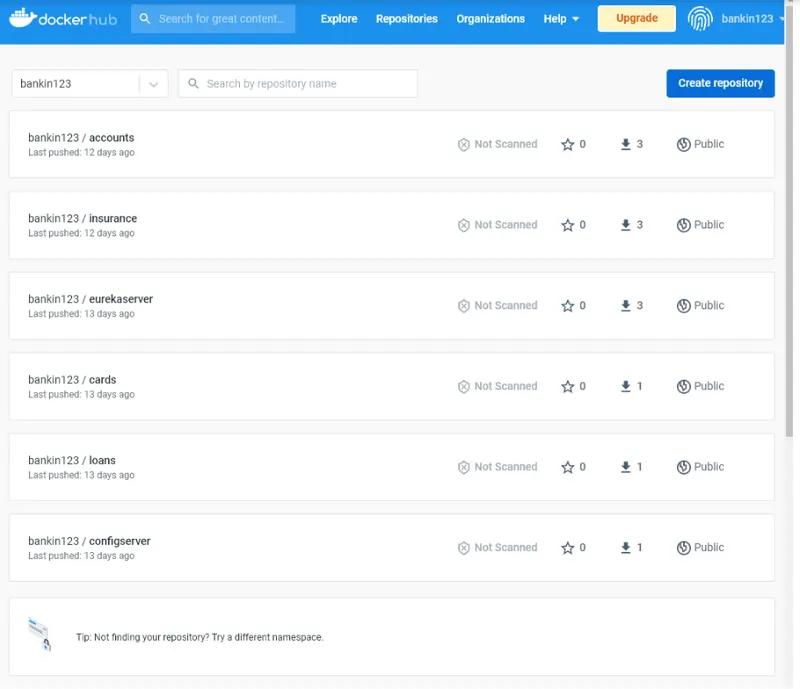
Image:
Solution :
First, let's create a new Java project for our microservice. We can use your preferred IDE, Eclipse, to create a new Maven or Gradle project in Spring Initializr.
Next, create a class called "InsuranceApplication" that will handle the insurance policy functionality.
Create a new Java project in your IDE:
- Open your IDE and create a new Java project.
- Set up the project structure according to your preferred directory layout.
Define the project dependencies:
- Include the necessary dependencies for building a microservice, such as Spring Boot and any other libraries you may need.
- You can manage dependencies using a build tool like Maven
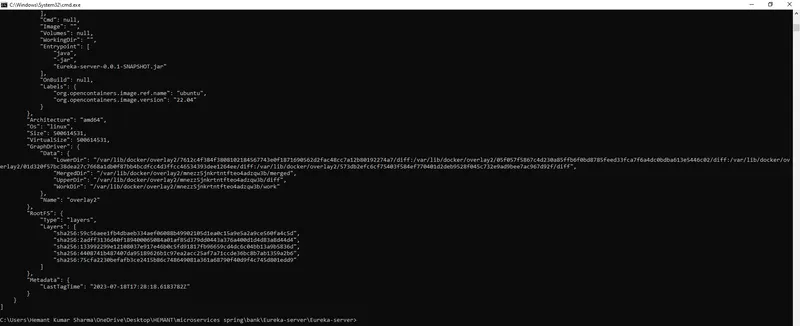
Compose the whole app using Docker Compose:
- Open a terminal or command prompt.
- Navigate to the directory containing the docker-compose.yml file.
- Run the command
docker-compose upto start the entire application.
Set up Docker Hub and Docker Desktop:
- Create an account on Docker Hub (https://hub.docker.com) if you don't have one.
- Install Docker Desktop on your machine.
Dockerize your microservice:
- Create a Dockerfile in the root directory of your project.
- Define the necessary instructions in the Dockerfile to package your microservice into a Docker image.
- Build the Docker image using the Dockerfile and tag it appropriately.
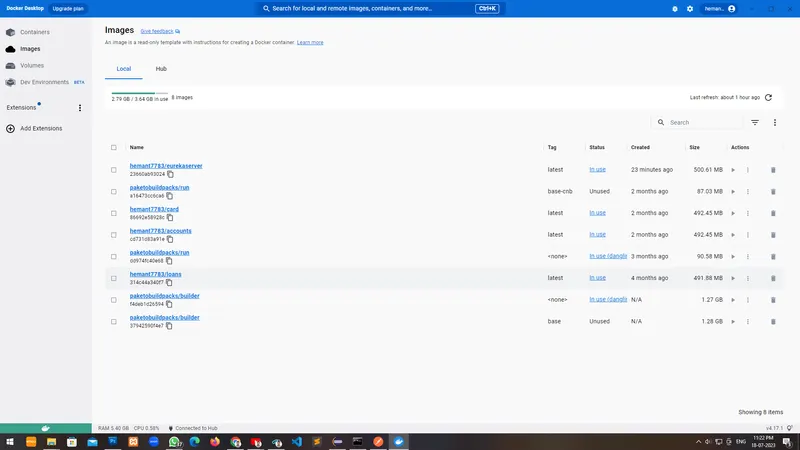
image :
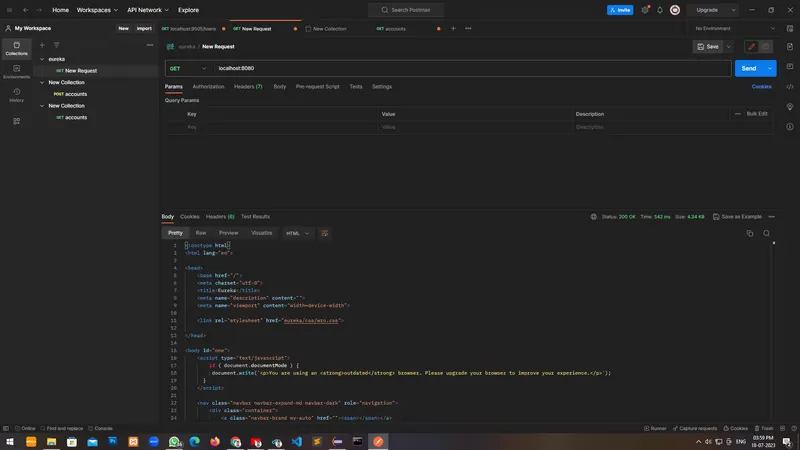
Test the microservice using Postman:
- Launch Postman and create requests to test the functionality of your microservice.
- Send sample requests to the defined API endpoints and verify the responses.
Note: Every project code file is uploaded in the rar file.