Preparing Schedule & Cost Estimation for a building using REVIT
1A)
AIM:
Using the shortcut key to complete the given task
INTRODUCTION:
In this question we have modify the existing project by using shortcut key. One by one shown the step
PROCEDURE:
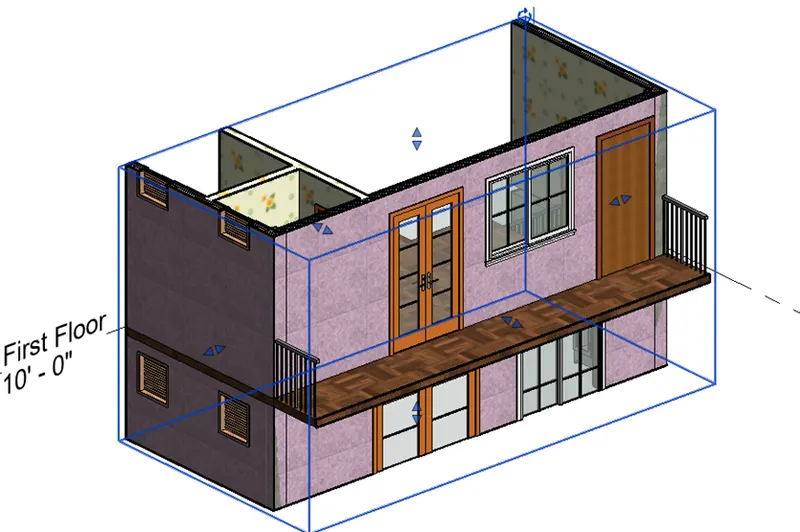
A) SECTION BOX (BX)
- Open Revit software
- Click on open and select previously created model
- Set in 3D view
- Select any part of the building to create a section box
- Type shortcut BX, the section box visible for the particular view
- We can adjust the section box by stretching the arrow, for more visibility near that particular part
B) CREATE SIMILAR (CS)
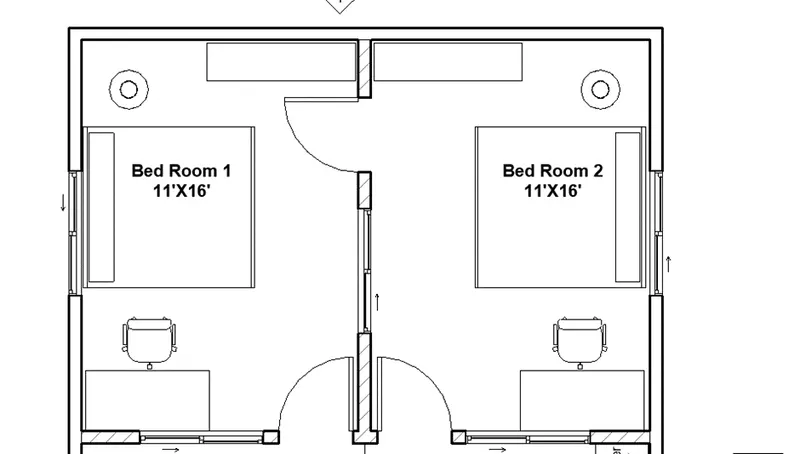
- In the floor plan layout
- Select door and window one bye one to create similar element
- Type command CS
- Automatic door will appear for placing
C) THIN LINES (TL)
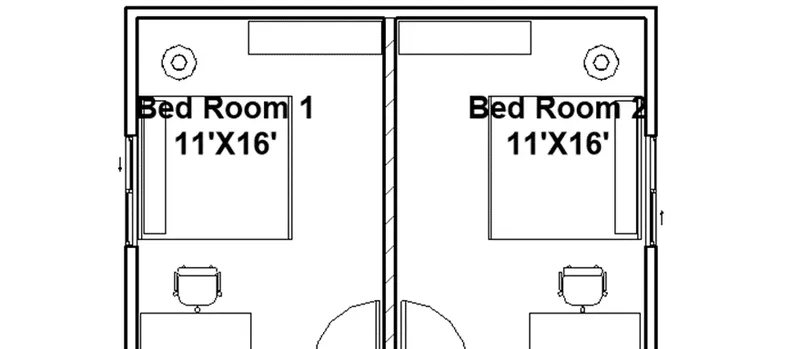
- In the floor plan layout
- Type command TL
- The line will be thin in the floor plan
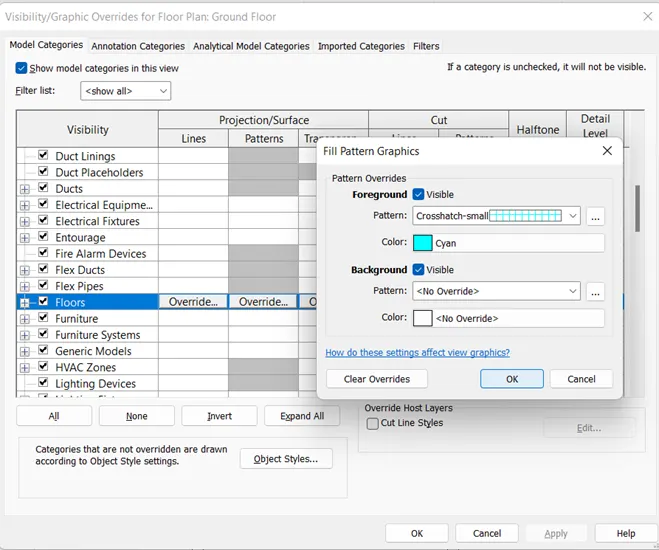
D) VISIBILITY GRAPHICS (VG)
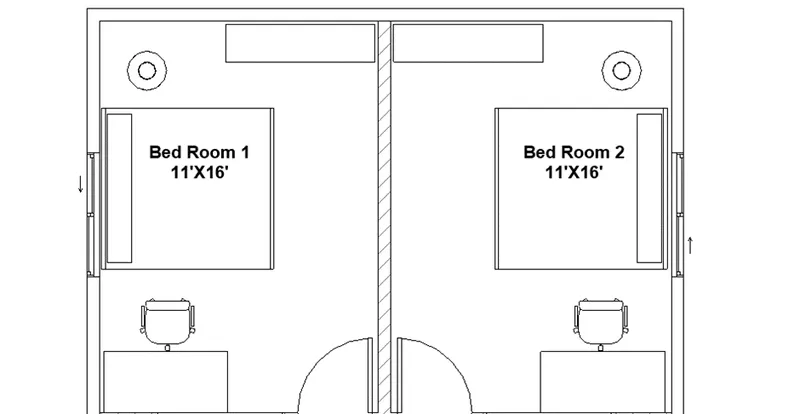
- In the floor plan
- Type VG command
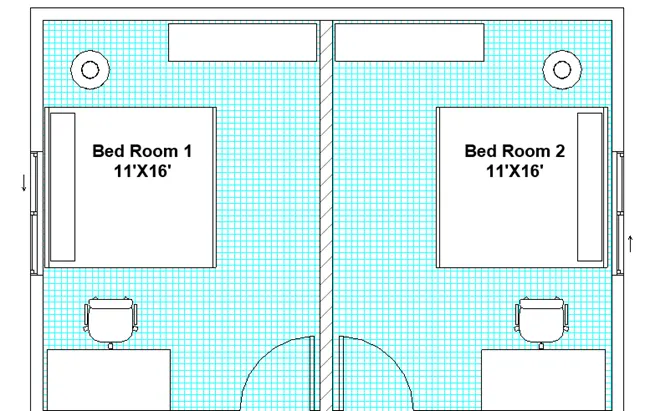
- Go to floor > pattern> override
- Change pattern and colour>ok
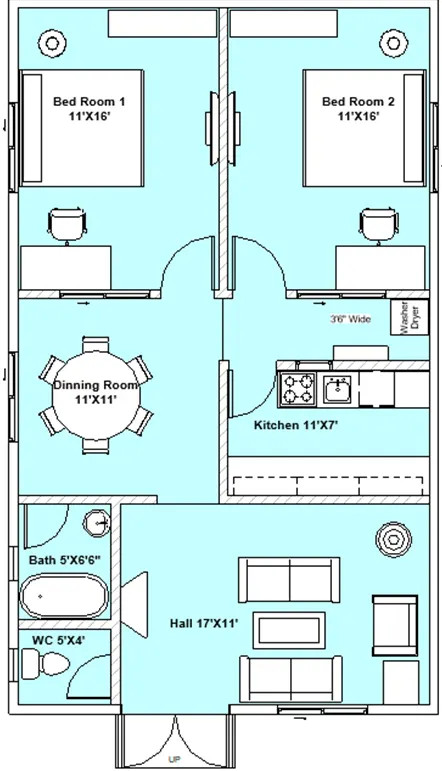
E) VIEW RANGE (VR)
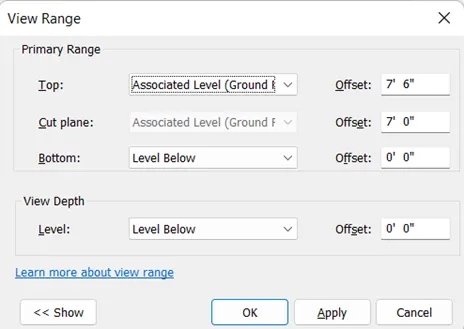
- In the floor plan
- Type VR command
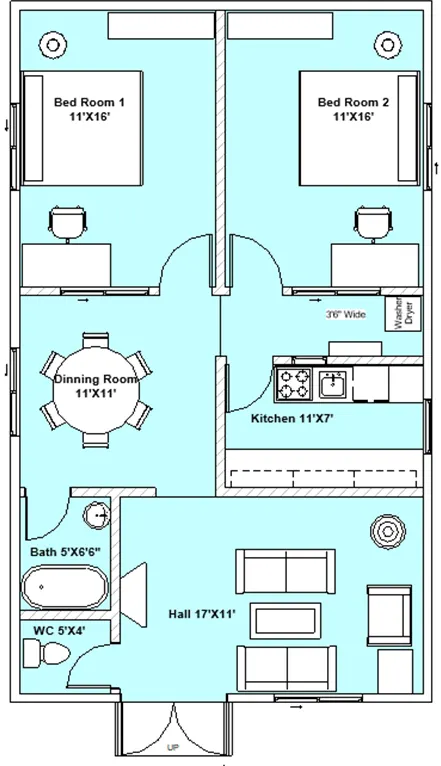
- In appeared dialog box we can changed the levels or offset for increase or decrease the view range
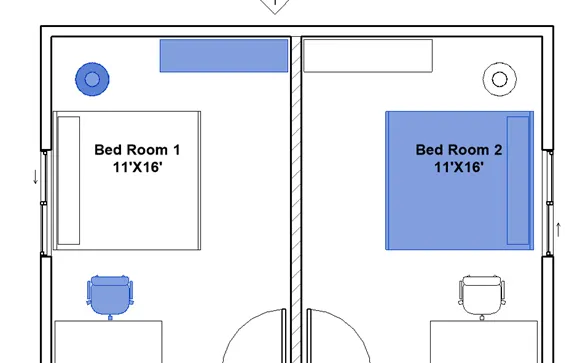
F) RESELECT (CTRL<)
- In the floor plan
- Type ctrl and left arrow key (<) command
- Reselected all the previously selected item
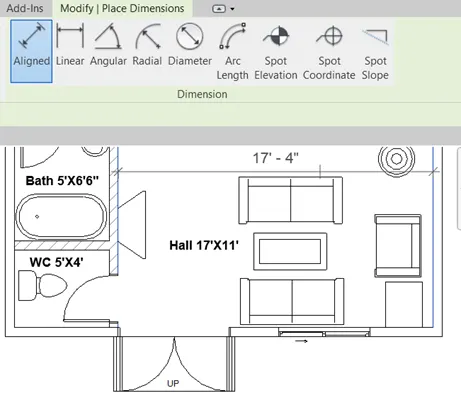
G) ANNOTATION (DI)
- In the floor plan
- Type DI command
- Annotation tab will open and active aligned dimension
- We can choose any dimension after activating the annotation tool
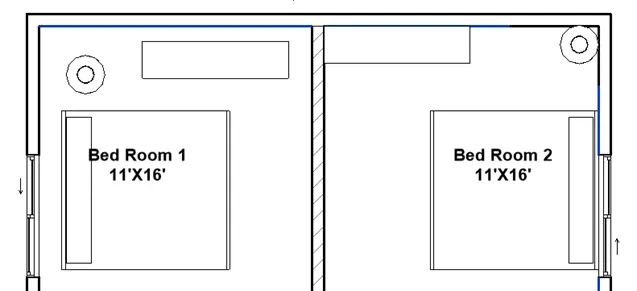
H) ALIGN (AL)
- In the floor plan
- Type AL command
- First select base line then select element to align
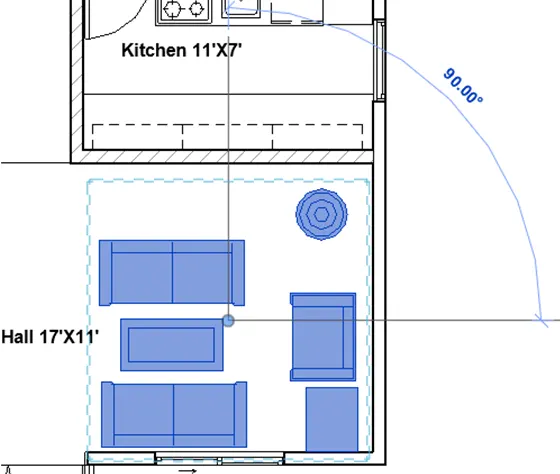
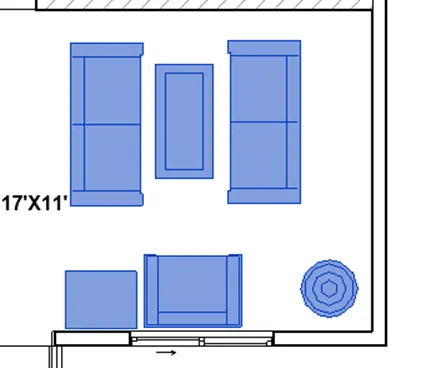
I) ROTATE(RO)
- In the floor plan
- Type RO command
- Select item to be rotate
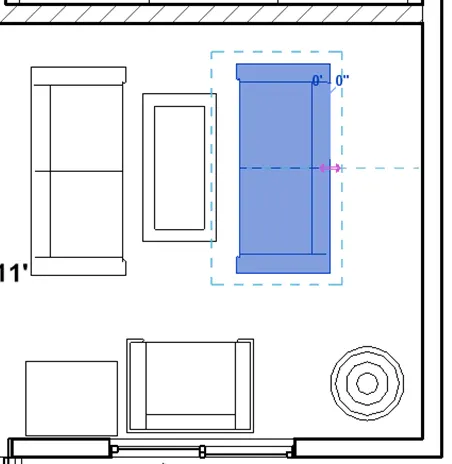
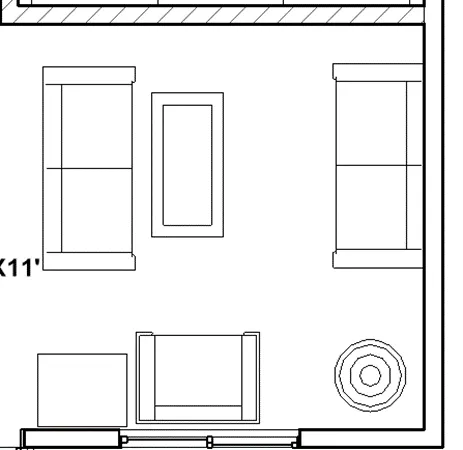
J) MOVE(MV)
- In the floor plan
- Type MV command
- Select the element to be move
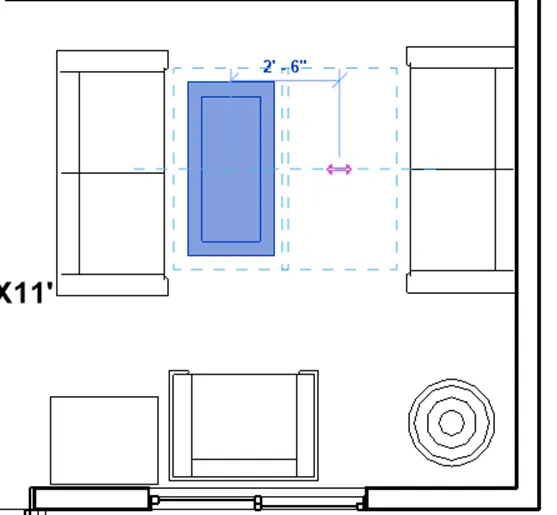
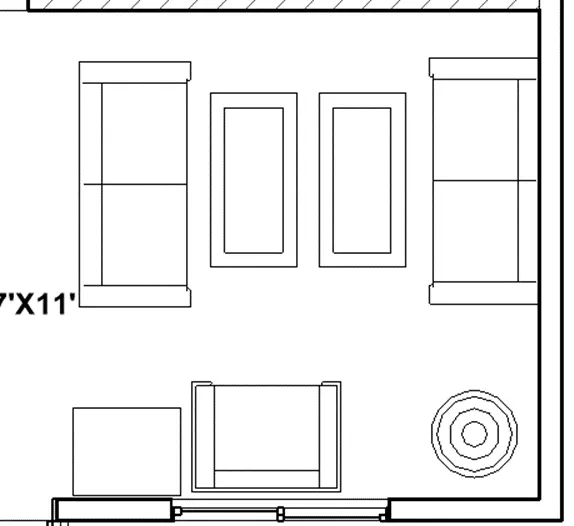
K) COPY (CO)
- In the floor plan
- Type CO command
- Select the element to be copy
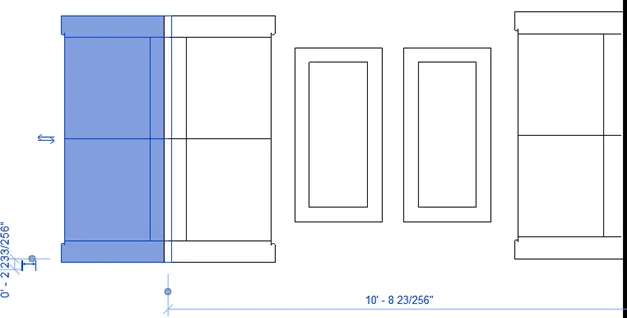
L) MIRROR(MM)
- In the floor plan
- Type MM command
- Select the element then press enter and choose axis to be mirror
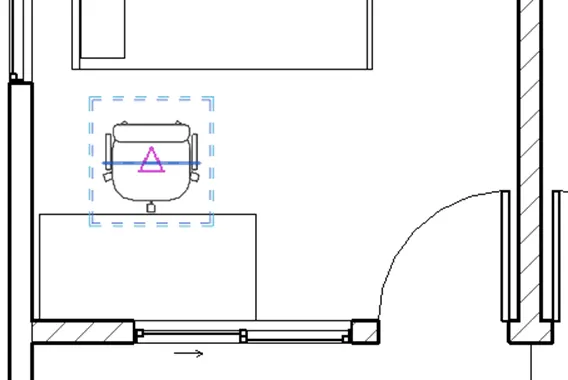
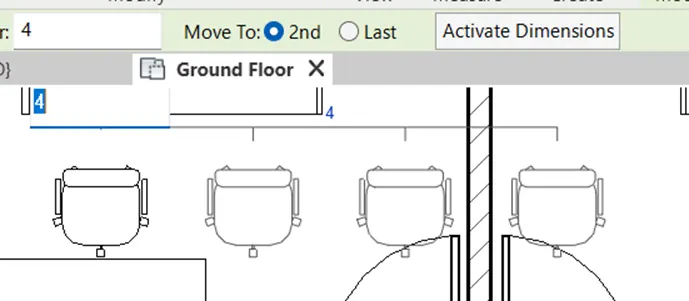
M) ARRAY(AR)
- In the floor plan
- Type AR command
- Select the element to be array> enter
- In ribbon modify tab will be appear provide the number of copies
- Pick the point of the element, move desired side to make array of element
RESULT:
modified or created the elements by using shortcut keys.
2A)
- Walls
- Doors
- Windows
- Material – Concrete/Wood
AIM:
In the question we have to create schedule for wall, door, window and material in previous week model 6 to 8
INTRODUCTION:
From week 6 to 8, I have worked on same project so that I prepare only one building door window schedule
PROCEDURE:
STEP 1) OPEN MODEL
- Launch the Revit software
- Click on open and select previously created drawing as Arch_Residential
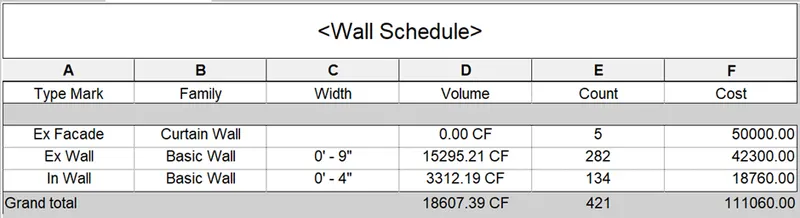
STEP 2) CREATE SCHEDULE FOR WALL
- Go to view tab drop down schedule and click on schedule/quantities
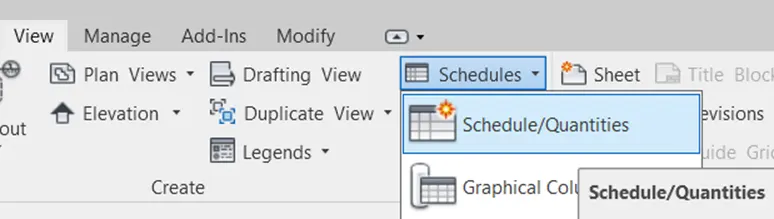
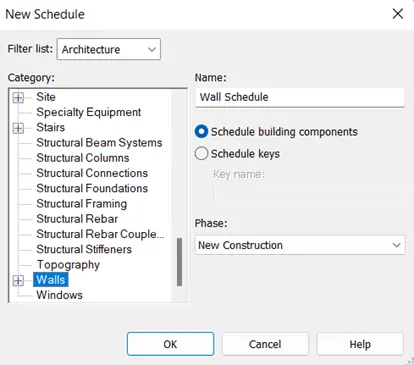
- Select wall from dialog box and click ok
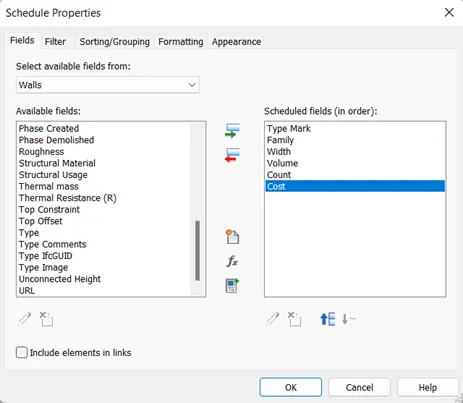
- Add required parameters in the list
- Arrange in order
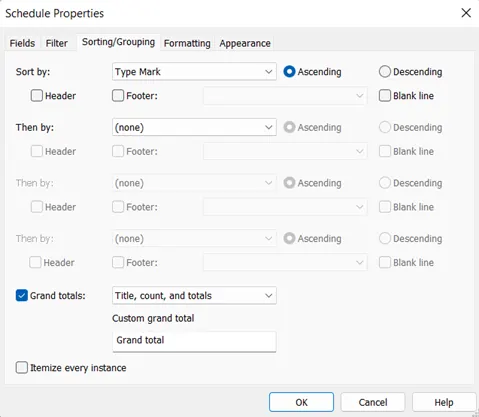
- In the dialog box go to shorting/grouping tab and change the settings
- After change the setting similar walls can not be shown multiple time in schedule
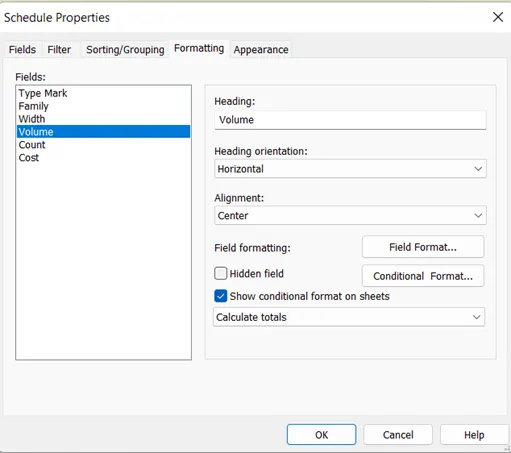
- In the dialog box go to formatting changed to calculate totals
- Similarly change for cost
- After change the setting wall schedule prepare
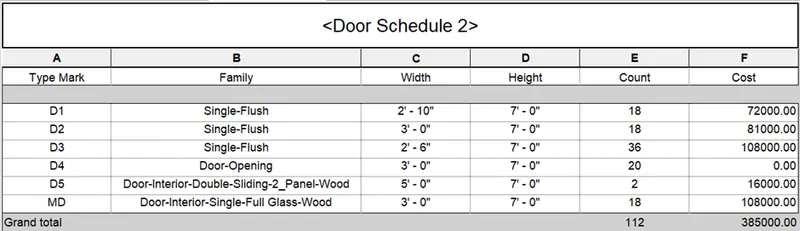
STEP 3) CREATE SCHEDULE FOR DOOR
- Similarly did all the setting for door
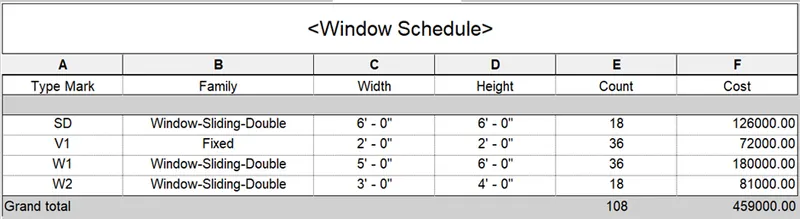
STEP 4) CREATE SCHEDULE FOR WINDOW
- Similarly did all the setting for window
STEP 5) CREATE SCHEDULE MATERIAL
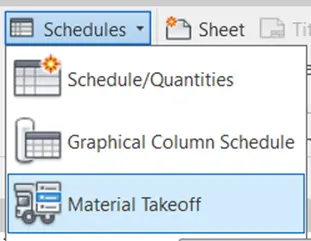
- Go to view tab drop down schedule and click on material takeoff
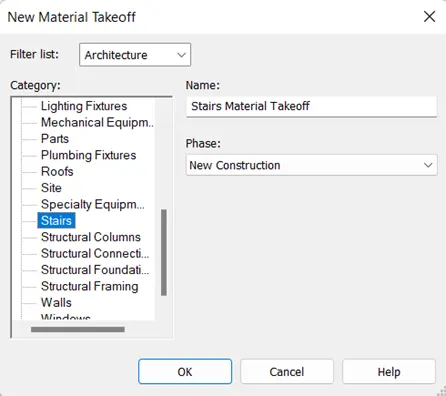
- Select stairs from dialog box and click ok
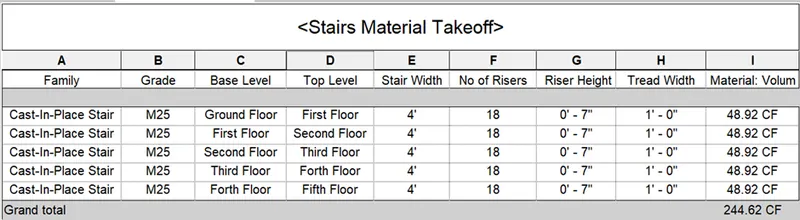
- Add required parameters in the list
- Arrange in order
RESULT:
Following the above procedure, we got the result of each task.
3A)
AIM:
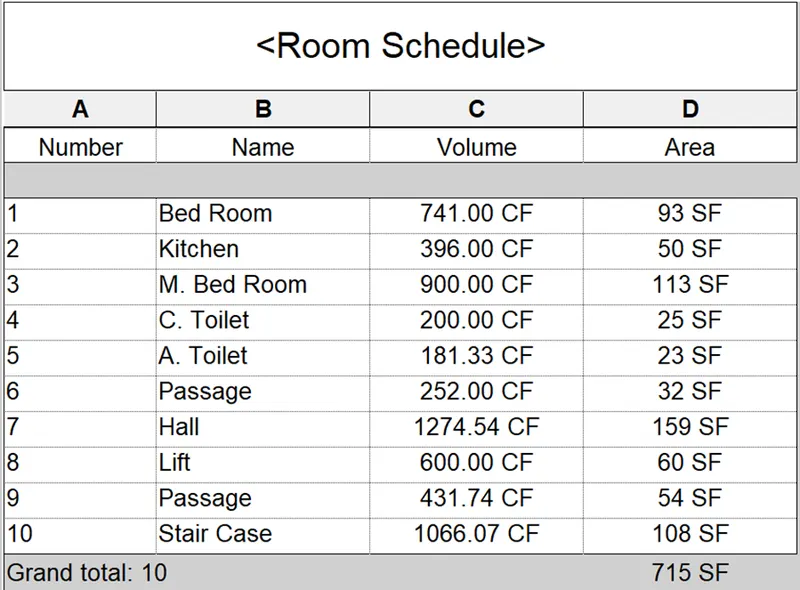
In the question we have to create schedule report for area and volume of each room
INTRODUCTION:
Calculate the area and volume of each room then provide room tags and prepare report schedule
PROCEDURE:
STEP 1) OPEN MODEL
- Launch the Revit software
- Click on open and select previously created drawing as Arch_Residential
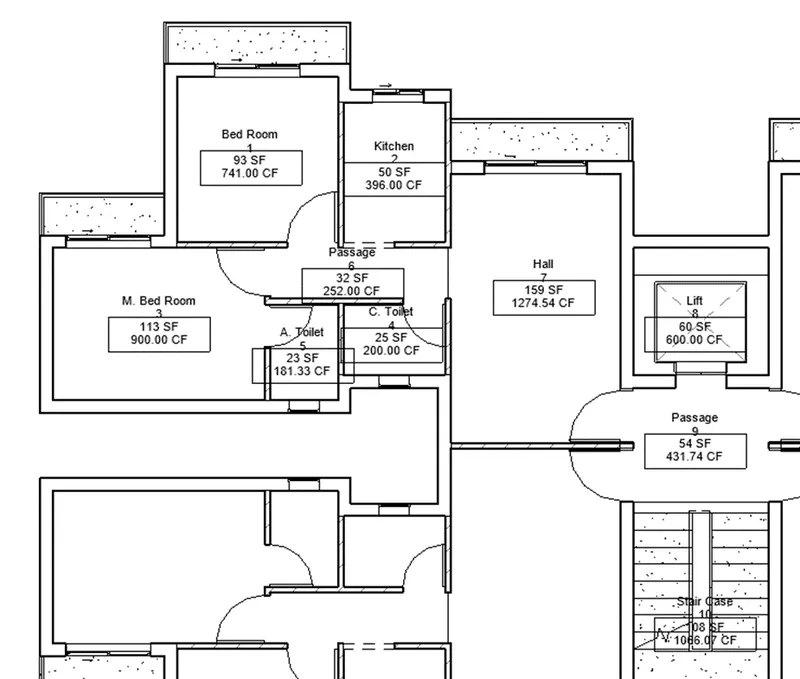
STEP 2) CALCULATE AREA AND VOLUME
- In the first-floor plan
- Go to architecture tab
- Select room under the room and area panel

- Click one by one in all rooms
- Used room separator to divide the hall with passage
- Edit the names of rooms accordingly
STEP 3) PREPARE SCHEDULE
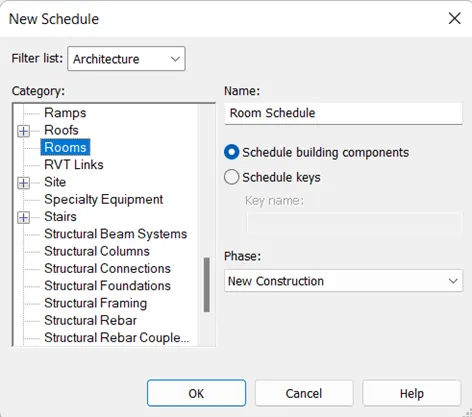
- Go to view tab drop down schedule and click on schedule/quantities
- Select rooms from dialog box and click ok
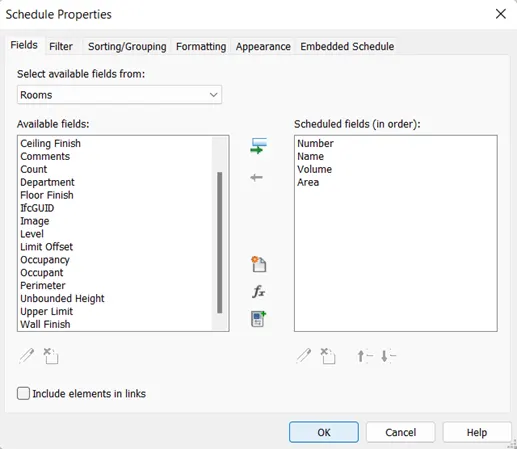
- Add required parameters in the list
- Arrange in order>OK
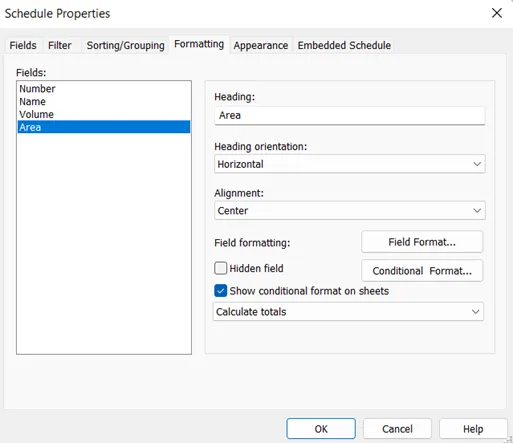
- From shorting/ grouping tab check on grand total for calculate the total area
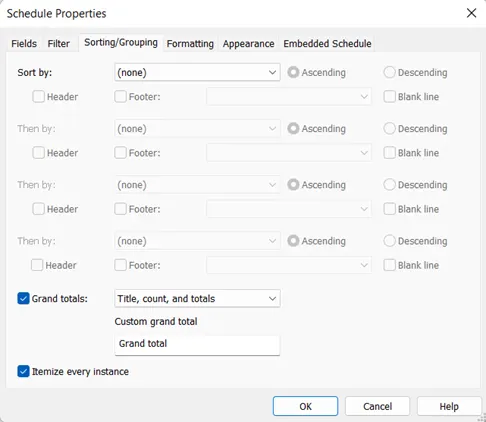
- For calculating total area of room select calculate totals from formatting tab for area only
RESULT:
Following above procedure, we got the result of area and volume of each room with appropriate tag and prepare room schedule
4A)
AIM:
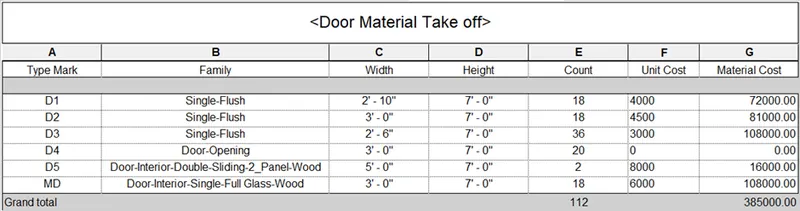
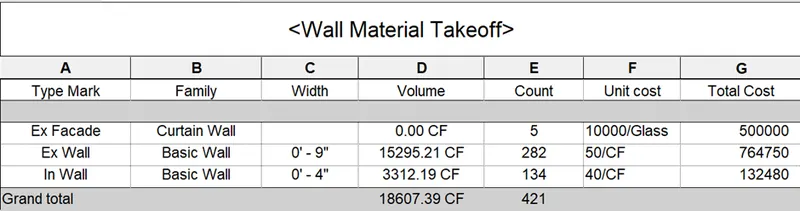
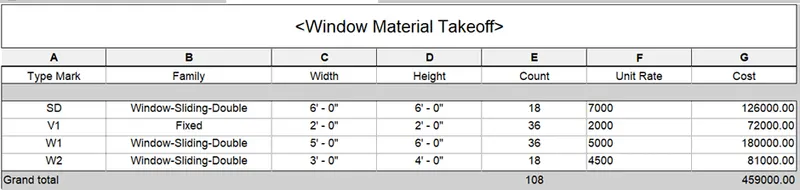
In the question we have to create same schedule for material and prepare total cost of material
INTRODUCTION:
By using unit rate of material through internet prepared total cost of material individually
PROCEDURE:
STEP 1) OPEN MODEL
- Launch the Revit software
- Click on open and select previously created drawing as Arch_Residential
STEP 2) TOTAL COST OF MATERIAL
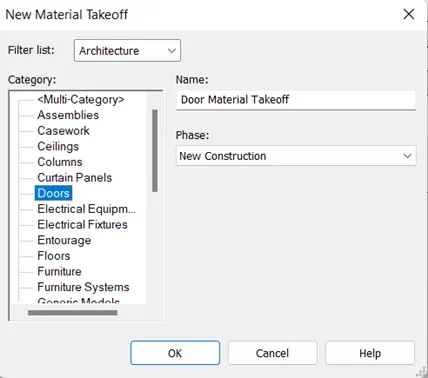
- Go to view tab drop down schedule and click on Material takeoff
- Select Door from dialog box and click ok
- Add required parameters in the list
- Created material take off schedule
- Similarly created other material take-off schedule
RESULT:
Following the above procedure, we got the result of total cost of material and prepared schedule individually.
5A)
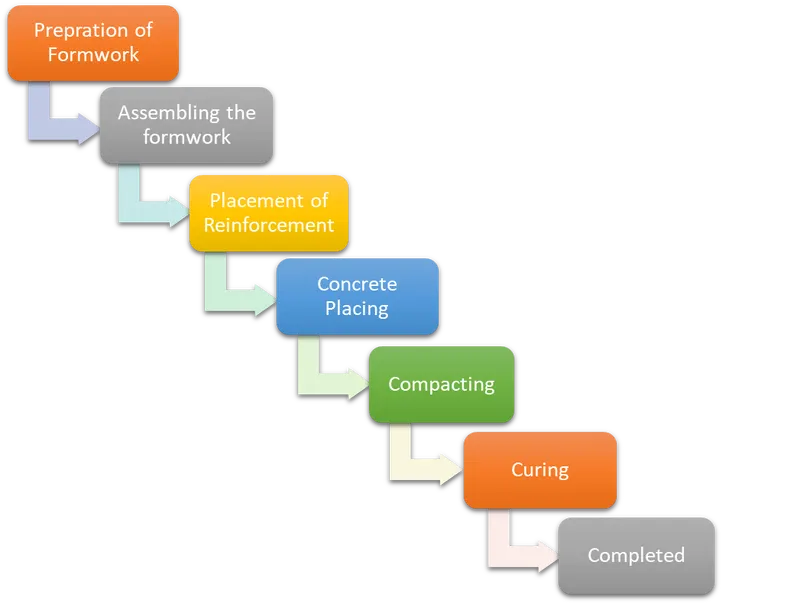
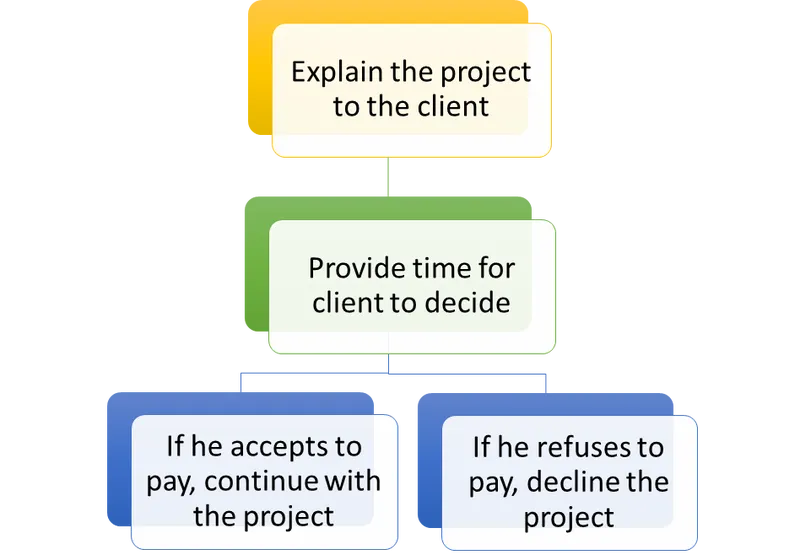
AS per discussed in class, I have listed the flow chart for below scenario:
a) How to decide framings for a structure using Dynamo
b) If there is no water coming from the pipes

c) If request for money from client has been declined for the project
6A)
a)The parameter associated with wall are listed
Type
Model
Volume
Material
Thickness
Function
cost
b)The parameter associated with floor are listed
Material
Function
Finish
Mark
Model
Cost
thickness
c) The parameter associated with door are listed
Type
Mark
Material
Function
Width
Height
Cost
The parameter associated with window are listed
Type
Mark
Material
Function
Length
Width
Height
Cost
e) The parameter associated with table are listed
Model
Function
Length
Width
Height
Cost
material
f) The parameter associated with building are listed
Grids
Levels
Area
Length
Width
Height
Family
Geographic
Material
Functional
Aesthetics
sustainability
safety