Preparing Schedule & Cost Estimation for a building using REVIT
ASSIGNMENT NO 9
- Use the shortcut keys in REVIT discussed in class to complete the following tasks and list them below –
Using 3D model create a section box
To create similar doors and windows in a floor plan layout
To reduce the thickness of lines visible in a plan view
To apply override settings to a floor in a model section view
To increase a range of visibility in a plan view
To select the previously selected items
To add annotations to the model views
To bring the model elements in line
To rotate the model elements
To move an object to another locations
To copy a model elements
To mirror an elements about an axis
To create an array of model elements
Ans –
REVIT -
The REVIT program is used for the creation of three dimensional models, views, details and construction documents for architectural projects.
In order to really know what REVIT is, it helps to understand the larger models of BIM (Building information modeling).
REVIT structure is BIM software solutions for structural engineering companies, and structural engineers.
That provides a feature rich tool set helping to drive efficient design processes in BIM environment.
REVIT is allows for entire buildings or parts of building to be modeled and worked on, which is very useful for all parties involved in construction project.
Using REVIT modeling as a part of BIM process eases the creation of 3D renders, 3D perspective detailed drawings and walkthrough.
Now a days, REVIT is most essential software in civil industry and many companies are using this software.
Aim –
To use the shortcut keys in REVIT and complete the following tasks.
Procedure –
Open REVIT software.
First we have to create a section box.
Open last assignment 3D model.
1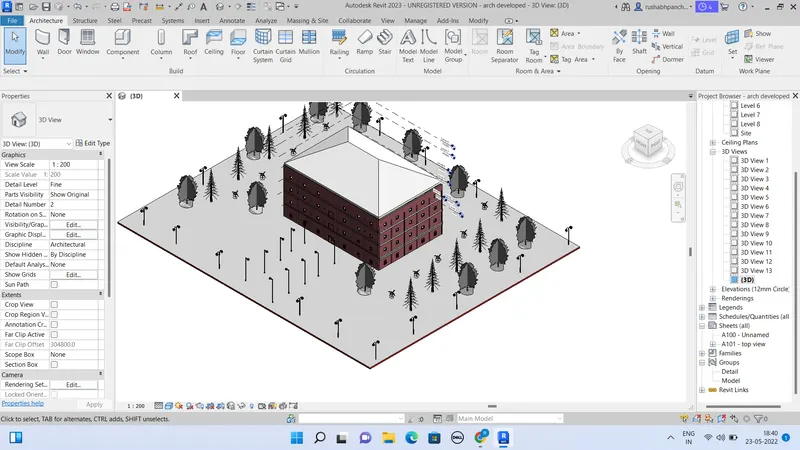
The shortcut key for the section box is BX.
Type BX and automatically, section box will create around the 3D model.
2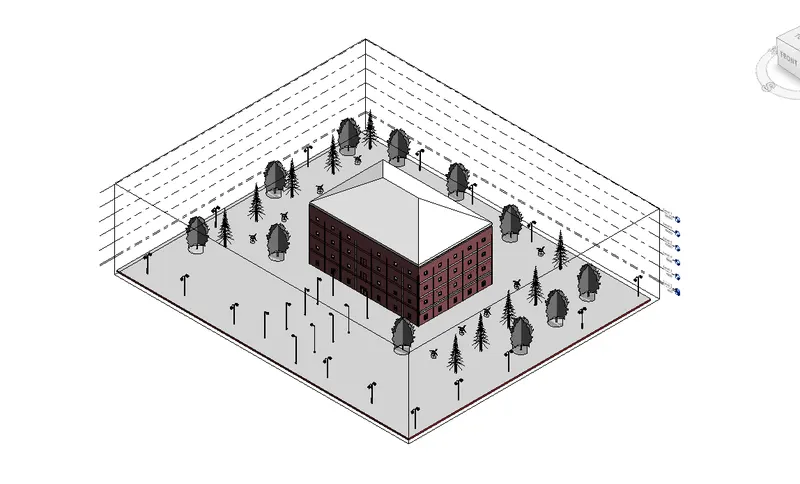
In the project browser on the left side, just scroll down.
There will be an option of section box.
3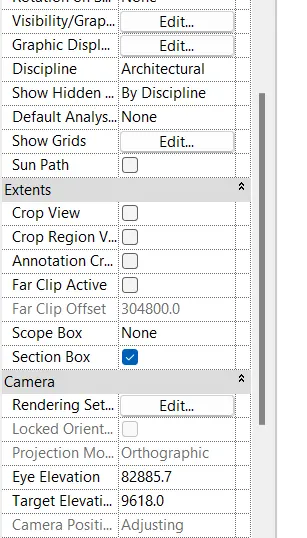
You can remove section box by using that browser.
If you want to create a section box for any part of the drawing.
Then, select that part and press BX.
The section box around that part will appear.
4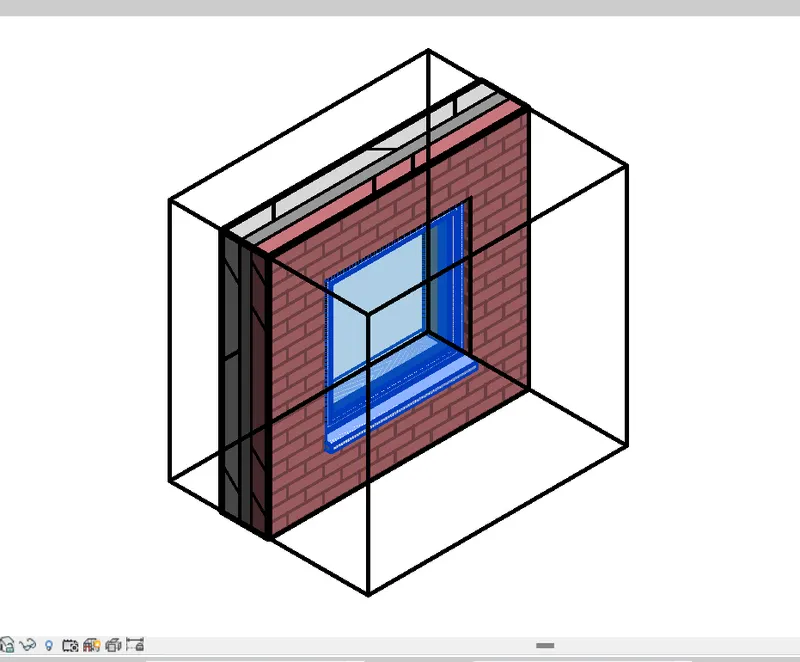
Select that part, in project browser the details will appear.
5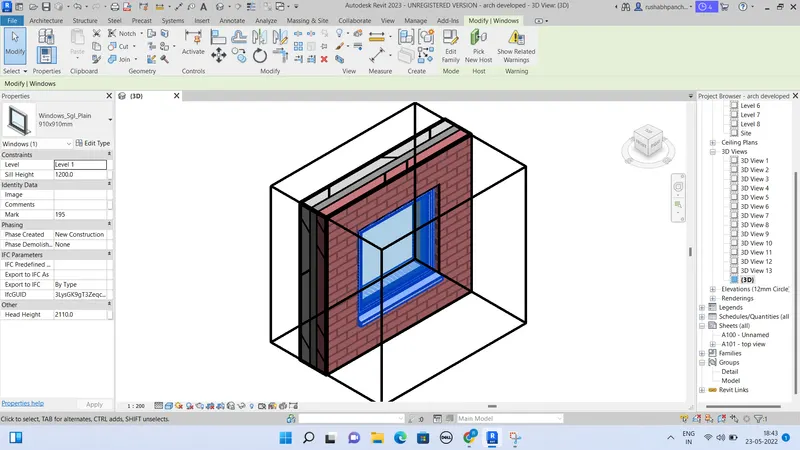
Now, we have to create similar doors and windows.
All the doors and windows are same in this design.
So now, we can create similar furniture.
The shortcut key for creation of similar component is CS.
Select a furniture.
6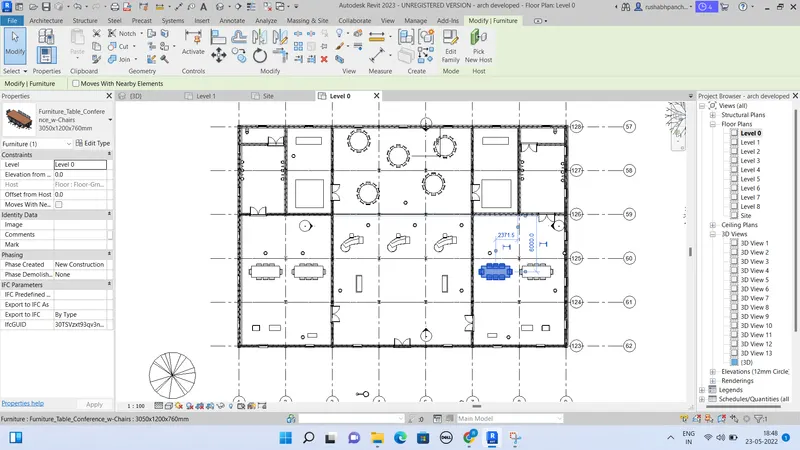
Type CS and place the similar components to the respective site.
7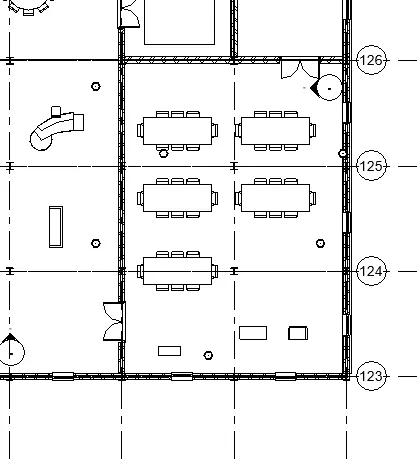
Now, we have to reduce the thickness of lines.
Select the wall.
8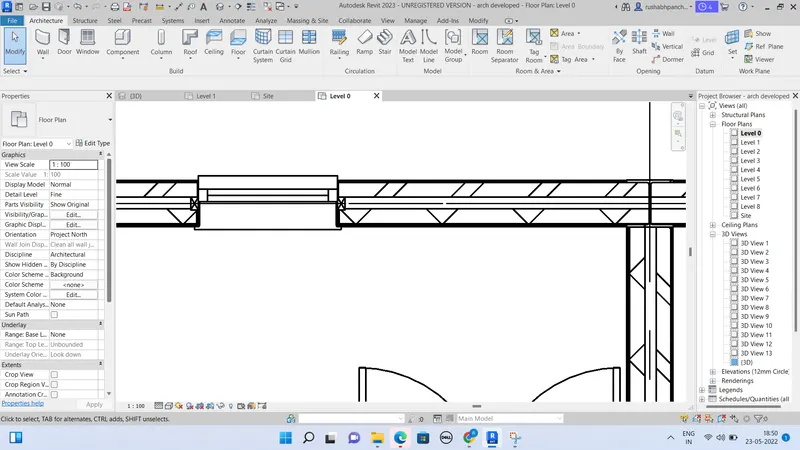
The short cut key for the reducing the thickness is TL.
Type TL and the thickness will reduce.
9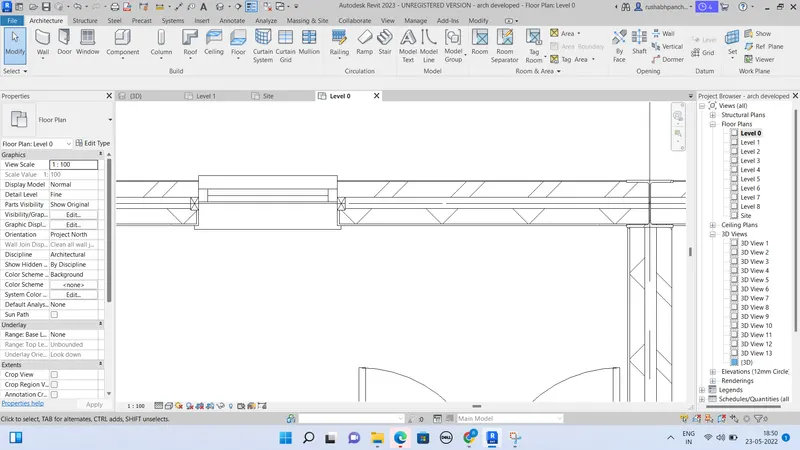
Now, we have to apply override setting to a floor plan.
EOD is the shortcut key for override.
Type VG, that is visibility graphics.
10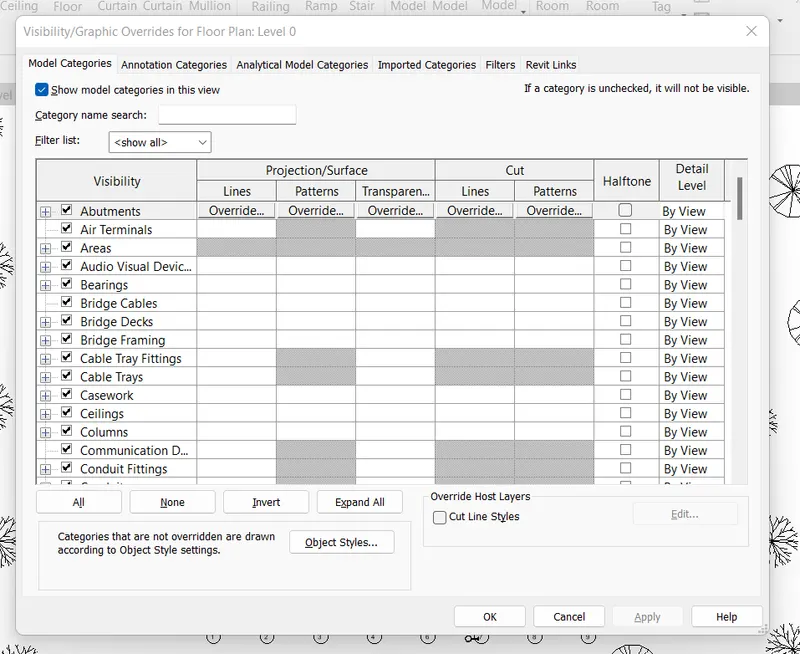
There will be an option called override.
11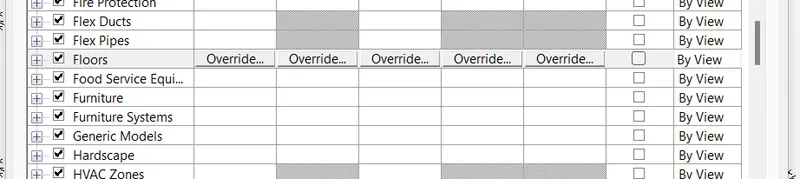
Click on the override, the dialogue box will appear.
12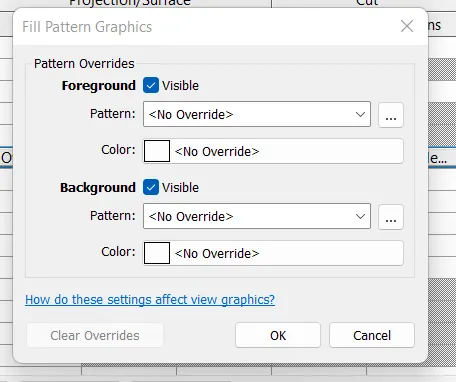
Click on the pattern, the different types of patterns will appear on screen.
13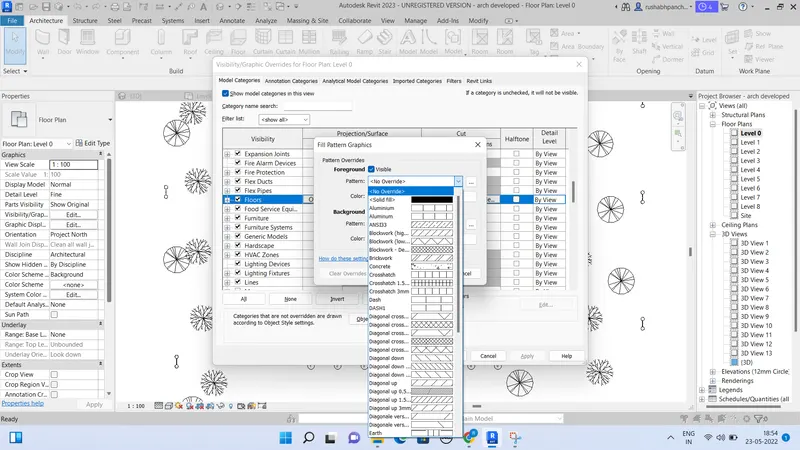
Select the pattern and also change the colour.
14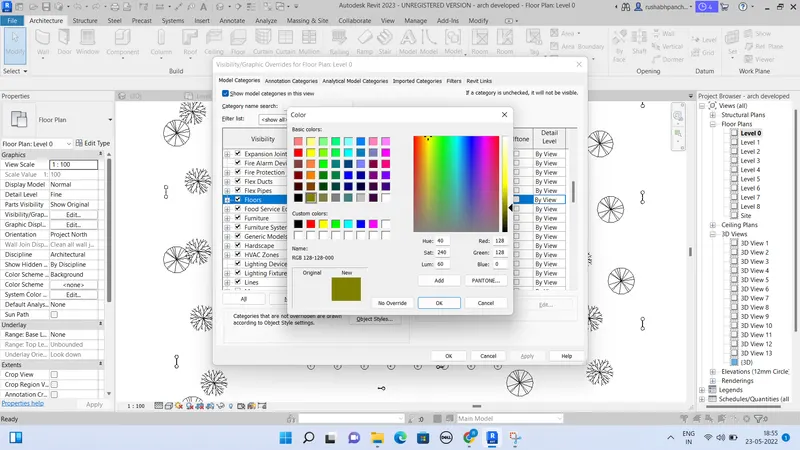
Now, we have to increase the range of visibility in the plan view.
VR is the shortcut key for visibility range.
Type VR and the dialogue box will appear.
15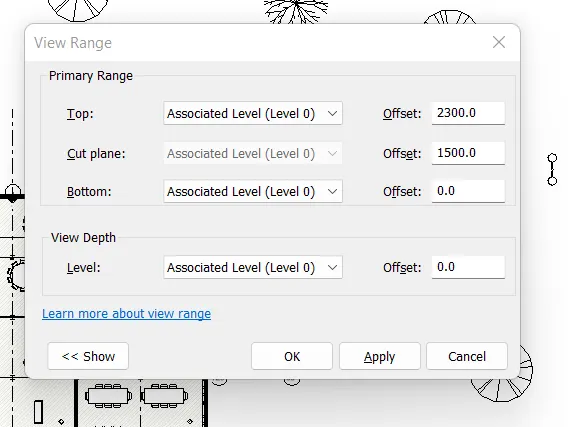
You can change the view range from this box setting.
Now, we have to select the previously selected items.
The shortcut key to select the previously selected items is CONT + < ( control + left arrow key ).
Now, we have to give annotations to project.
The short cut key for annotations is DI.
Type DI in the screen.
16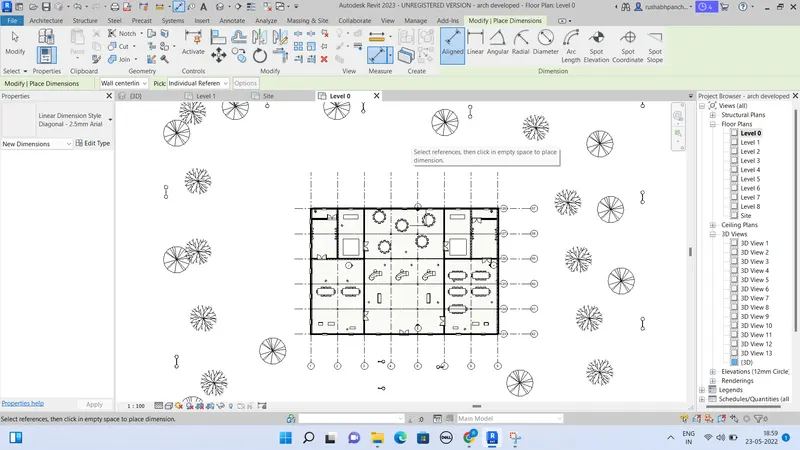
Click on the aligned.
And give the dimensions to wall.
17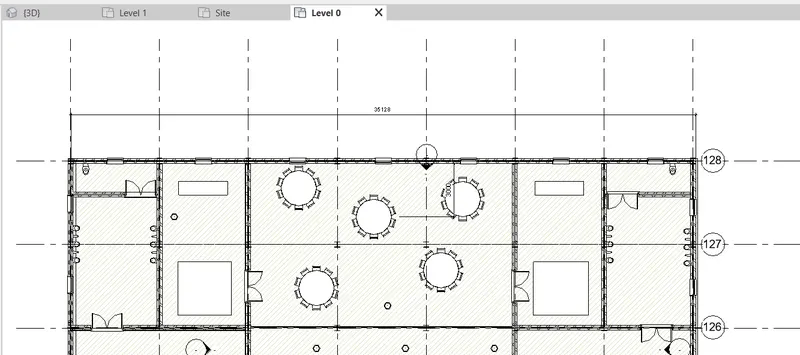
Now, we have to use aligned option.
The shortcut key for the aligned option is AL.
Create a small floor in the plan.
Select that floor.
18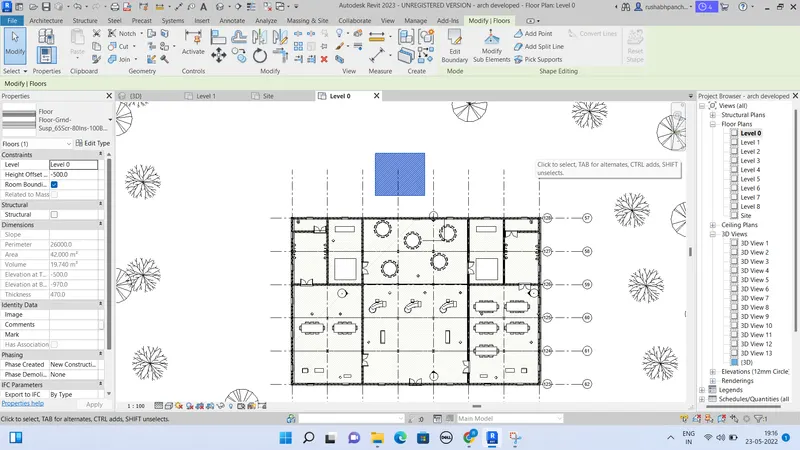
Type AL for aligned option.
And align that floor to the mail floor.
19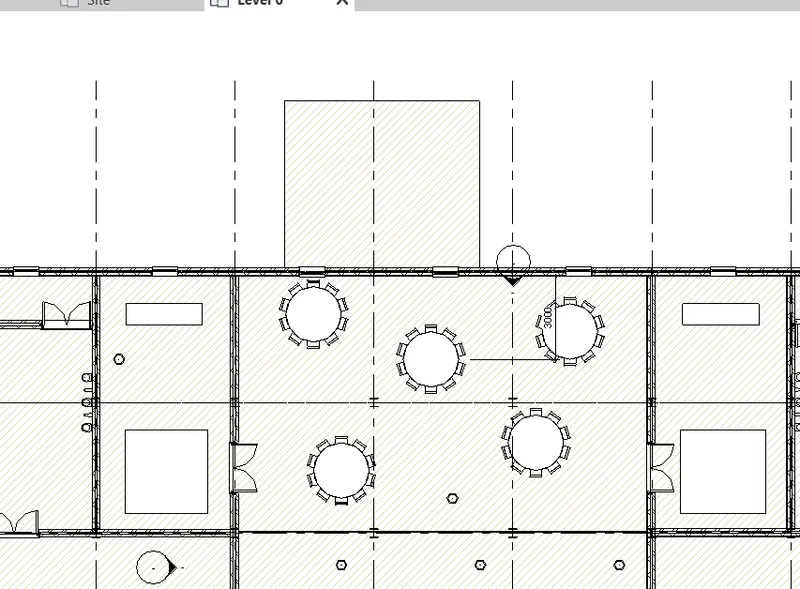
Now, we have to rotate the element.
The short cut key for rotate is RO.
Select the element.
20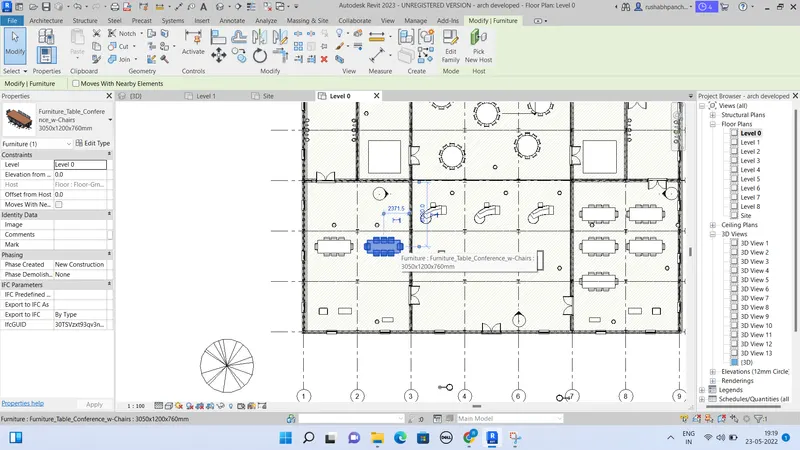
Type RO.
The rotation angle will shown to you.
21
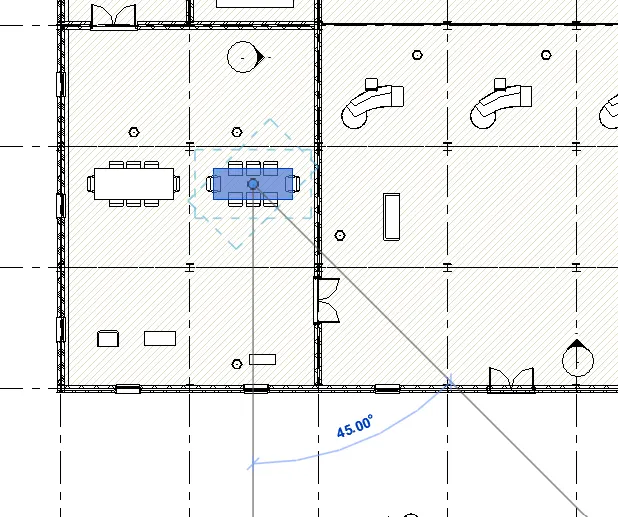
Take 90 degree option.
22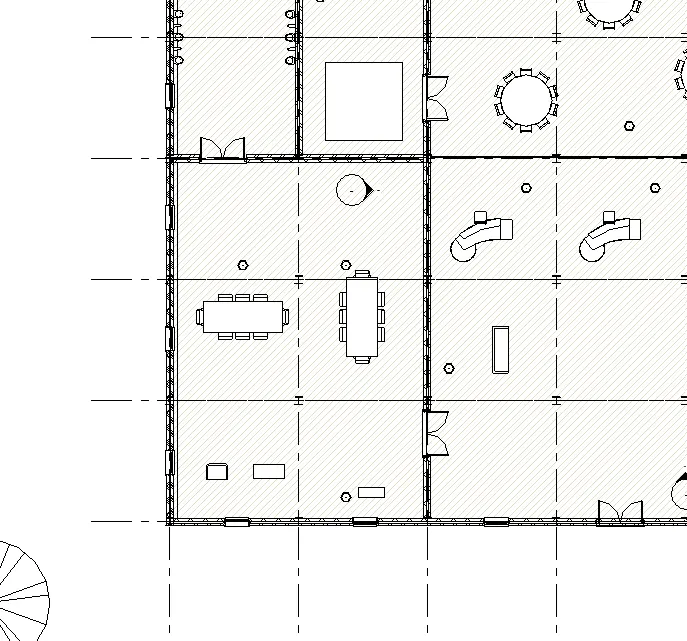
Now, we have to move an object to another location.
The shortcut key for move is MV.
Select an object.
23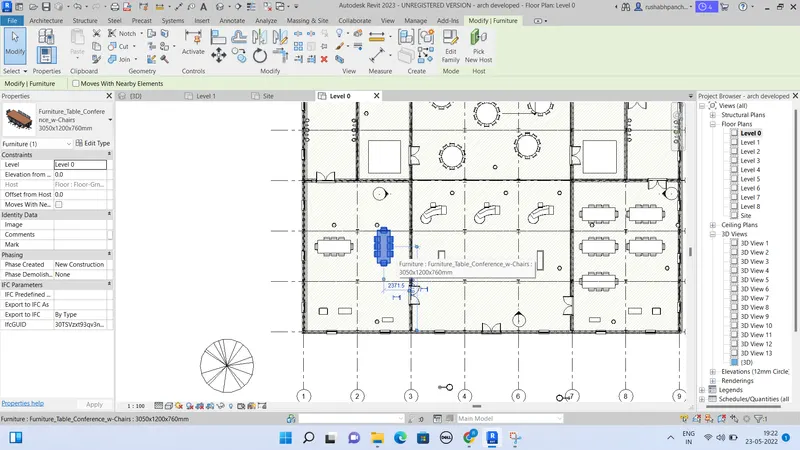
Type MV.
24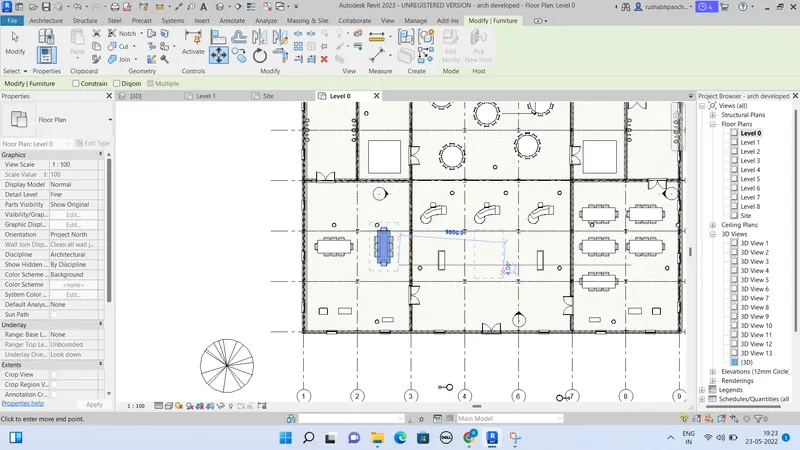
Place the object.
25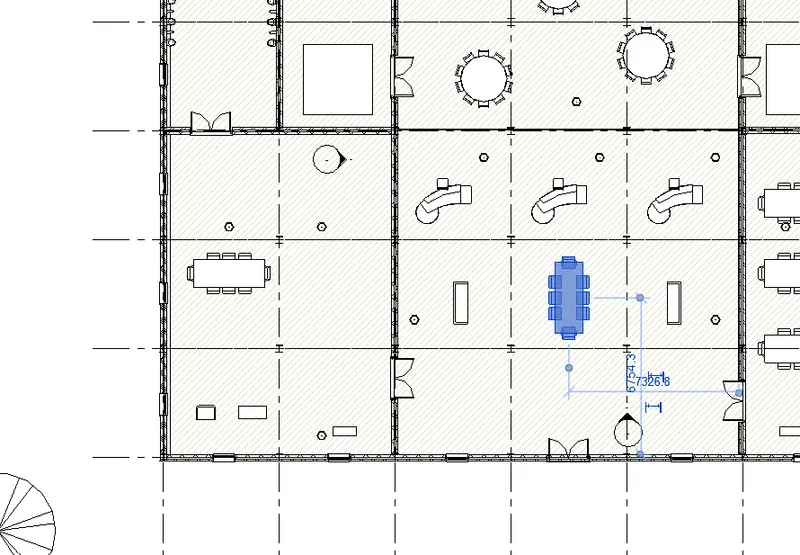
Now, we have to copy an element.
The shortcut key of copy is CO.
Select an object.
28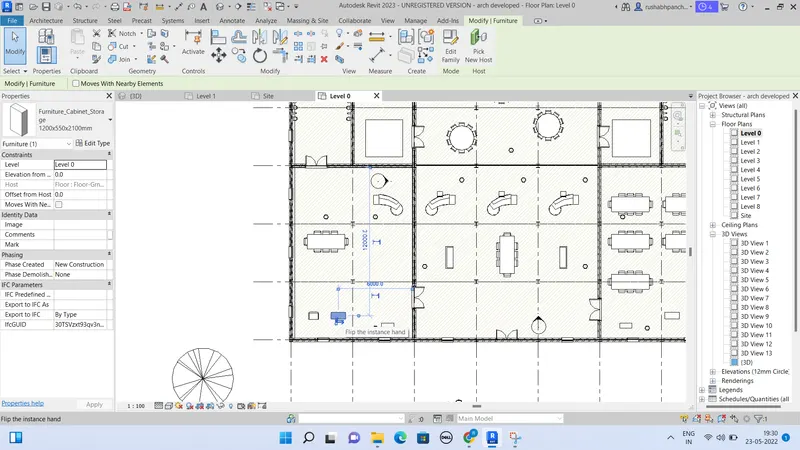
Type CO.
29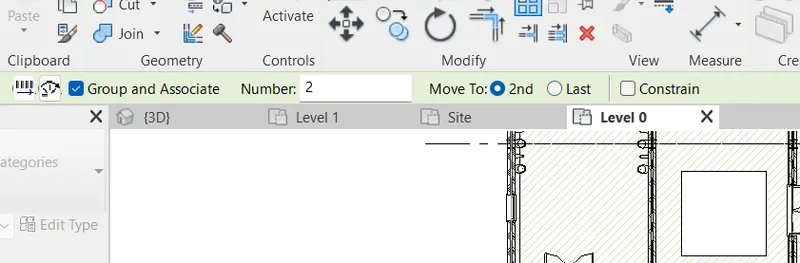
And copy the element.
30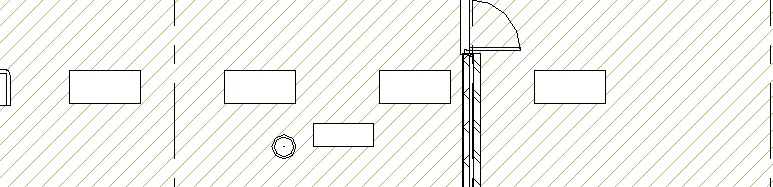
Now, we have to mirror the element.
The shortcut key for mirror is MM.
Select an object.
26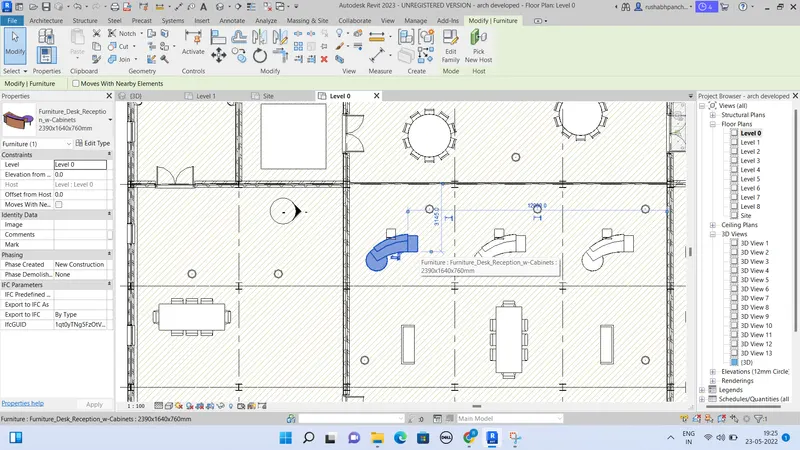
Type MM.
Select the axis and create mirror.
27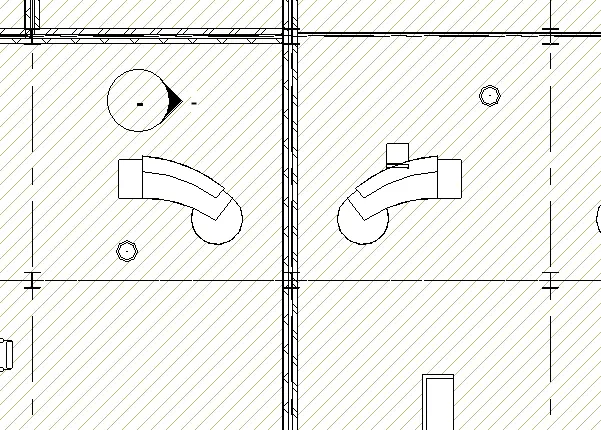
Now, we have to create an array.
The shortcut key for array is AR.
Select the element.
28
Type AR.
Select the no 4.
29
Create 4 arrays.
30
Result –
By using the shortcut keys, all the tasks has been completed.
- Using REVIT and the project used from week 6 to 8 prepare a schedule for the following
Walls
Doors
Windows
Material – concrete/wood
Ans –
REVIT -
The REVIT program is used for the creation of three dimensional models, views, details and construction documents for architectural projects.
In order to really know what REVIT is, it helps to understand the larger models of BIM (Building information modeling).
REVIT structure is BIM software solutions for structural engineering companies, and structural engineers.
That provides a feature rich tool set helping to drive efficient design processes in BIM environment.
REVIT is allows for entire buildings or parts of building to be modeled and worked on, which is very useful for all parties involved in construction project.
Using REVIT modeling as a part of BIM process eases the creation of 3D renders, 3D perspective detailed drawings and walkthrough.
Now a days, REVIT is most essential software in civil industry and many companies are using this software.
Aim –
To prepare a schedule for the walls, windows and doors.
Procedure –
Open REVIT software.
Open last assignment project.
Creation of wall schedule -
Go to view tab and there will be an option called schedule.
31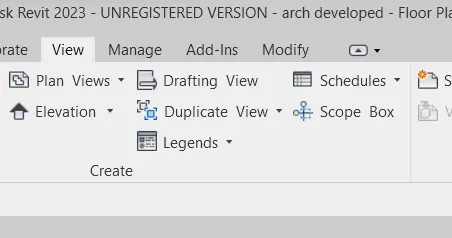
Click on schedule and select schedule/quantities.
The dialogue box will appear.
32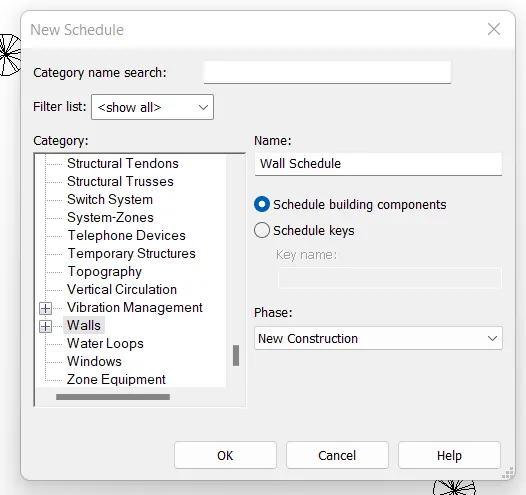
Select wall schedule and press ok.
The new dialogue box will appear.
33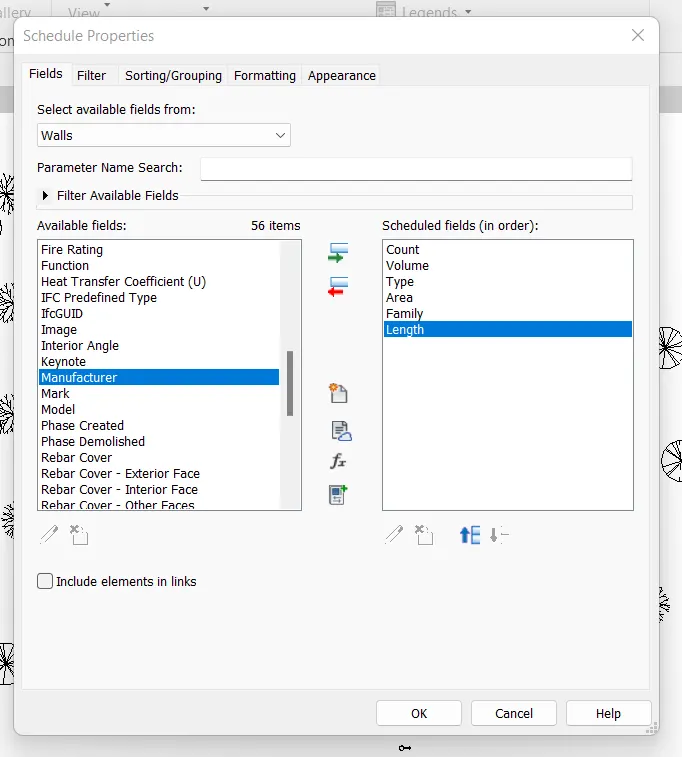
We have to transfer the fields to the schedule field.
Select count, volume, area, type, family and length.
Press ok.
The wall schedule will created.
34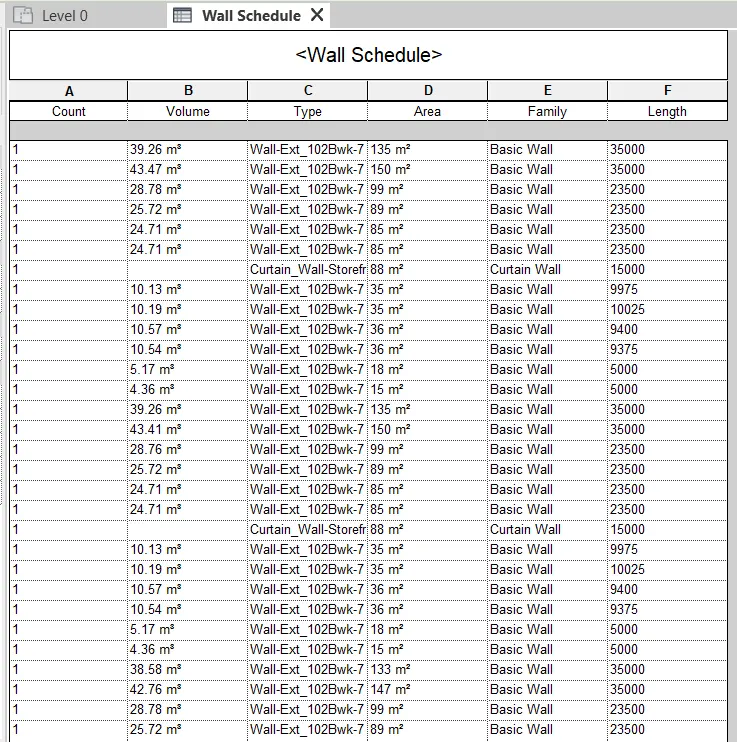
35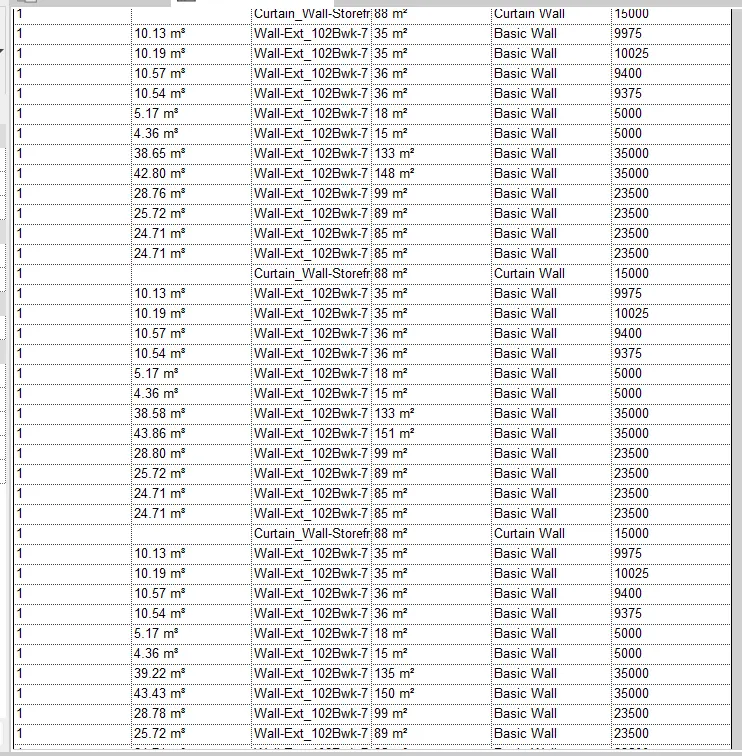
36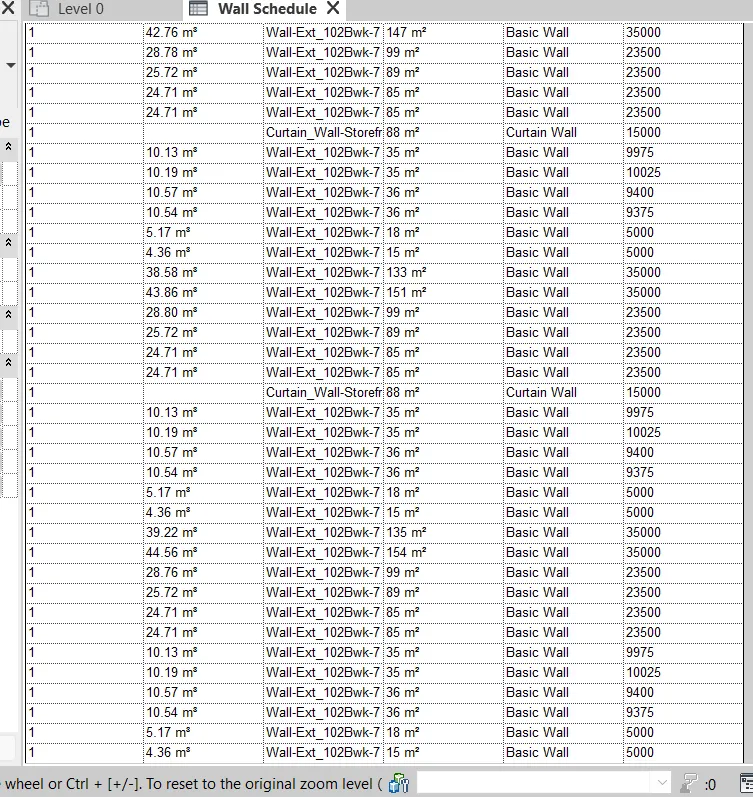
Creation of door schedule –
Go to view tab and there will be an option called schedule.
37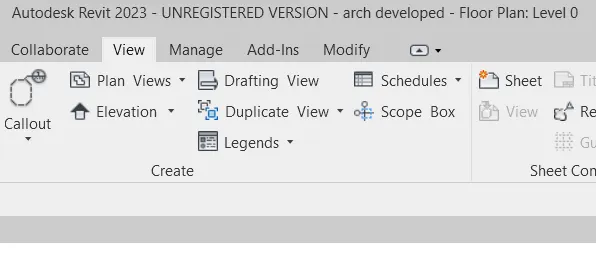
Click on schedule and select schedule/quantities.
The dialogue box will appear.
38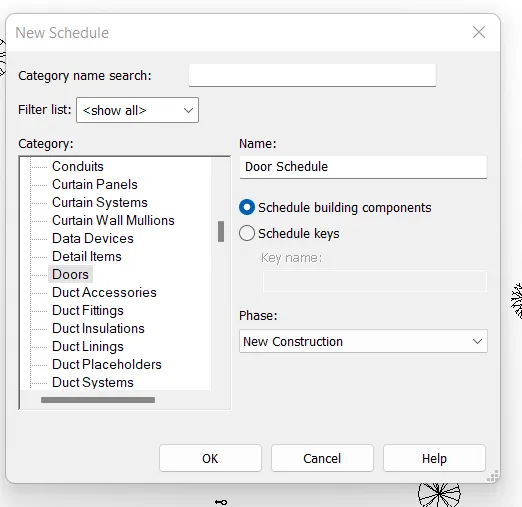
Select door schedule and press ok.
The new dialogue box will appear.
39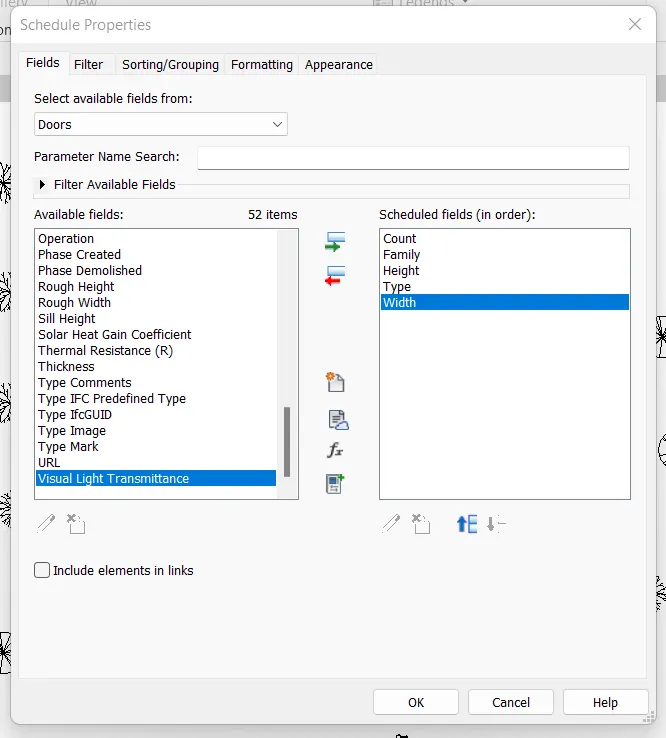
We have to transfer the fields to the schedule field.
Select count, height, type, family and width.
Press ok.
The door schedule will created.
40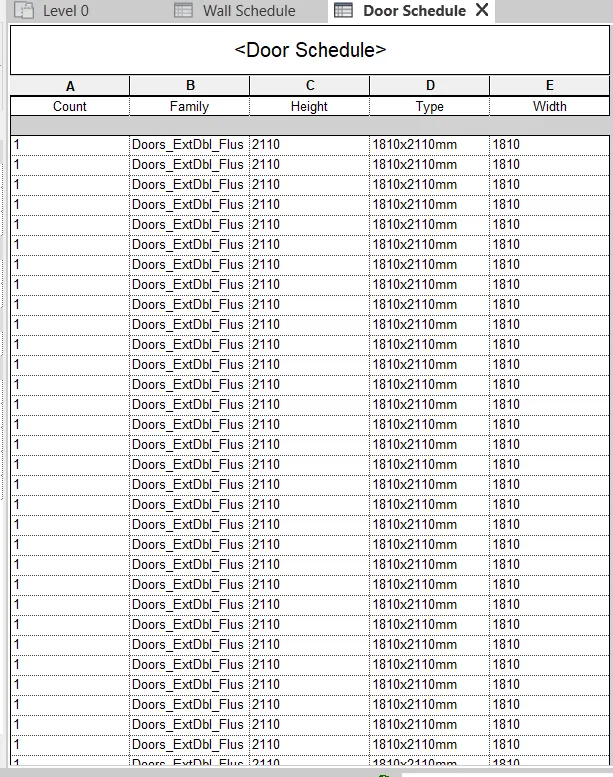
41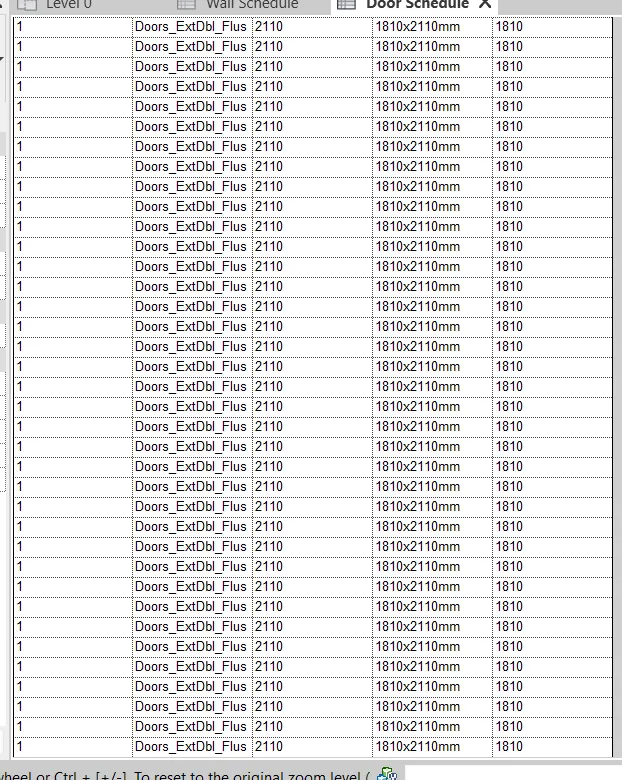
Creation of window schedule –
Go to view tab and there will be an option called schedule.
Click on schedule and select schedule/quantities.
The dialogue box will appear.
42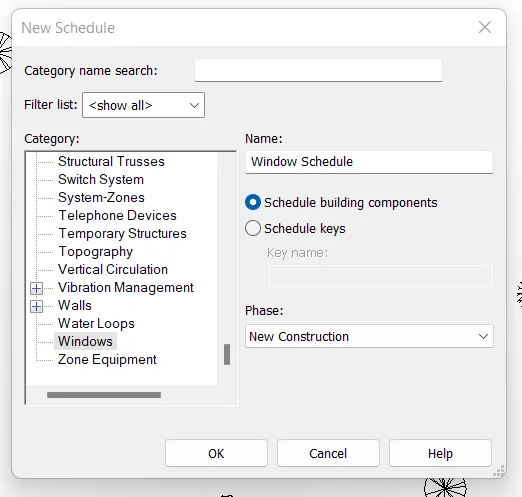
Select window schedule and press ok.
The new dialogue box will appear.
43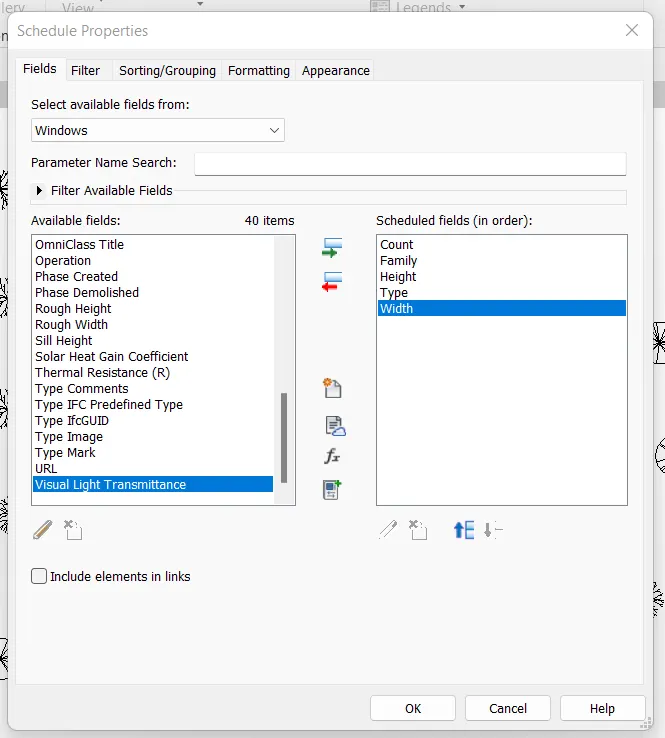
We have to transfer the fields to the schedule field.
Select count, height, type, family and width.
Press ok.
The window schedule will created.
44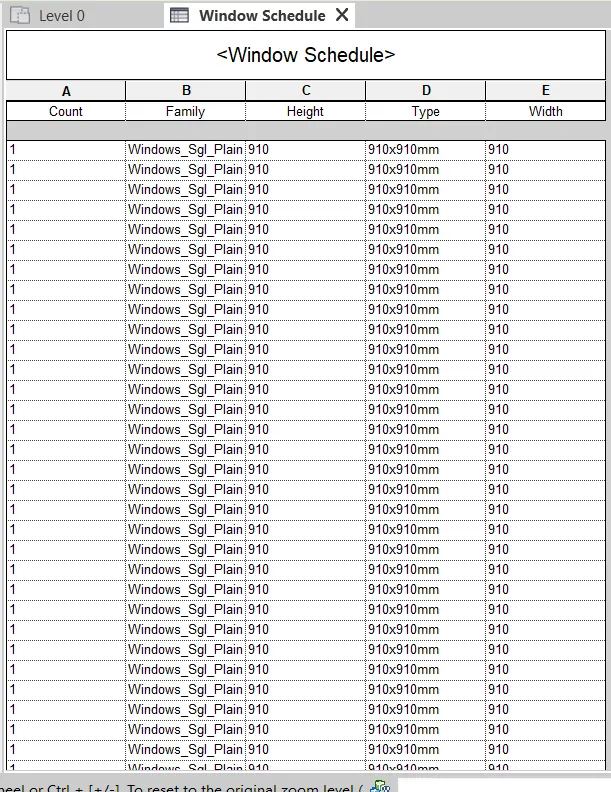
45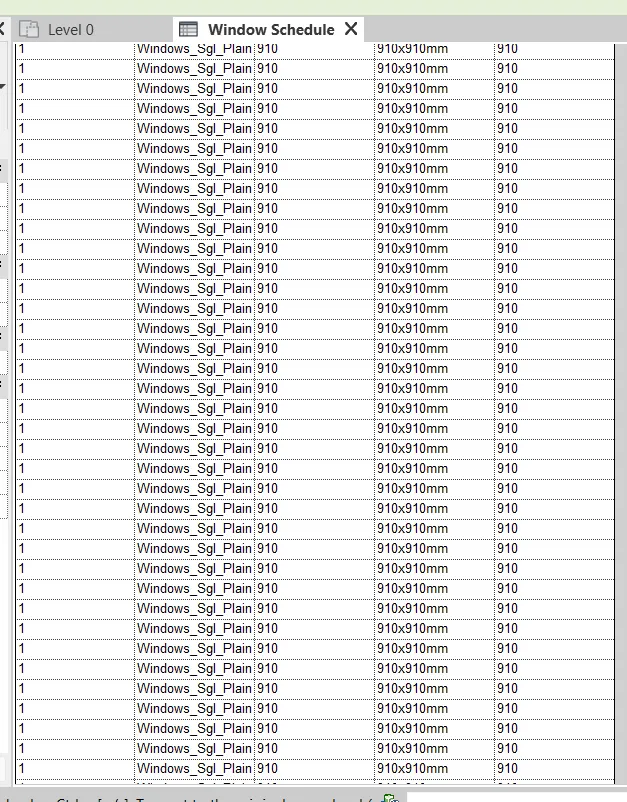
46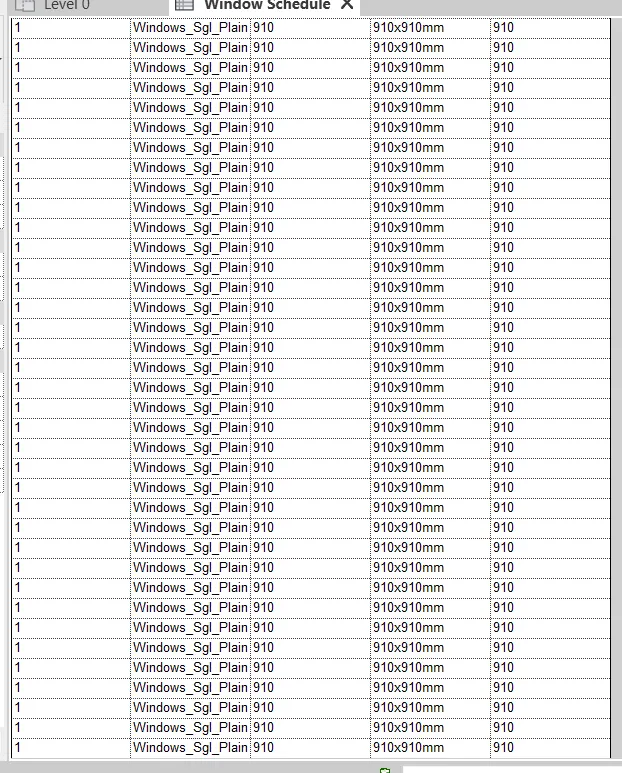
Creation of material schedule –
Open REVIT software.
Open last assignment drawing.
Go to view tab.
Click on the schedule and select the material takeoff.
47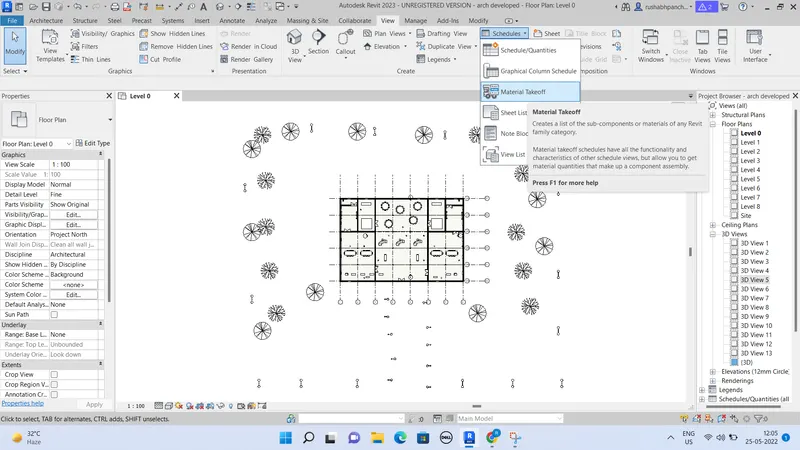
The dialogue box will appear.
Select the floor material takeoff.
48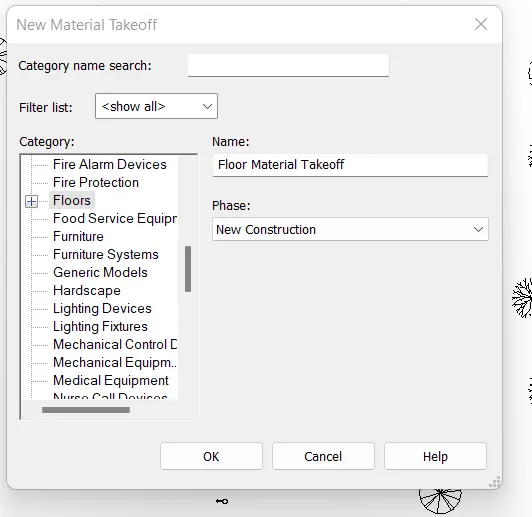
Select area, count, model and volume.
Press ok.
The material schedule will appear.
49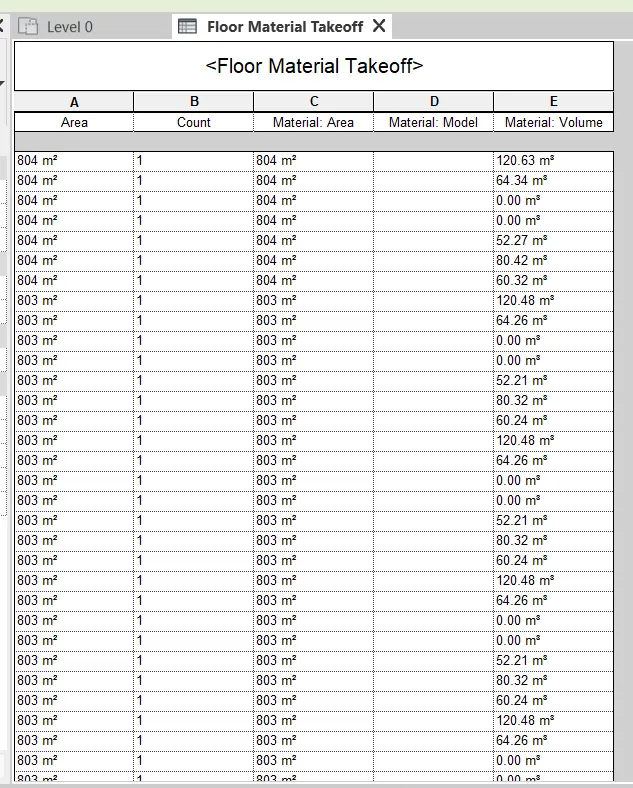
50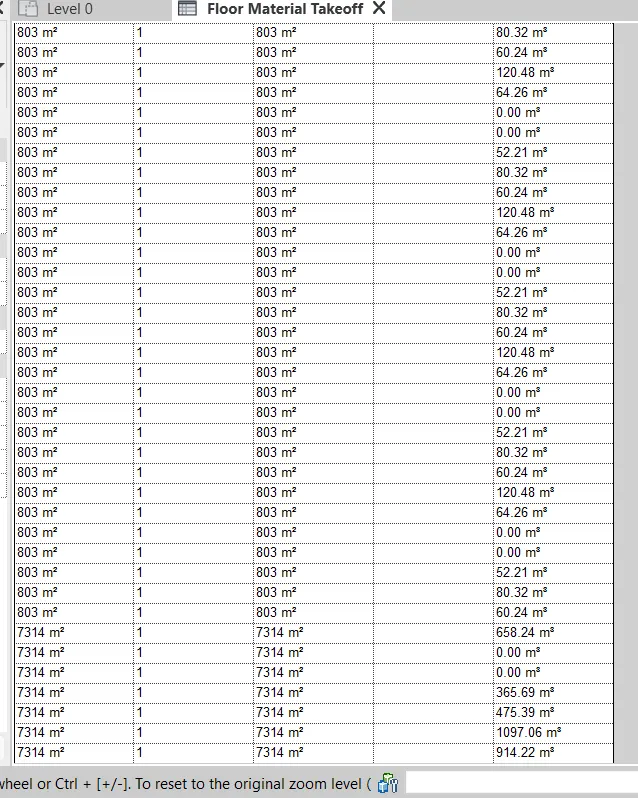
Result –
34
40
44, 49
- Using REVIT calculate area and volume of each room in the model with appropriate room tags applied to each room. Prepare a schedule report for each area and volume for each room.
Ans –
REVIT -
The REVIT program is used for the creation of three dimensional models, views, details and construction documents for architectural projects.
In order to really know what REVIT is, it helps to understand the larger models of BIM (Building information modeling).
REVIT structure is BIM software solutions for structural engineering companies, and structural engineers.
That provides a feature rich tool set helping to drive efficient design processes in BIM environment.
REVIT is allows for entire buildings or parts of building to be modeled and worked on, which is very useful for all parties involved in construction project.
Using REVIT modeling as a part of BIM process eases the creation of 3D renders, 3D perspective detailed drawings and walkthrough.
Now a days, REVIT is most essential software in civil industry and many companies are using this software.
Aim –
To prepare a schedule report for area and volume of each room.
Procedure –
Open REVIT software.
Open last assignment.
Go to view tab.
Open schedule option.
Select room schedule.
51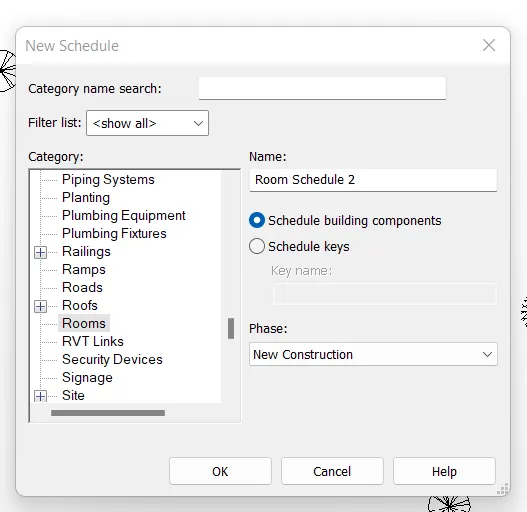
Transfer fields like area, count, name, number and volume in schedule fields.
52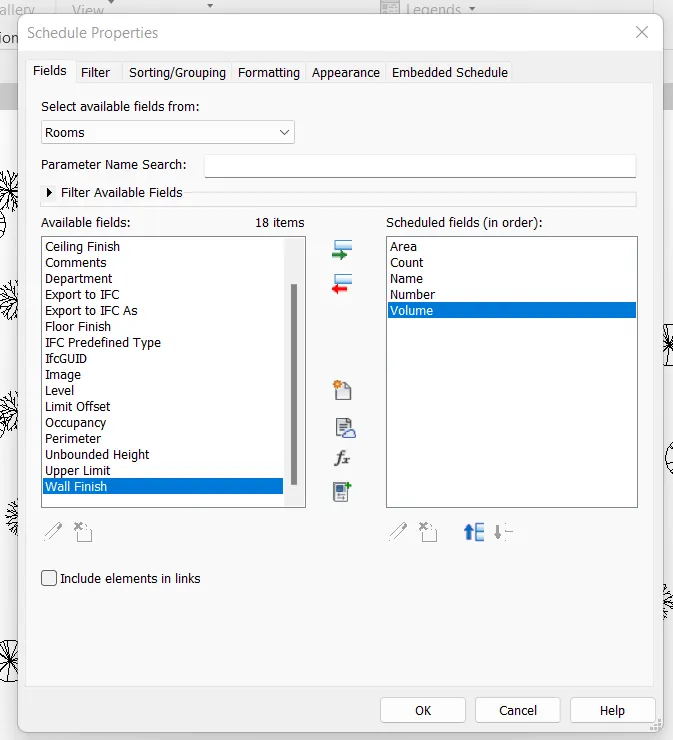
First, we have to give the tags to all the rooms.
Go to modify and create rooms and give tag on placement.
54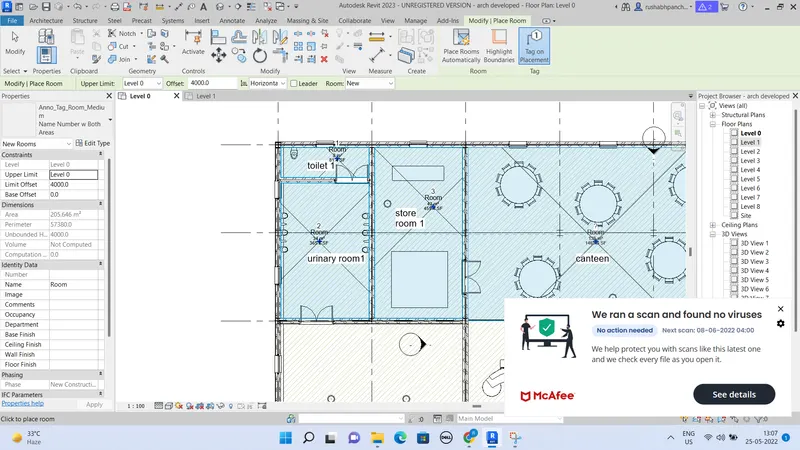
Select all rooms and give name to them.
55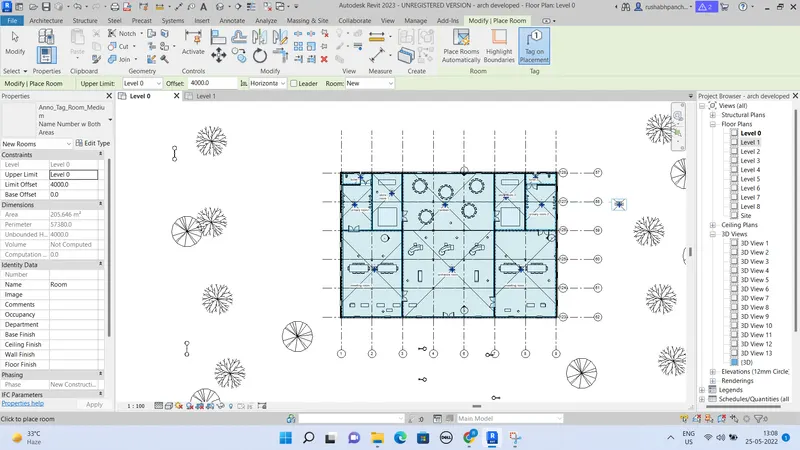
53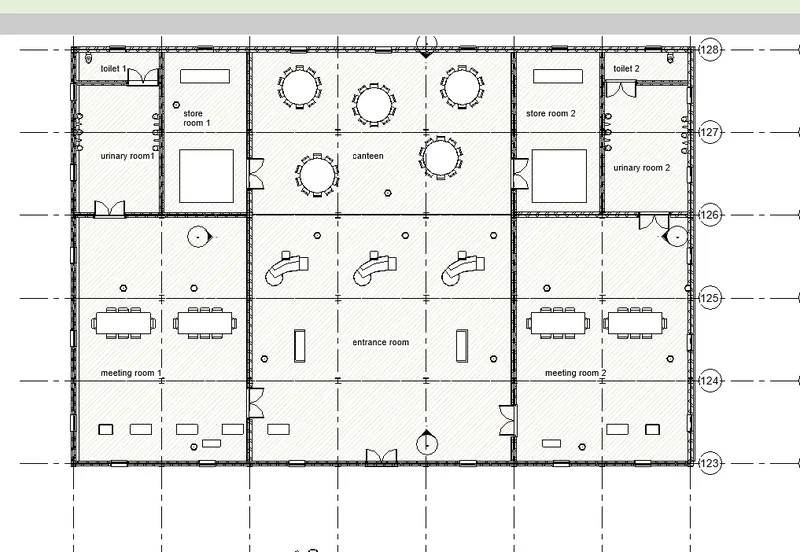
After tagging, create schedule file.
Result –
56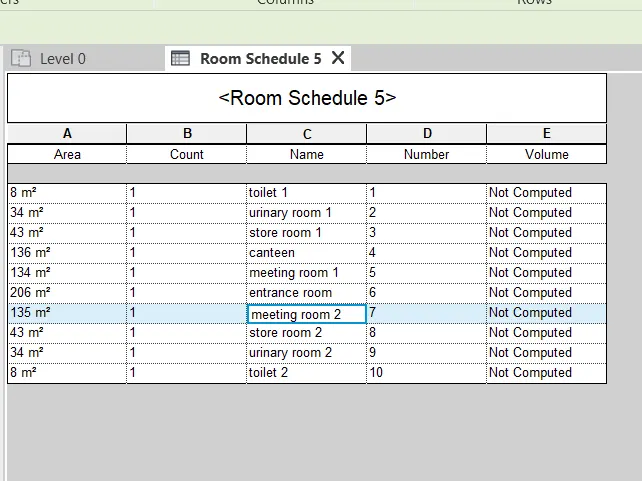
- Using the same schedule use the unit cost rate for materials available in the internet. Prepare total cost of materials used in the project
Total cost of materials
Individual material takeoff.
Ans –
REVIT -
The REVIT program is used for the creation of three dimensional models, views, details and construction documents for architectural projects.
In order to really know what REVIT is, it helps to understand the larger models of BIM (Building information modeling).
REVIT structure is BIM software solutions for structural engineering companies, and structural engineers.
That provides a feature rich tool set helping to drive efficient design processes in BIM environment.
REVIT is allows for entire buildings or parts of building to be modeled and worked on, which is very useful for all parties involved in construction project.
Using REVIT modeling as a part of BIM process eases the creation of 3D renders, 3D perspective detailed drawings and walkthrough.
Now a days, REVIT is most essential software in civil industry and many companies are using this software.
Aim –
To prepare a schedule which includes total cost of material used in project.
Procedure –
Open REVIT software.
Open last assignment.
Select a wall from the plan.
There will be a project browser at left side.
57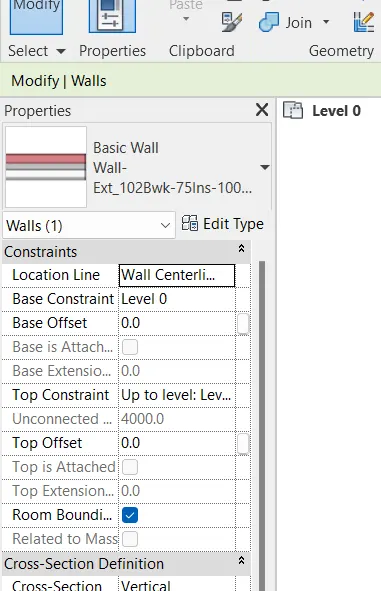
Click on edit type.
There will be an option called cost.
Enter an amount of Rs 50 in section.
58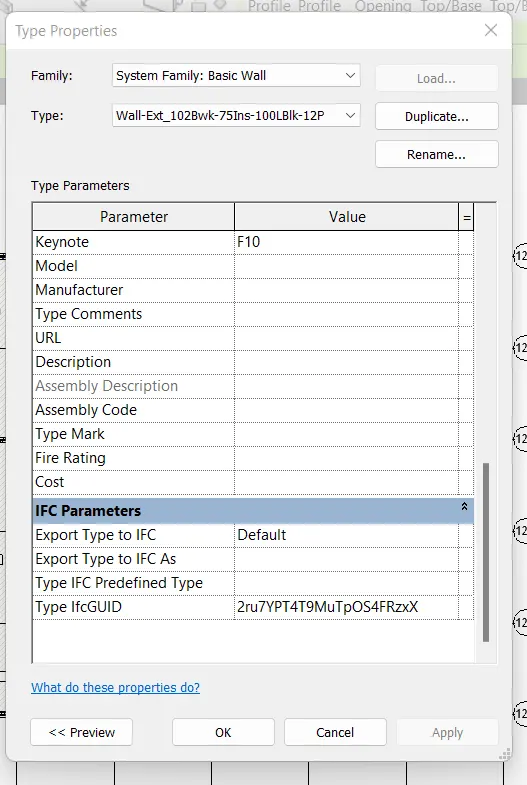
Now, open an option called material takeoff.
59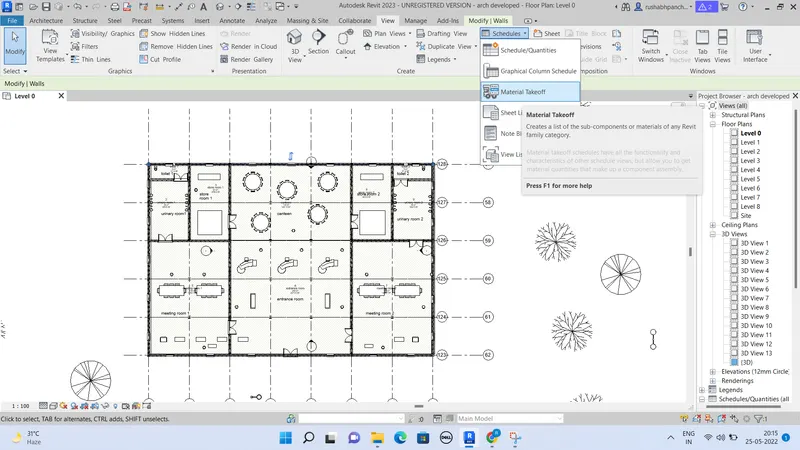
Select wall material takeoff.
60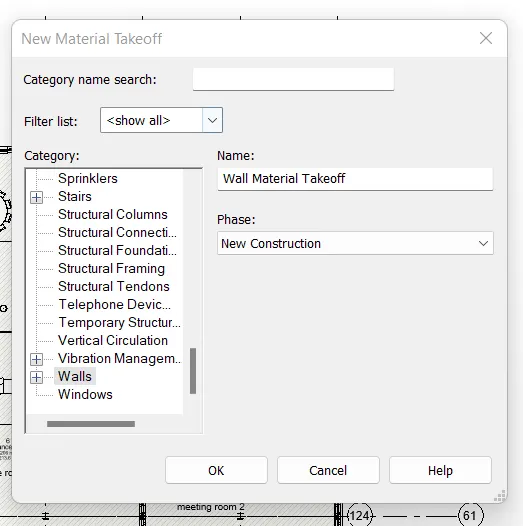
Include the cost, count, name and volume in scheduled fields.
61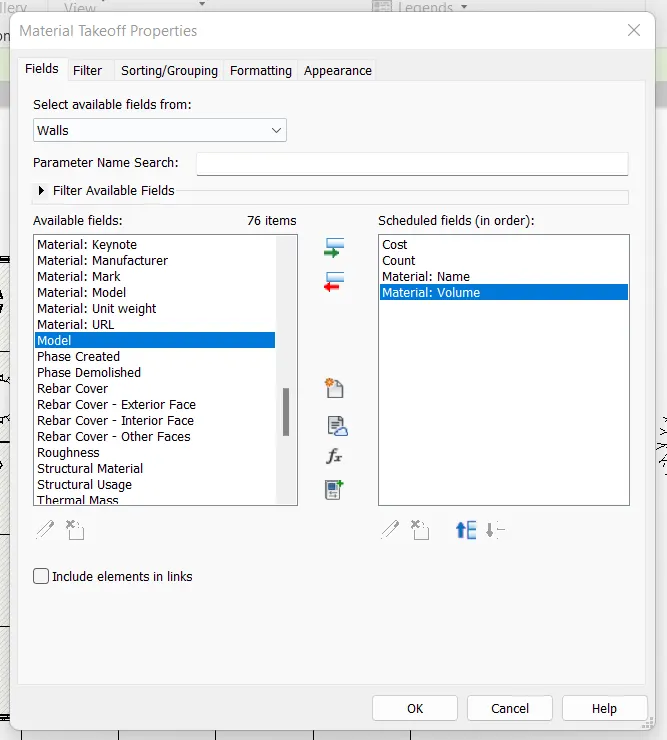
The wall material takeoff will appear.
62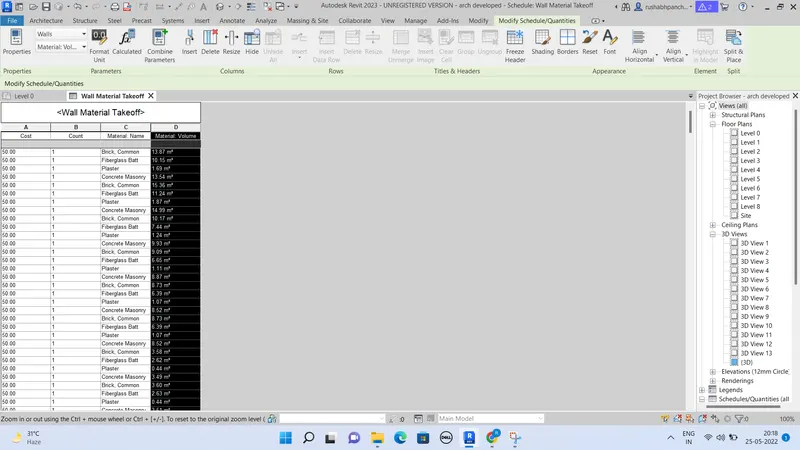
Select the last column and right click on that column.
63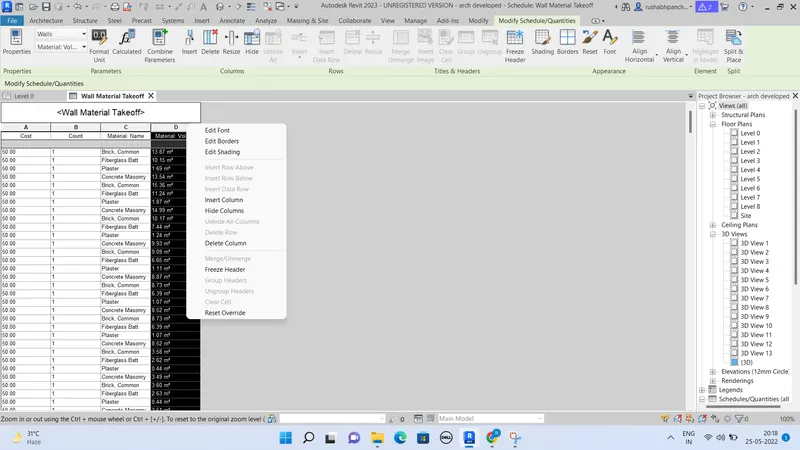
Click on insert column option.
The new column will appear.
64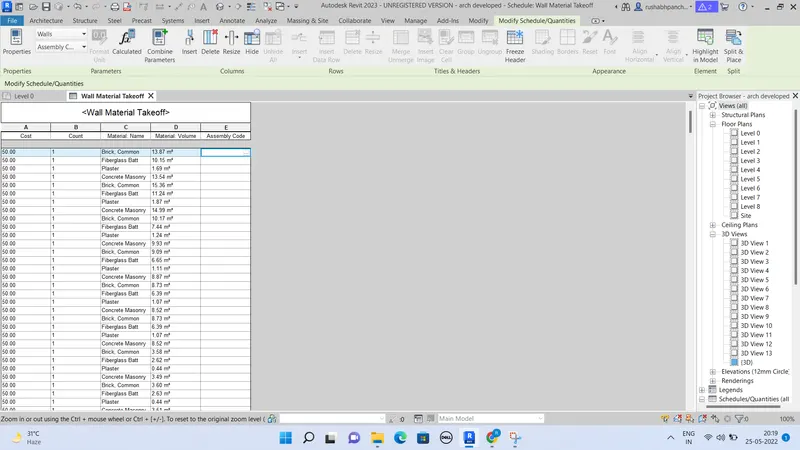
Rename it as total cost.
There will be an option of tab called calculated.
65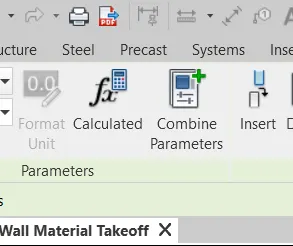
Click on that option and enter a formula of cost * volume.
Press enter.
66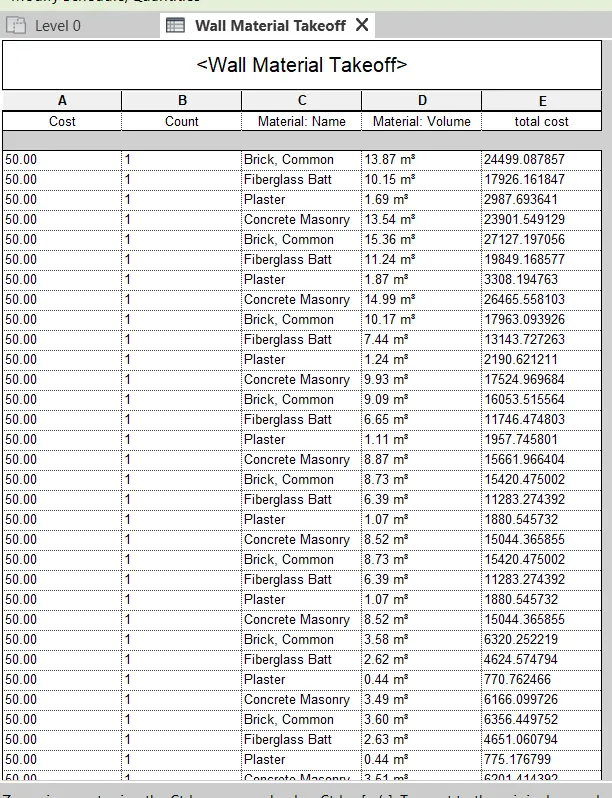
67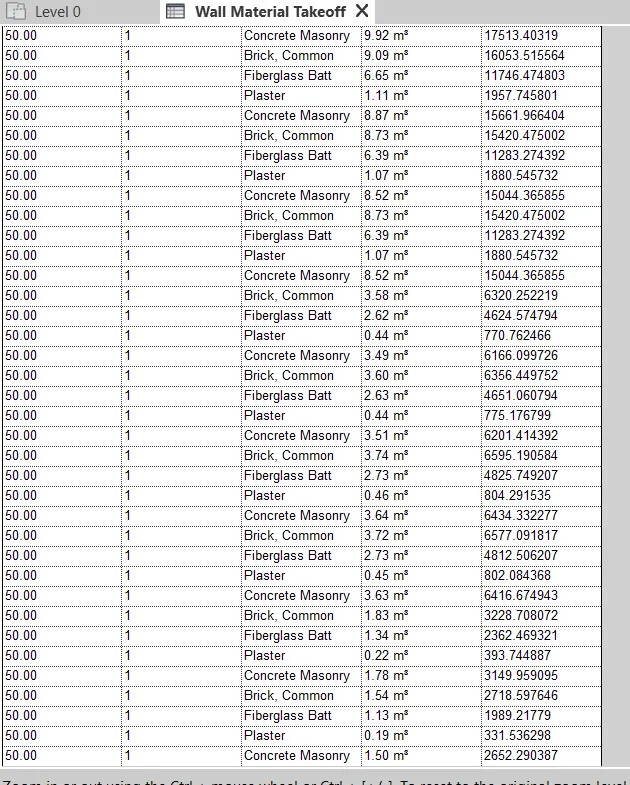
Now, we have to calculate total cost of the doors.
Select door.
Project browser will appear.
68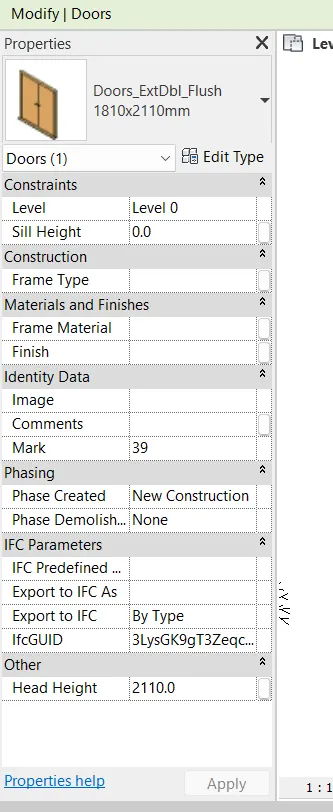
Click on edit type.
Dialogue box will appear.
Enter the amount of Rs 150 in cost.
69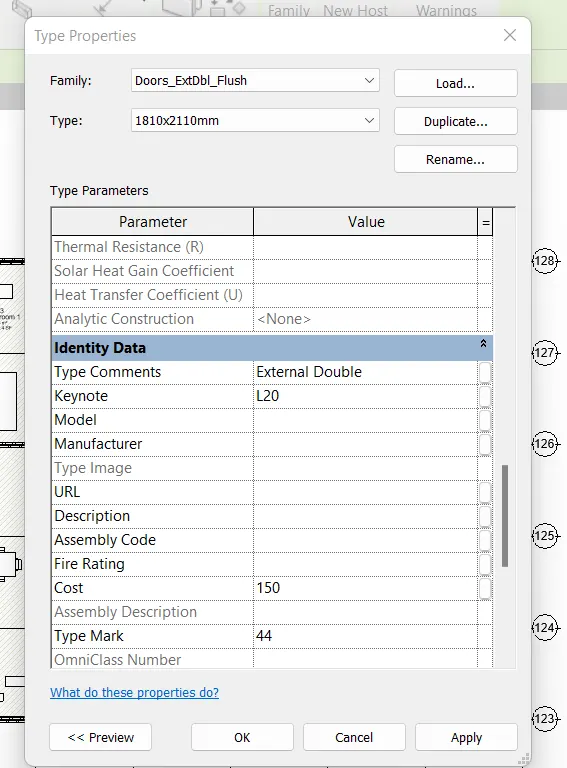
And press on apply.
Select the door material takeoff.
70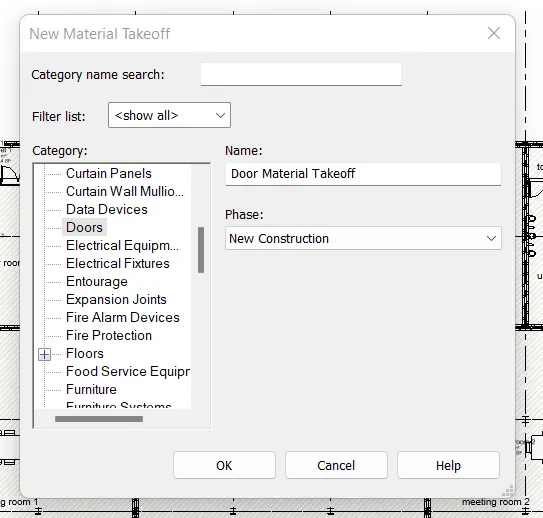
Press ok.
The door schedule will appear.
71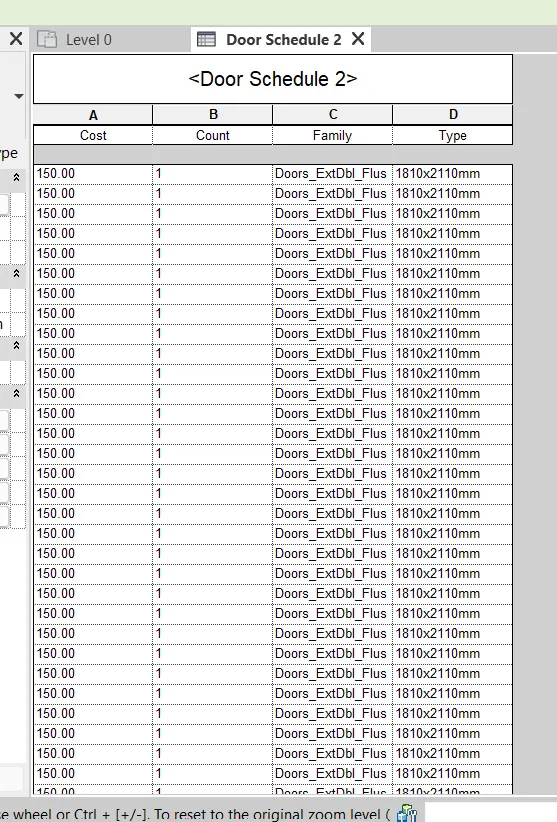
Create new column
72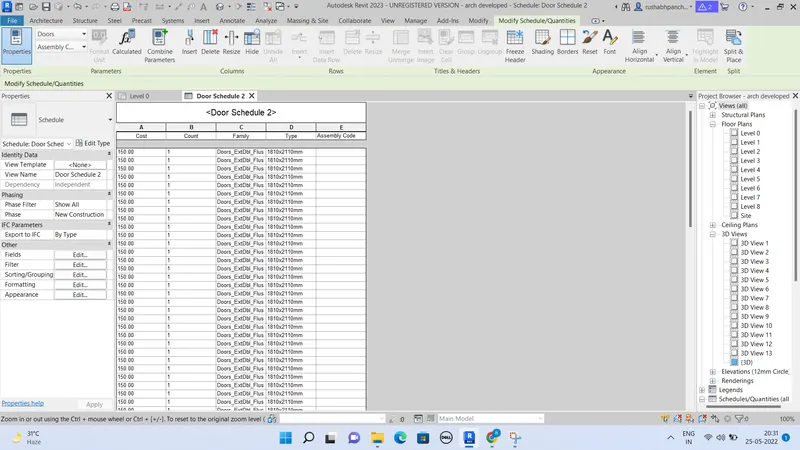
And create total cost.
Result –
66
67
- Using the concept of visual programming discussed in class, list a flowchart for the following scenario-
How to decide framings for a structure using dynamo?
If there is no water coming from the pipes.
If request for money from client has been declined for the project
Ans –
REVIT -
The REVIT program is used for the creation of three dimensional models, views, details and construction documents for architectural projects.
In order to really know what REVIT is, it helps to understand the larger models of BIM (Building information modeling).
REVIT structure is BIM software solutions for structural engineering companies, and structural engineers.
That provides a feature rich tool set helping to drive efficient design processes in BIM environment.
REVIT is allows for entire buildings or parts of building to be modeled and worked on, which is very useful for all parties involved in construction project.
Using REVIT modeling as a part of BIM process eases the creation of 3D renders, 3D perspective detailed drawings and walkthrough.
Now a days, REVIT is most essential software in civil industry and many companies are using this software.
Procedure –
How to decide framings for a structure using dynamo
73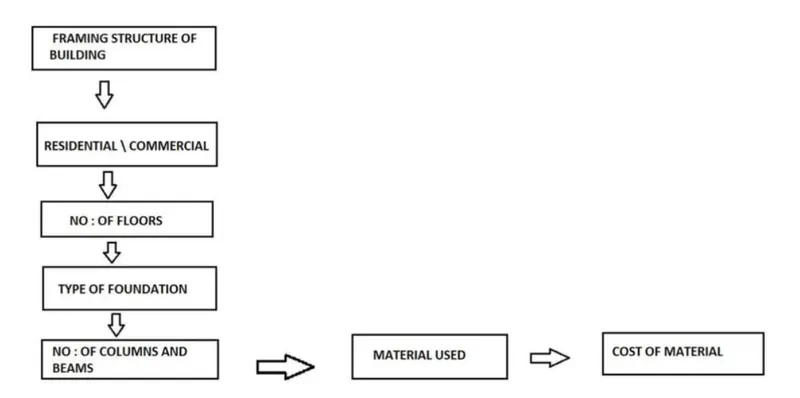
If there is no water coming from the pipes
74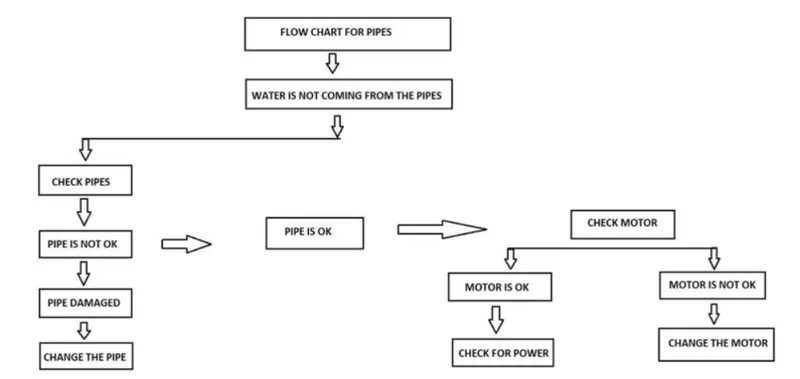
If request for money from client has been declined for the project
75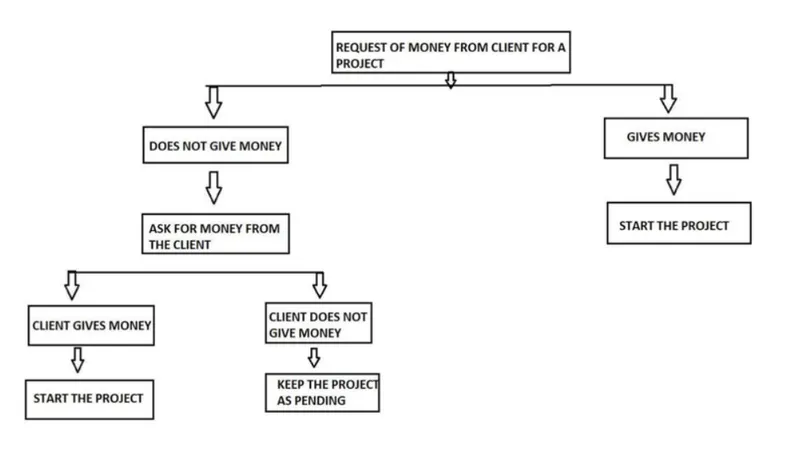
- List the parameters associated with the each model element –
Wall
Floor
Door
Window
Table
Building
Ans -
REVIT -
The REVIT program is used for the creation of three dimensional models, views, details and construction documents for architectural projects.
In order to really know what REVIT is, it helps to understand the larger models of BIM (Building information modeling).
REVIT structure is BIM software solutions for structural engineering companies, and structural engineers.
That provides a feature rich tool set helping to drive efficient design processes in BIM environment.
REVIT is allows for entire buildings or parts of building to be modeled and worked on, which is very useful for all parties involved in construction project.
Using REVIT modeling as a part of BIM process eases the creation of 3D renders, 3D perspective detailed drawings and walkthrough.
Now a days, REVIT is most essential software in civil industry and many companies are using this software.
Procedure –
The parameters associated with walls
Types of wall
Wall thickness
Wall length
Wall height
Wall description
Wall material
Wall location
Material cost
Wall volume
Parameters associated with floor
Types of floor
Floor thickness
Floor length
Floor area
Floor volume
Floor description
Floor material
Material cost
The parameters associated with door
Door type
Door length
Door width
Door height
Door material
Door description
Door area
Door volume
Material cost
The parameters associated with windows
Window type
Window length
Window width
Window length
Window material
Window description
Window area
Window volume
Material cost
The parameters associated with table
Table type
Table material
Table description
Table length
Table width
Table height
Table cost
The parameters associated with building
Building type
Building location
Building area
Building perimeter
Number of possible loads on building
Building height
Building material