Morphing Operation on a given Model by using HYPERMESH
AIM :
To morphing the given side body component to the desired shape as given in the referance image and also create a Macro file which is TCL/TK file for morphing operation.
OBJECTIVE :
Morphing operation for given body until get a given desired shape.
Create a macro file which is TCL/TK file for morphing operation.
CAD IMAGE MODE :
Open a Hyperworks Software, set the user profile which is optistrct. Click the "Import Solver Deck" option from where tool bar section. Choose the "Import Model" option and select the appropriate HM file and then click to import the model.
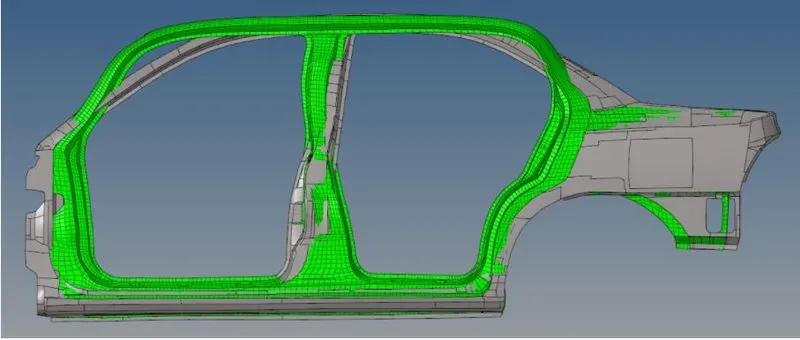
After importing the model, it will looks like shown in the below image.
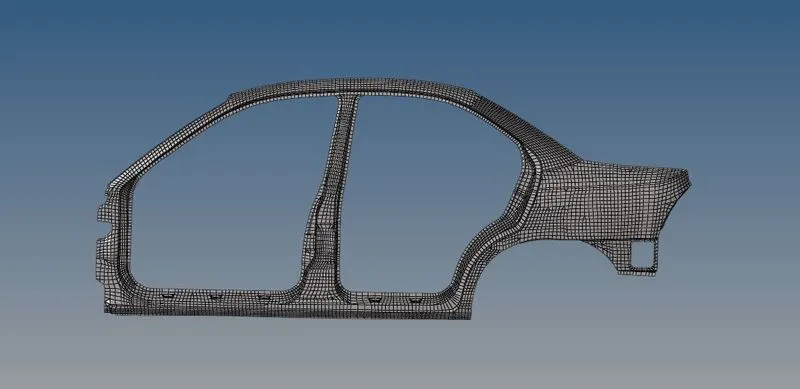
Also, some of the reference images are given as shown in the below snaps. We have acquired this desired shape will after completion of morphing operation.
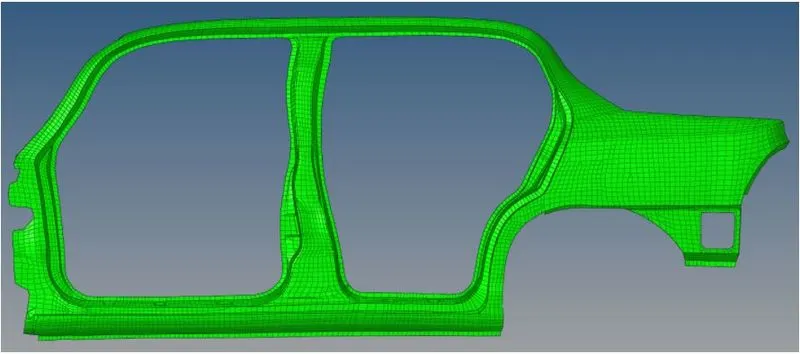
We have to notice, a B - Pillar or Center Pillar has slightly changed from where it's Top portion which were moved front and bottom portion has moved little bit of backward.
And also, Back wheel arch has slighty moved towards left side rather moved front direction.
Front pillar or A Pillar has slightly shrinkage at where top portion and bottom portion has slightly expand on towards backward direction.
Roof Part gets flatted instead of slight curvature on it and also shrinkages are happened at where cross section of the Roof Portion.
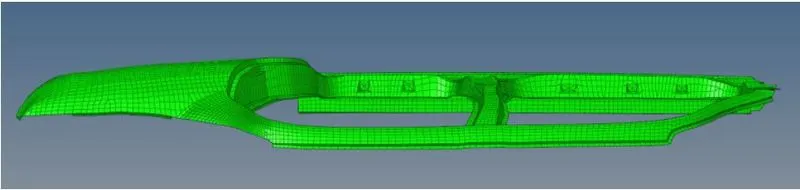
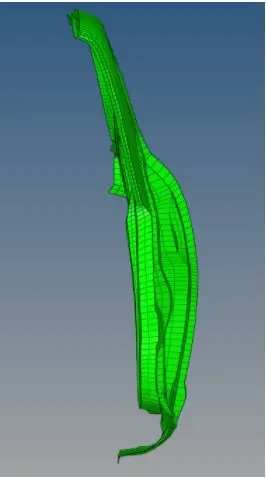
This is one of the referance image which has represents before morphing & After morphing with comparing surface and Mesh elements.
Number of elements wouldn't be changed, because we just change the shape itself as per our new requirements without removing anything.
PROCEDURE TO ACQUIRING THE OBJECTIVES :
i) Morphing the given Body :
I) Creating the domains and Handles :
After importing the model, we are gonna select the "Tool" main menu panel and then Select the "HyperMorph" Panel for which specially to morphing operation.
We have lots of panel options to do morphing operation on a mesh elements. From where, we have a one option which is "Domains".
Select the create option, set into "2D Domains" because elements are 2d only and further set into "All Elements" because we concern all elements which are presented in the side door body. After that, click the create option for which hypermesh automatically creating the domains and then creating the handles itself.
A Handles are very used option to optimize the elements and changes the shapes as per our new needs.
As we notice, I had set the options which are "2d domains and then All elements" as shown in the below image.
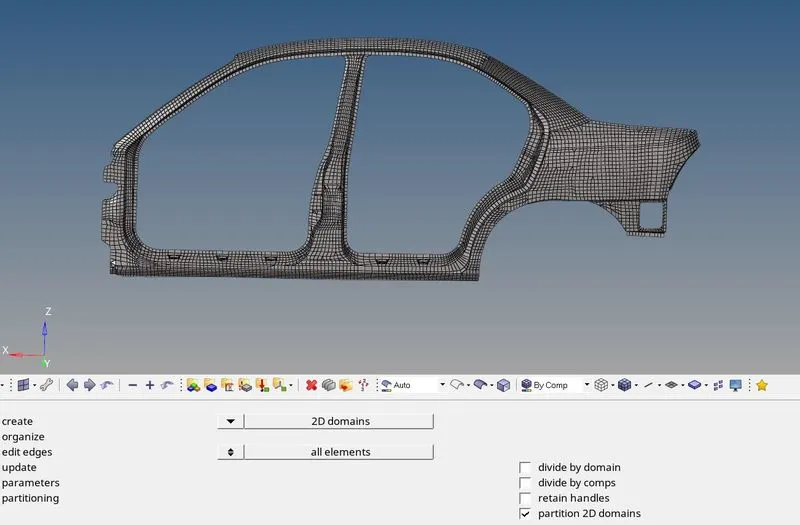
After creating the domains on the mesh elements, it will looks like as shown in the below snap.
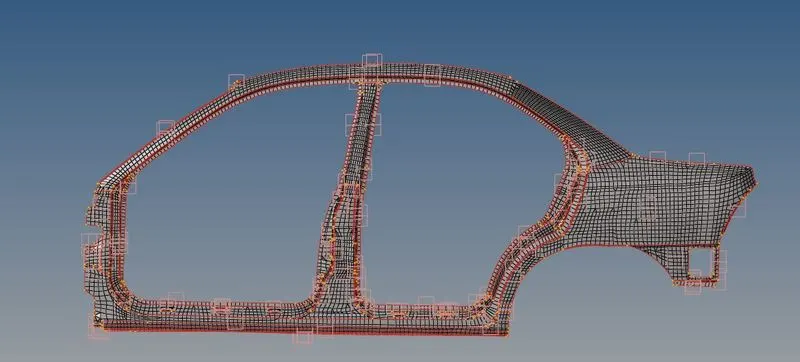
Actually, Handles are created along with domain creating, but didn't see any handle from where image itself as shown in above image.
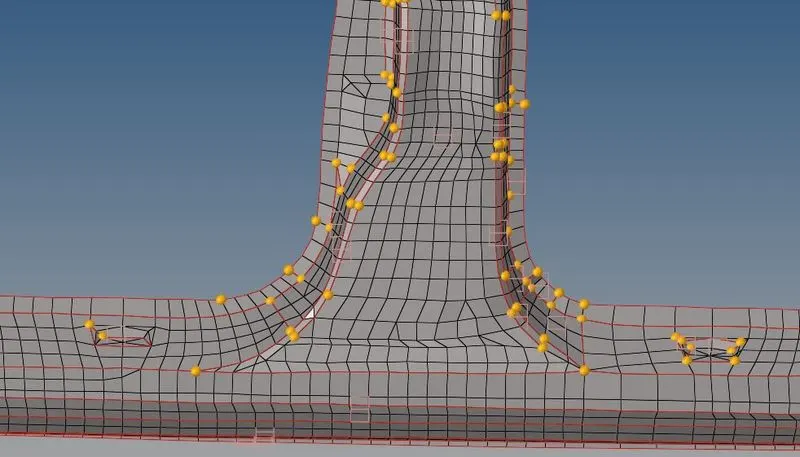
When we zoom in towards the mesh elements, a handles are clearly visible to our eyes. A Hypermesh have own algorthim to which automatically create the handle and domains as well.
Hypermesh were created 529 domains and 468 Handles along the entire components.
II) Creating the Morph Volume :
Go to "Morph Volumes" sub panel under which "Hyper Morph" panel, select the create option and then select the all elements which are presented from which side body for creating the Morph Volume.
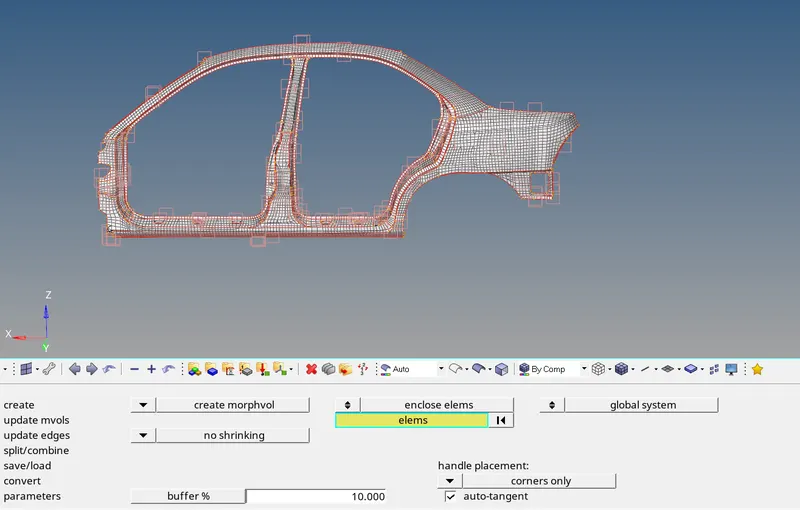
After selecting the elements, it will automatically creating the morph volume cuboid after clicking the Create option. We have to keep the default option for creating the morph volume.
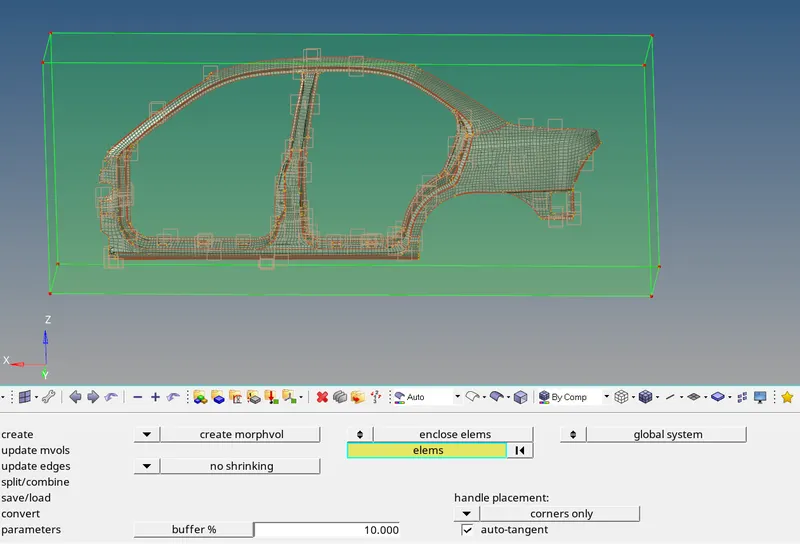
Inorder to morphing the elements properly, we have to discritize the morph volume as per our convenience. First of all, select the "Split/Combine" option instead of "Create" option from which under the "Hyper Morph" option.
We have to split the morph volume along the longitudinal direction by 10 intervals. Just select the appropriate line and then automatically split by hypermesh itself, a split spot will looks like as shown in the below image.
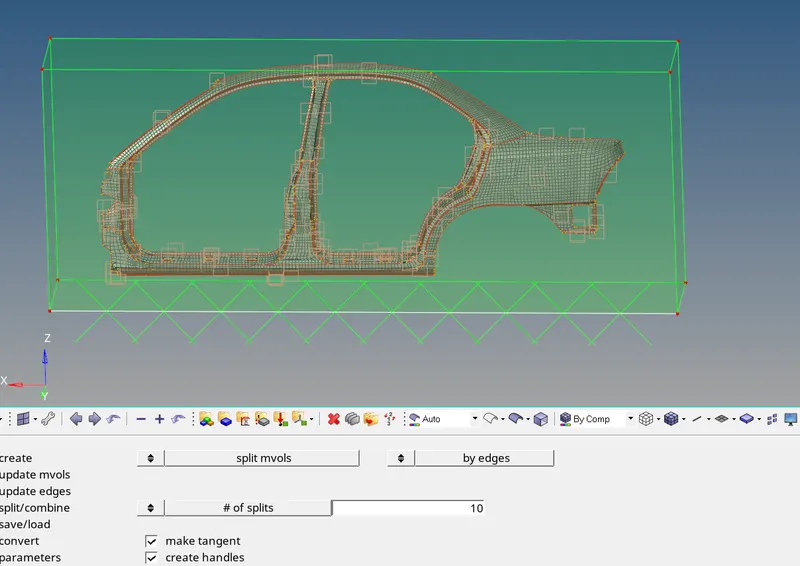
After clicking the split option, it will splitted and looks like as shown in below image.
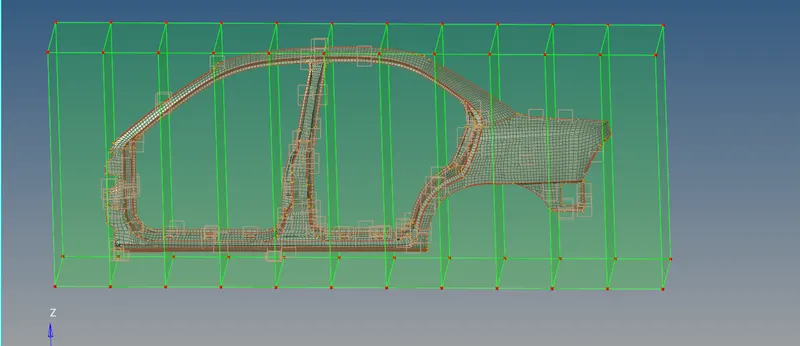
Simialrly, we have split on lateral direction as well. But, in this portion which is lateral We have keep 4 intervals instead 10 intervals because lateral direction is always smaller than the longitudinal direction.
After Hypermesh automatically choose the split spot, it will looks like as shown in the below image.
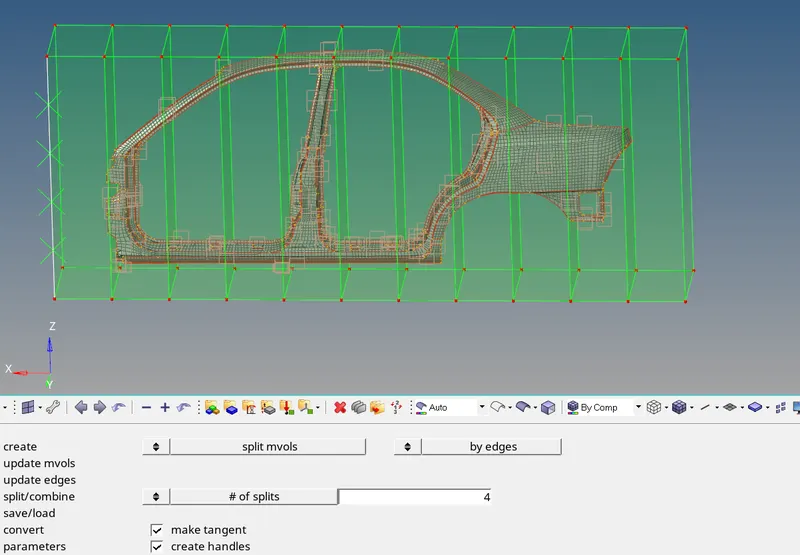
After creating the small chunk of volume, it will looks like as shown in below snap. From this, we have manually reshape the elements as per our given desired shape.
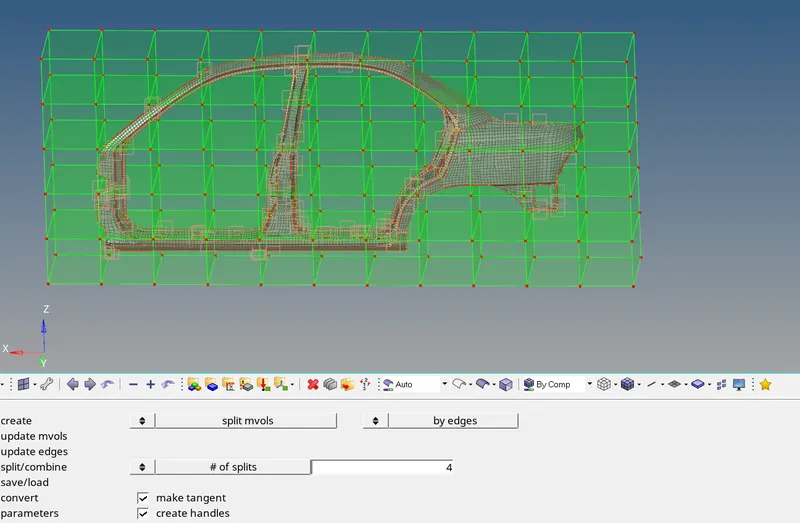
After that, we gonna "Morph" option instead of "Morph Volume" from where under the "Hyper Morph" panel. Select the "Move Handles" option for which drag the respective handle to achieve the desired shape from it.
After completes the morphing operations, a final model has looks like as shown in the below image itself.
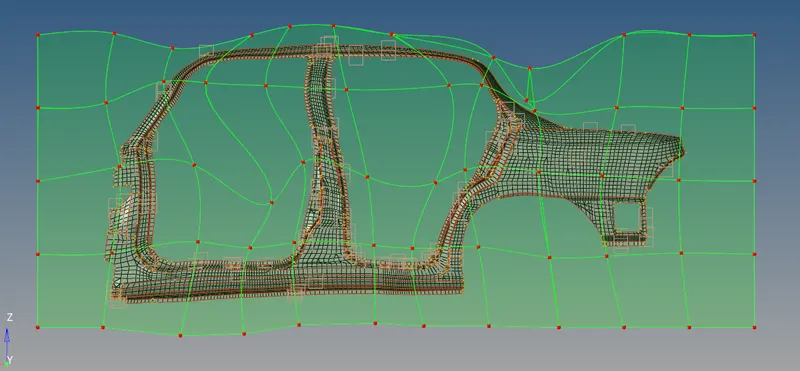
By use this option to restrict the movement of the handle whenever we dragging the neighbour or nearest handle.

After achieving the desired shape by using morphing operation, it will looks like as shown in the below snap.
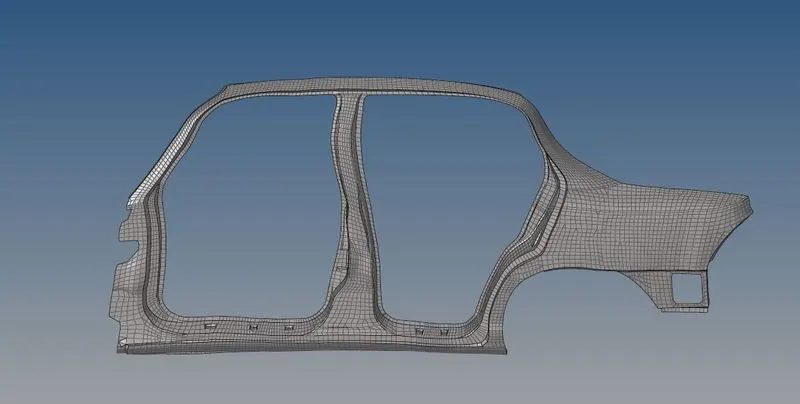
A below image has showing final model without handles, domain and morph volumes as well.
ii) Creating the Macro or Tcl file :
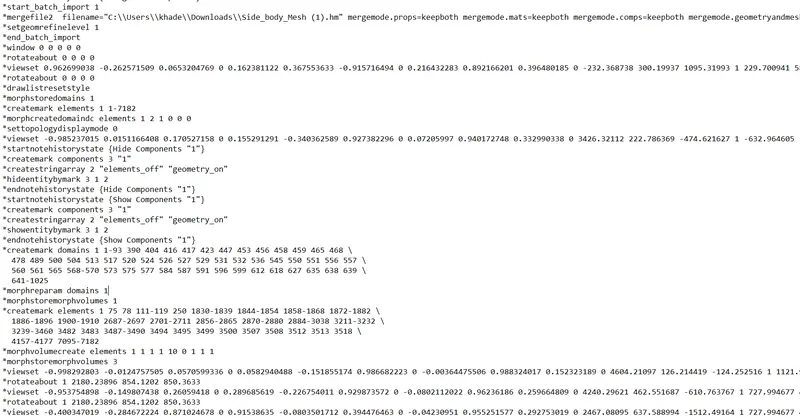
Illustrations :
Actually, a tcl file is automatically written by hypermesh itself. Whatever operation I had done on that particular hypermesh file, it will storing into own file itself by text format.
Sometimes, this macro file were storing into corresponding place of hypermesh model folder itself, if we opened the Hyperworks software through the Administrative Run. Rather Sometimes it's were storing from where documents folder itselfs.
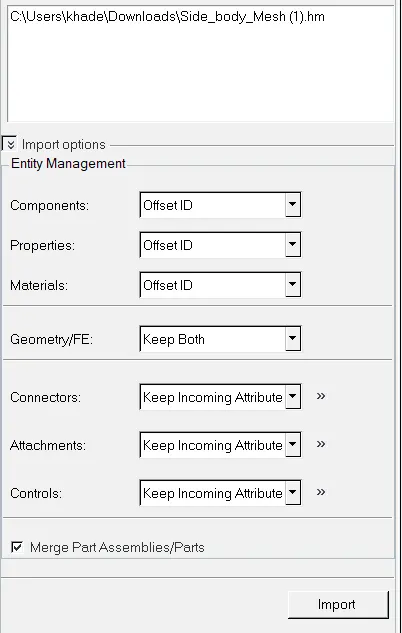
"Start_batch_import 1" - After I click the import model option from where hypermesh itself, those operation are storing in text formats.
A 'below tab' given options status are automatically written into macro file by hypermesh.
"Setgeomrefinelevel 1" - A "Set geometry refinement level ratio is 1" which means Hypermesh showing the mesh elements from where graphical window without refinement.
"End_batch_import" - After Clicking the "Import option", it will writtened like this.
A Model were initially Zero at which "window" and "rotate about" as well.
"Morphstore domains1" - After creating the "2D domains" on the given mesh elements, it will wriitened like this.
Further whatever operation are done for getting the desired shape from which given shape, it will storing each and every action into macros file by text format.
For macros file checking, Click the "File" option from where title menu bar with followingly click the "Run" option and then select the "Tcl/tk Script" option. Open the appropriated script file and then click the open option, it will showing the final model.
CONCLUSION :
We had successfully reshaped the given side door body as per reference images by using morphing tools.
A Hypermesh writtened macro file for which each & every operations and also it has ran successfully.
Final reshaped Model Image :
In this model showing, we are successfully achieved the given desired shape by using Morphing Operation.