Hood design-Week 2
Aim: To Design Hood outer panel, inner panel and the necessary reinforcements by following the Master section with the design parameter
Introduction: Hood is the main component of a car at the front portion. It is used to decorate the car and add a luxurious look. The shape of the Hood is made aerodynamic in order to minimize the air effect. Hood is generally used to access the parts easily such as radiator, engine and many other parts. A car hood, also referred to as a bonnet in some other countries, is the hinged cover that rests over the engine of a front-engine vehicle. Its purpose is to provide access to the engine for repair and maintenance. A concealed latch is typically used to hold down the hood. On vehicles with an aftermarket hood and on race cars, hood pins may be used to hold down the car hood. Hoods sometimes also contain a hood scoop, wiper jets, power bulge, and/or hood ornament. Car hoods are typically constructed from steel and sometimes from aluminum. Aftermarket car hoods may be constructed from various other materials, including carbon fiber, fiberglass, or dry carbon. The hood design may vary from one make and model to another.
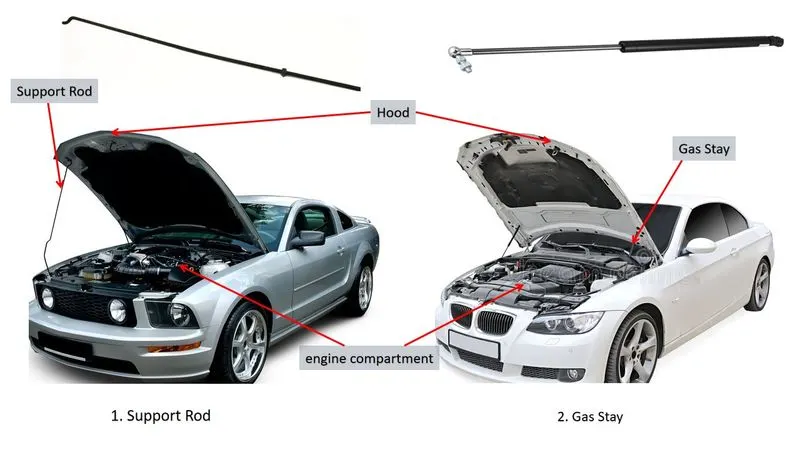
while access for repairs and maintenance Hood can fix by two methods
1. Support Rod
2. Gas Stay
Design requirements for Car Hood
1. Hood Head zone for lock striker: In the fig shows Hood Head zone for lock striker
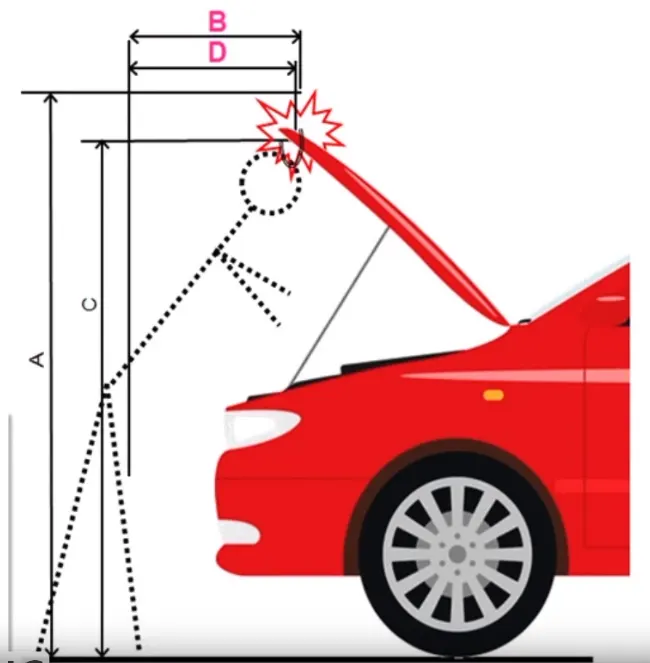
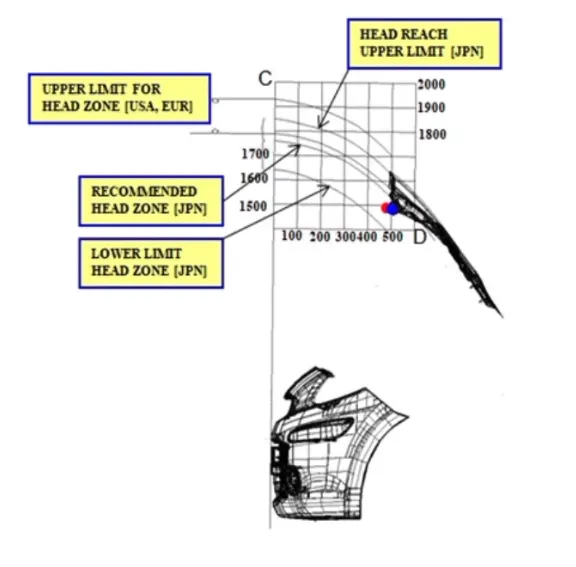
Hood Head zone for lock striker
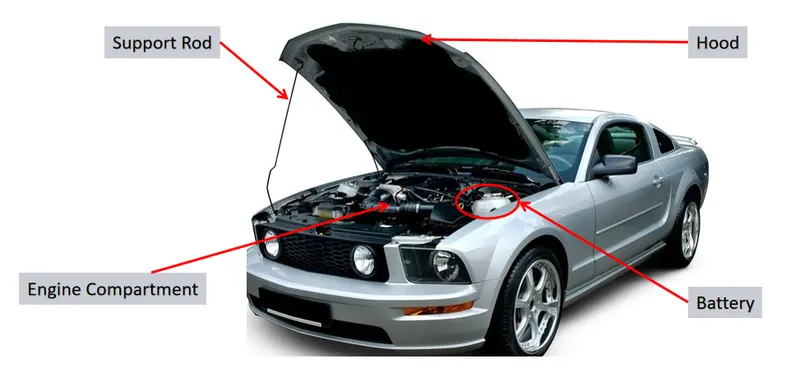
From the Fig. The opening angle of hood will give A, C, B And D with respect to the ground. those A, B, C & D are decided in the head zone. Opening angle varies from region to region depending on average human weight. Depending on the standards we are deciding the angle. So from the angle data, Support rod or Gas stay is designed. The position of Support rod is on the other side of the battery which is shown in the fig. below.
2. Adding latches and stiffener pad: Latches are added where and all the weight is added. On the inner panel we have Hinges and striker, which are attached to the inner panel so due to this attachment the strength of the inner panel is going weak. In order to strengthen the inner panel Latches will play a very important role. Stiffener pad is the sponge-like material place b/w Inner and outer panel to reduce vibrations.
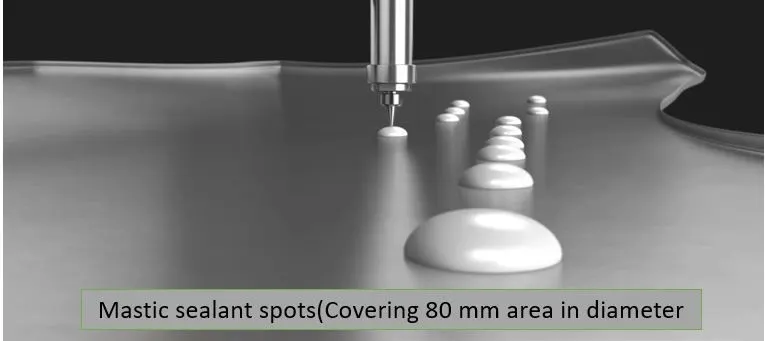
3. Mastic Seals: Mastic Seals place b/w Inner and outer panel to reduce Noise, vibration, and harshness. Every Mastic will have an effect of 80mm Dia locally. shown in the fig 3.1. Inner and outer panel gap is 2 to 5mm
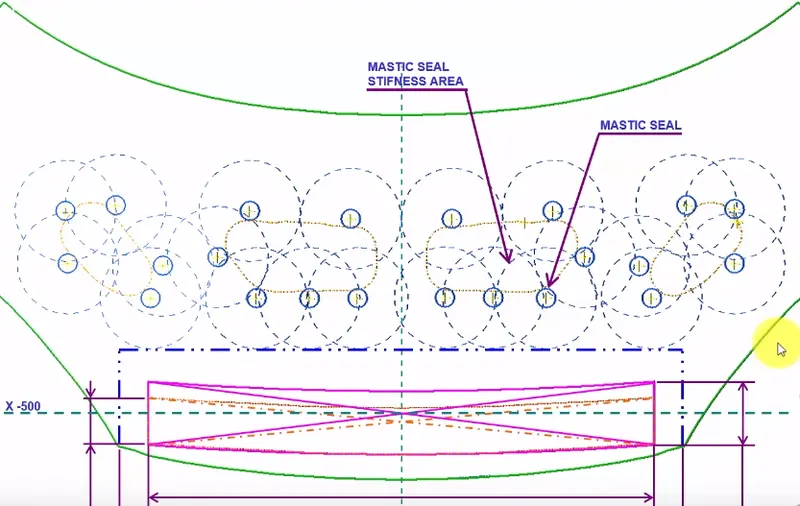
Fig.3.1: Mastic Seals
4. Emboss definition: Emboss are provided in the inner panel of the hood assembly. This helps in weight reduction of the hood and also to dissipate the force during collision. Force dissipate is shown in the fig. 4.1 this project design.
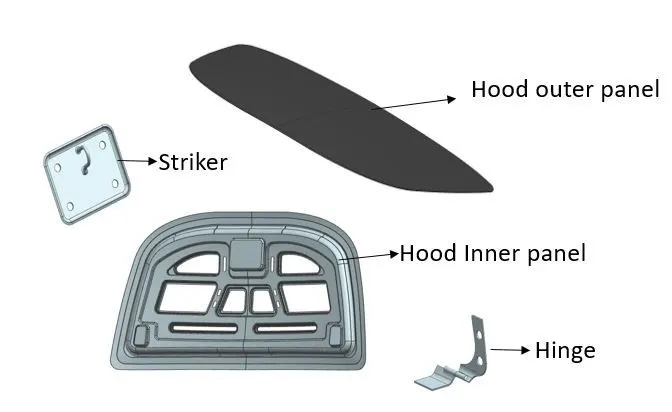
Parts of hood-
- Hood outer panel
- Hood inner panel
- Hinge and its reinforcement
- Striker and its reinforcement.
The inner panel provides the strength while the outer panel is the styling metal cover mounted on inner panel.Instead of any welding process,these two panels are connected by applying the master sealents in between them and hemming operation is performed on the outer panel which holds the inner panel.The underside of hood is often covered with stiffening pads which arrest the sounds in between them.
While the hinges are used to for opening or closing the hood.Striker is used for locking the hood in closed position.So mating these components with hood,it losses its strength locally.So the hinge and striker reinforcements are used to improve the strength.
Parameters to be considered while designing the hood-
- Material selection.
- Opening angle of the hood
- Pedestrain safety
- Hinge position
- Striker position.
- Mastic data
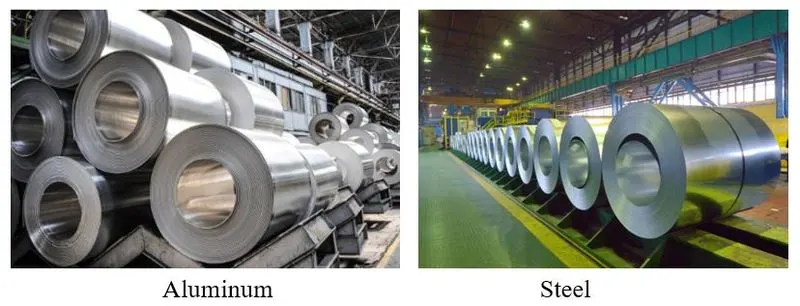
Material selection: Material selection has become a crucial part of design for engineers, due to availability of diverse choice of materials that have similar properties and meet product design specifications.So now today automotive industries expected to possess a number of significiant properties like high tensile strength as well as high stiffness-bending,static ,dynamic.It must also provide good quality and safety both to car body and occupants against crashes.It should also be able to protect occupants from noise,vibration and harshness(NVH).It should provide a good surface finish that is smooth,and should also be corrosion resistant.In addition to this as considering environment concerns,it is also expected to be recyclable and eco-friendly.So as per such extensive requirements, only steel and aluminium have been preferred for hood design because of its low density and helps to reduce the car weight.
Opening angle of hood:
Opening angle is one of the important criteria while opening hood.It can be varies from country to country because of their required standards and model of the car.All the persons are not in similar height.The average height of persons can also be differ from country to country.So taking that parameters into consideration the opening angle can be defined.As the opening anlge is more which impacts the more head injury while opening angle is less reduce head impact.
Generally they are two types of supports are used to lift the hood-
- Support Rod
- Gas stay.
Support rod-
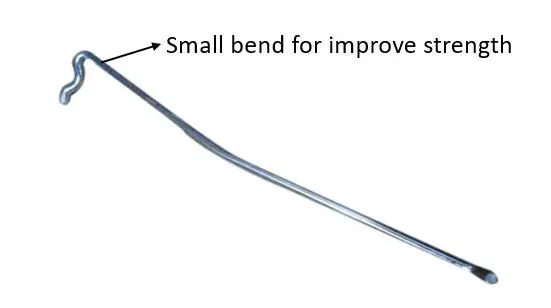
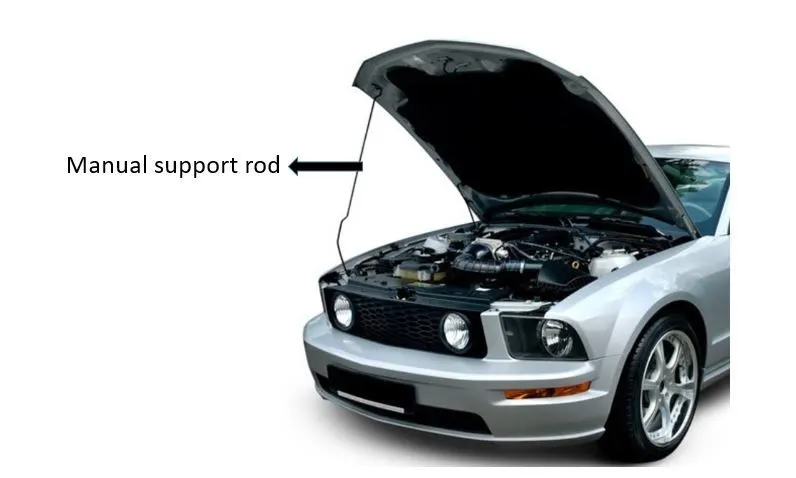
Support rod is basically a long cylindrical steel rod used to lift the hood manually.It is very simple in design and cheap in cost.One end is connected at the side of engine compartment with outer mounting and other end is hooked to the inner mounting of hood during opening condition.While the hood is in closed condition,the support rod is disconnected from inner mounting and placed in provided space of support rod at engine compartment.But the only thing is to incorporate the support rod on the opposite of battery in engine compartment because if in some cases the battery needs to servicing.At that time it is difficult to remove the battery because of support rod position.So it can be positioned on opposite of battery compartment.Support rod are commonly used where the hood weight is less and can able to lift by manually.
Gas stay:
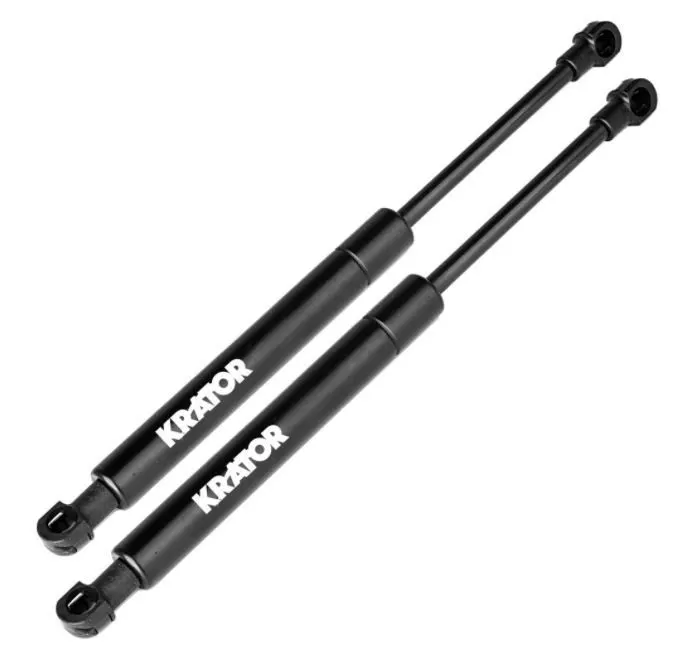
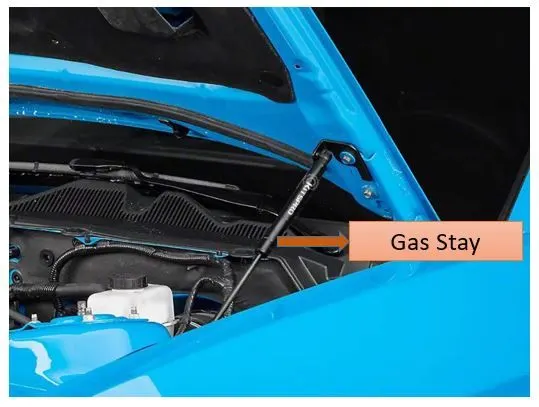
Gas stay is also as similar to support rod used to lift the hood but instead of manually it can lift the hood by using the gas pressure.It can be typically designed where the hood or bonnet weight is more and unable to lift hood manually.The cost of gas stay is more than the manual support rods.
Pedestrain safety-
Euro NCAP or European New CAR Assessment programme is a european voluntary car safety performance assessment programme which provides the consumer information on the safety of cars.Due to the steadily increasing number of vehicles equipped with active bonnets, Euro NCAP developed test procedures for active pedestrain protection systems of passive vehicle safety.

It has created the five star safety rating system determined from a series of vehicle tests.These represent in a simplified way,important real-life accident scenarios that could result in injured or killed car occupants or other road users.The number of stars reflects how well the car preforms.So high number of stars shows not only the test result was good, but also the safety equipment on the tested model is readily available to the consumers.
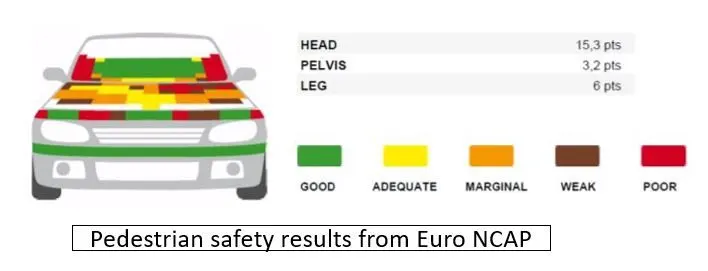
So the protection of pedestrains and other vulnerable road users in the event of a collision with a vehicle front is one of the most important contributions of passive vehicle safety to injury mitigation of road traffic accidents. .So according to the Euro NCAP for pedestrain protection, it defines the various zones on hood and tested for crash analysis.So this analysis can be carried out by using the wrap around distance.
Wrap Aound Distance:
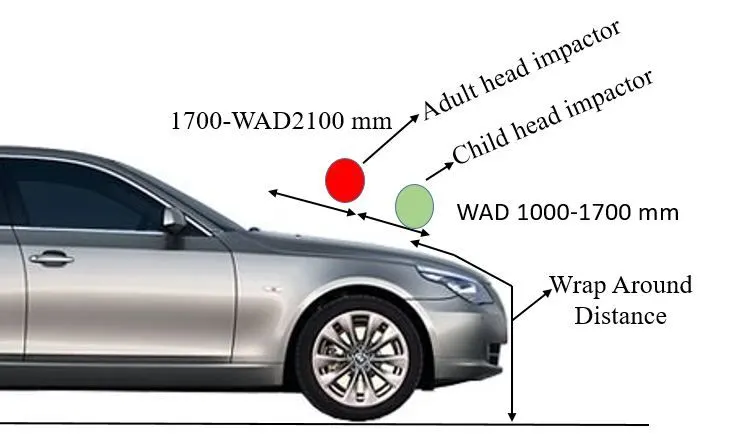
When the car hit or crashes the pedestrain, the whole human body is get contact with front of the car.At this moment the impact will be more on pedestrain head than other parts because of hood position.So the distance taken from the head impact area to the ground is refered as Wrap Around Distance.
The impact is mainly depends upon the type,shape of the vehicle,speed of the vehicle and movement of the pedestrains.So the wrap around distance plays a major role in safety measurement of pedestrain.so it can be measured longitudinally in the center of the vehicle from ground.
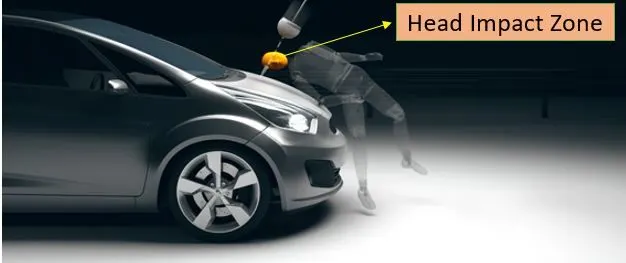
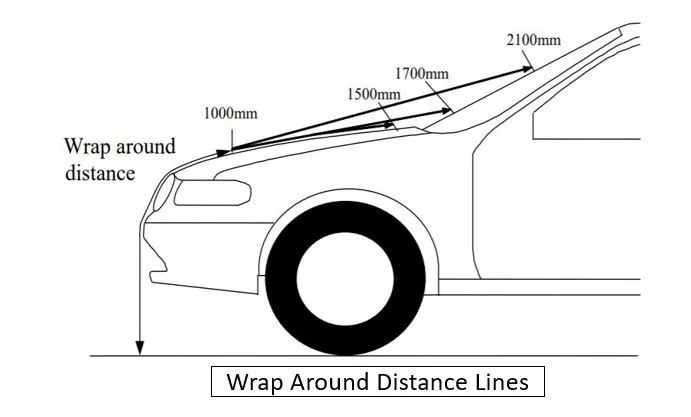
During the crash test analysis, Euro NCAP determines the two tests on head impact based on wrap around distance.One is child head impact zone test and another one is adult head impact zone test.After the test analysis, it says that the child head is mostly impacted in between 1000 to 1700 mm WAP and adult head is impacted in between 1700 to 2100 mm WAD.
Hinge position:
Hinges are used to join two parts together while allowing them to rotate relative to each other.So the proper Positioning of hinges palys a major role for opening the hood.
Few things to be consider while positioning hinges:
- The surface where the hinges to be mounted on the inner panel must be flat,otherwise it leads to loosening of fastners and resulting in NVH issues(Noise, vibration,Harshness).
- Both the hinges on their respective sides must be in the same centreline axis.
Striker position-
For proper opening and closing of hood,the striker should be positioned perpendicular to the trajectory of the hood and the surface where the striker to be mounted on the inner panel must be flat in order to avoid NVH issues.
Mastic data-
Mastic is the sealant applied between the hood outer and inner panel.The main purpose of adding the sealant is to avoid the NVH issues as well as providing good aesthetic look to the outer panel.As the assemble of inner panel and outer panel is subjected to any type of welding process, it may results some spots on the outer panel.So the customer and even the manufacturer did not consider it.Also by direct joining of outer and panel,it leads to generate some sound when vehicle is in motion resulting NVH issues.So in order to overcome this issues a mastic sealant is applied between the gap of outer panel and inner panel because it behaves like a rubber which restricts the sound as well as providing good deforming. Initially it is in form of glue,but after the treatment in hot furnace it gets hardened and provides strength between both panels.Each spot of mastic sealant can cover and give a strength upto 80mm area diameter.
Sheet Metal Operations involved in design of hood-
- Blanking and piercing
- Deep Drawing
- Embossing
- Hemming
Blanking and piercing:
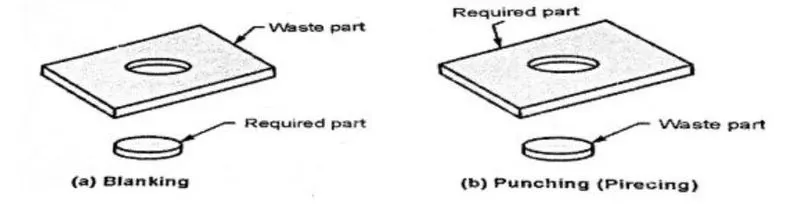
Blanking and piercing are shearing operations where a part is removed from sheet material by forcing a shaped punch through the sheet and into a shaped die.In blanking-the piece being punched out becomes the workpiece while in piercing-the punchout is the scrap and the remaining strip is the work piece.So these two operations performed on the same work part simultaneously is termed as 'Pierce and Blank'.
Advantages-
- Metal remains original shape and does not bend in the process.
- To improve the strength and reduce the weight of the body.
- To evenly distribute the impact force.
Deep Drawing:
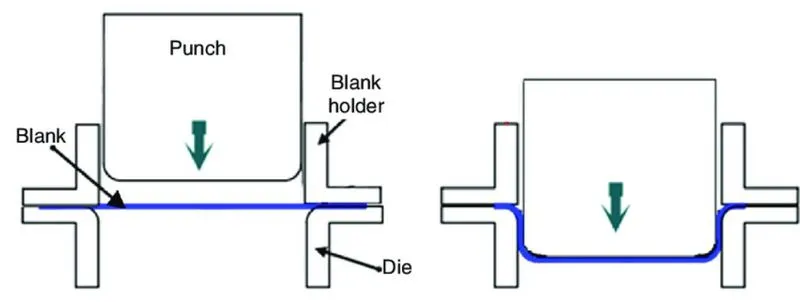
Deep drawing is a sheet metal forming process by which a sheet metal blank is slightly clamped along its perimeter by a blank holder and radially drawn into a forming die by use of a punch.It can shapes a sheet metal blank as a hollow body open on the one side or of a projected hollow body to one with a smaller cross section;without intentionally modifying its wall thickness.
Advantages-
- Deep drawing is very efficient process, since it uses less material and consequently a cost decrease.
- The quality of parts made is higher than in other processes.
Embossing-
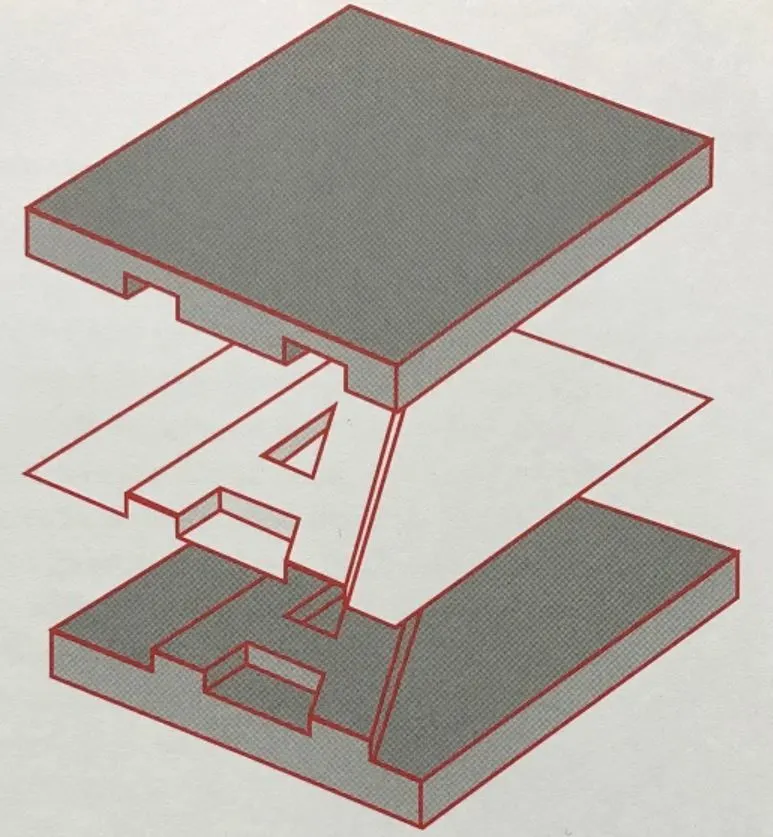
Embossing is a forming operation used to create indentations on the sheet such as raised(or indented) lettering or strengthening ribs.During the operation sheet metal is drawn to shallow depths using with male and female matching dies.
Advantages-
- Stiffening and strengthen the sheet metal.
- Ability to maintain same metal thickness before and after embossing.
- Ability to produce unlimited patterns on the sheet.
Hemming-
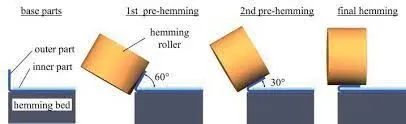
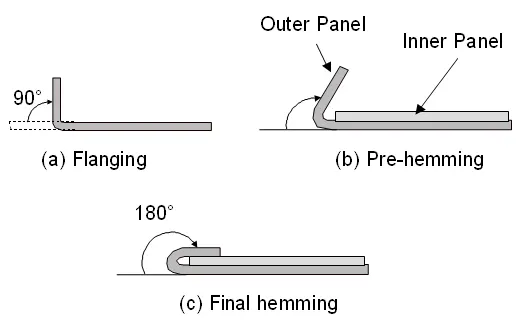
Hemming is a forming operation in which the edges of the sheet are folded over another part in order to achieve a tight fit.Normally hemming operations are used to connect tha parts together, to improve the appearance of a part and to reinforce part edges.
In car part production, hemming is used in assembly as a secondary operation after deep drawing, trimming and flanging operations to join two sheet metal parts together.Typical parts for this type of assembly are hoods, doors, trunk lids and fenders.
There are various types of hemming
- Open hemming
- Closed hemming
- Rolled hemming
- Tear drop hemming
DESIGN METHODLOGY-
- Creating hood inner panel
- Creating hood outer panel
- Creating emboss for hinges
- Creating emboss for latch
- Creating hinge and latch reinforcements
- Assembling the components
MANUFACTURING DATA-
- Outer panel thickness=0.75mm
- Inner panel thickness=0.75mm
- Reinforcement thickness=1.5mm
- Establish the relief at corners to reduce stress concentration.
MASTER SECTION-
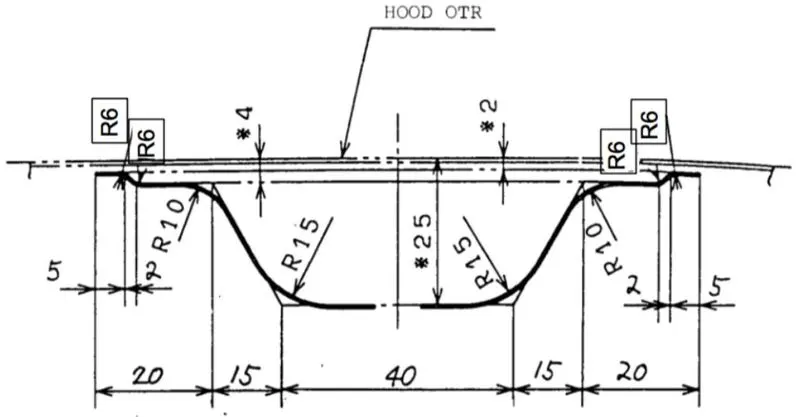
DESIGN PROCEDURE-
- Open the assembly workbench.
- Add the existing parts -outer panel(Class A surafce), Hinge assembly, Striker part files.
- Craete the new part within the assembly and name it as inner panel.
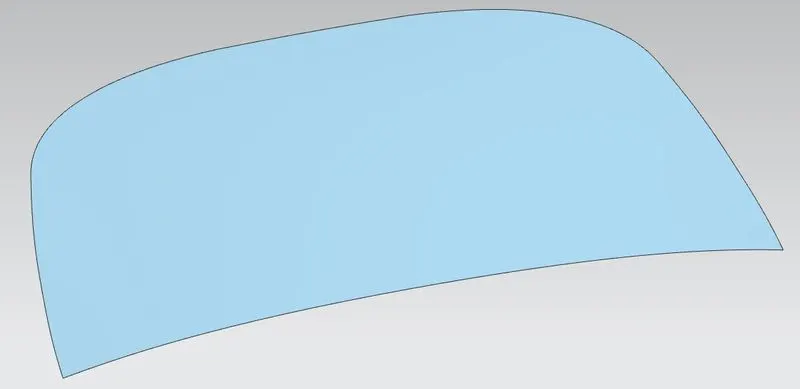
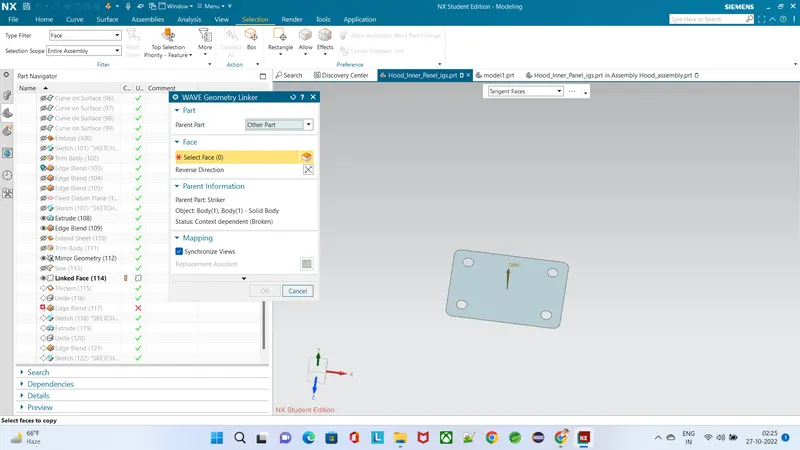
- Open the inner panel part naviagtor and using wave geometry linker, copy the body of outer panel used as reference for designing inner panel.
- Trim the sheet from YZ plane.
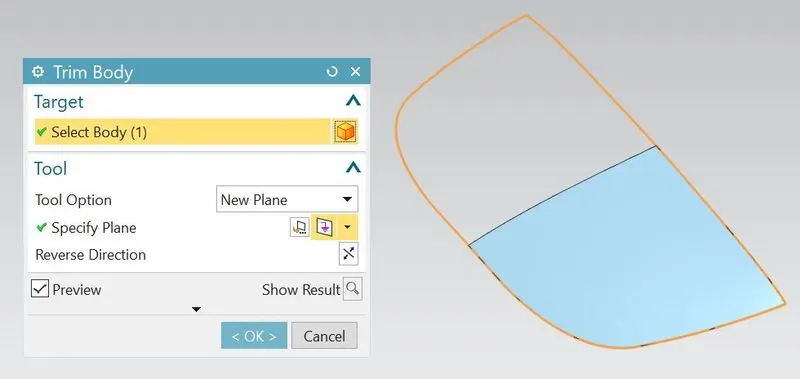
- Offset the trim sheet to 0mm and and used it as working surface of inner panel.
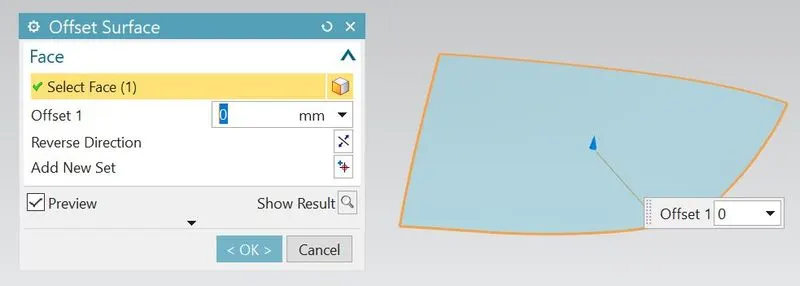
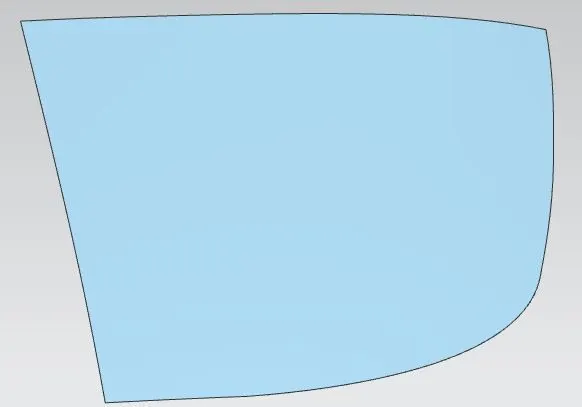
- Hide all surfaces except the working surface.
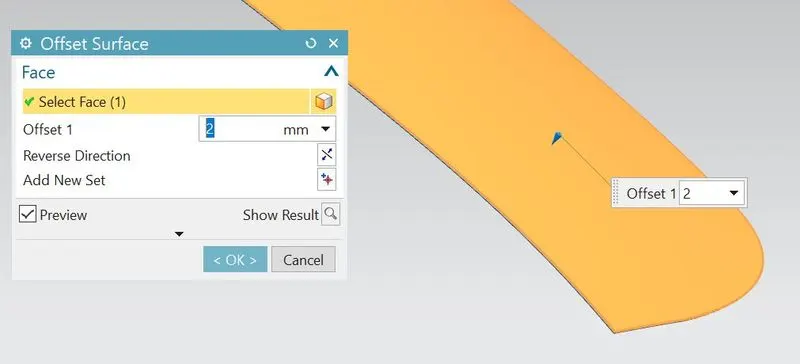
- Offset the working surface to 2mm(First layer of inner panel).
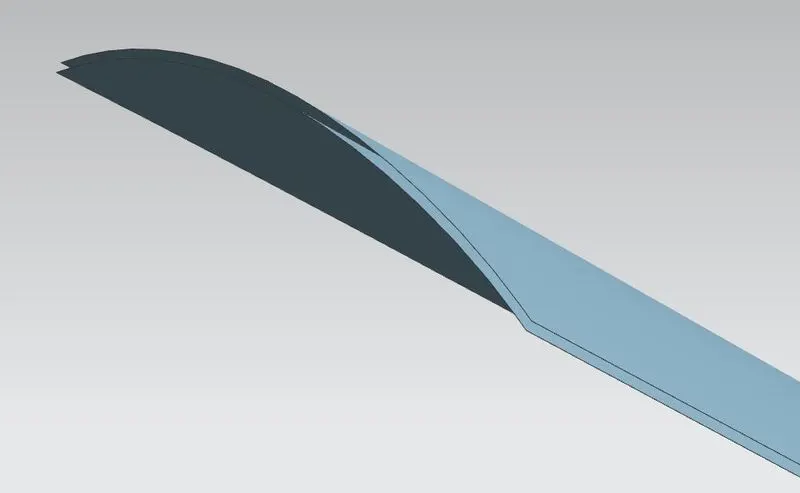
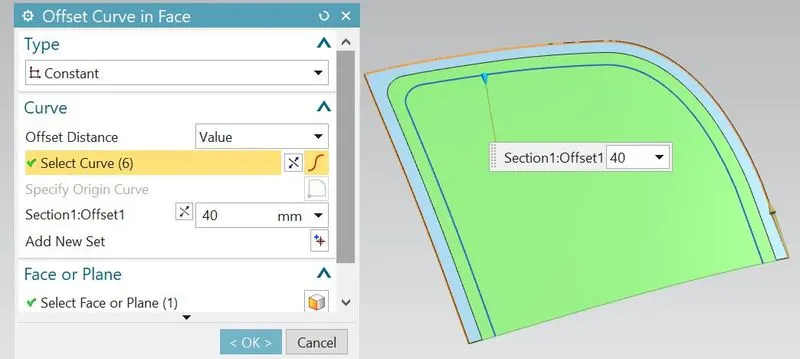
- Using the offset curve on face, offset the curves to 20mm and trim the sheet using offset curve as boundary.
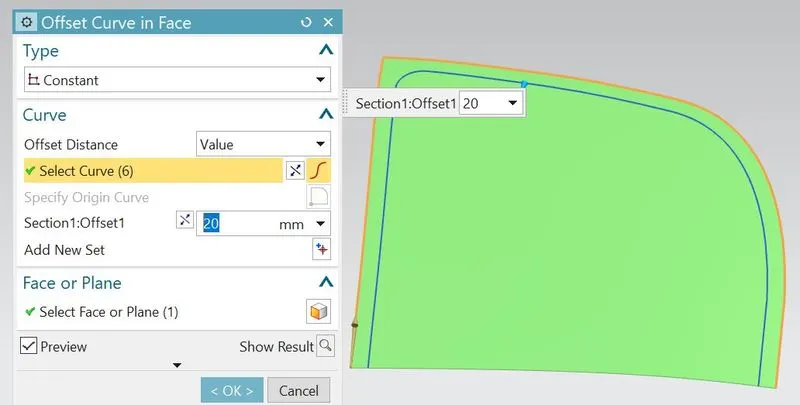
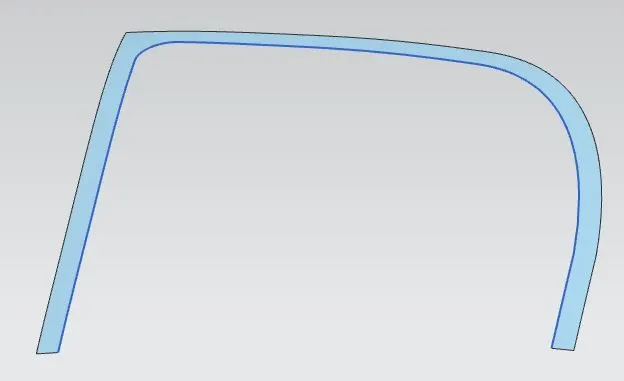
- Again offset the working surface to 4mm(Second layer of inner panel).
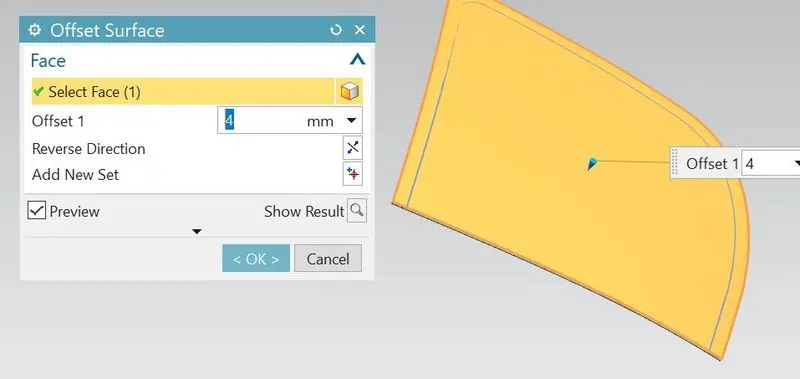
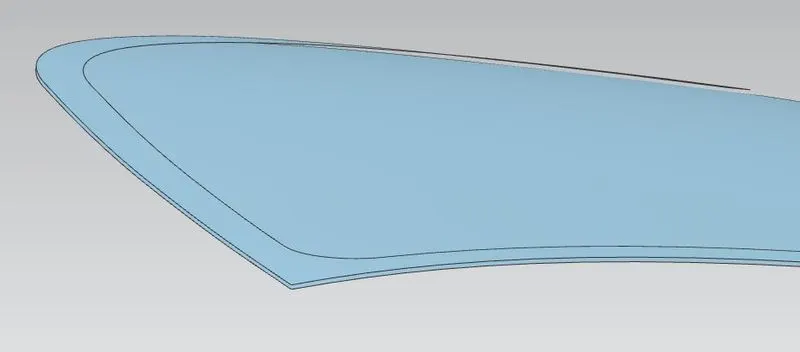
- Using the offset curve on face, offset the curves to 40mm and trim the sheet using offset curve as boundary.
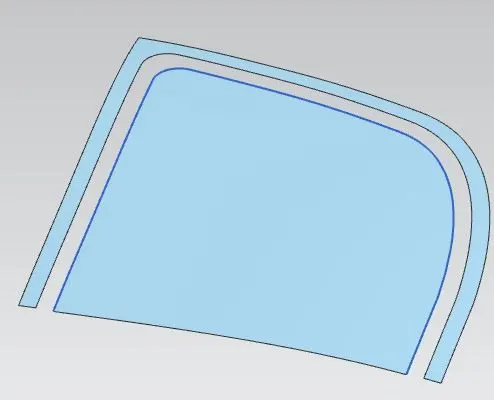
- Join the two surfaces using through curves feature.
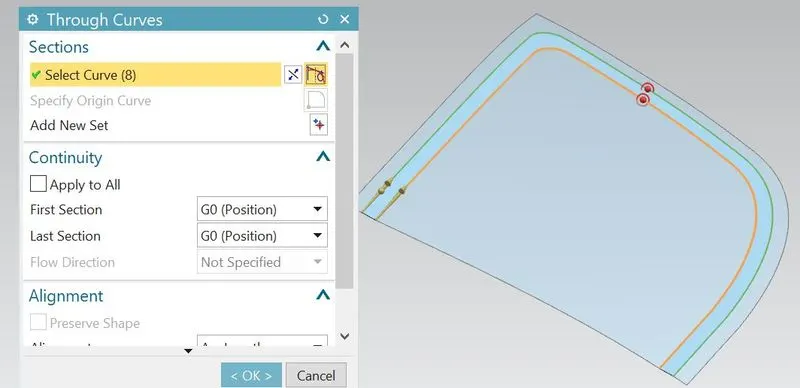
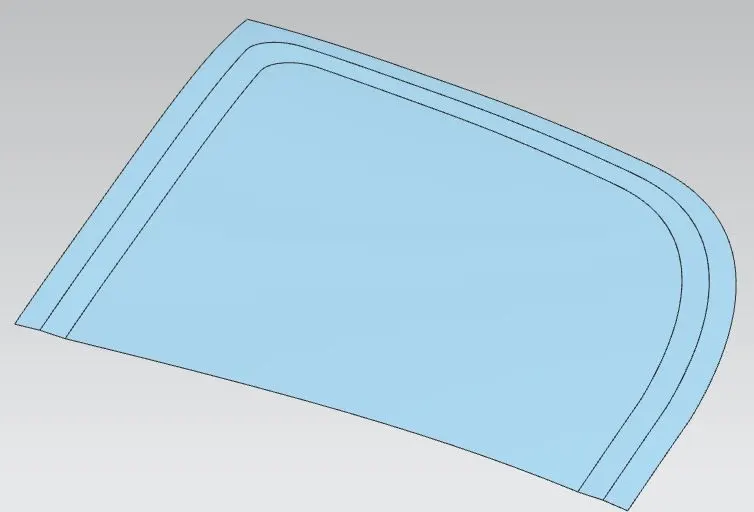
- Again offset the working surface to 25mm(Third layer of inner panel).
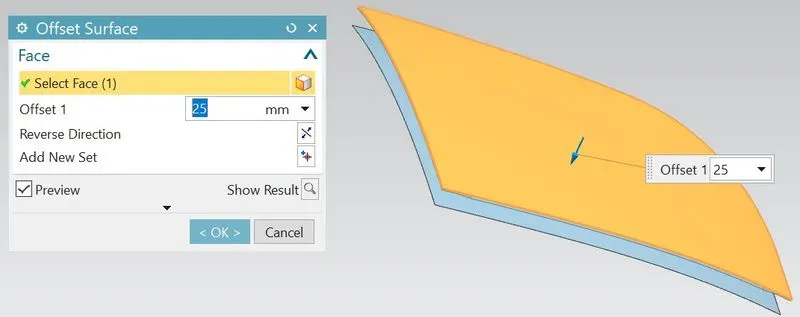
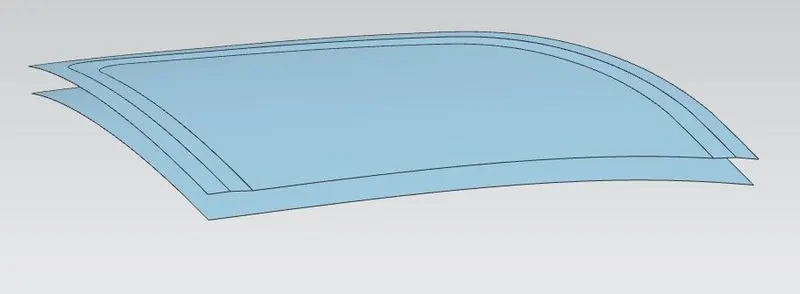
- Using the offset curve on face, offset the curves to 55mm and trim the sheet using offset curve as boundary.
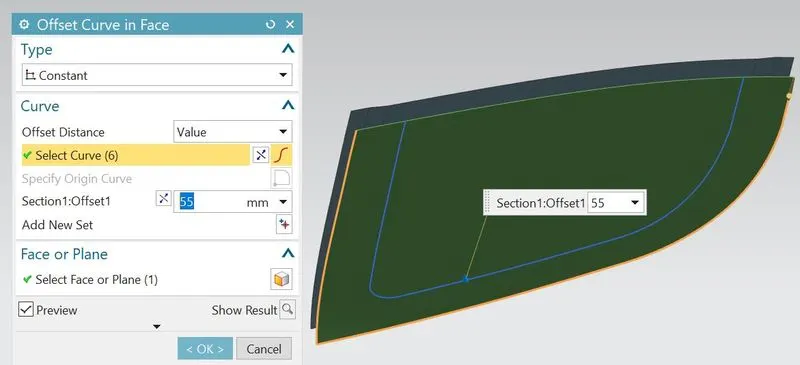
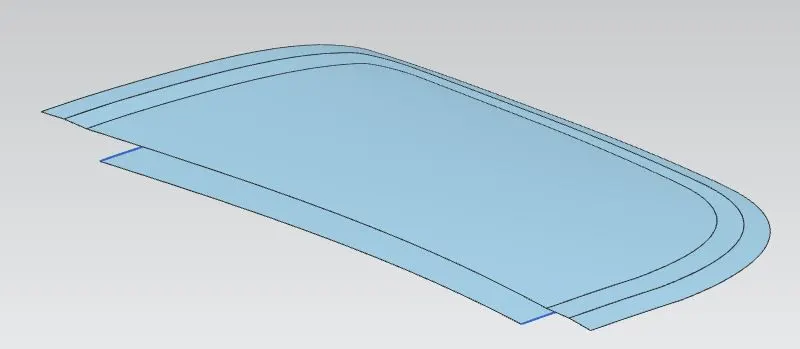
- Create the law extension on the previous trim sheet edges.
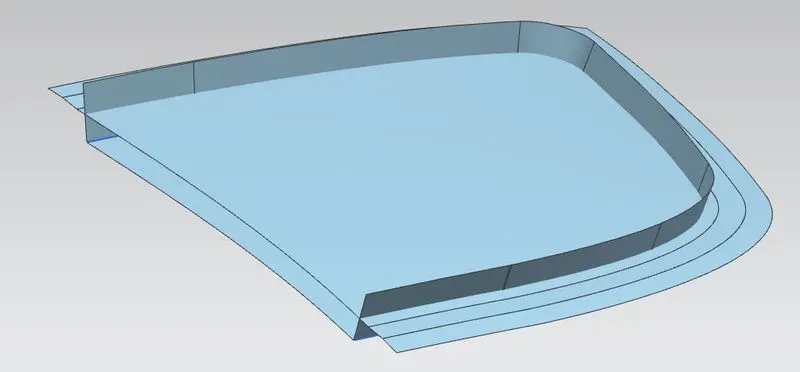
- Trim the extra law extension material from the second layer.
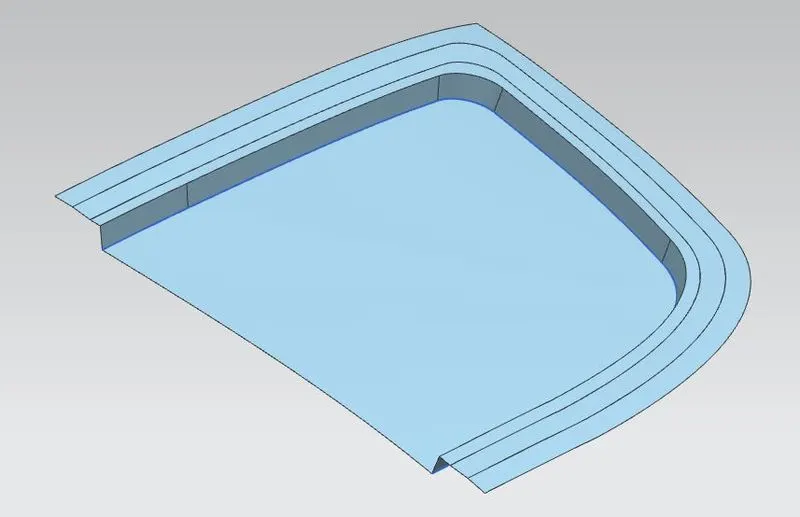
- Apply the required blends in order to avoid the sharp corners or edges.
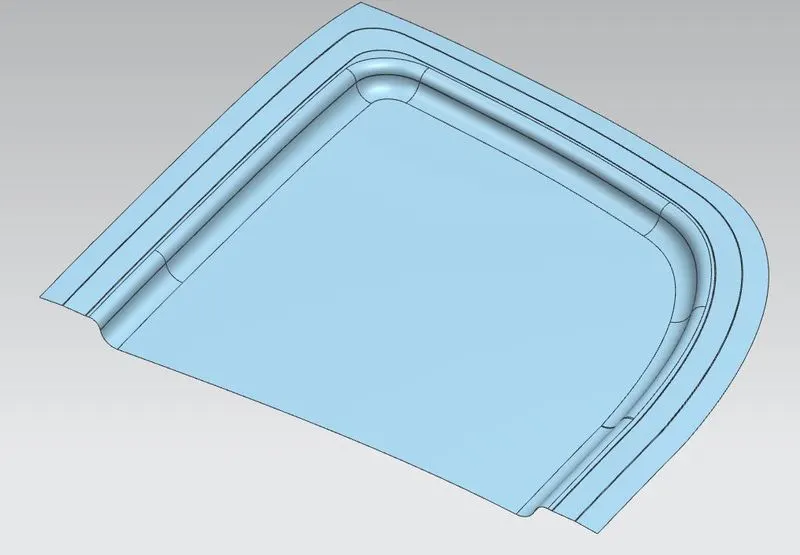
- Create the sketch on XZ plane and draw the profile for to create emboss on surface and project the sketch on surface.(Leave proper space for hinge and striker positioning).
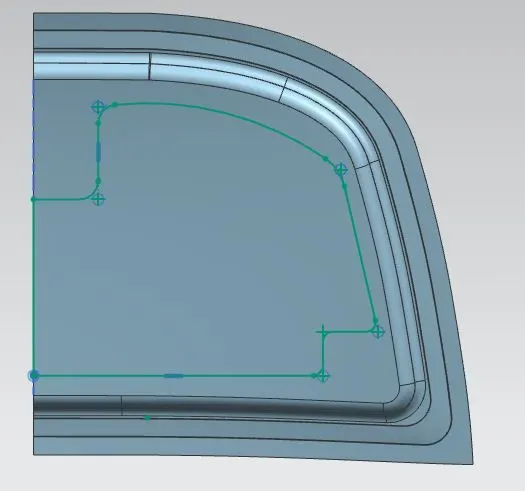
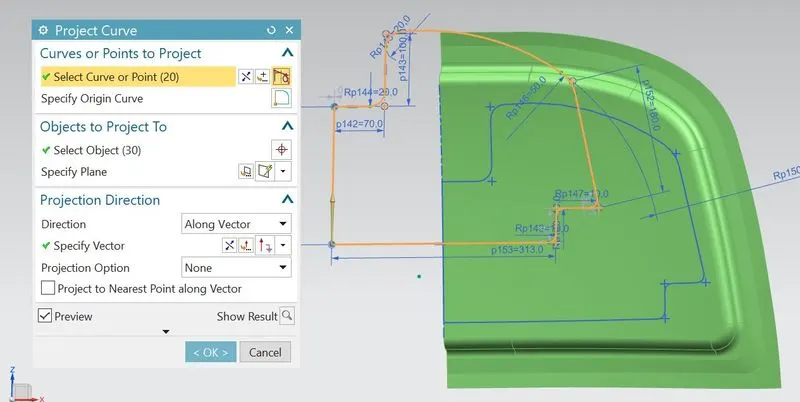
- Offset the surface to 5mm and apply law extension to projected sketch.
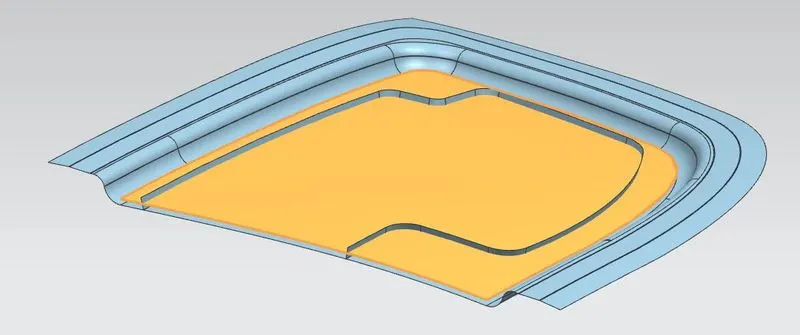
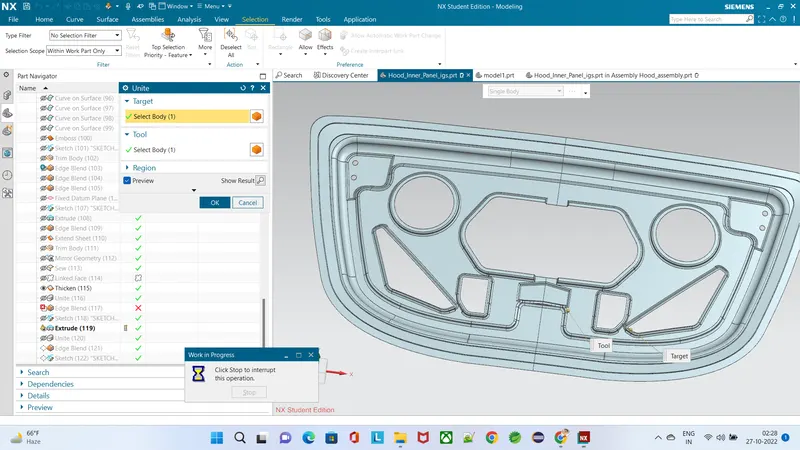
- Using law and extend,create the emboss.
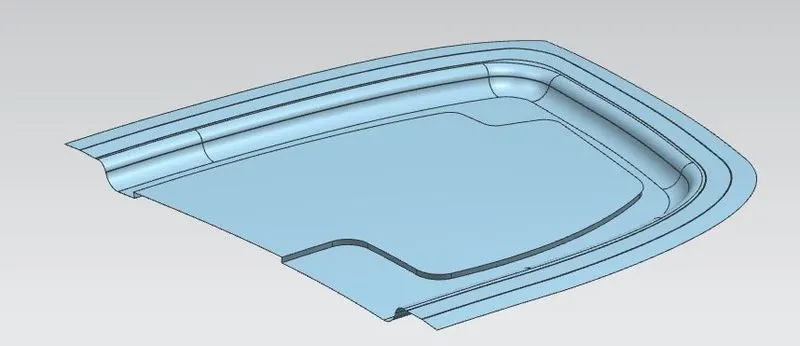
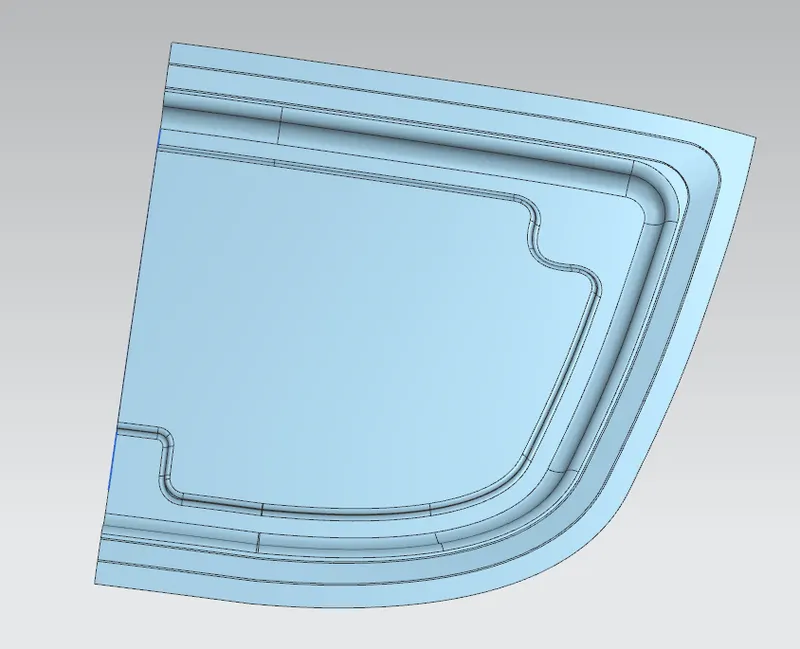
- Create the individual profiles on the embossed surface and also emboss them.
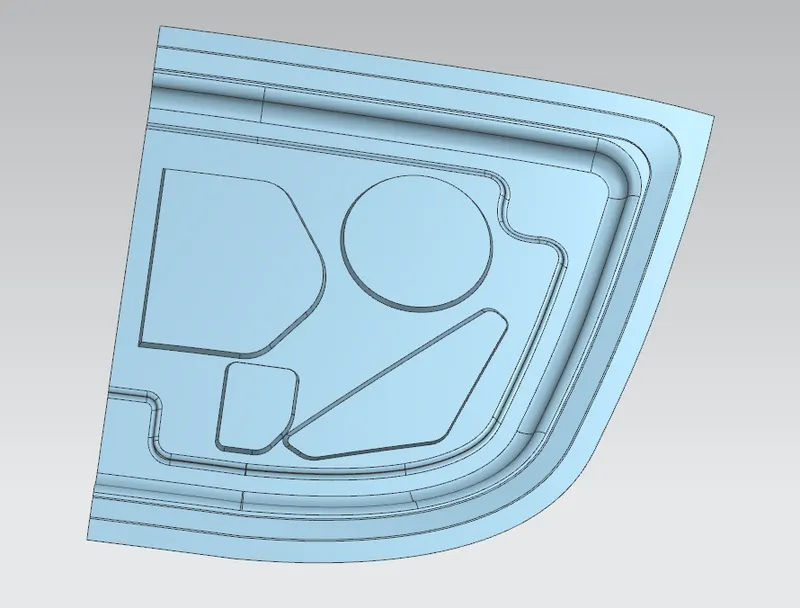
- Create the individual profiles on previous embossed surface in order to allow the space for mastric points and trim the sheet from profiles results in reduce the hood weight and apply the blends.
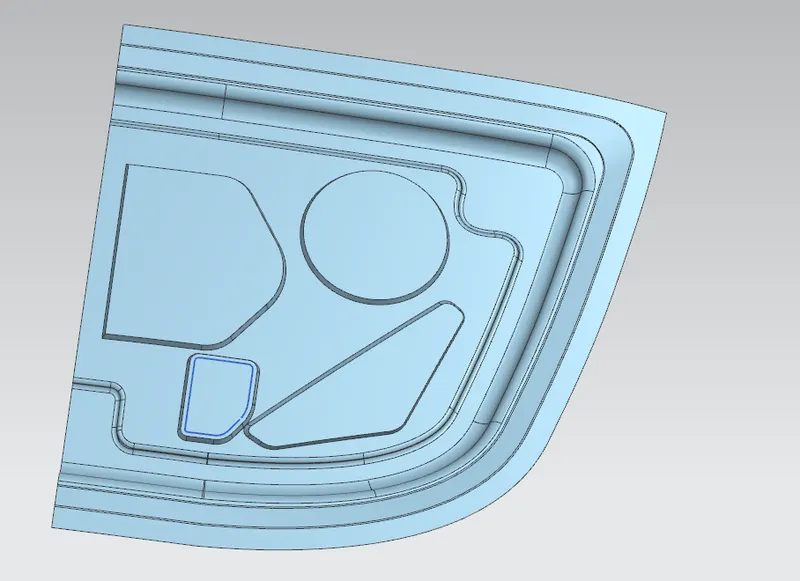
- For to create flat emboss for the hinge positioning,create the new datum palne from XZ palne and orient this plane using move object as matches parallel with the inner panel
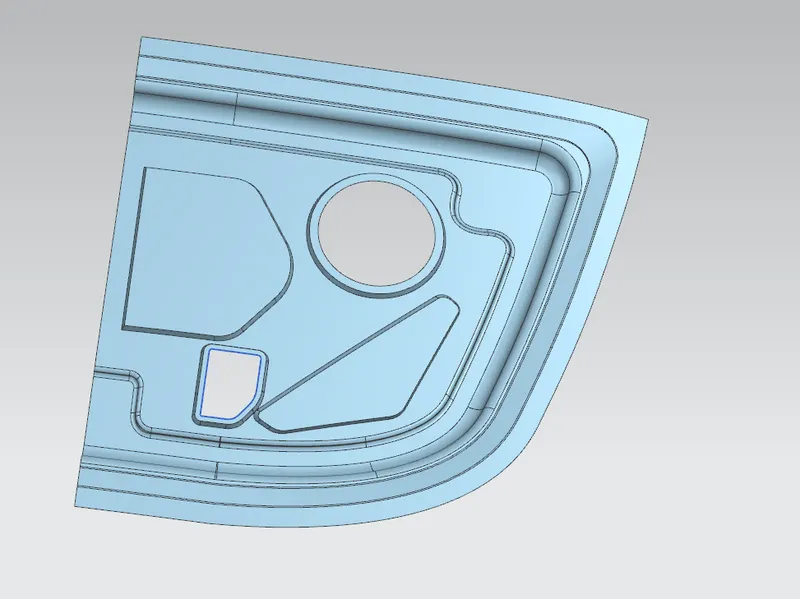
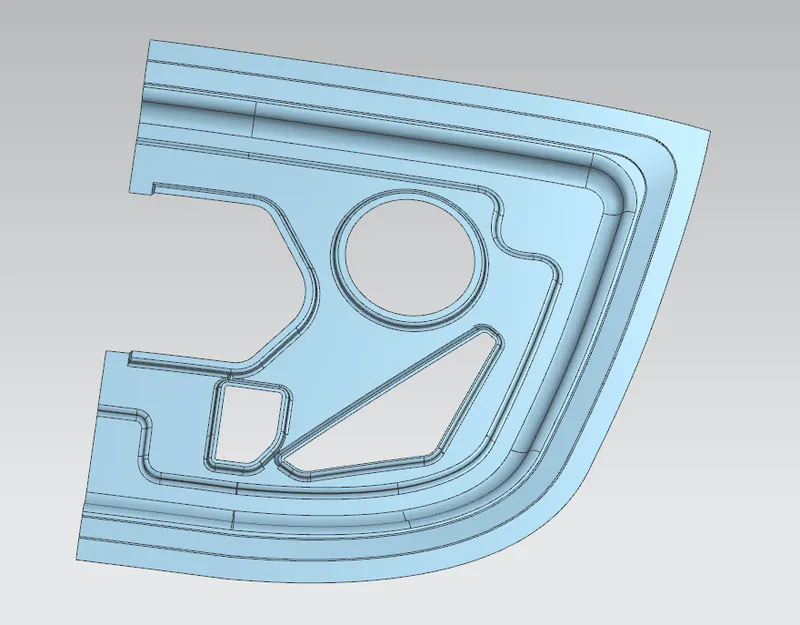
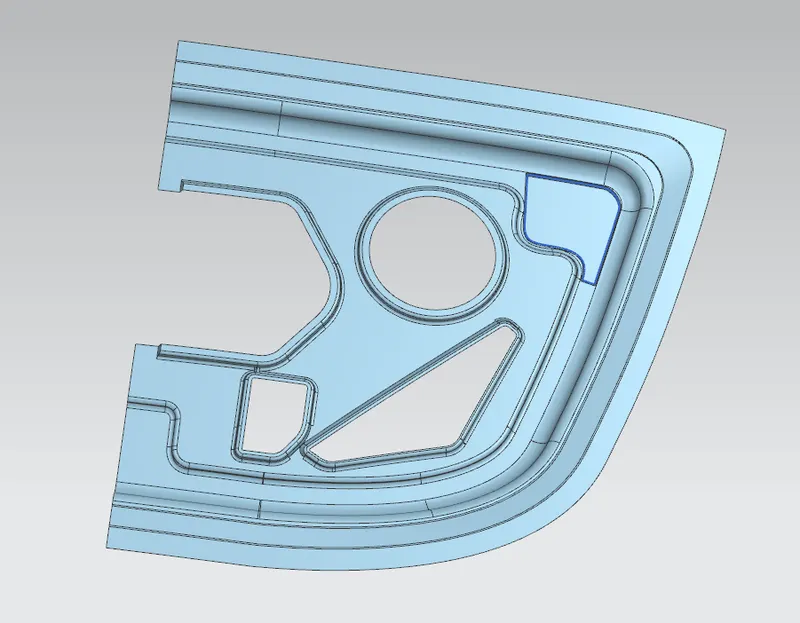
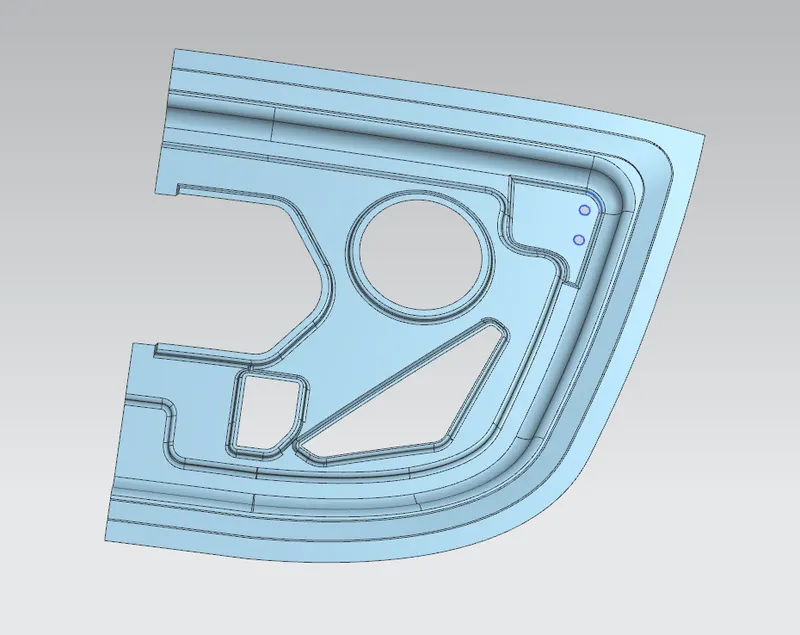
- Create the new sketch on new datum plane and draw the profile for hinge emboss and emboss it.Add the blends to emboss.
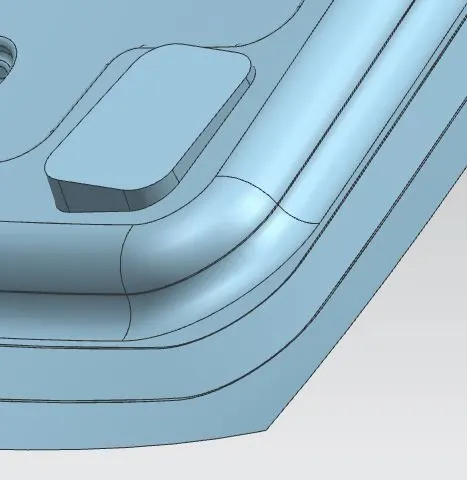
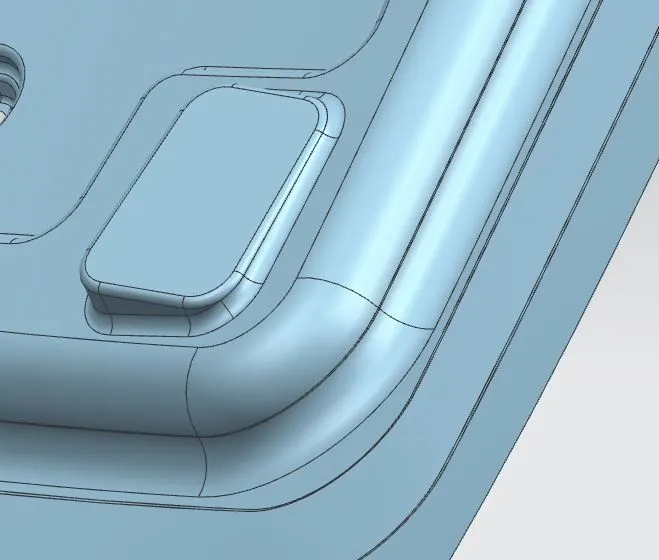
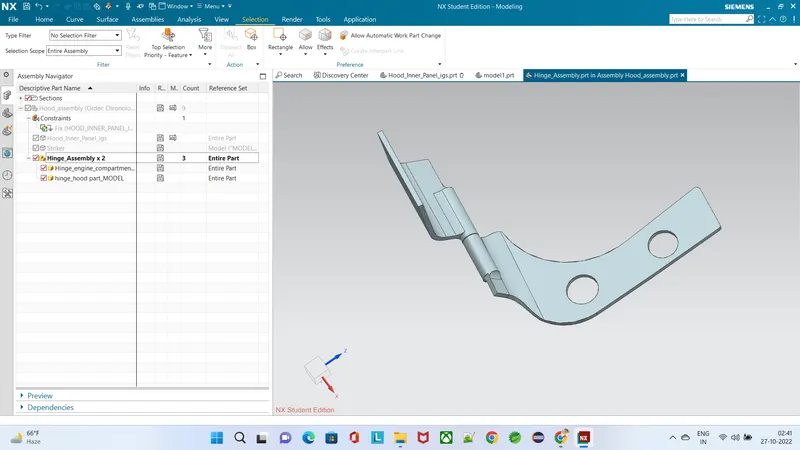
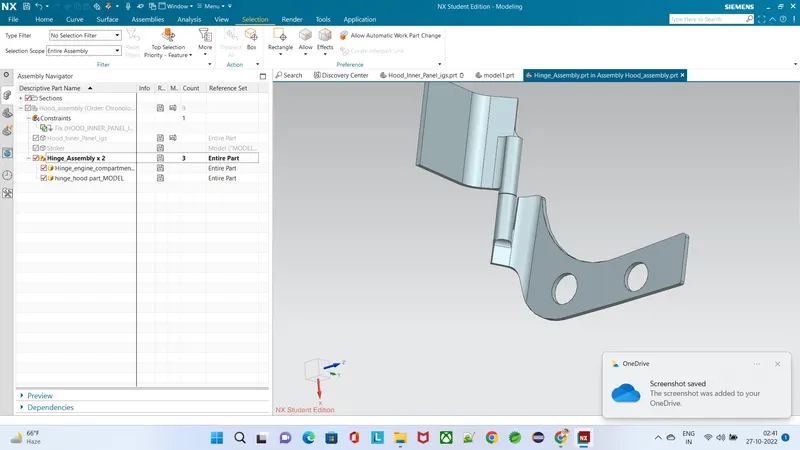
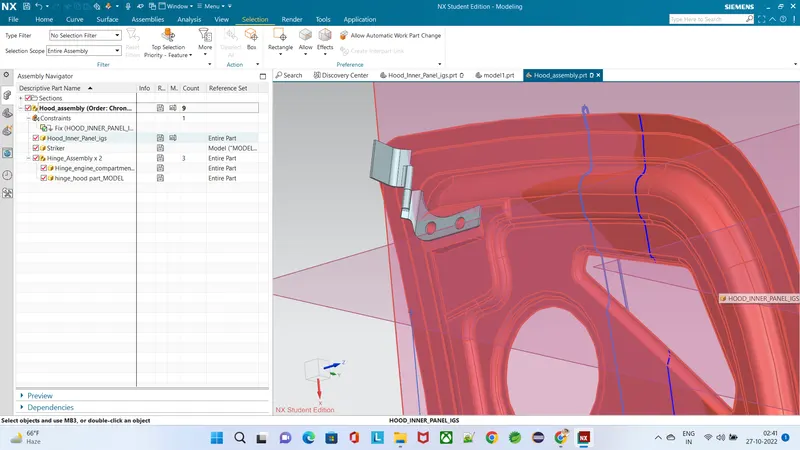
- Go to the assembly and using assembly constraints,constrain the hinge on inner panel.
- Copy the curves of hinge holes from hinge using the exract geometry and paste on inner panel of hinge emboss and trim the sheet.
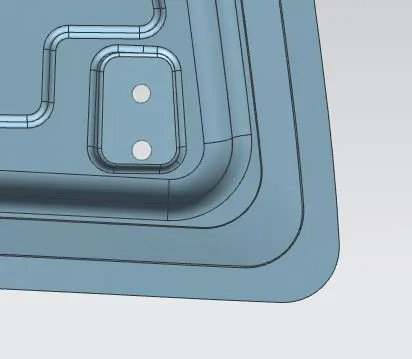
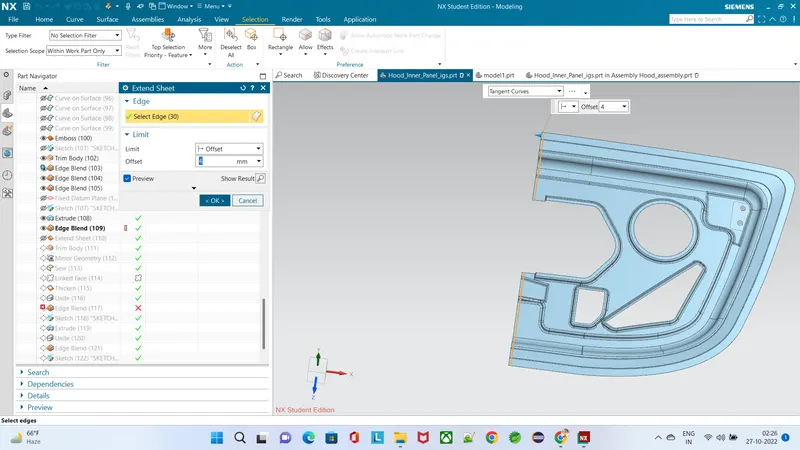
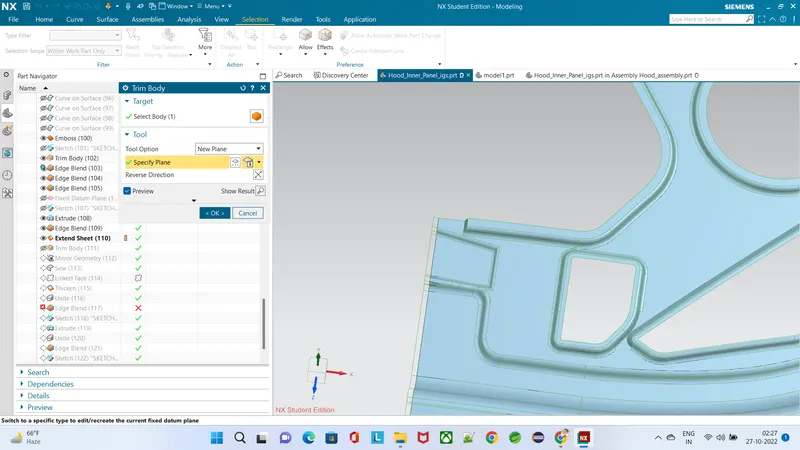
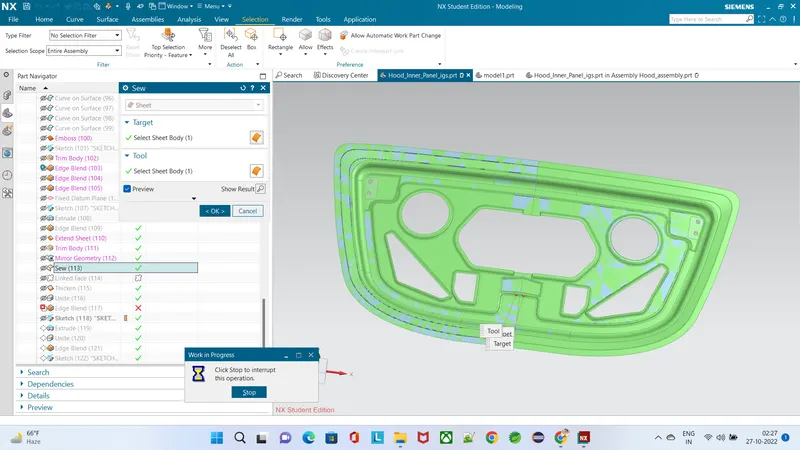
- Mirror the panel using mirror geometry and sewed it together to get single panel.
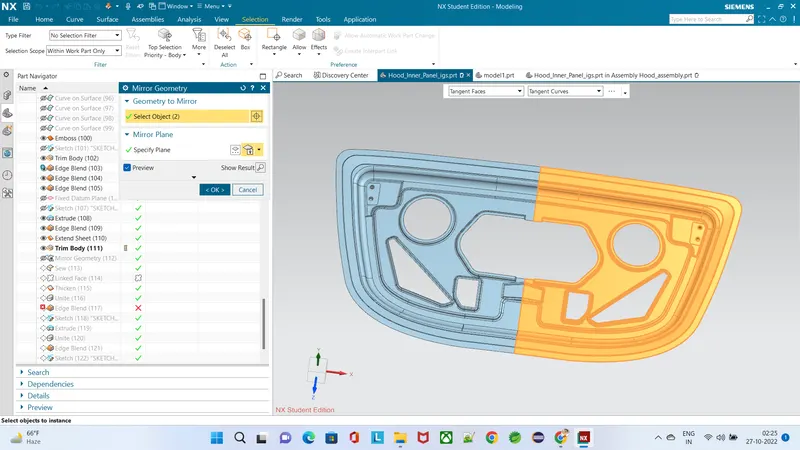
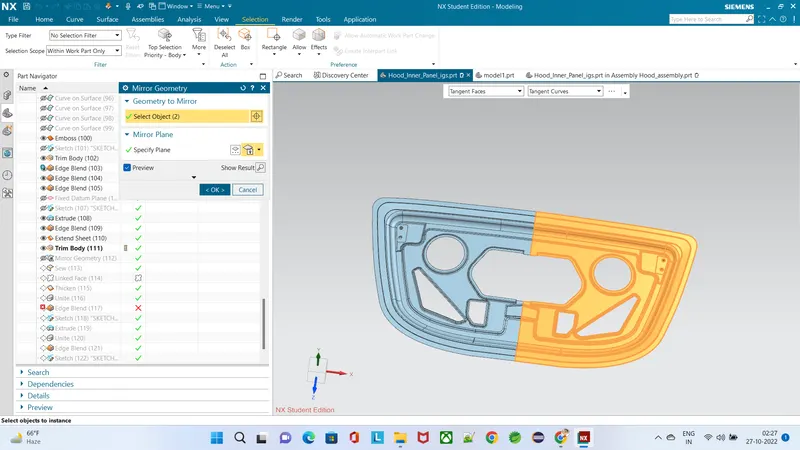
- Go to assembly,using mirror assembly and mirror the hinge assembly from the YZ plane.
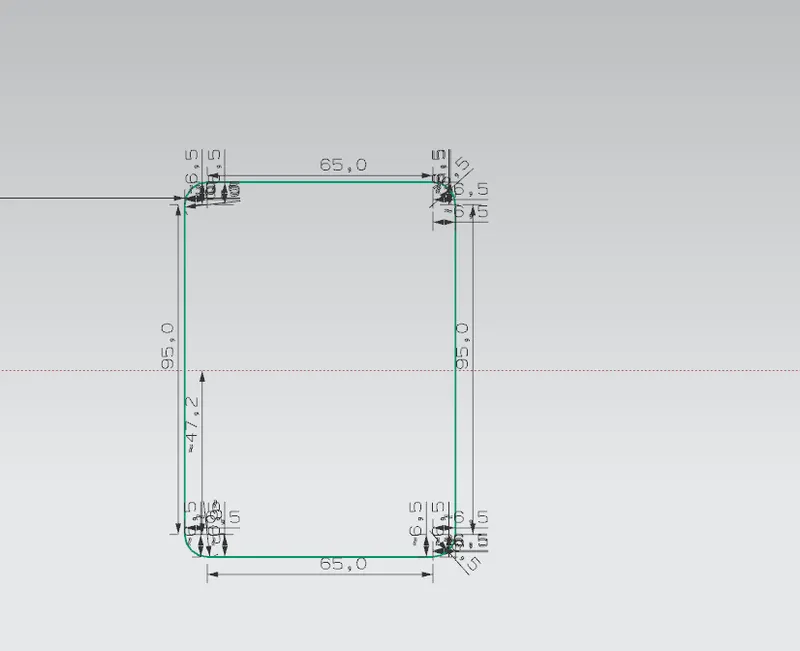
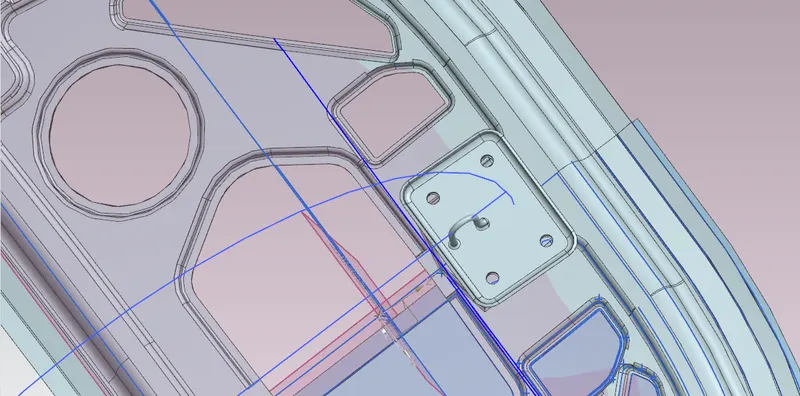
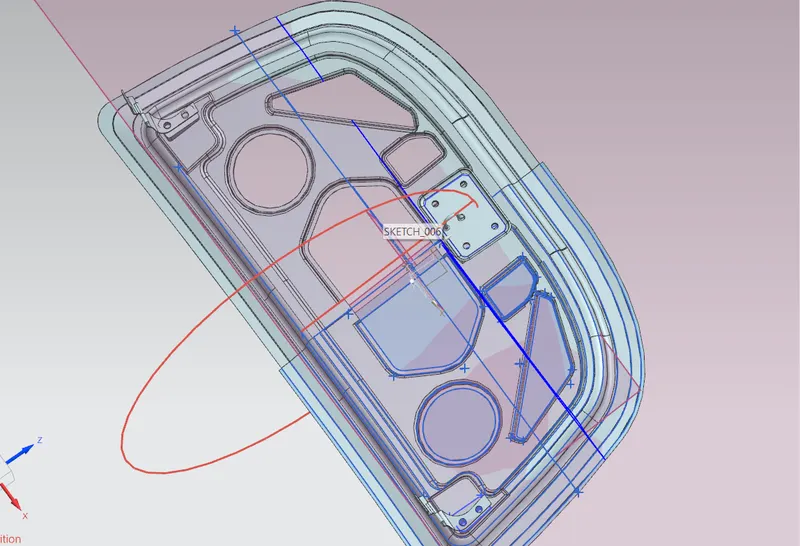
- For proper opening and closing of hood,the latch and striker should be positioned properly(Perpendicular to trajectory of hood).For that, go to the inner panel navigator and draw the hinge axis.Now,using the hinge axis as center draw a big circle to the position where we need the latch to be placed.Then draw a tangent line to the circle parallel to inner panel.
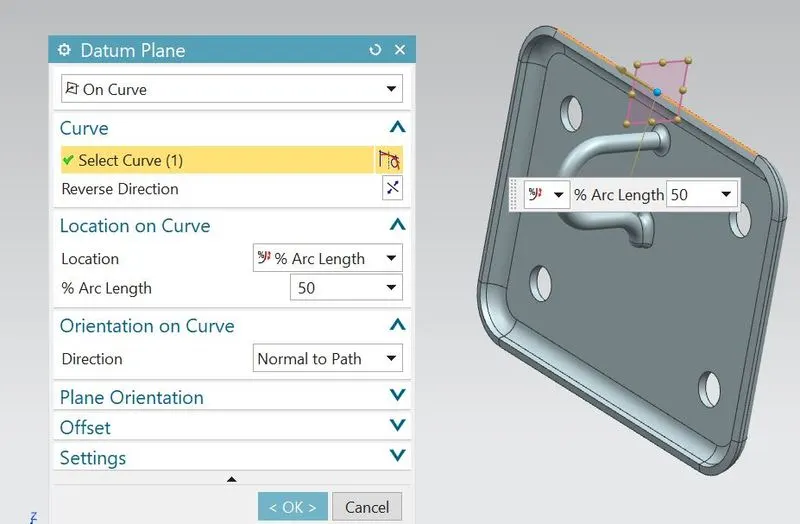
- Then go the striker part naviagtor and create the new datum palne at the exact center of upper edge.
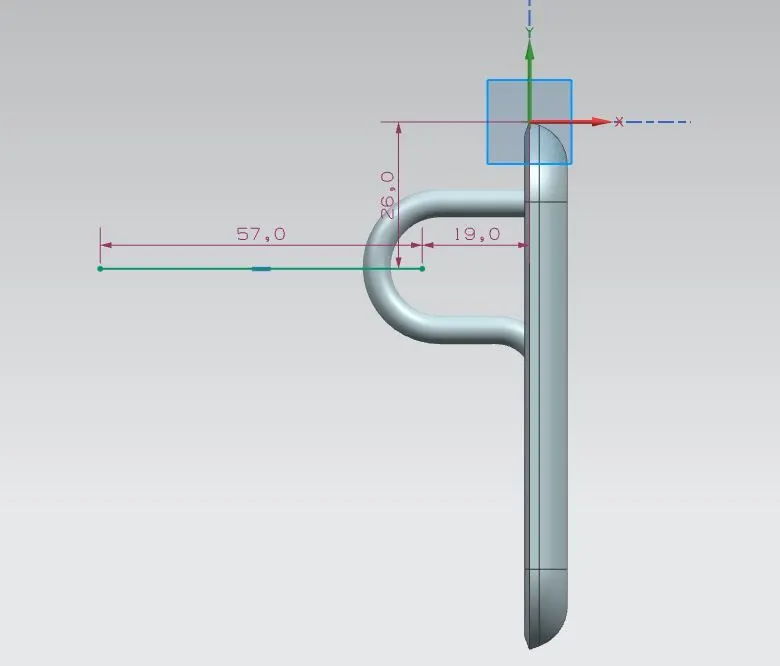
- Create sketch on datum plane and draw the staright line and exit.
- Go to assembly constraints,constrain the striker on inner panel.(Note-To change dimensions of circle, automatically the striker position will also updated as per requirement).
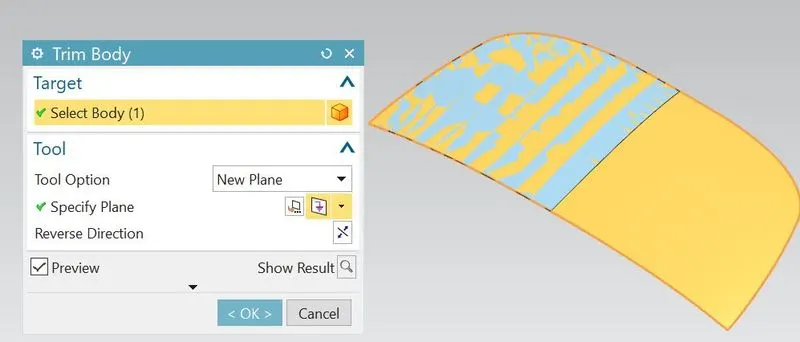
- Go to the outer panel part navigator and trim half surface from the YZ plane.(Untrimmed sheet is working surface).
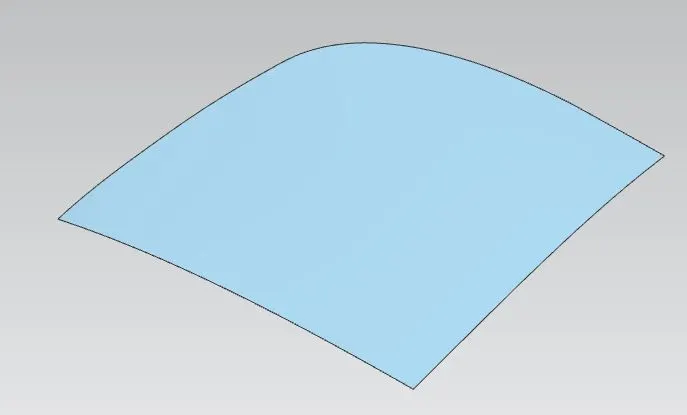
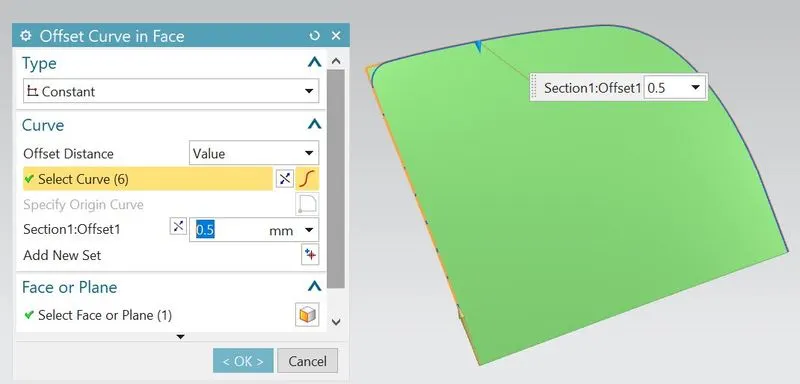
- Offset the curve on the working surafce of about 0.5mm.
- Create the flanges from offset curve with angle 80 deg using law extension.
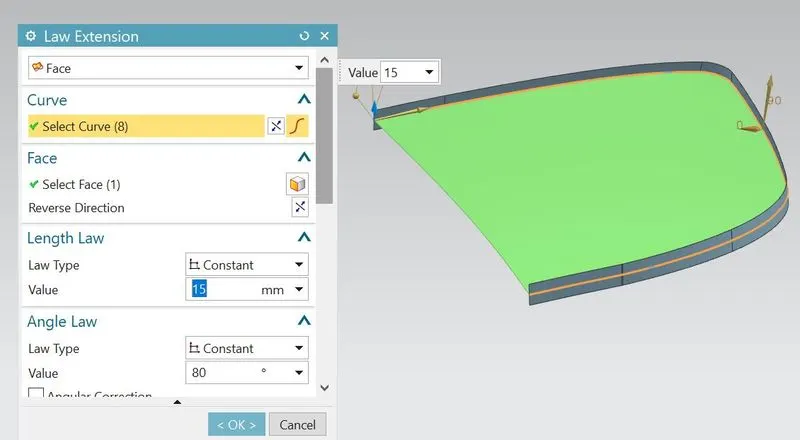
- Offset the law extension suface to 15mm inside.
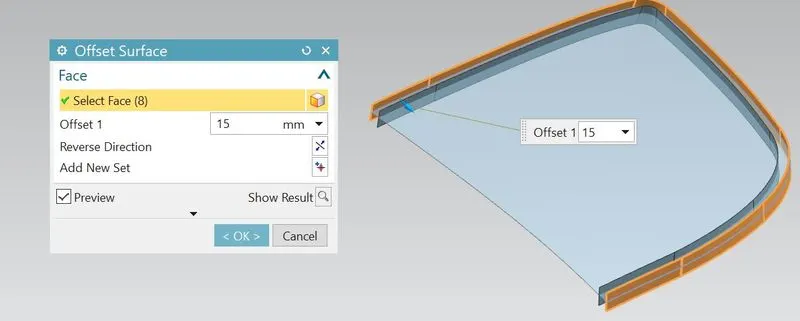
- For the hemming,we have top,bottom and side surface.So the working surface is offset to 2.95 mm.
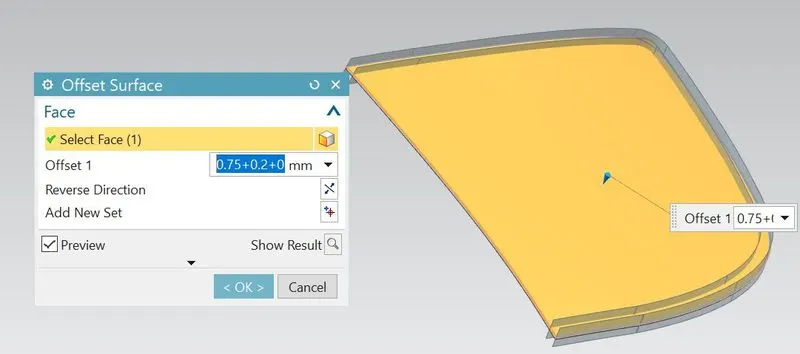
- Trim the sheet using trim sheet.
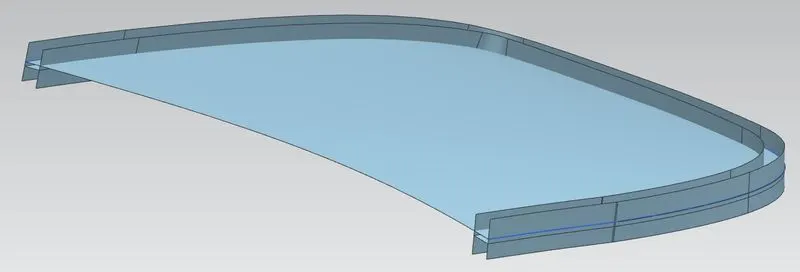
- Using face blend, blend the three surfaces.
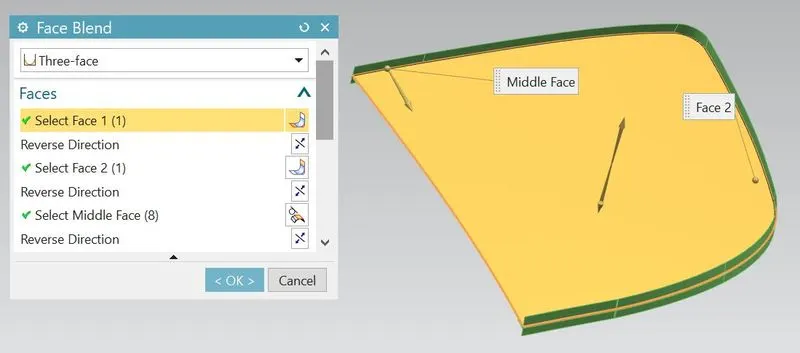
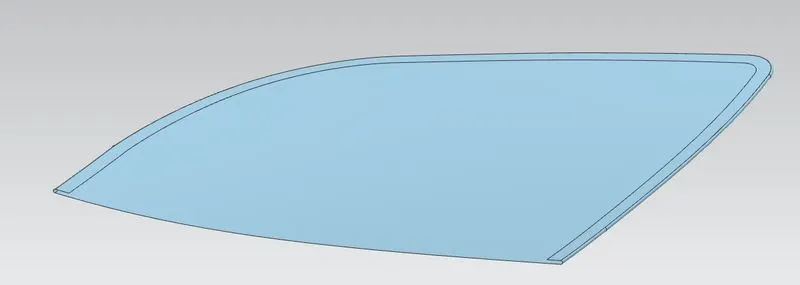
- For giving relief in the front and and right of the panel,draw the splines using G1 continuity as per relief data.
- Trim the sheet using the spline curve as boundary curve with trim sheet.
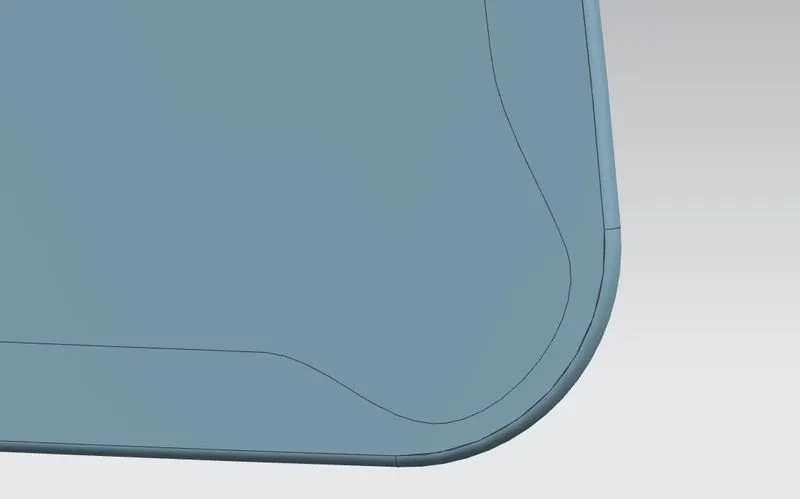
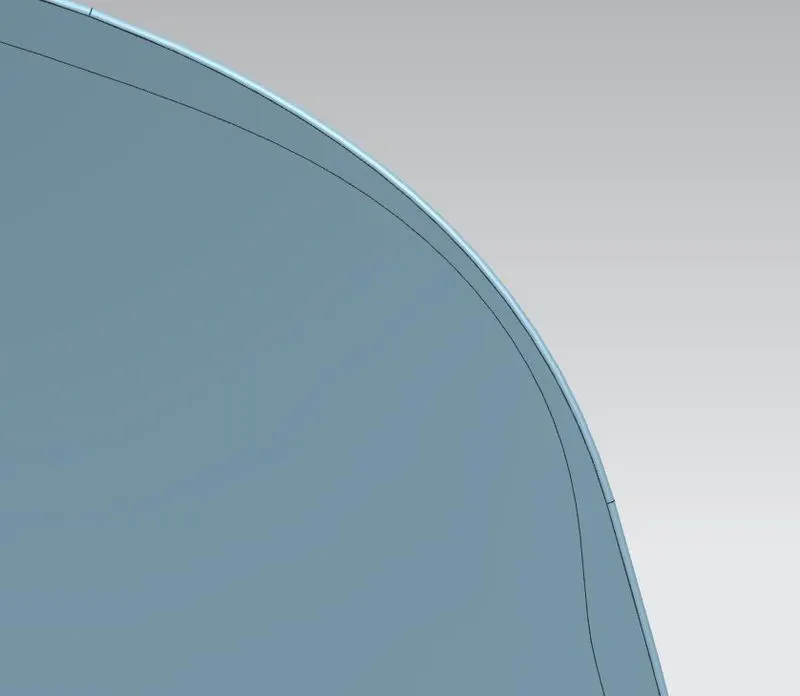
- Mirror the obtained panel using mirror geimetry and sew it.
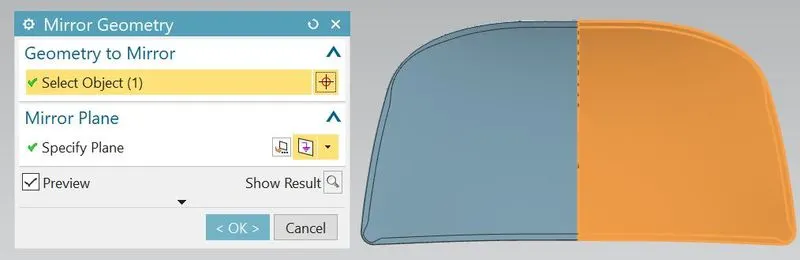
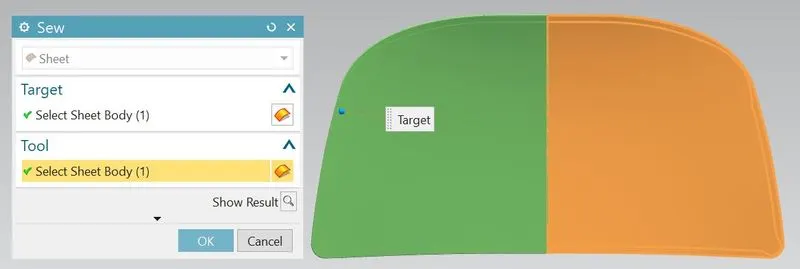
- Thicken the part inside to about 0.75mm.
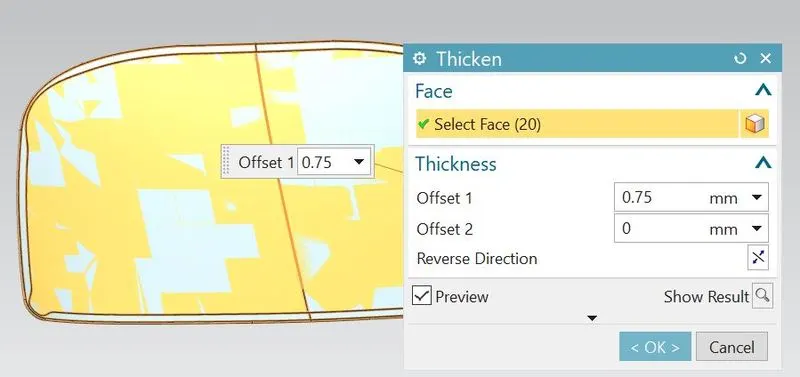
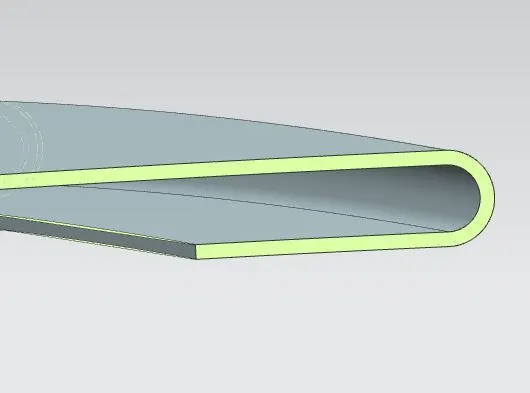
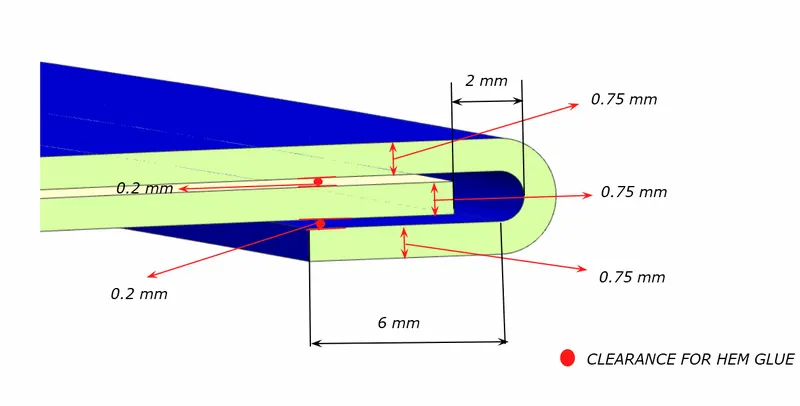
- So the outer panel should be completed.
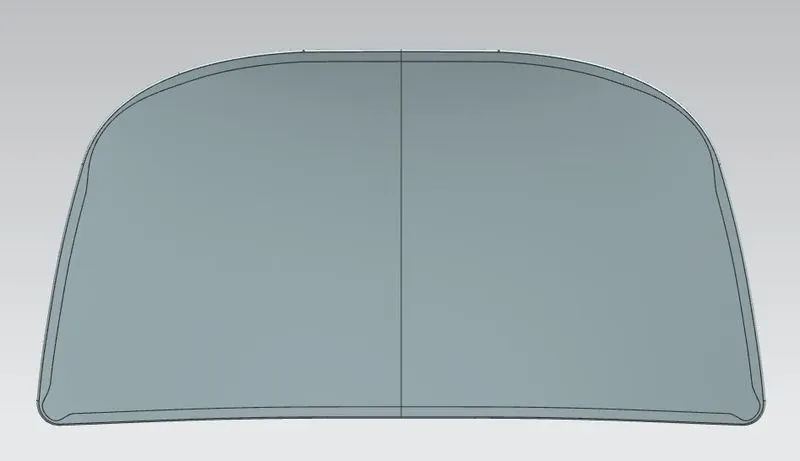
Finally all the parts can be created and assembly of the hood should be completed.
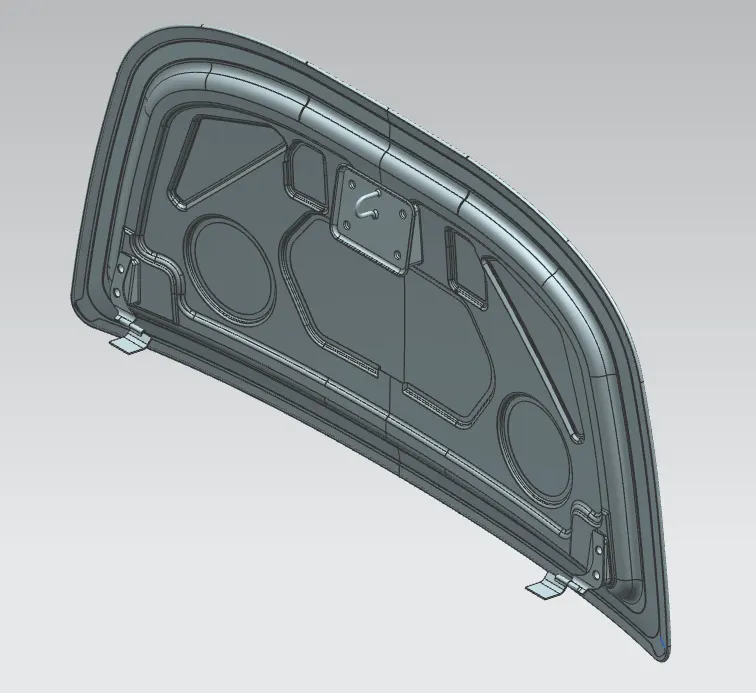
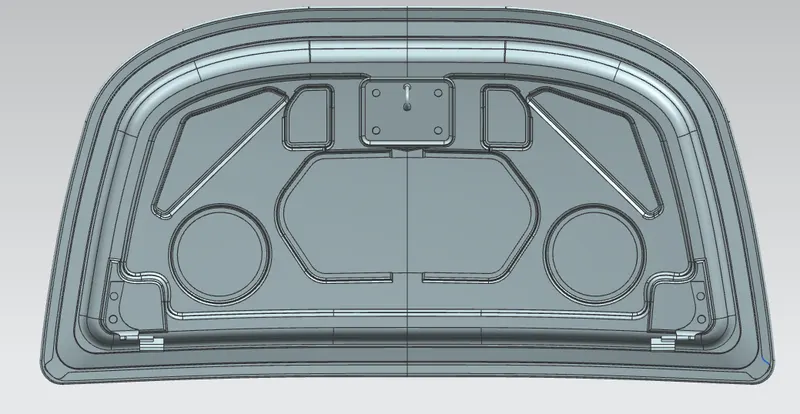
Conclusion-
Design of parts and assembly of BIW hood can be successfully completed as per the manufacturing requirements by using NX-CAD software and also learnt a knowledge on how to use important tools such as curve and surface commands.