Hood design-Week 2
HOOD DESIGN
Objective
Design hood outer panel, inner panel and reinforcements with the given outer hood skin, master section and design parameters.
INTRODUCTION
The hood is the hinged cover over the engine of motor vehicles. Hoods can open to allow access to the engine compartment (or trunk on rear-engine and some mid-engine vehicles) for maintenance and repair. In design perspective hood should meet some specific conditions like pedestrian safety, hood head zone for the lock striker, force distribution when subjected to frontal collision (occupant safety), manufacturability etc. A typical hood assembly consist of hood outer panel, inner panel, latch and striker, hinge, hood stay. Hood stay is an apparatus for supporting the engine hood of a moto vehicle in its open positionIt is the most critical part of the car as it is always exposed to the frontal crash, climatic conditions, heat generation by the engine compartment, etc. This gives access to the engine, battery, and other components which are always needed to be inspected at regular intervals. Hood is the combination of an outer and inner panel and as per its design consideration,
Design parameters
Hood Thickness Information
Outer Panel Thickness = 0.75mm
Inner Panel Thickness = 0.75mm
Reinforcement Thickness = 1.5mm
Master Section
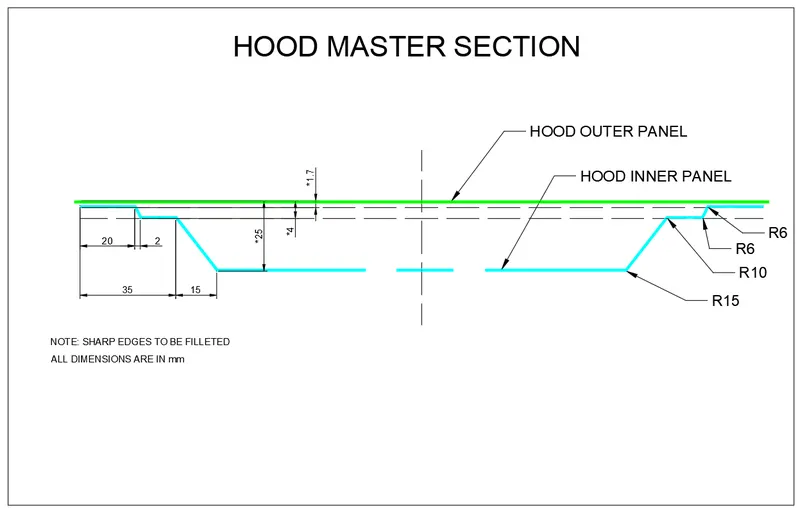
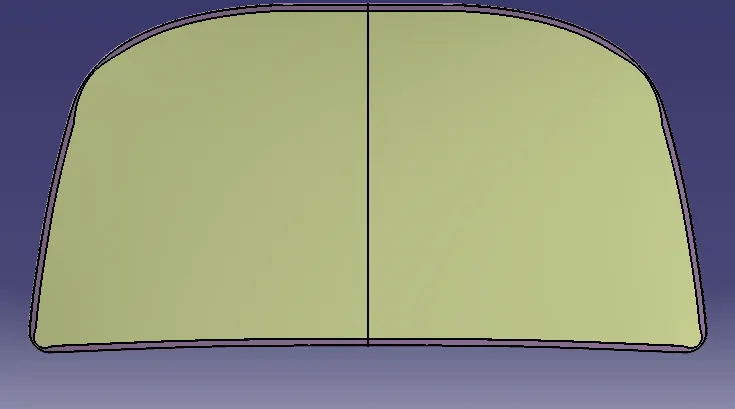
Hood and Components..
.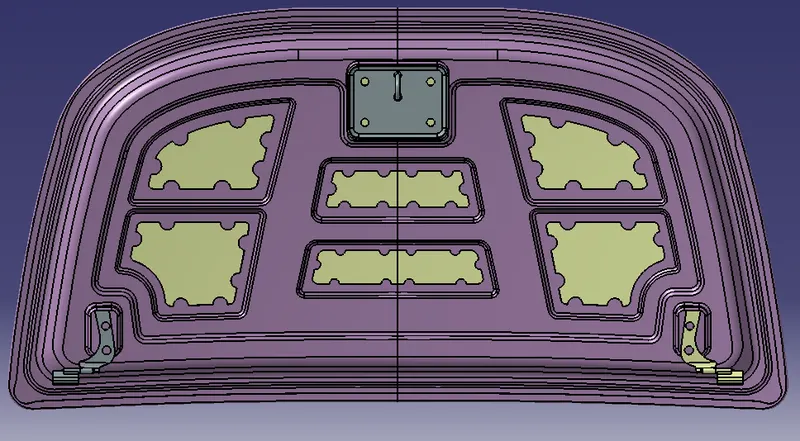
finel assembly designe of hood
Components
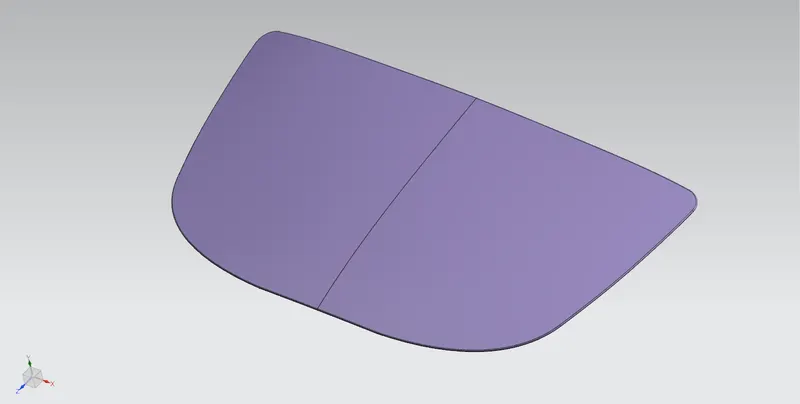
1.Hood outer panel
Outer panels are the aesthetic elements of a car. It is the styling team who provides the skin for the outer panel. The shape, position and size of the hood should satisfy the safety norms. So while designing the hood we should give more importance to pedestrian safety. The outer panel is attached to the inner panel by hemming. So, it is necessary to provide required hemming flange and reliefs for the hemming operation. We also provide mastic sealants between outer panel and inner panel to reduce vibration.
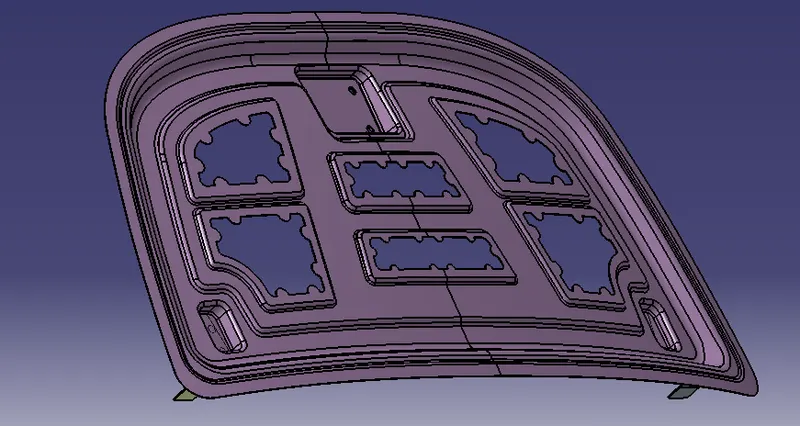
2.Hood inner panel
Inner panel is the part that gives strength and rigidity to the outer panel. The master section represents the initial emboss shape and size. Then we provide the emboss for the latch and hinge elements after fixing the location.
1. Hinges
Hinges allow the hood to rotate around a fixed axis for opening and closing movement. One part of the hinge is fixed with the engine compartment, while other part is connected to hood.
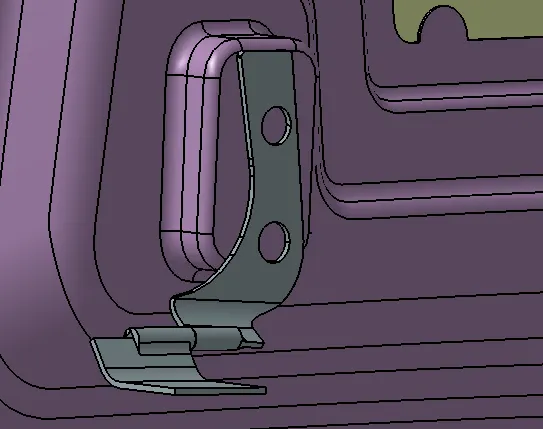
Fig.2.1 Right Hinge Assembly
2. Latch and Striker
Latch and striker mechanism is provided to lock the hood, in order to prevent accidental opening of the hood during driving. The latch is present on the engine compartment while the striker is attached to inner part of hood.
.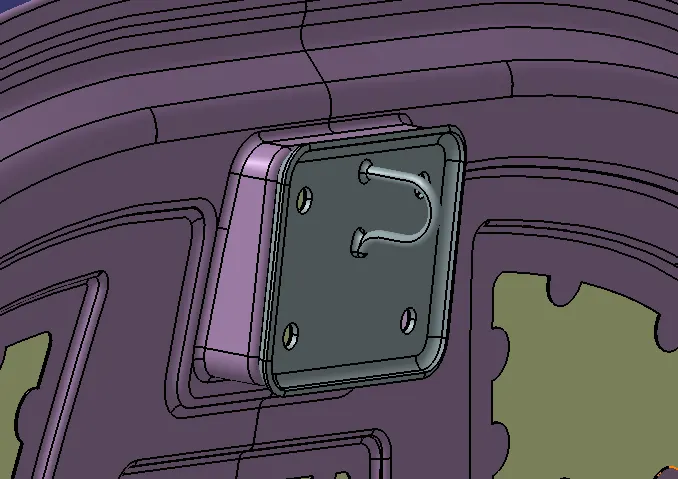
FIG.2.2 Car Hood latch striker
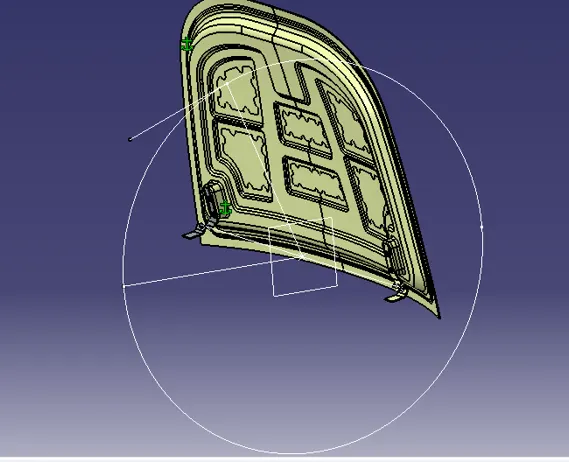
3.Latch Trajectory:
It is the path along which the hood rotates during opening and closing movement. The striker on the hood follows a particular path while opening or closing the hood, which is along circumference of a circle with center at the hinge axis. This path is nothing but latch trajectory. It is a very important aspect in hood design, in order to decide hinge, latch and striker installation points.
4.Mastic Sealant:
Mastic sealant helps to locally improve strength of the hood. It is generally a hard rubber part, which is introduced as a paste in between inner and outer panel of the hood, which will get hardened inside the furnace. Every mastic sealant point will have a tendency to improve the local strength in around 80 mm diameter. Considering this, the mastic points are positioned such that most of the hood region is covered.
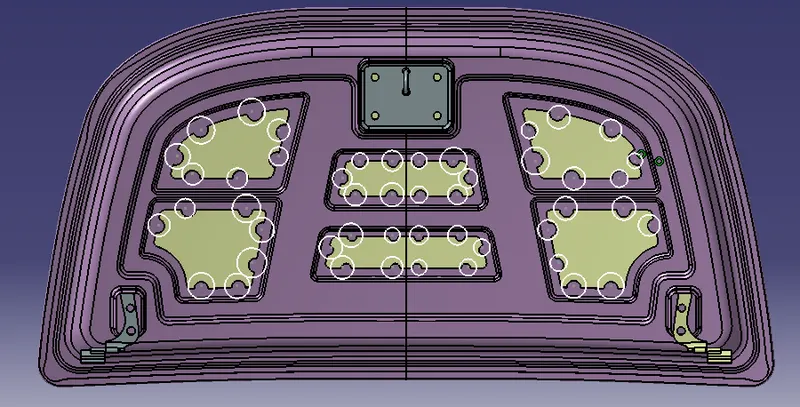
Fig.4 Mastic Sealant Points (highlighted in white)
Reinforcements are provided according to the design requirements. Mainly it is provided at the hinge and latch regions to improve the strength locally. Usually thickness of reinforcements will be higher than that of the inner panels and the value varies according to cost and requirement. According to the design requirement here it is given 1.5mm thickness to both hinge and latch reinforcements.
Hemming –
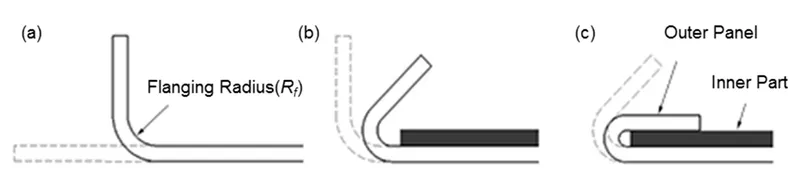
Hemming is a forming operation in which the edges of the sheet are folded over other part or simply folded in order to achieve a tight fit. In car part production, hemming is used in assembly as a secondary operation after deep drawing, trimming and flanging operations to join two sheet metal parts (outer and inner) together.
The typical three-step bending process of the hemming operation comprising of the flanging, pre-hemming, and final hemming process.
There are two types of hemming operations,
- Conventional die hemming
In conventional die hemming, the flange is folded over the entire length with a hemming tool.
- Roll hemming:
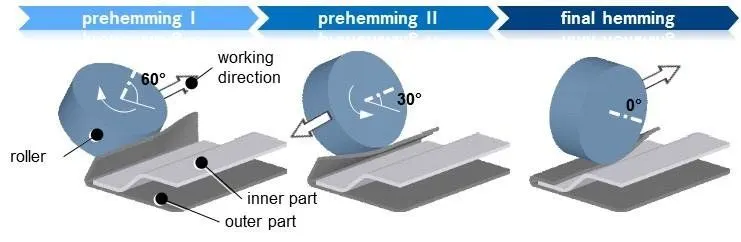
It is the roll hemming process that is used for automotive sheet metals. Roll hemming is carried out incrementally with a hemming roller. An industrial robot guides the hemming roller and forms the flange. Roll hemming operation can also be divided into several pre-hemming and final hemming process steps. Roll hemming is very flexible to use and tool costs are significantly lower as compared to those of conventional die hemming. However, the cycle times are much higher since the hemming is realized using a hemming roller which follows a defined path.
Hemming Data:
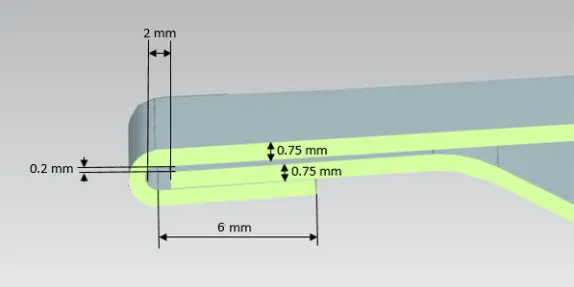
Manufacturing Process:
The following are the manufacturing steps done to generate the outer and inner panel of the hood.
Blanking: It is the process where the required sheet metal material is cut from the sheet metal coil for the manufacturing of the hood using a blanking die.
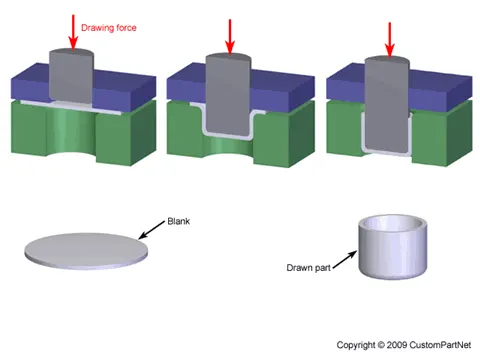
Stamping: The material obtained from blanking is stretched using the stamping die. The stamping die is designed according to the embossed design. This process is called deep drawing.
Conclusion
In this challenge I learned to design the hood inner panel, outer panel with the help of master sketch and the styling surface. And also learnt the assembly of Hood inner panel, Outer panel, and the reinforcements like latch and hinge assembly by using catiav5.