Hood design-Week 2
HOOD DESIGN
Aim: To Design and apply the reinforcements to the Hood Inner and Outer panel using NX-CAD software by following the master section as a input and assume the necessary design values if needed.
Introduction to Hood of the Automobile Car:
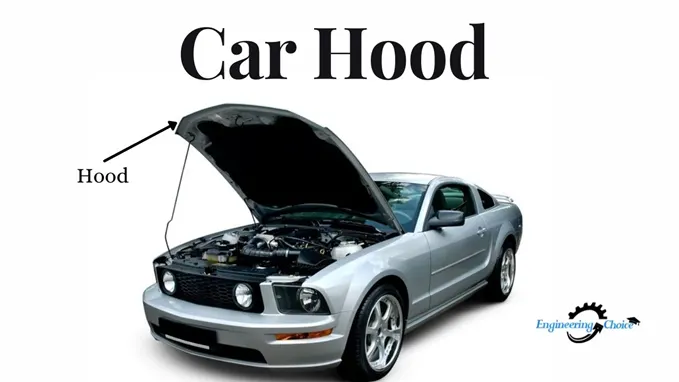
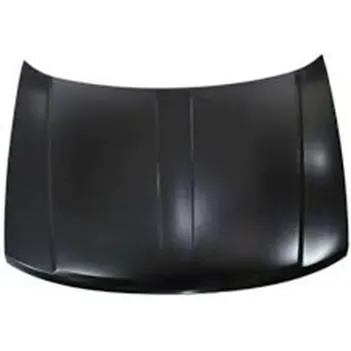
The hinged cover above an automobile's engine is referred to as the hood (American English) or bonnet (Commonwealth English). In some rear-engine and some mid-engine cars, hoods may be opened to provide access to the engine compartment or trunk for maintenance and repairs.
Release/ safety and security mechanisms: The interior hood latch handle, hood release cable, and hood latch assembly make up the majority of automobiles' hood release systems. Typically, the hood latch handle is placed in the door frame, next to the driver's seat, or below the steering wheel. Hood pins may be used to secure the hood on racing cars or vehicles with aftermarket hoods (which do not employ the original latch mechanism). Some aftermarket hoods with latch systems still contain hood pins to keep the hood buttoned down in the event that the latch breaks.
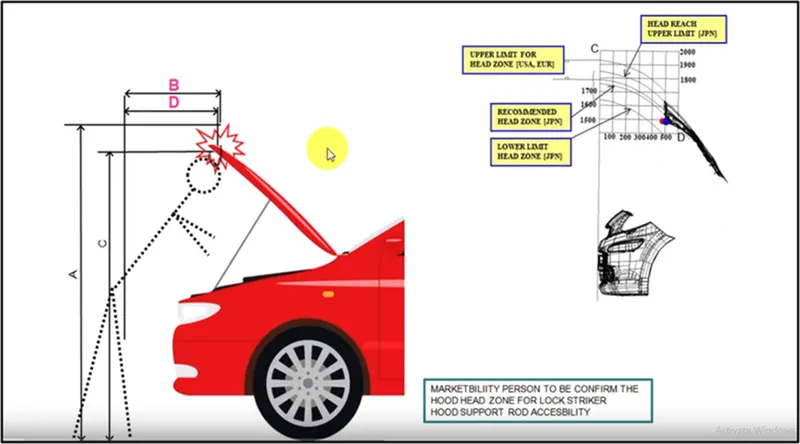
1.Hood head zone for striker locking:
This factor has to be taken into account when building the hood because when we open the hood to get access to the engine compartment to do any operation while the hood is open, the minimum height of the hood needs to be such that it does not crash or strike the person operating's head. Thus, the height of the hood in open situations should be higher than the average height of people in that area to prevent injury to people.
Types of Hood Support
- Support Rod:
These support rods are often used in automobiles to hold the hood open. As compared to gas stays, these support rods are more affordable. This sort of hood support requires manual hood opening. The support rod must be manually positioned on the supporting rod point, which is opposite to the support rod position, in order to keep the hood open. The support rod is fastened to the hood or the engine compartment. These support rods are often only utilised in vehicles with lighter hoods.
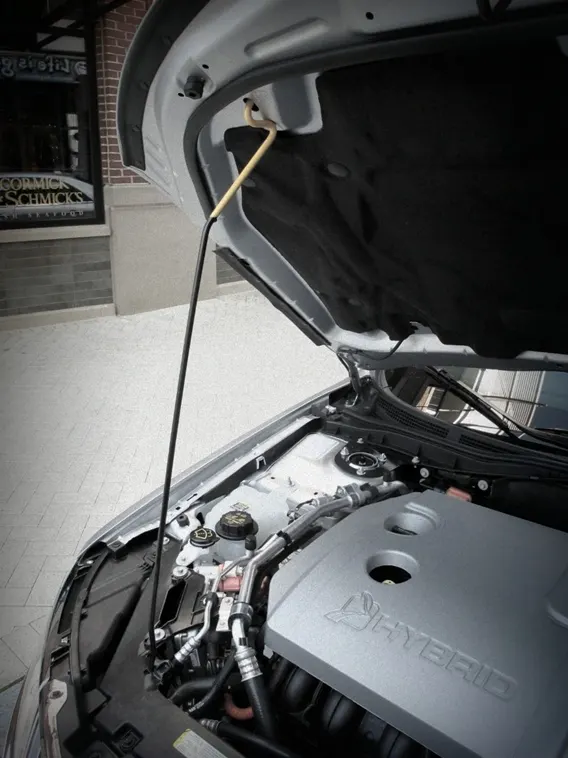
2. Gas Stay: These Gas Stay support rods are the kind that are used with heavy-duty hoods. These gasses stay rods are packed with pressurised gas to assist keep the hood open. To open the hood, Gas Stay just requires a little initial push. While easier to employ than support rods, gas stays are more costly.
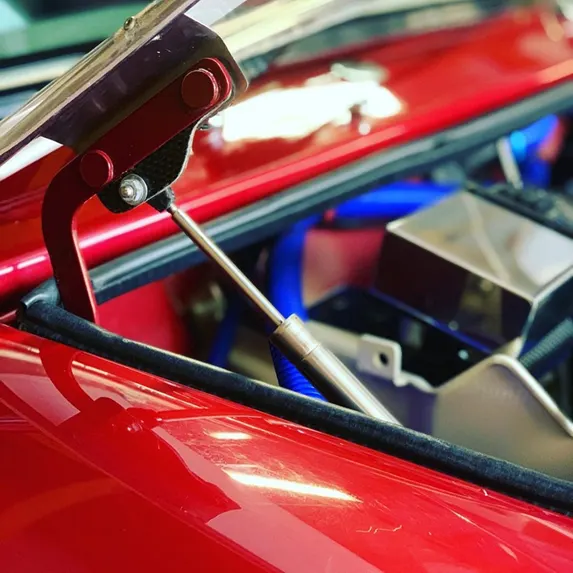
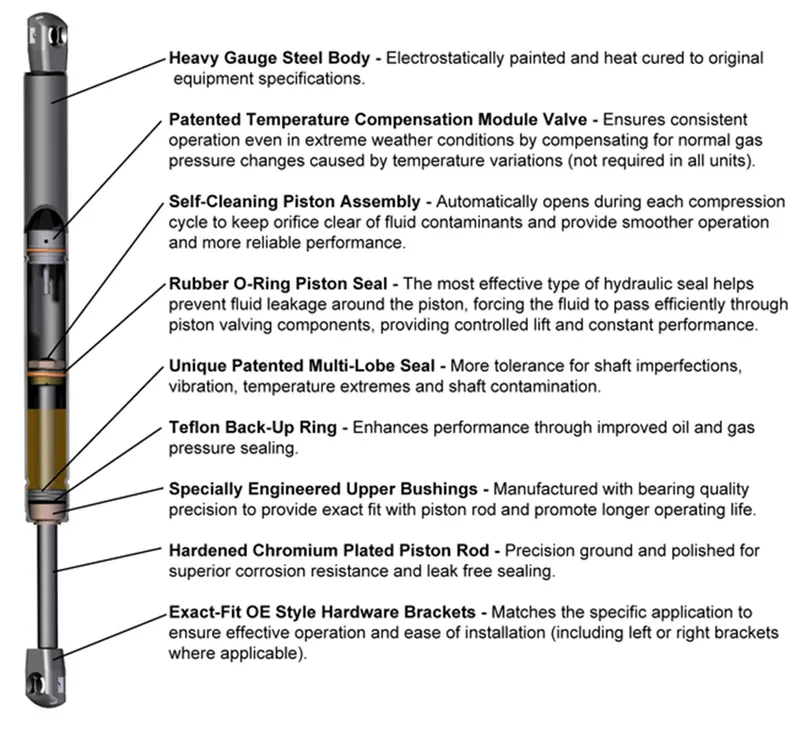
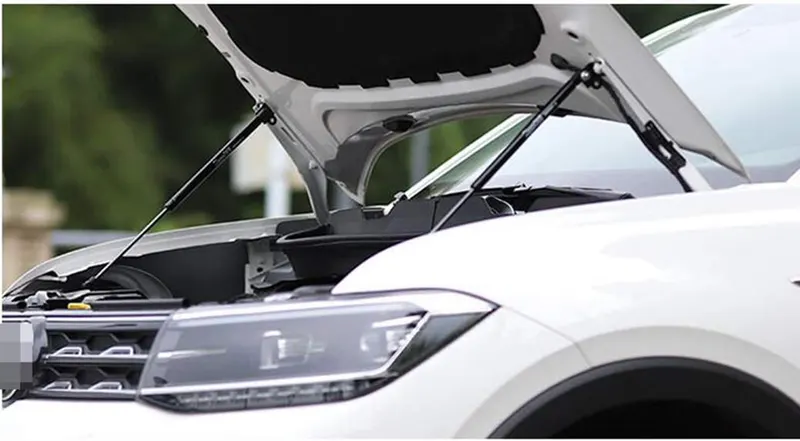
Fig. Gas stay holding hood open
2. Pedestrian safety:
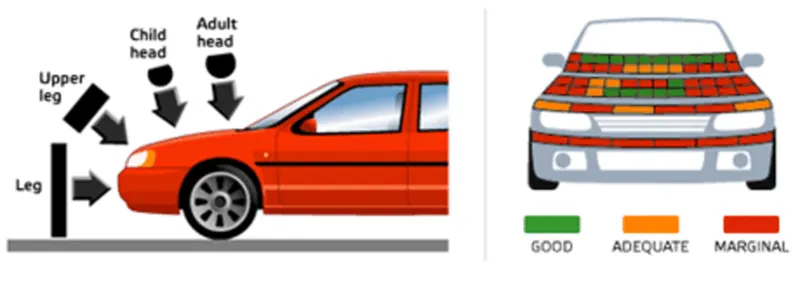
Regulations that restrict the degree of a pedestrian's head damage after being hit by a car have gone into force in Europe and Japan. As can be seen from the Mazda RX-8 and other cars' multicore hood inner panel designs, this is leading to increasingly sophisticated hood designs. Additional modifications are being developed to employ the hood as an active structure and push its surface away from the hard motor components by a few millimetres in the event of a pedestrian collision. Mechanical (spring force) or pyrotechnic devices may be used to accomplish this.
3. Mastic Data:
A sort of liquid sealant called mastic cures in an elastic condition, making it flexible while maintaining the link between the surfaces that have been bonded. It sticks to almost any surface, making it an all-purpose sealer.
The outer panel's primary use is for aesthetic reasons. Bolts and welding are therefore not an option. Mastic sealants and hemming are required to do this. Mastic sealants are rubber-like rubber-like elastic materials. Between the outer and inner panel, it is situated. It starts off as a paste, but after being heated in a furnace, it hardens, uniting the outside and inner panels. Mastic sealant has an impact of 80mm diameter and tends to strengthen the strength of the panel.
- The 10mm diameter can provide 80mm diameter of strength
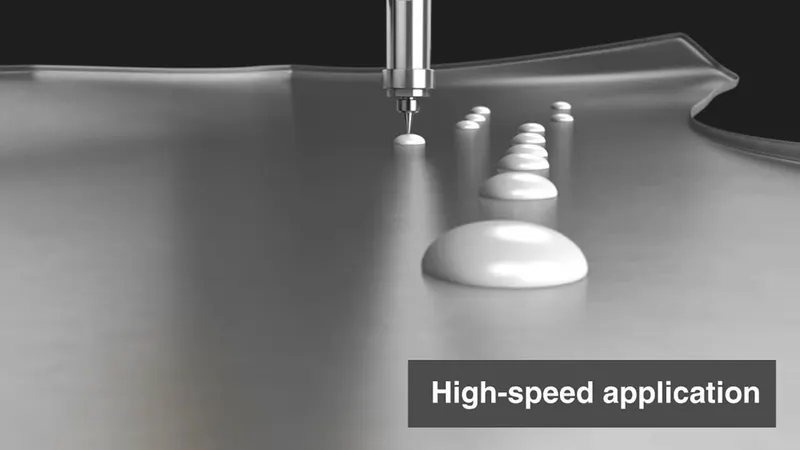
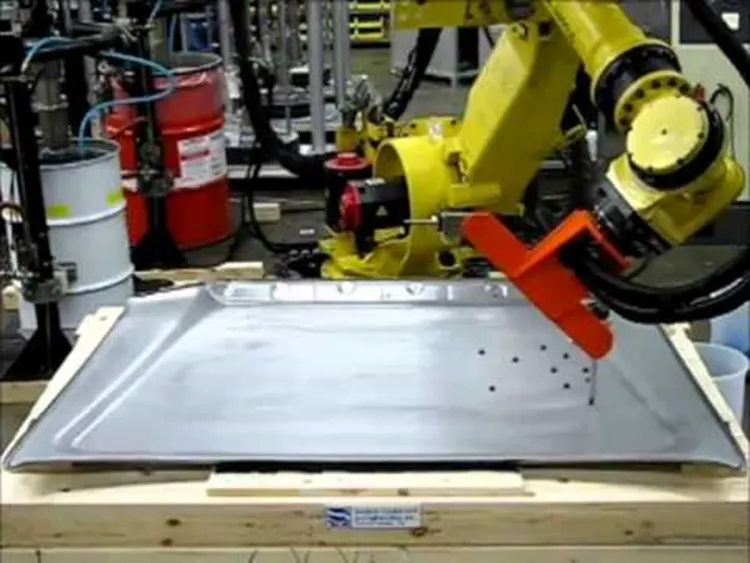
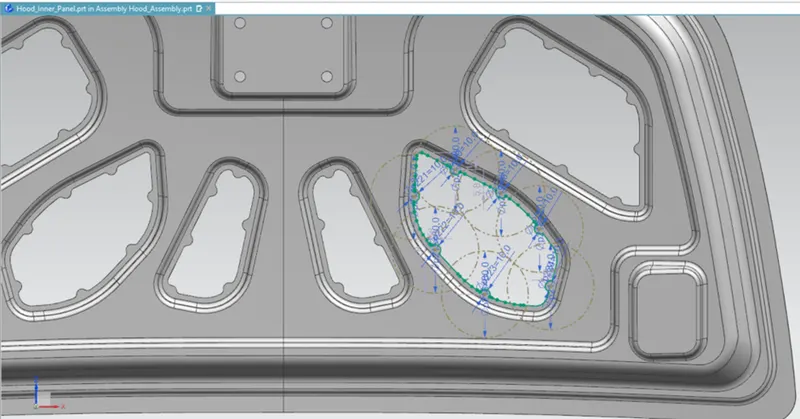
Fig. Sketch used in Nx-cad to represent the Mastic data points
4. Emboss Definitions:
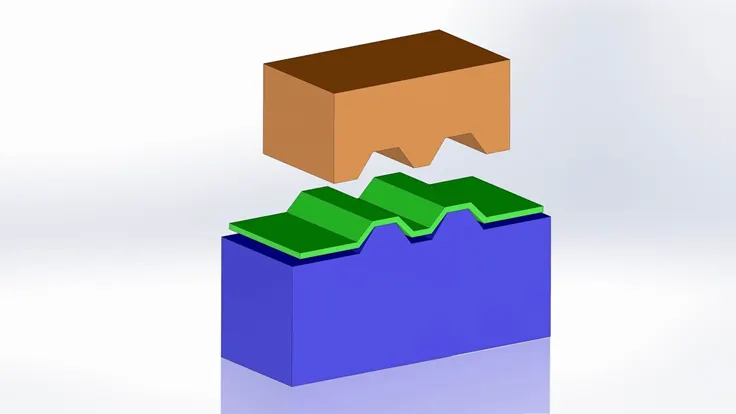
For the purpose of generating raised or sunken patterns or relief in sheet metal, embossing is a stamping technique. This procedure may be carried out using male and female roller dies that are matched, or by passing a sheet of metal or a strip of metal between rolls with the required pattern, presumably without changing the metal's thickness.
- Emboss should be in 7 degrees to 25-degree incline in angle and it should not be in 90-degree angle, why because when we do stamping in manufacturing the stamping tool fits the sheet metal hence it will not come out of that sheet metal, so this is the main reason why the emboss face is in angle.
- Metal sheet is produced with a pattern or design by drawing it through the male and female roller dies. Several designs may be created on the metal sheet depending on the roller dies used.
5. Manufacturing process:
- Deep Drawing
- Embossing
- Hemming
Deep Drawing:
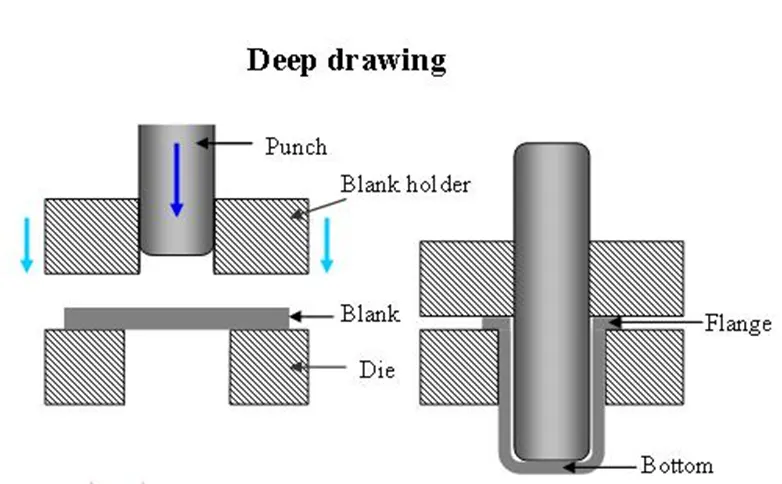
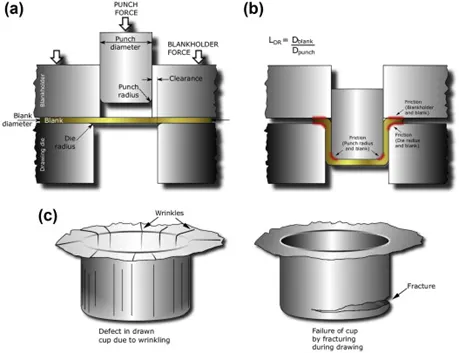
A sheet metal blank is radially dragged into a forming die during the deep drawing process by the mechanical action of a punch. Hence, it is a shape change process that keeps the material. When the drawn part's depth is more than its diameter, the procedure is referred to as "deep" drawing. This is accomplished by redrawing the component using a number of dies. Due to the material retention characteristic, the flange region (sheet metal in the die shoulder area) receives radial drawing stress and tangential compressive stress. Flange wrinkles are a consequence of these compressive stresses (hoop stresses) (wrinkles of the first order). By utilising a blank holder, which facilitates regulated material flow into the die radius, wrinkles may be avoided.
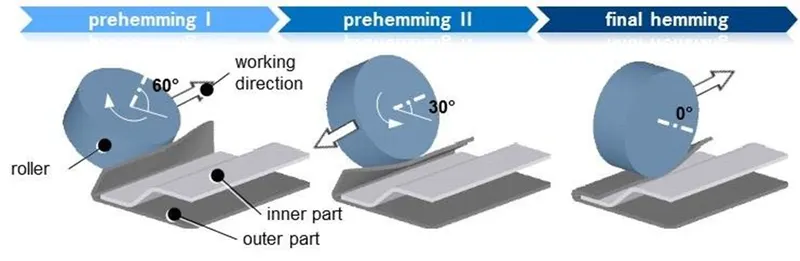
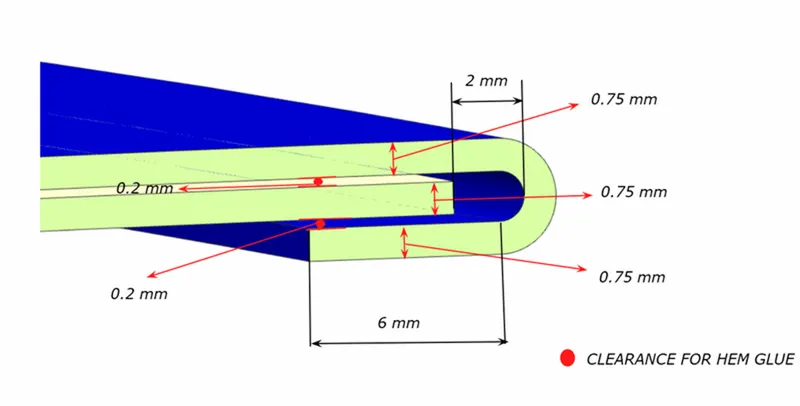
Hemming: In order to obtain a snug fit, the sheet's edges are folded or folded over another area during the hemming process. The car industry uses hemming to adhere inner and exterior closing panels together (hoods, doors, tailgates, etc.). It involves folding or bending the outer panel's flange over the inner panel. The precision of the process has a considerable impact on how the outside of the automobile looks, making it a crucial component of the completed vehicle's quality.
- Hemming is a secondary technique used in the assembly of two sheet metal sections (the outer and inner) for hood designs, after deep drawing, trimming, and flanging operations.
- Roll hemming: A robot uses this procedure to fold a sheet over or over another sheet by guiding a tiny roller over the flange. The method is tailored for low volume automotive applications, giving manufacturers of closures and subassemblies with designed flanges a clear advantage.
6. Hemming Data:
7. Hood Components:
- Hood outer panel or skin of the hood
- Hood inner panel
- Hinge assembly
Hood outer panel or skin of the hood:
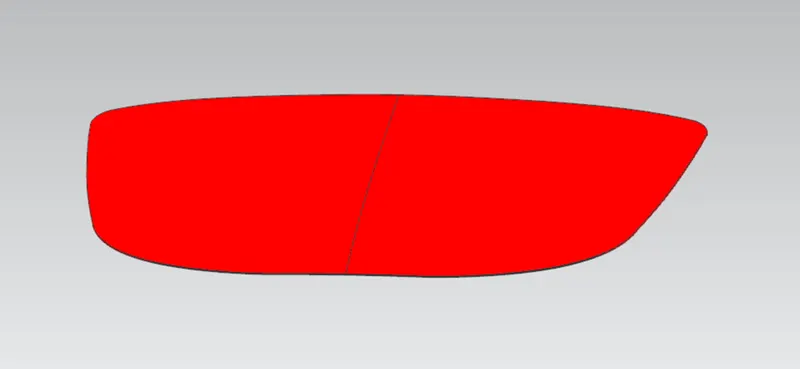
All of the other hood components are housed inside of this portion of the hood, which serves as a covering or casing for those components. This components outside surface have an excellent surface finish and is covered with corrosion-resistant paint to protect the internal components from rust and give the automobile a nice appearance from the outside. This component, which gives our hood its shape, has been given various styles and shapes to improve the vehicle's appearance and performance and lessen the stresses that moving air exerts on the vehicle.
Hood inner panel:
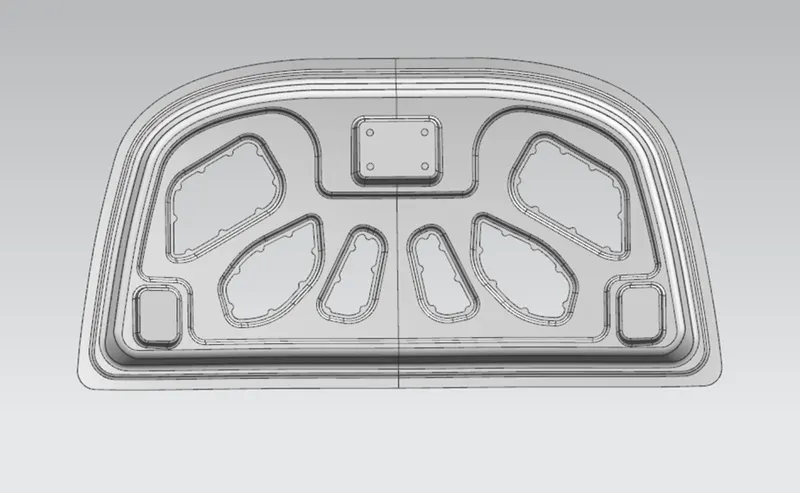
In order to make our hood completely functional, hinges and striker must be fastened to this portion, which is encased in the outer panel and gives the hood stiffness. It also has embossed areas for optimal force distribution and mastic sealant sites, as well as reinforcement for the hinge and striker. As indicated below, some material was removed from the inner panel of the hood to lighten it.
Hinge assembly:
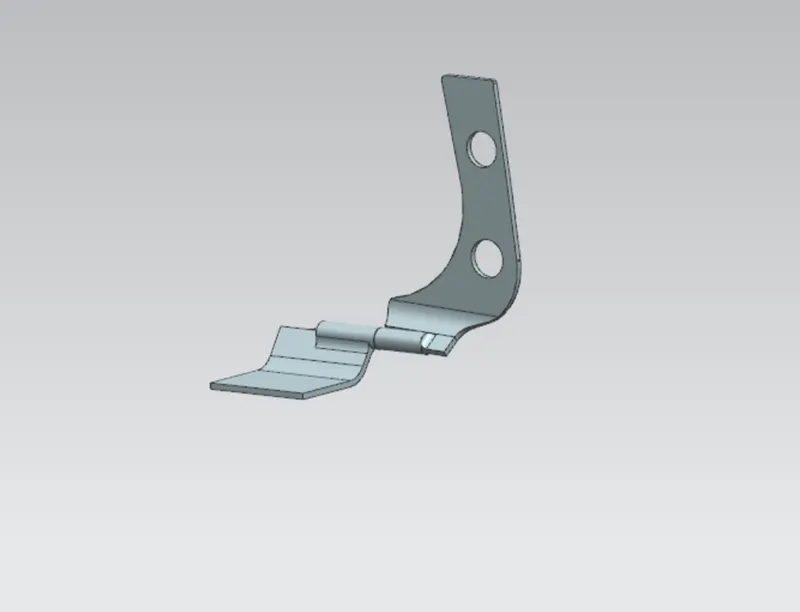
It is a crucial component of our hood since it is the only one that allows us to easily open and shut it whenever necessary. This component has to be sturdy enough to support the weight of the hood as well as the forces that an impact would exert on it. So, this component must be constructed with the greatest care to ensure that it does not malfunction while in use.
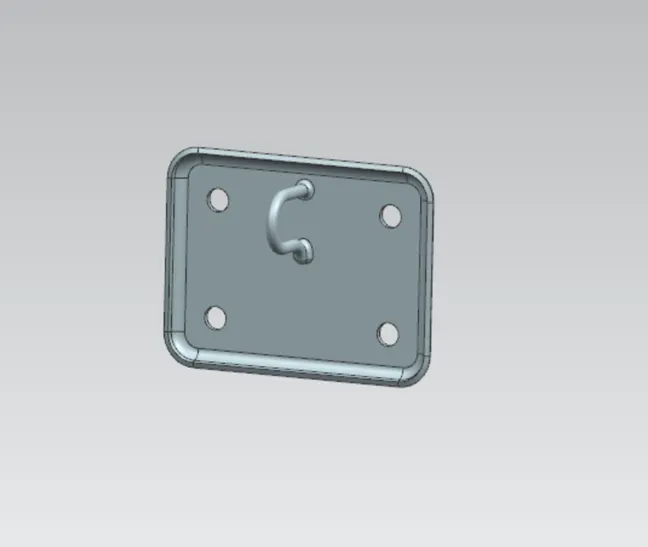
Striker: This component is used to lock the hood; it has a latch-type mechanism and is situated on the inside panel of the hood. To determine where our striker will be, we utilise the trajectory approach, which makes it simple to find our striker. Unless the hood is manually opened by lifting the latch lever, this component keeps the hood closed.
Master Section:
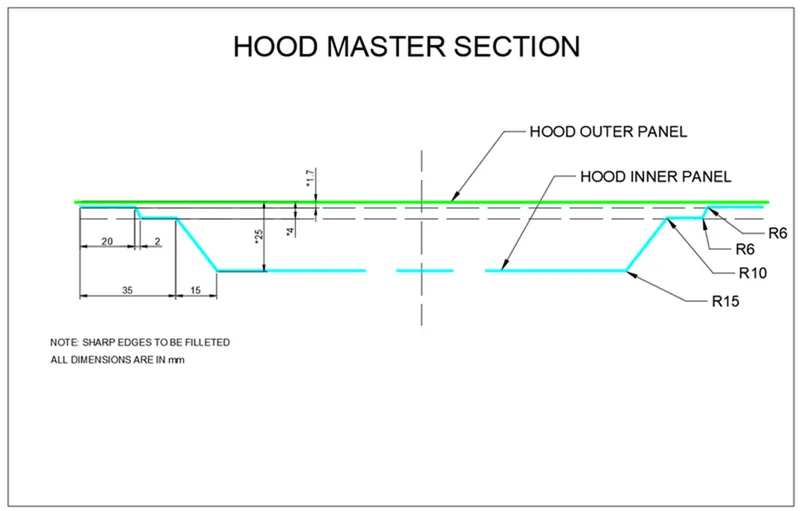
Using this master section, we have to design the Inner and Outer hood panel.
Latch Trajectory: The latch trajectory depicts the striker's route while a vehicle's hood is opened and closed. The established criterion based on the average height of a person determines the radius of the circular trajectory. From the hinge axis up to the latch, the radius is calculated.
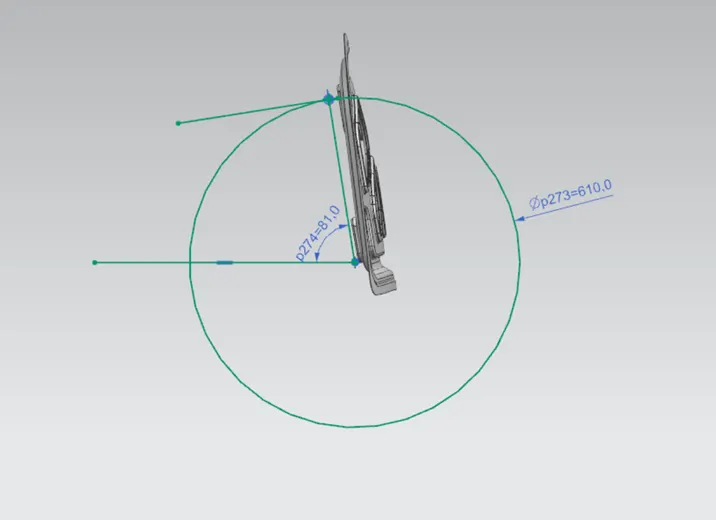
Corner Relief:
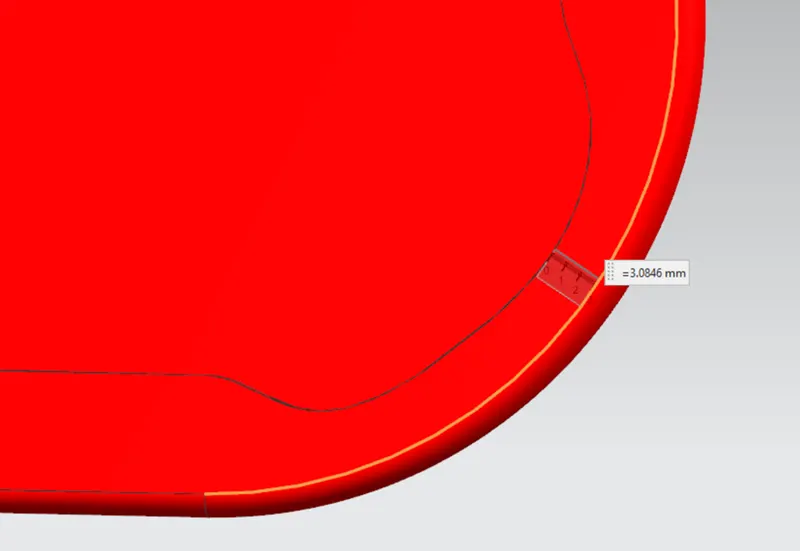
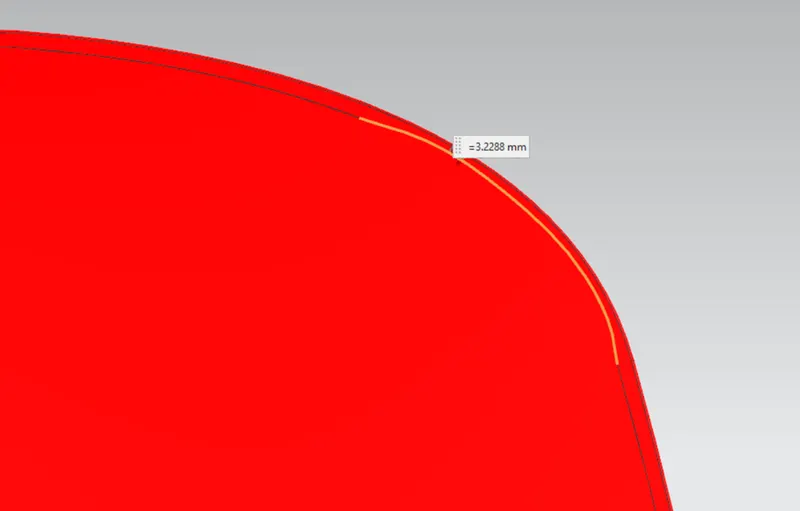
- Relief is applied to the part or component to relieve any stresses that may have arisen in a specific region, such as sharp corners, whilst the hemming process is being carried out. Corners are rounded or chamfered as a result.
- 3 mm of sheet metal must be removed for the roll hemming procedure.
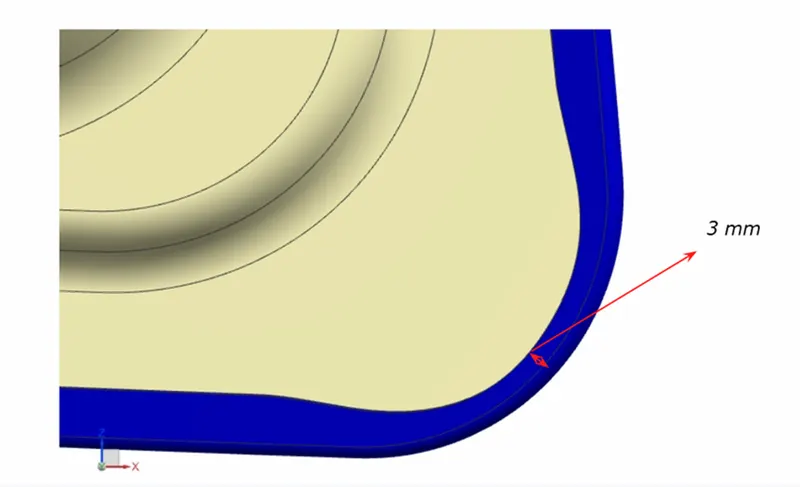
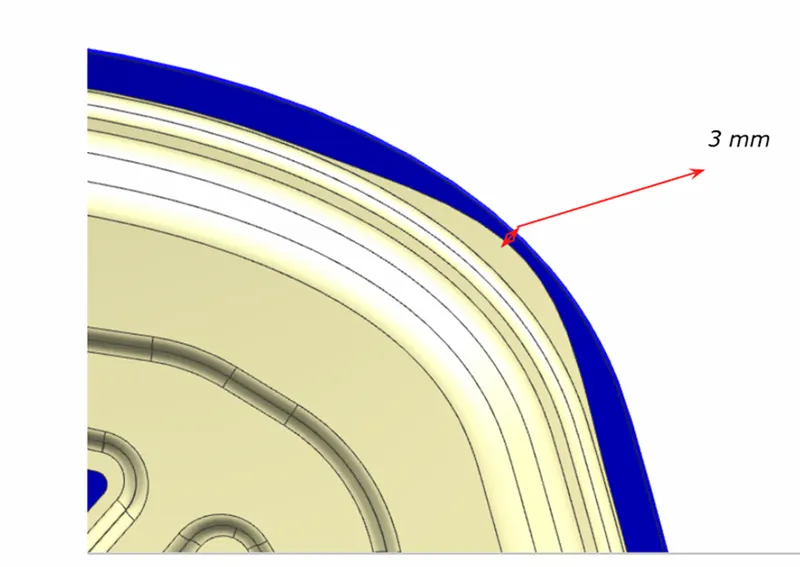
Fig. Master setion for front and rear relief
Tools used in NX-Cad:
Wave geometry linker, Sketch, offset curve in a face, project curve, Intersections curve, Bridge curve, through curves, Face blend, Edge blend, Law extension, offset face, Trim sheet, Sew, Emboss.
Images of the Final Assembly of the Hood
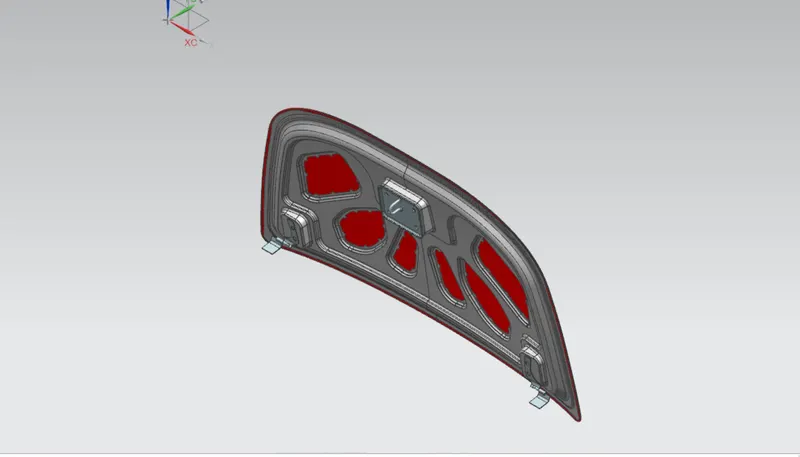
Fig. Isometric view
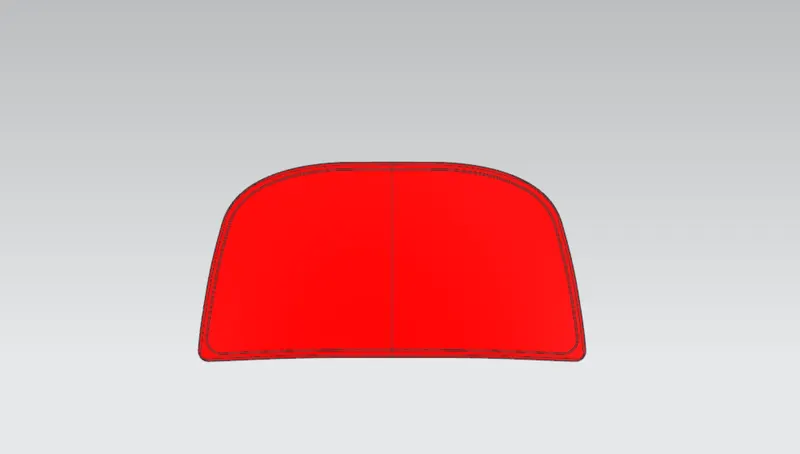
Fig. Front view
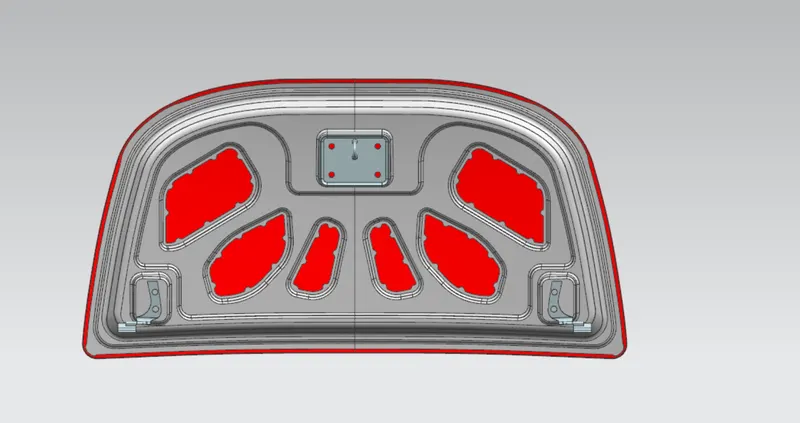
Fig. Back view
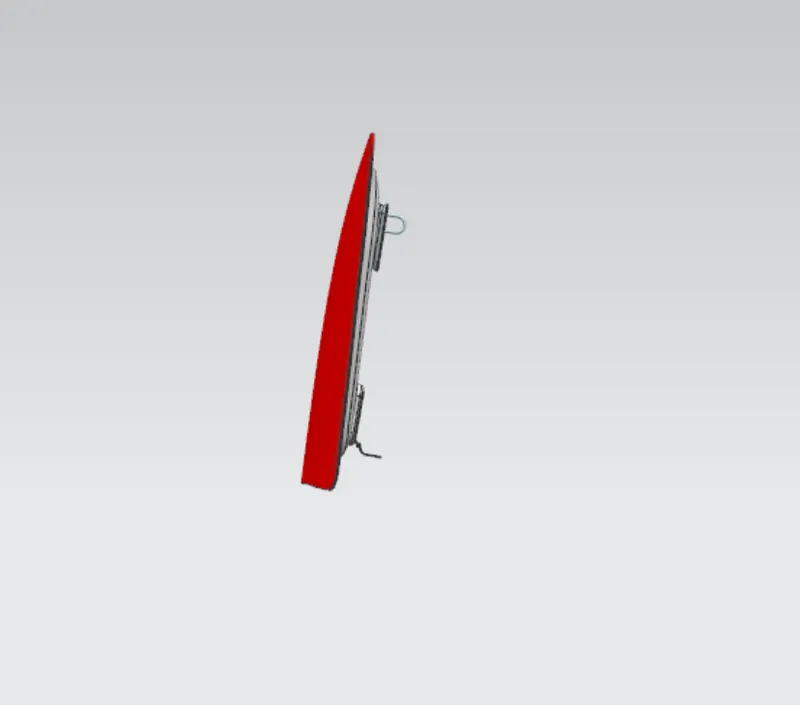
Fig. Right view
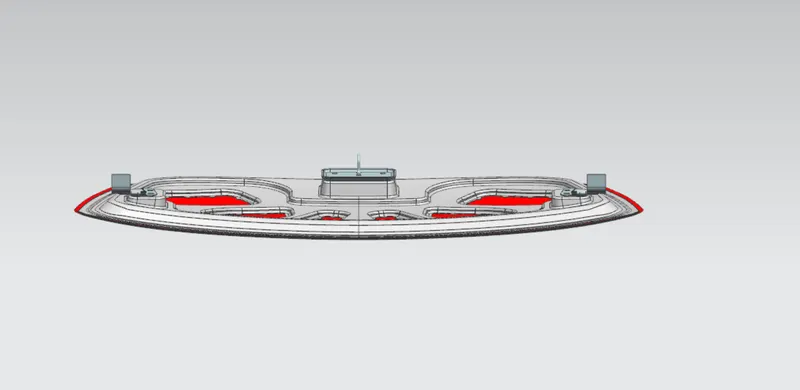
Fig. Top view