Fender Design
FENDER DESIGN CHALLENGE
OBJECTIVE :
The main object of this project is to design the BIW(Body in white) of front fender using the fender skin data and master section shared by the styling team and make it ready for manufacturing(Using NX CAD).
FENDER :
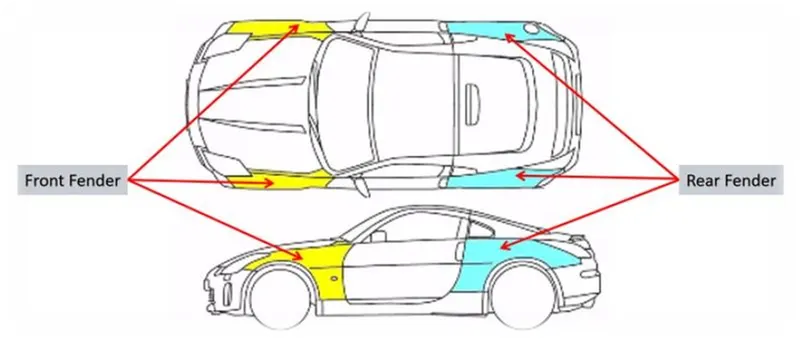
Fender is the American English term for the part of an automobile, motorcycle or other vehicle body that frames a wheel well (the fender underside). Its primary purpose is to prevent sand, mud, rocks, liquids, and other road spray from being thrown into the air by the rotating tire. Fenders are typically rigid. Sticky materials, such as mud, may adhere to the smooth outer tire surface, while smooth loose objects, such as stones, can become temporarily embedded in the tread grooves as the tire rolls over the ground. These materials can be ejected from the surface of the tire at high velocity as the tire imparts kinetic energy to the attached objects. For a vehicle moving forward, the top of the tire is rotating upward and forward, and can throw objects into the air, at other vehicles or pedestrians. In British English, the fender is called the wing (this may refer to either the front or rear fenders. However, in modern unibody vehicles, rear fenders may also be called quarter panels.) The equivalent component of a bicycle or motorcycle, or the "cycle wing" style of wing fitted to vintage cars, or over tires on lorries which is not integral with the bodywork, is called a mudguard in Britain, as it guards other road users – and in the case of a bicycle or motorcycle, the rider as well – from mud, and spray, thrown up by the wheels. In modern Indian and Sri Lankan English usage, the wing is called a mudguard.
TYPES OF FENDERS :
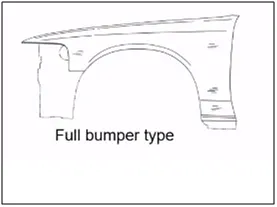
1. FULL BUMPER TYPE - These types of fenders were used in earlier models of vehicles. They contribute to the major increment of the steel weight by just covering the front headlights with respect to the bumper region. The problem associated with this kind of fender is there is a lot of wastage in the blank and every inch of a material is a cost to the industry.
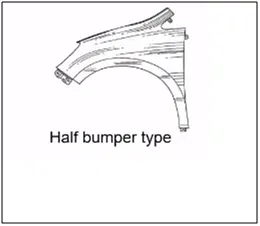
2. HALF BUMPER TYPE - These fenders are mainly used for serving the purpose of cost-cutting and reducing enough proportions of the steel wait resulting in a reduction of the weight of the vehicle slightly. They can be economically manufactured, i.e by slightly increasing the blank size, we can produce two fenders at a time.
DESIGN METHODOLOGY :
Here we have to design the front fender using the styling surface forwarded by styling team after analysing the wheel arch and drip area requirements following pedestrian safety. Master sections are also provided as shown below
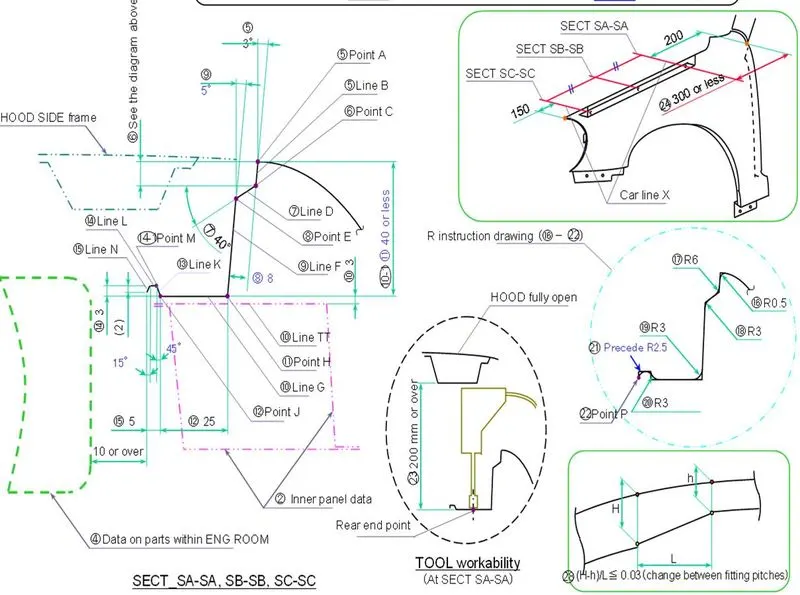
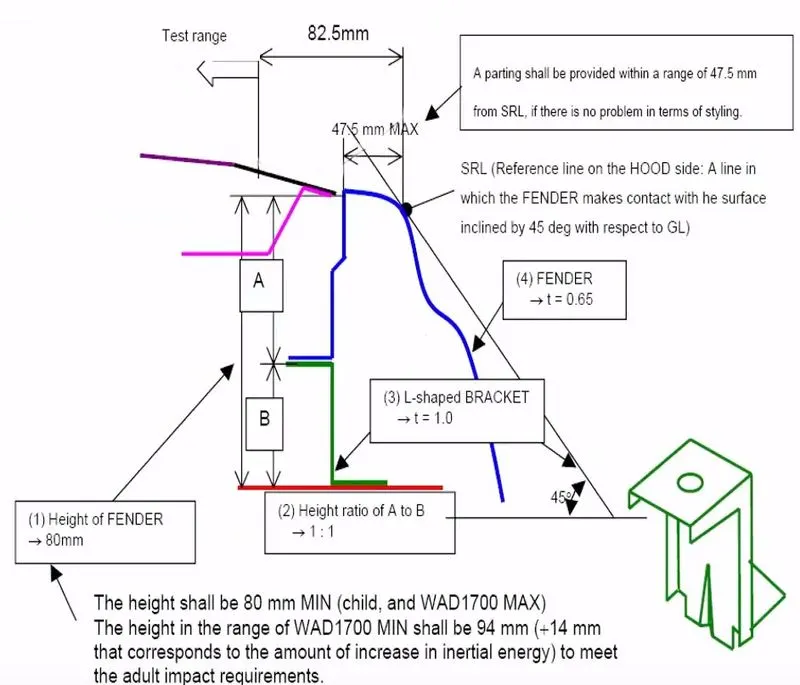
Following the master section and considering various factors such as accessibility of tools while assembling the fender into the engine compartment, spring back effect (usually if the depth more than 60mm) etc. we have to design the fender in a manufacturable, safer, and cost efficient manner.
We have to design various mounts such as :
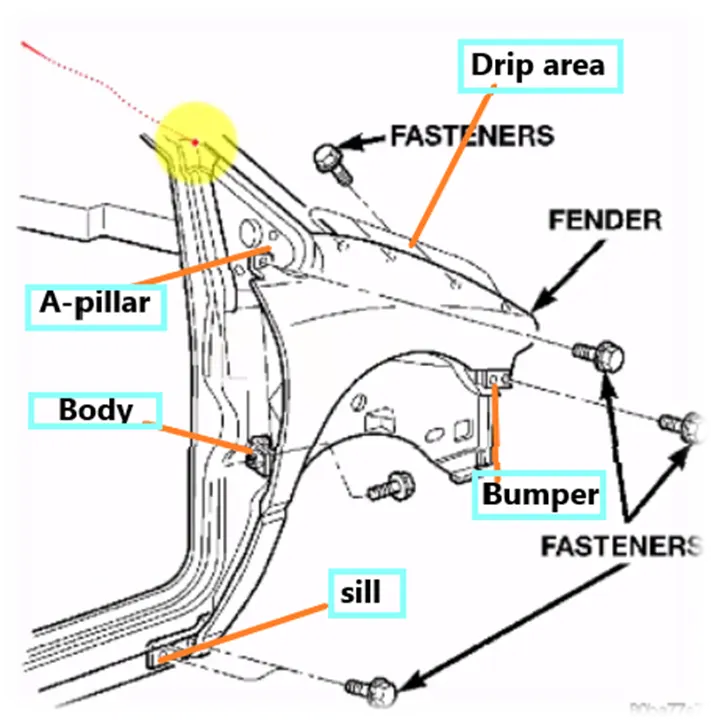
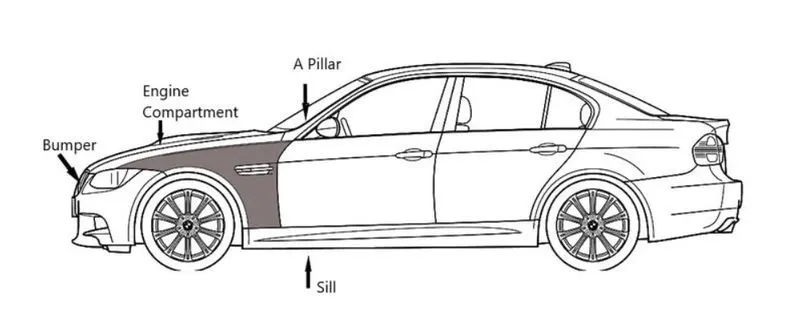
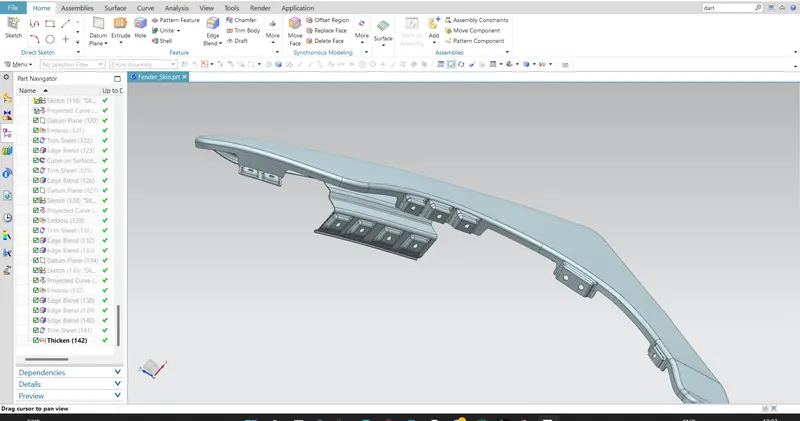
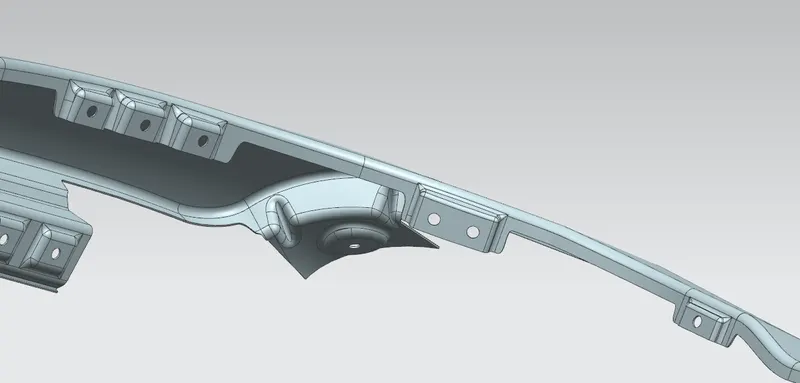
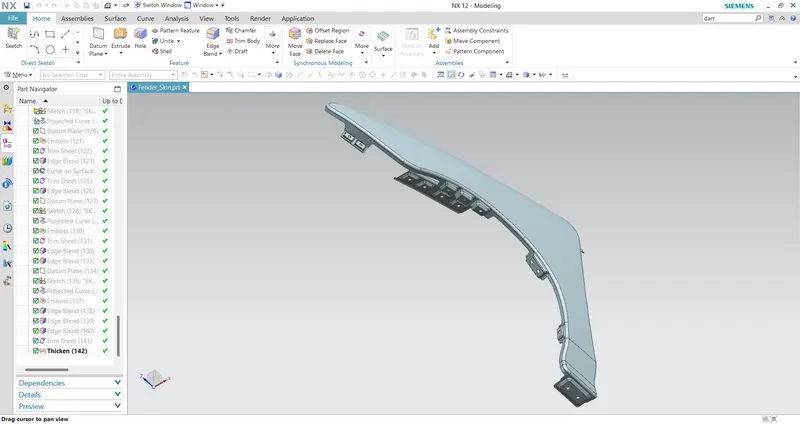
The front fender has basically five mounting positions with respect to the other components. The mounting positions are as follows:
- Drip Area Mounting.
- A-Pillar Mounting.
- Sill Mounting.
- Bumper Mounting.
- Baffle Mounting.
Note - For the creation of the Drip Area Mounting, the given Master Section is followed, and the other mounting points are created by assuming appropriate positions with the respected components.
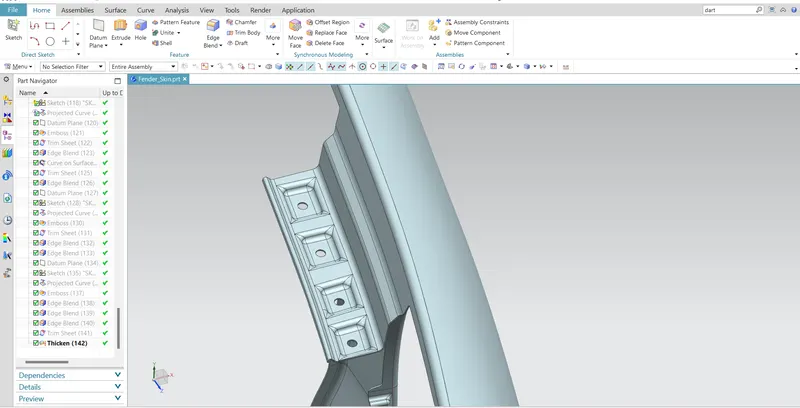
1. Drip Area Mounting :
- The drip area is the most important mounting in a fender, it is the point where the fender has to be attached to the engine compartment.
- The drip area should be designed in such a way that it should be at least 150mm away from the front end of the fender to have sufficient space for mounting headlamps housing.
- Mostly the drip area starts from 200mm away from the rear end of the fender, to have sufficient space for the cowl which carries the wiper equipment.
- The length of the drip area depends on the length of the fender.
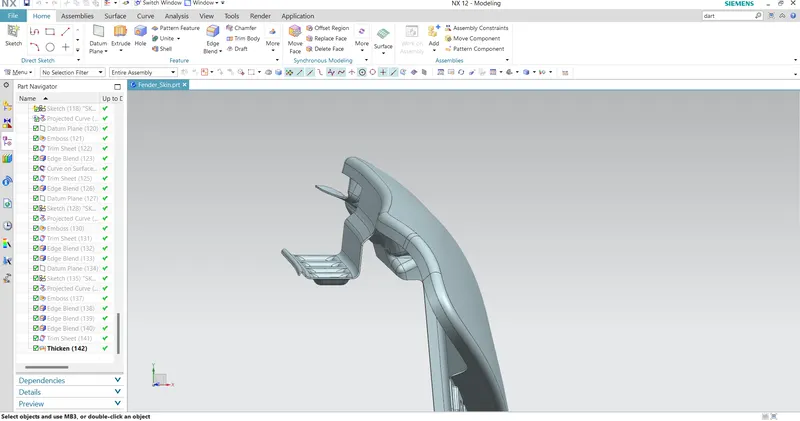
2. A-Pillar Mounting:
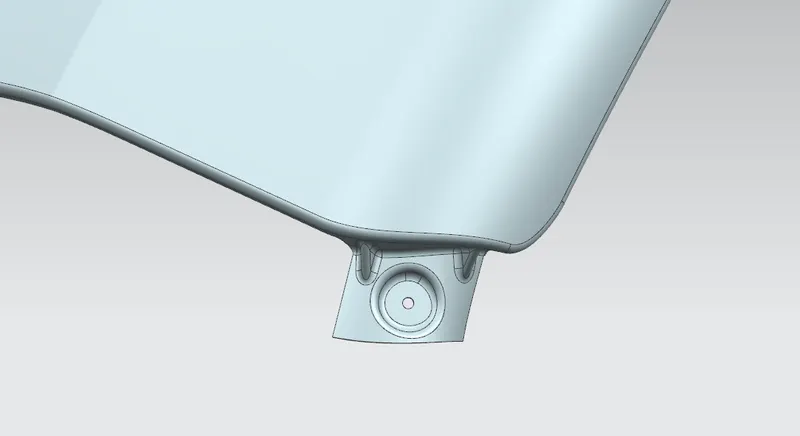
- This mounting position is created for attaching the fender to A Pillar of the vehicle.
- The mounting has to be created by taking the reference from the A-pillar of the vehicle.
- Enough clearance should be given for the easy mounting of the wiper equipment.
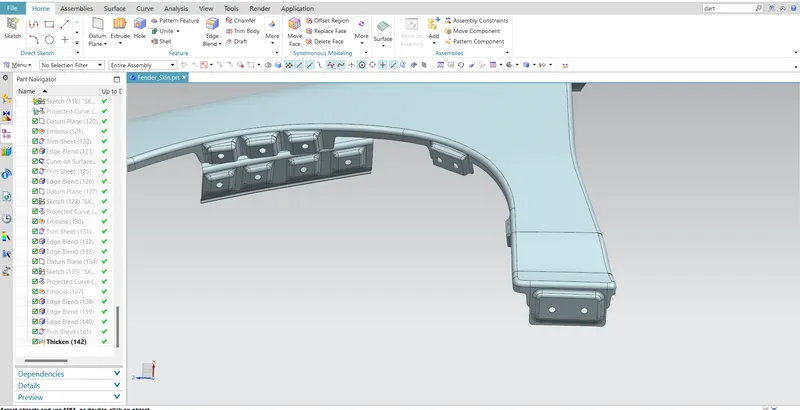
3. Sill Mounting: Sill mounting is created on the bottom portion of the fender for attaching to the sill.
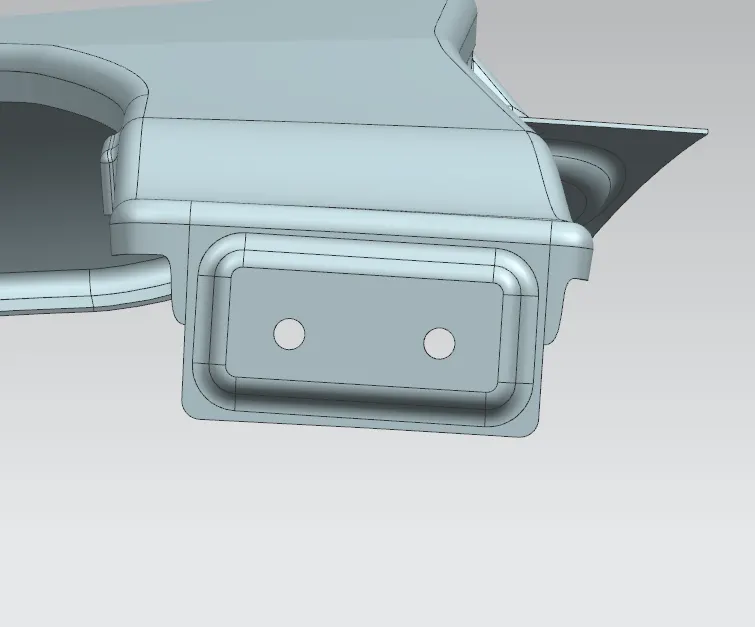
4. Bumper Mounting: This mounting point is created for attaching the bumper to the fender. It should have enough strength to hold the bumper steadily.
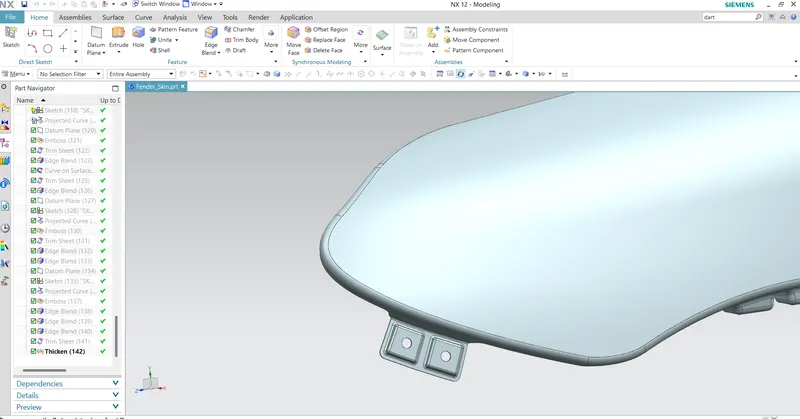
5. Baffle Mounting: These mounting points are created for attaching plastic components i.e baffle which prevents chipping inside the engine compartment.
CONCLUSION :
Thus using the styling surface received from styling team, front fenders of the car were successfully designed following the engineering principles. Next, this will be forwarded to CAE team for further analysis and will be modified if needed.