Creating Kitchen layout, Hatching of Architectural elements and sectional view of an Industrial Building in AutoCad
ASSIGNMENT NO 10
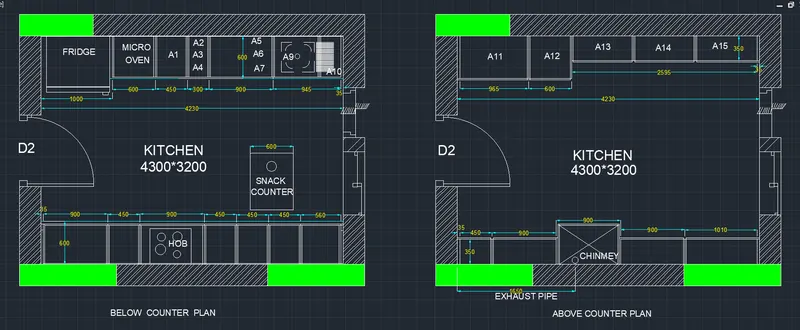
- Create the layouts of the kitchen and provide hatches pattern as shown. Use proper dimensions and assume sizes of door and other as per standard.
Ans -
KITCHEN LAYOUT
Procedure :-
Click on AutoCAD application and open this application
Type QNEW in command bar and enter
Select default setting as Metric
In default setting click on use a wizard and in that advance setting and set unit as decimal and precision as 0 and press Next
Set Angle as Decimal Degree and precision as 0 and click next
, In default setting click on use a wizard and in that advance setting and set unit as decimal mid precision as 0 and press Next
, Set Angle as Decimal Degree and precision as 0 and click next
,;Set Angle Measure as EAST and press NEXT
Set Angle Direction as Counter- Clockwise and press NEXT
Set Area by providing length as 100 and width as 100
Press finish
Keep ORTHO , Object snap >ON
Keep Snap and Grid Off
Un + enter
,Type > Decimal, Precision >
Units to scale inserted content > milimeter
enter
- Below Counter ,Plan :
Take x line command
Put x line horizontal and x line vertical
Trim the negative coordinates
Take offset of both lines at 230mm distance
Take offset command
Select distance as 4230 and select object as vertical inner wall line
Again take offset command
Offset the last object at a distance of 230
Trim the un wanted lines
Take offset command
offset distance > 3200
Select object > Click on Horizontal line
Again take the offset to last object at 230
Trim the un wanted lines
Click on drop down
Other > Load
Select AC AD IS0 02W 100 ) OK
Set Global Scale Factor as 10
Provide the dotted line at 600 distance as shown below
assume the door size as 1000
leave the space for door as shown below
Now to create offsets for fridge, microwave and all
Offset the Short vertical wall at a distance of 1000, 1600, 2050, 2350, 3250, 419 5 as show n below
Take a dotted line
Provide it at a height of 600 from upper horizontal line
Trim the projection lines
Assume the thickness as 12
Take offset command and provide the thickness as given below
Assume the size of Window as 800 and door near that window size is 800
From the draw panel
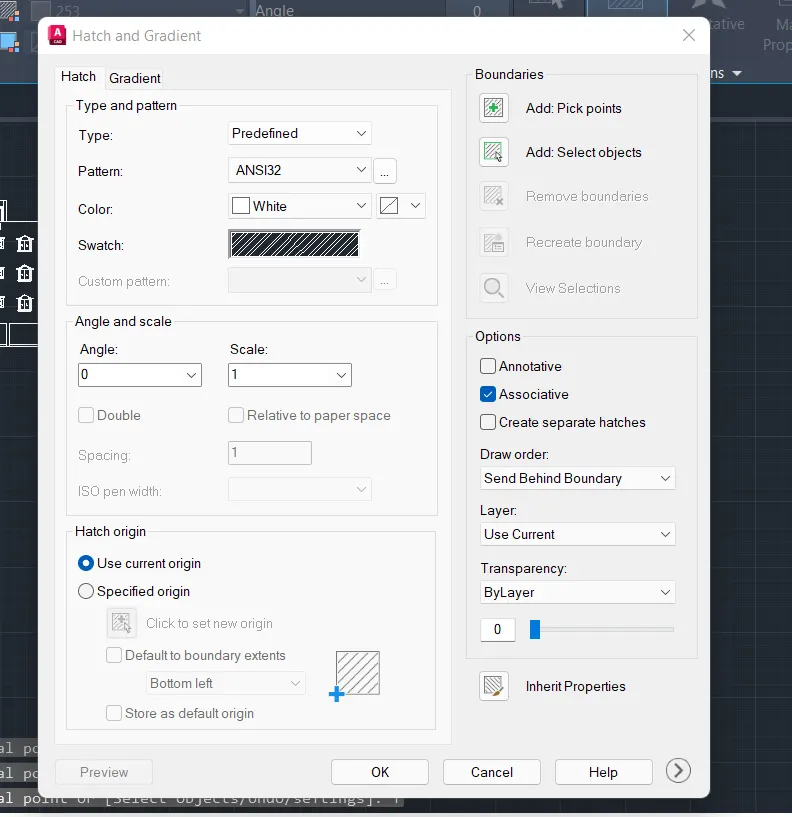
Click on hatch
Select ANS l32 hatching
Select the area where to provide that hatch
Enter
Take proper ties of hatching system
Take scale as 300
From the draw panel
Click on hatch
Select Solid hatching
Select the area where to provide that hatch
Enter
To create the text
Click. On Annotation tab > Multi- line
Manage t ext ile > New
style name as> NEW > OK
font Name > Arial
◊ font Style > Bold
Height > 150
And press set current
Use Multiline, text
And f ill the required text as kitchen
To create the text
Click on Annotation tab > Multi- line
Manage t ext ile > New
Style name as > Ot,her > OK
Font Nam e > Arial
font Style >, Regular
Height - 150
And press set current
Use Multiline text
And f ill the required text as shown below
Use circle command to show the synking hole
Use the line command, Circle command to show the door as show n below
Above Counter Plan
Take construction line command
Take offset of both lines at 230mm distance
Take offset command
Select distance as 4230 and select object as vertical inner wall line
Again take offset command
Offset the last object at a distance of 230
Trim the un w an ted line s
Take offset com m a n d
offset distance > 3200
Select object > Click on Horizontal line
Again take the offset to last object at 230
Trim the un wanted line s
Provide the offset at 350mm
Assume the door size as 1000
o Leave the space for door as shown below
Take offset command
Offset the Short vertical wall at a distance of 35, 965, shown below
Assume the thickness as 12
Take offset command and provide the thickness as given below
Use the circle command in chimney to show the exhaust pipe
Assume the size of Window as 800 and door near that window size 800
From the draw panel
Click on hatch
Select Solid hatching
Select the area where to provide that hatch
Enter
Click on Annotation
Modify dimension style
Select arrow size > 50
Arrow, Dimension line and extension line colour > Yellow
Text size > 80
Text c o lour > cyan
Enter
Take line a r dimension command
Provide it to show the 35mm dimension
Then use continuous dimension Command
Provide the dimensions
To opposite side repeat the procedure
To create t he t ext
Click on Annotation tab > Multi - line
Manage textile > New
Style name as > NEW > OK
Font Name > Aria l
Font Style > Bold
Height > 150
And press set current
RESULT -
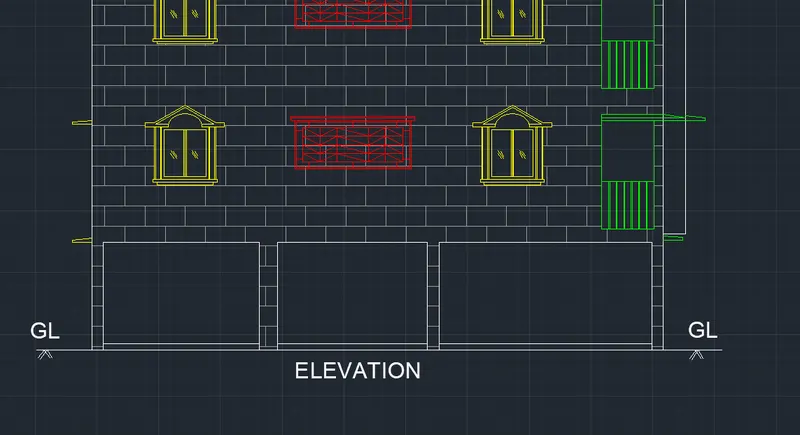
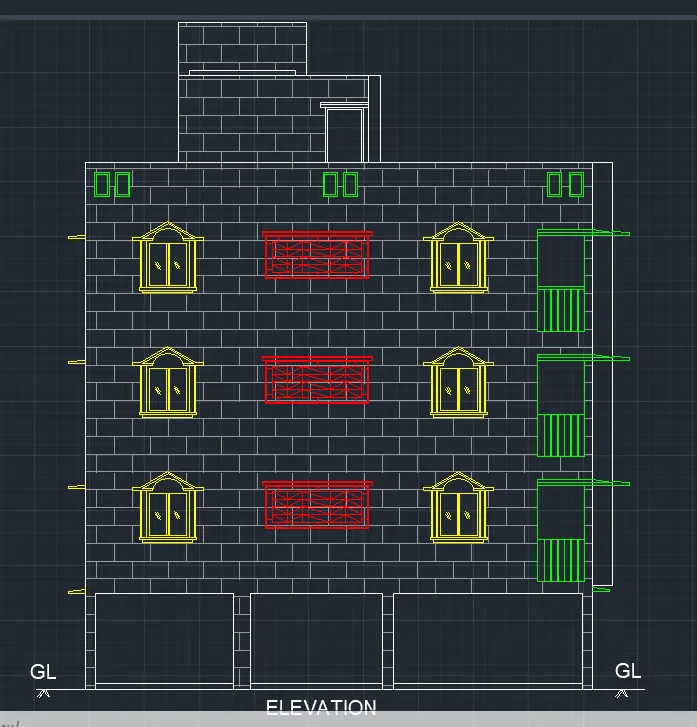
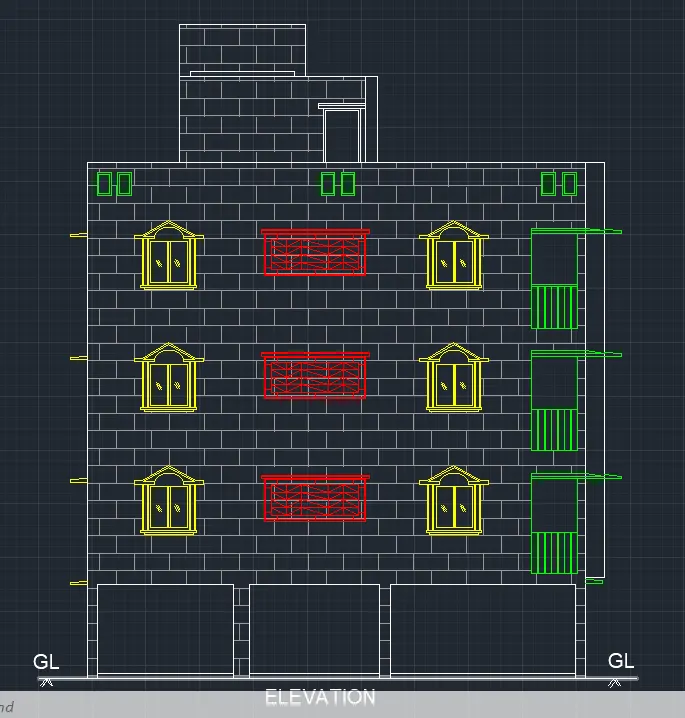
2.Create the elevation of plan created in challenge 7 and apply proper hatch in the walls, doors, windows and other architectural elements. Refer the dimensions of the plan and section in the challenge 7.
Ans –
Procedure –
First we have to open the design of challenge 7 in auto cad.
Arrange the plan and the section horizontally and vertically.
As per the question take all the horizontal as well as vertical projection of the plan.
Take all vertical projection of plan in downward direction and take all horizontal direction from the section.
Take the projection of windows also.
After taking the projection, all horizontal and vertical projection will meet each other.
The elevation type structure will form by projections.
Type tr for trim command and erase all the unnecessary lines of the drawing.
Create outer chajjas as per the proper dimensions given in the design.
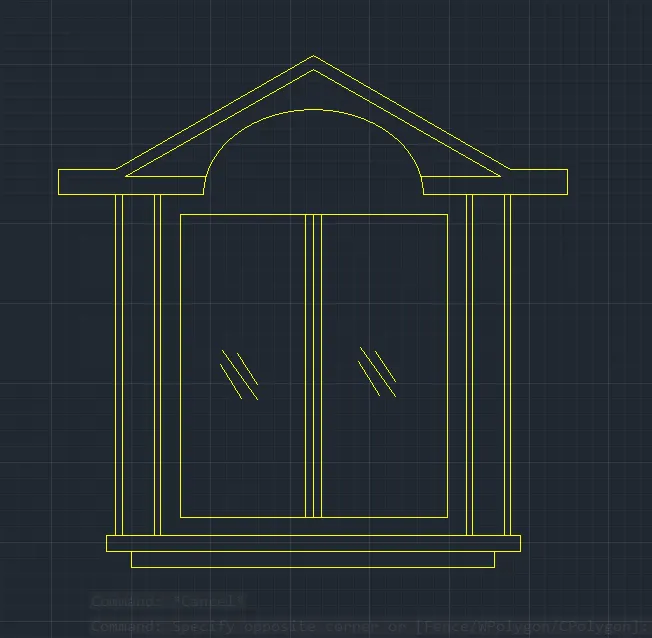
Creation of window –
For creation a window we have a outer square of window.
That square we got from the projection.
Type rec for rectangle command and draw 3 rectangle inside the square as per proper dimensions.
Divide the inner rectangle in 2 equal parts As they are representing the window doors.
Make ortho command of and draw 3 cross lines in that 2 divided squares as they represents the
Glass.
For creation of chajjas leave some equal space from the end of upper rectangle and draw a triangular part above the square.
Take ellipse command and draw a ellipse just below the triangle.
Type tr for trim command and erase all extra lines in window.
Copy this window and paste it in all six squares.
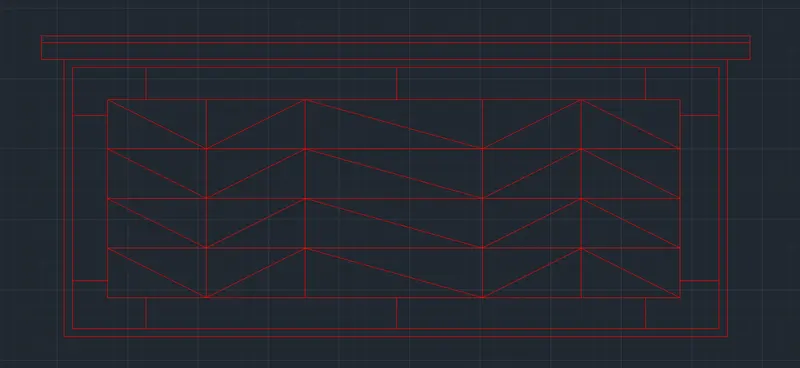
Creation of middle rectangular area
We have a rectangular which we got from the projection.
Create 2 rectangle inside the main rectangle by using rectangle command of the proper dimensions.
Type l for line command and divide the inner rectangle in 5 equal parts by vertically and 4 equal parts by horizontally.
Make ortho command off and draw cross lines as given in the drawing.
Type rec for rectangle command and draw 2 rectangles joining each other ar upper side of main rectangle.
Type tr for trim command and erase all unnecessary parts of drawing.
Copy this design and place it in 3 below rectangles.
For balcony area distribute the lower rectangle in 6 equal parts as they represents the grill of balcony.
And also create chajjas.
Type rec for rectangle command and draw 6 rectangles of small sizes and place it in corner points.
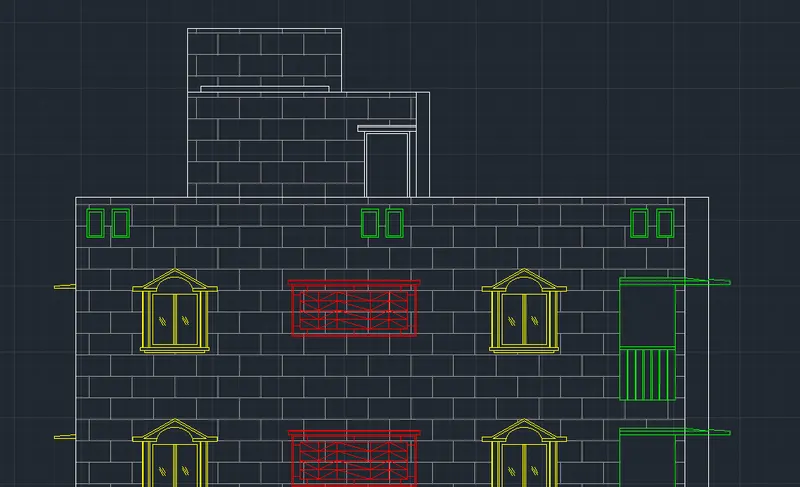
Take rectangle command and draw 2 rectangles in the terrace part of the drawing.
Layer properties -
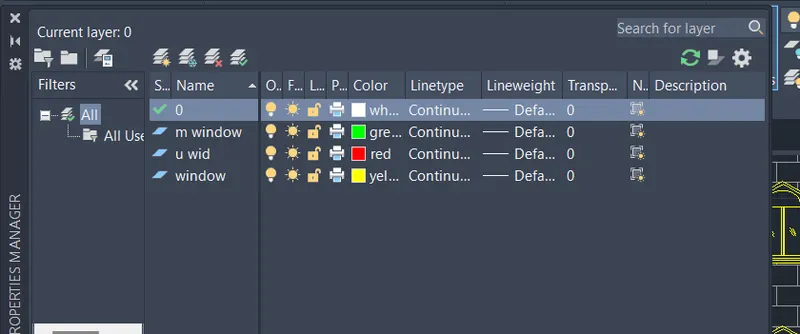
Type on layer properties for the colours.
Type on new layer and choose colour no 50 for the 6 windows.
Type on new layer and choose colour no 240 for the middle windows.
Type on new layer and choose colour no 80 for the balcony.
Hatching -
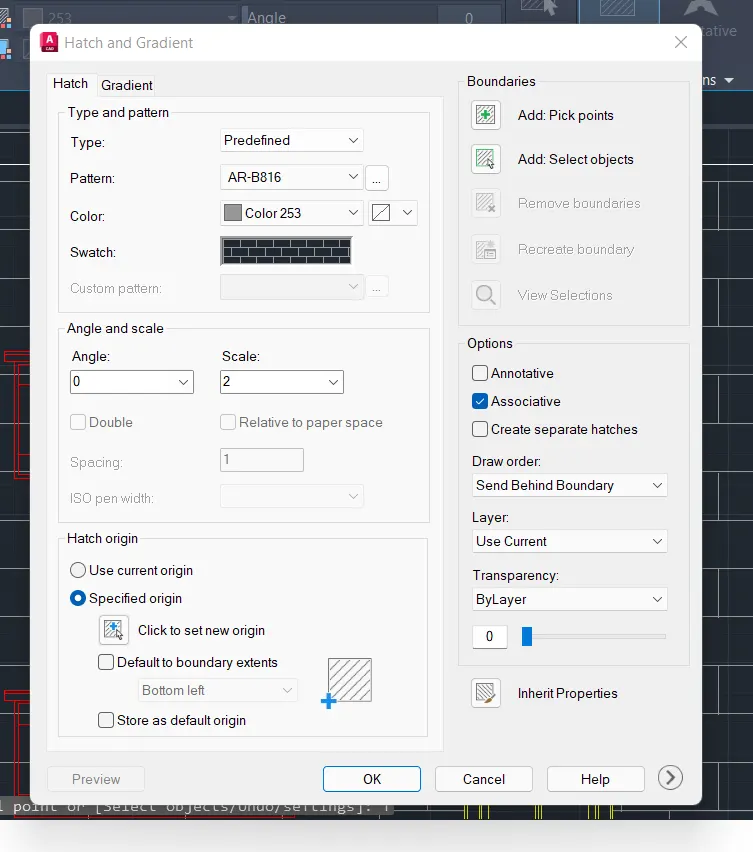
Type H for hatch command and 1 dialogue box will shown.
Select the pattern of AR-B816 and select the scale no is 2.
Also select the colour no 253.
Click on the boundaries and click on “ add pick points “.
Preass ok.
And select the area and click on it.
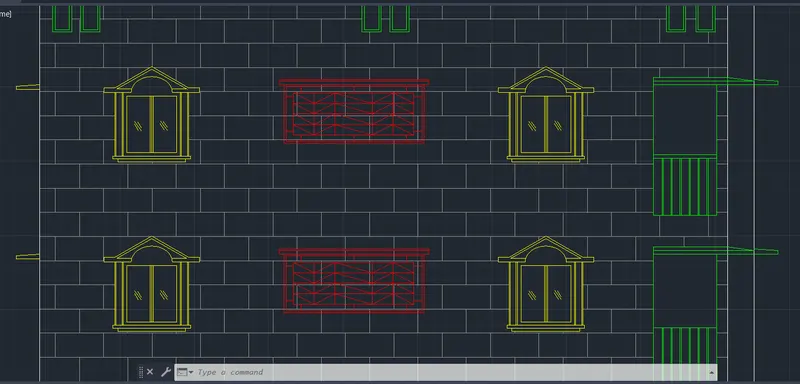
Type on text – single line text and give the diagram name as ELEVATION.
RESULT –
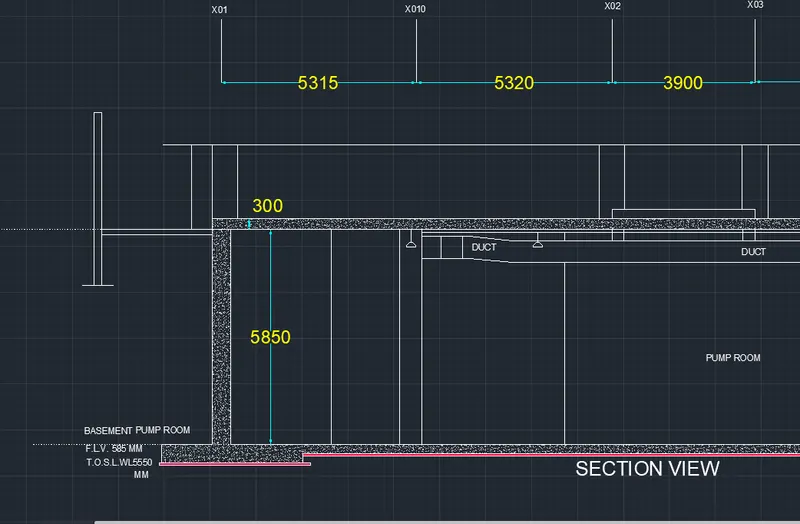
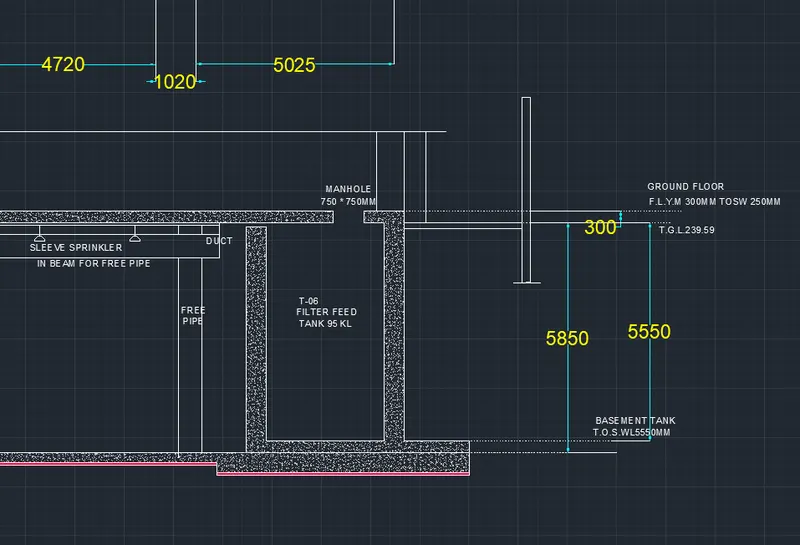
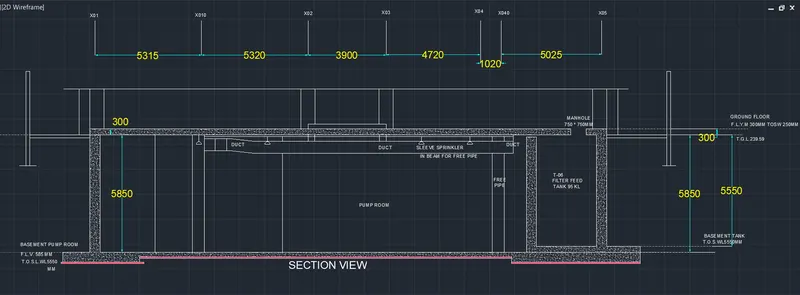
- Create the section view of an industrial building as shown in figure. Provide appropriate hatches and dimensions wherever required.
Ans –
Procedure –
Type l for line command and draw a horizontal line.
Type o for offset command and draw an offset of 5850 mm at upper side of line.
Again take offset command and draw a horizontal line of 300 mm at upper side of the upmost line.
Type l for line command and draw a vertical line on the left side crossing 3 horizontal line.
Type o for offset command and draw a vertical offset at a distance of 5315 mm from the vertical line on the right side.
Type o for offset command and draw a vertical offset at a distance of 5320 mm from the vertical line on the right side.
Type o for offset command and draw a vertical offset at a distance of 3900 mm from the vertical line on the right side.
Type o for offset command and draw a vertical offset at a distance of 4720 mm from the vertical line on the right side.
Type o for offset command and draw a vertical offset at a distance of 1020 mm from the vertical line on the right side.
Type o for offset command and draw a vertical offset at a distance of 5025 mm from the vertical line on the right side.
Type tr for trim command and erase all the unnecessary lines from the drawing.
As per the given design draw a wall of required sizes from all necessary places.
At the bottom line of the drawing leave 50mm distance and draw 3 horizontal lines which looks as a border lines of the drawing.
Leave a particular space and create a duct and also create a free pipe in the design.
At a section of 3900mm rectangle create a small rectangle at the bottom of the wall and draw 2 vertical lines.
Type l for line command and draw all the necessary lines which are given in the design as per proper spaces.
Type tr for trim command and remove all unnecessary lines from the drawing.
Dimensions –
Type un for units and select the decimal in units and take precision of 0.
And click on the mili meter.
Also choose the proper size of the arrow and texts.
And give the proper suitable colour to the text and lines.
Press ok.
Give dimensions wherever required.
Hatching –
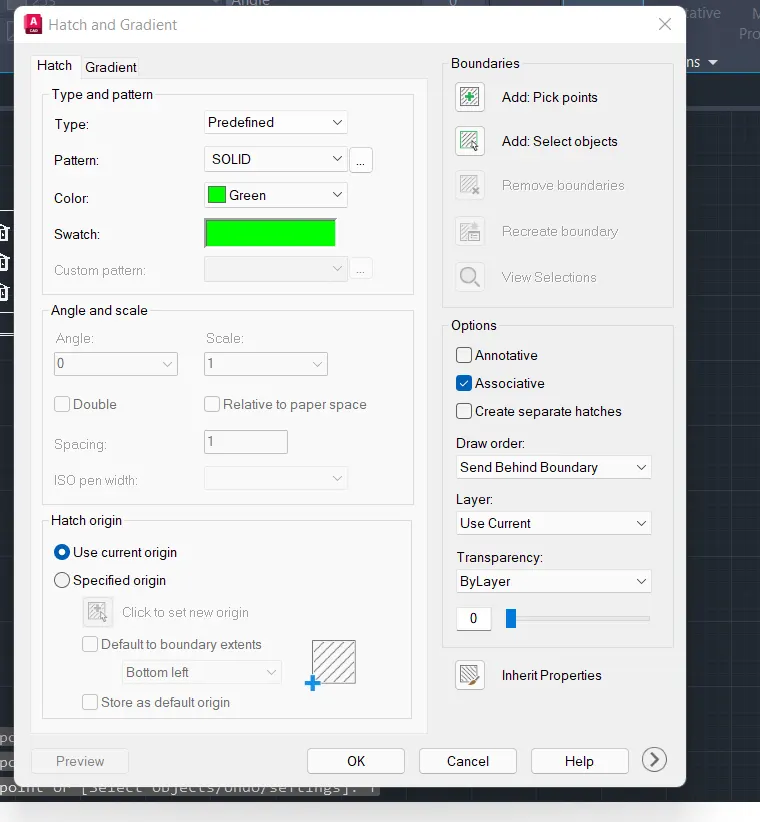
Type H for hatch command and 1 dialogue box will shown.
Select the pattern of AR-CONC and select the scale no is 1.
Also select the colour no 9.
Click on the boundaries and click on “ add pick points “.
Click on all walls and enter.
Type H for hatch command and 1 dialogue box will shown.
Select the pattern of SOLID and select the scale no is 1.
Also select the colour no 240.
Click on the boundaries and click on “ add pick points “.
Click on lowest 3 border type rectangles and enter.
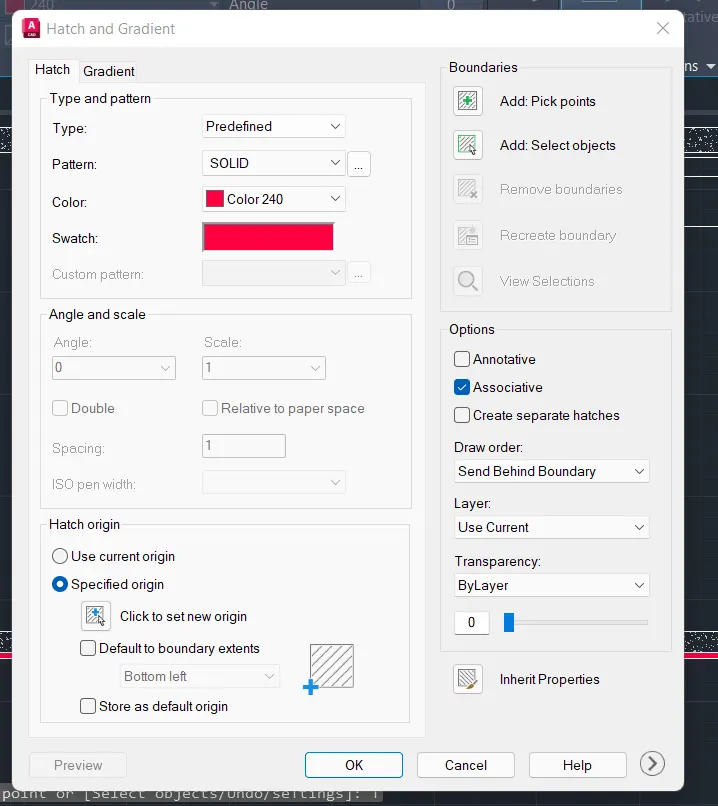
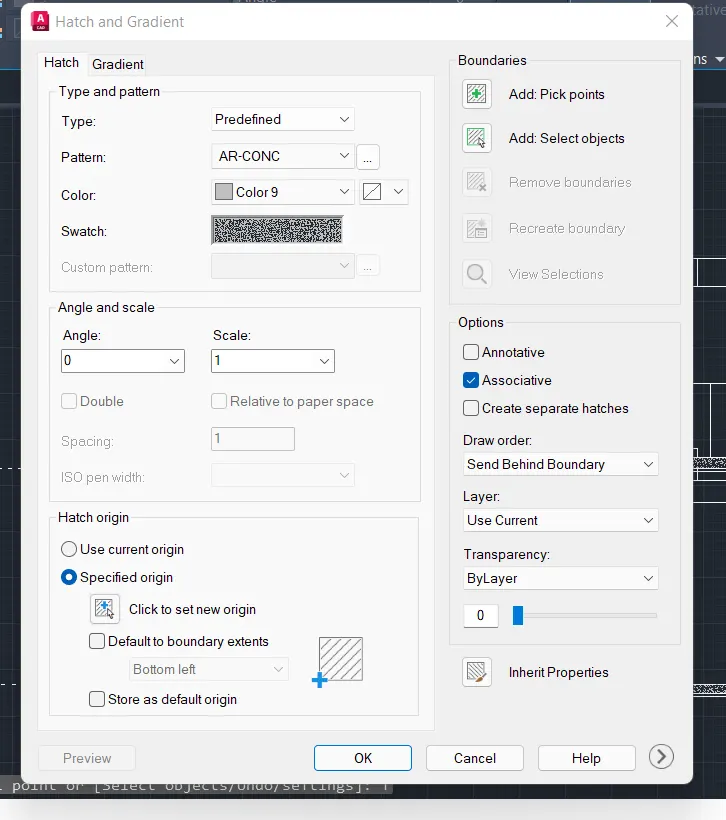
Preass ok.
And select the area and click on it.
Type on text – single line text and give the text wherever required.
Give the diagram name as SECTION VIEW.
RESULT-