Creating a Residence Layout, Seating plan, Toilet and Utility room plan using AutoCad
CHALLENGE 1
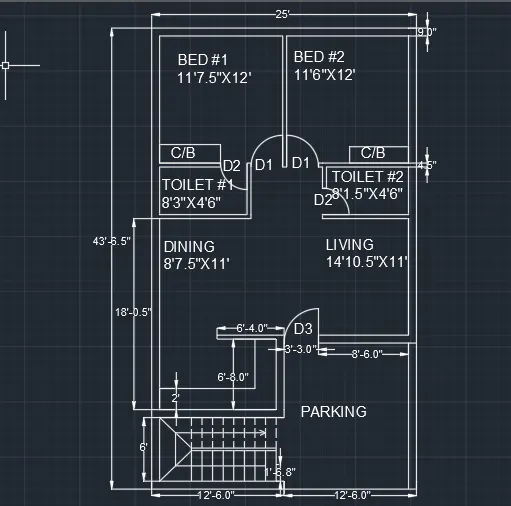
Residence Plan: Sketch the layout of a residence as shown in Figure 1. Consider all dimensions as
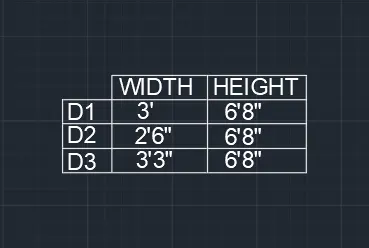
a reference to sketch the unit plan. Also, the text in the layout is only for reference. Assume the missing dimensions. Also, refer to the schedule for the size of the doors.
AIM- To draw a layout of a residence and schedule for the size of the doors.
INTRODUCTION-
Layout plan-
- Layout plan is the physical arrangement of all building components as per one need or Vaastu shastra.
- Layout planning is deciding on the best physical arrangement of all resources that consume space within a facility.
- Layout plan of the building gives the locations of the rooms arranged.
- Layout plan of the building is used to have an idea about all the dimensions at floor level.
- Layout plan of 436.5" X 25' containing rooms- 2 bedrooms, kitchen, dining, living, 2 toilet block, staircase, and parking area.
- Internal wall thickness= 4.5"
- External wall thickness=9"
- Staircase-Rise-6" and Trade=1"
PROCEDURE-
Step 1-
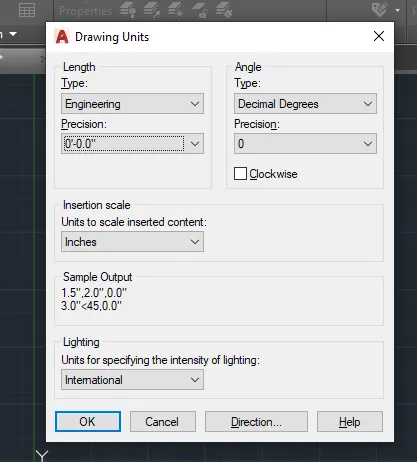
- Type units in the command line and then select length type as engineering and precision as 0'-0.0.
Step 2-
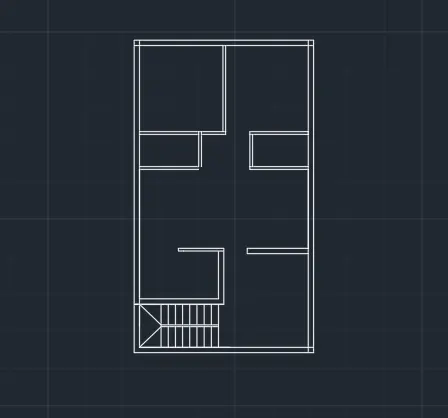
• Select line command from draw toolbar or Start the Line command by clicking
the Line button on the Draw panel on the Ribbon, or by entering L and then pressing Enter.
• Draw lines by entering the distances given by using a direct distance entry system.
• Terminate the command by pressing Enter, Esc, or the spacebar. Press Enter or the spacebar to repeat the Line command.
• Staircase details-trade 1' and rise 6"
Step-3
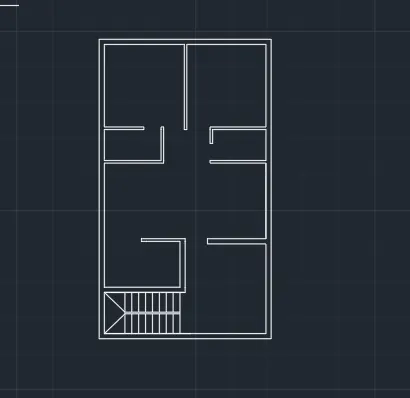
- Now trim all the unwanted lines from the layout plan
Step-4
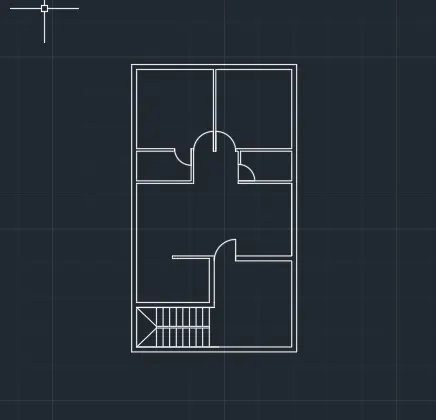
- Now Place doors at positions
Step-5
- Give all dimensions and names to the layout plan
Step-6
- Now make schedule of Doors
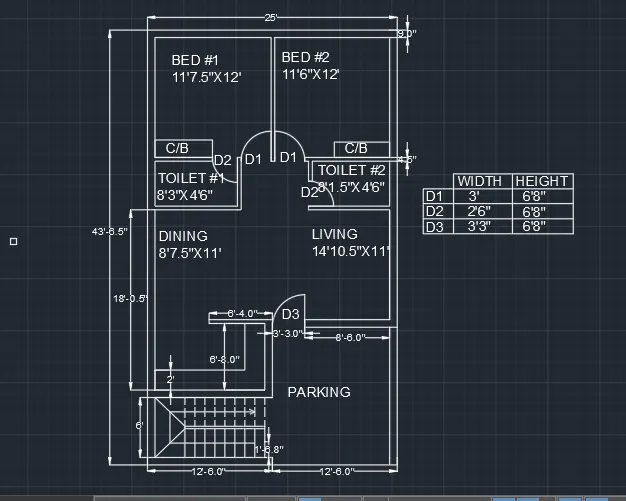
Result :
- The Given Residential plan is drawn using Autocad
CHALLENGE -2
Sketch the seating plan for an outdoor canopy. Assume the dimensions for the seating. Also, consider
the dimensions in mm.
AIM - To draw seating plan for outdoor canopy.
INTRODUCTION -
• Canopy- A canopy is a decorated cover, often made of cloth, which is placed above something such as a bed or a seat.
• Outdoor seating canopy-An outdoor arrangement of seating under a canopy.
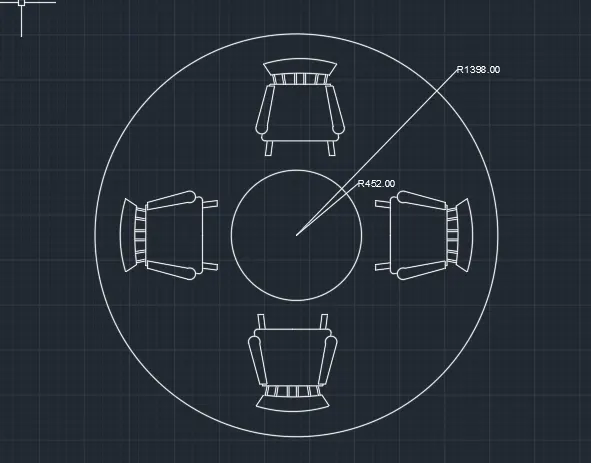
• Table size 452 mm and canopy size 1398 mm.
PROCEDURE:
Step 1-
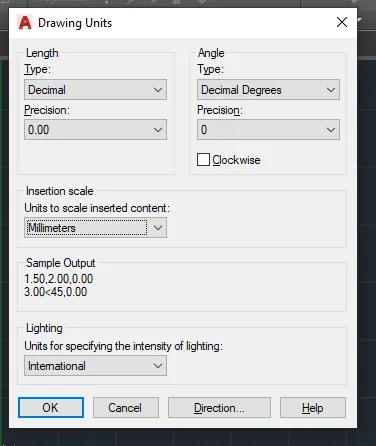
- Type units in the command line and then select length type as engineering and precision as 0'-0.0.
Step 2-
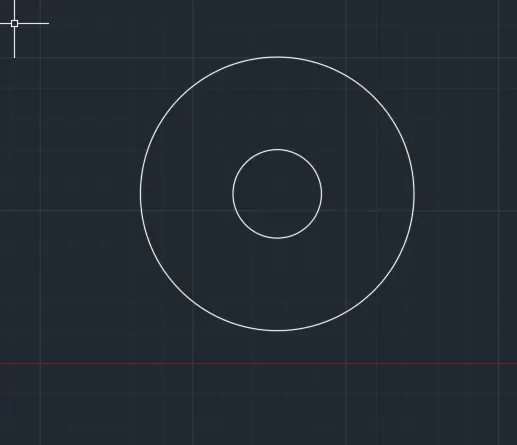
• Select circle command and draw circle.
• Circle-To draw a circle with AutoCAD, enter the CIRCLE command and With this option, you first click where you want the center point of the circle to be, then move the pointing device to establish the perimeter of the circle.
Step 3-
-
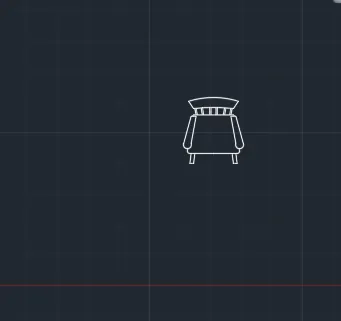
Go on view tab > palettes > design center > en-us folder > design center> home space planner > Block > chair.
-
Select the required block and enter the block.
Step 4-
- And then copy block to create an outdoor seating canopy.
CHALLENGE 3
Sketch the part plan for the toilets and utilities room. Consider the outer wall thickness as 300mm and inner wall thickness as 150mm.
Also, assume the missing dimension, Texts, dimensions, and hatches are only for references. Also, symbols for toilets and w/c are also for
references.
AIM- To draw a detailed plan of toilet and utility room.
INTRODUCTION-
- A detailed plan showing the details of toilet fixtures and utility room.
- Toilet of 1900x1700 mm size and utility room of 1900x2100 mm.
- Internal wall thickness-150mm.
- External wall thickness-300mm.
- One can add fixtures directly from the AutoCAD design center.
PROCEDURE-
Step 1-
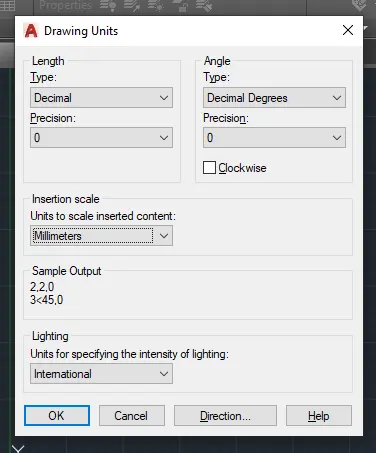
• Type units in the command line. Then select length type as decimal precision as 0.00 and insertion scale as millimeters and press ok.
Step 2-
- Select line command and draw lines by direct distance entry method.
- Line-Start the Line command by clicking the Line button on the Draw panel on the Ribbon, or by entering L and then pressing Enter.
- Draw line segments by picking several random points.
- Terminate the command by pressing Enter, Esc, or the spacebar. Press Enter or the spacebar to repeat the Line command.
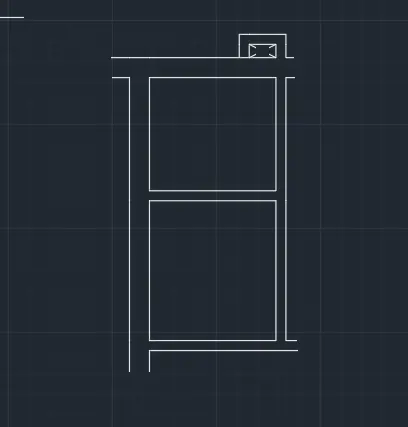
Step 3-
- Now place openings.
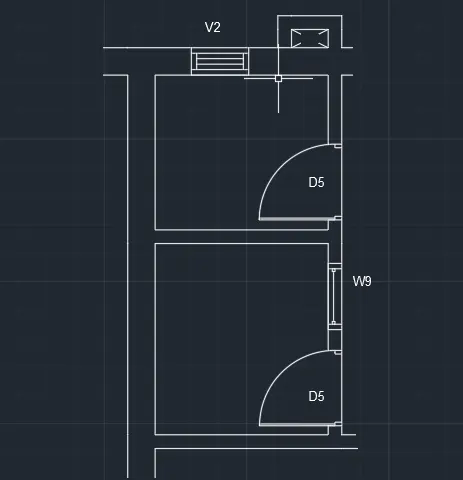
Step 4-
- Give all dimensions for the plan.
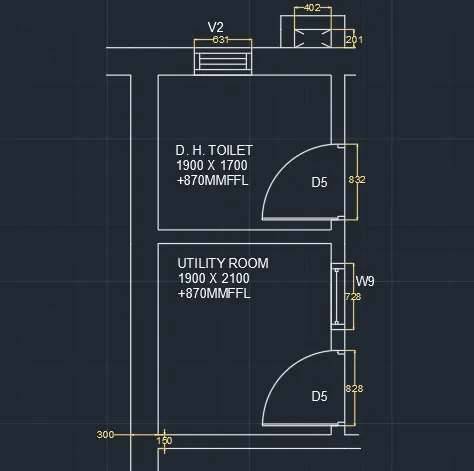
Step 5-
- Go on view tab > palettes > design center > en-us folder > design center> home space planner > Block> chair
- Select the required to block and enter block.
- And then copy block to create top of toilet and basin.
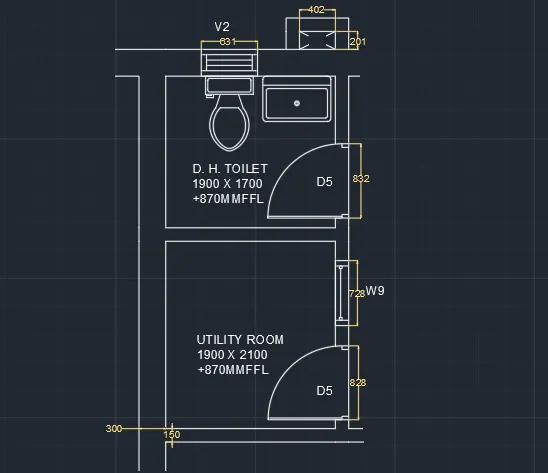
Results:
The given plans of the toilet and utilities are created successfully using Autocad.