2D sketch in Catia V5
Objective: To create a 2D sketch in Catia V5 software.
Procedure:
- Open Catia V5 software and go to File-New-Part.
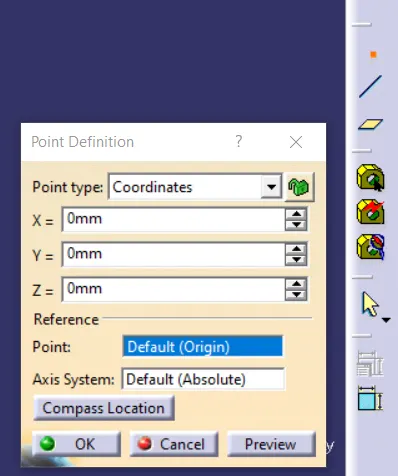
- Create a point at the center axis with co-ordinates x=0,y=0,z=0.
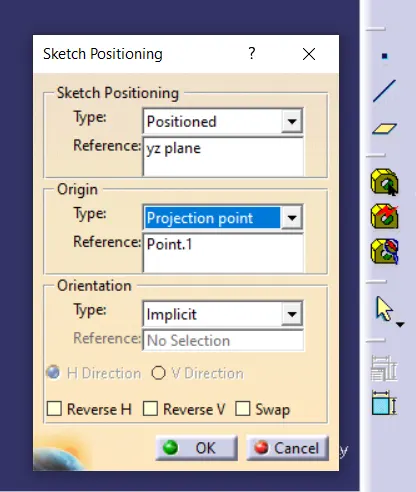
- Go to Toolbar-Insert-Sketcher-Positioned sketch.
- In Sketcher Positioning select yz-plane and in projecting point select center point of the origin.
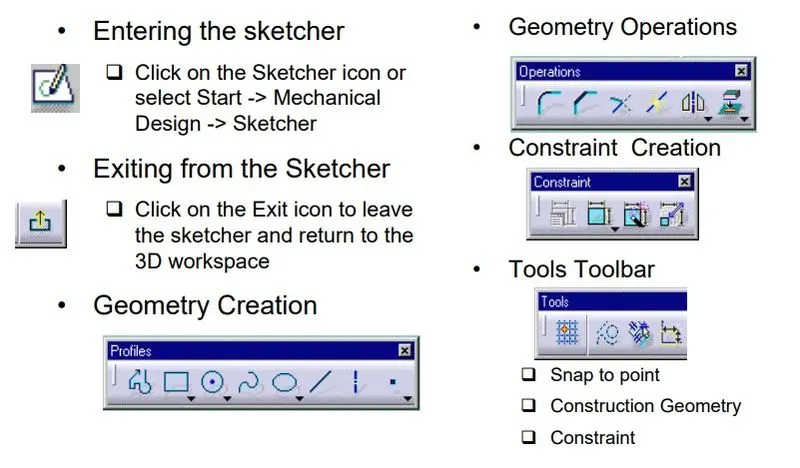
- Sketch the geometry with Profile toolbar.
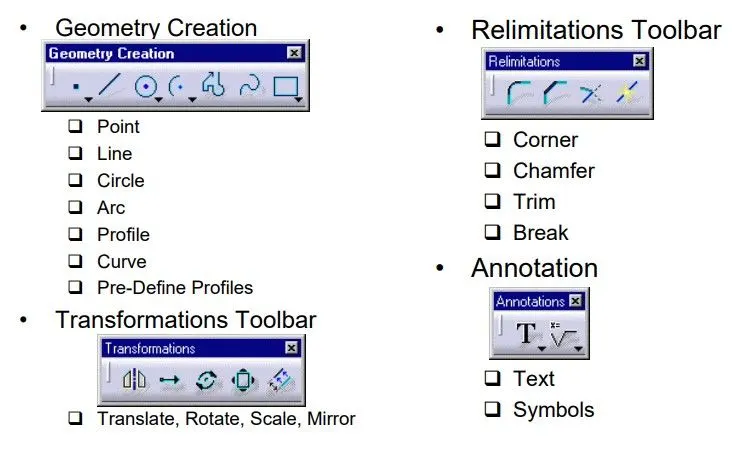
- Profile toolbar: The commands located in this toolbar allow you to create simple geometries (rectangle, circle, line, etc.) and more complex geometries (profile, spline, etc.).
- Operation toolbar: Once a profile has been created, it can be modified using commands such as trim, mirror, chamfer, and other commands located in the Operation toolbar.
- Give approprite constrain to the geometry.
- Constraint toolbar: Profiles may be constrained with dimensional (distances, angles, etc.) or geometrical (tangent, parallel, etc.) constraints using the commands located in the Constraint toolbar.
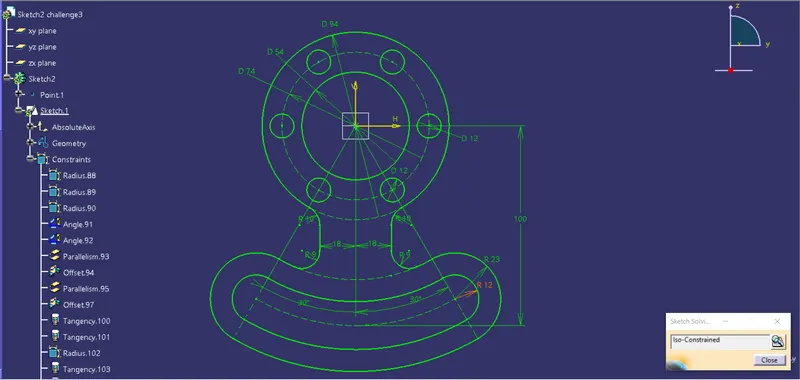
- Check for Sketch solving statues it should be iso-constrained.
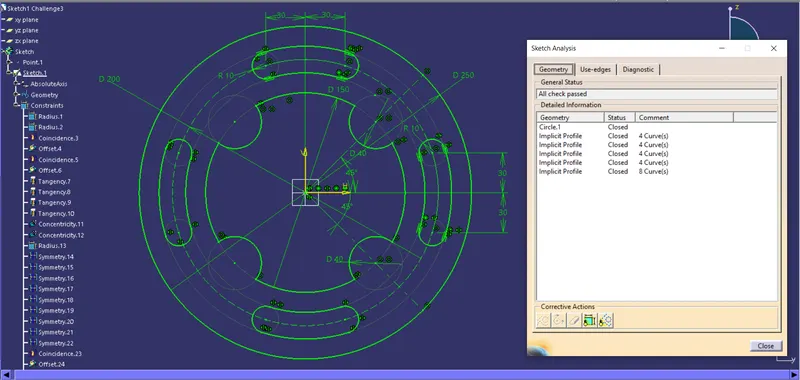
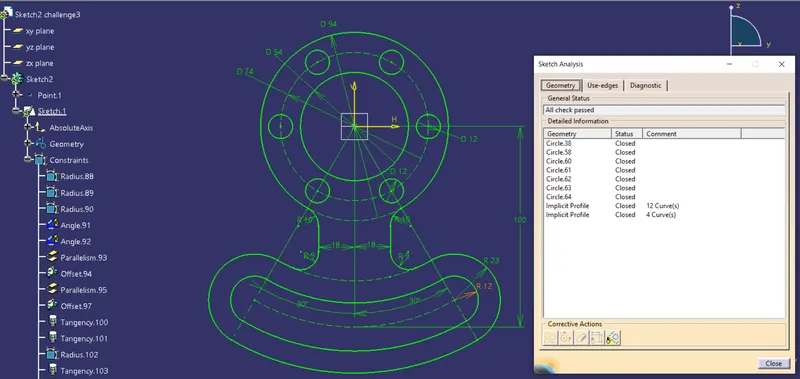
- Now check for Sketch Analysis.There should be no warrning and any sign of errors.
- Save the geometry by going to File-Save As with approprite name.
Navigation Contol in Catia:
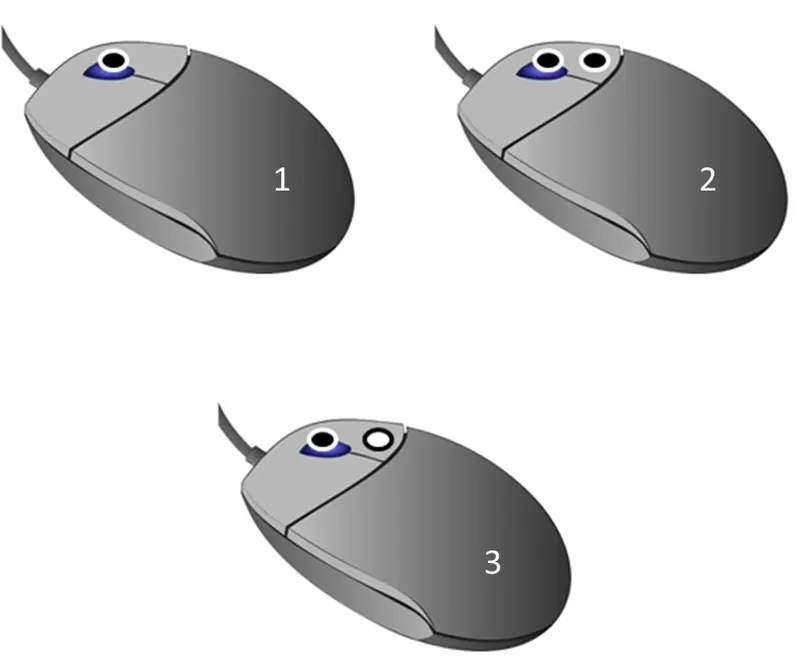
1. Click WHEEL and move mouse to PAN.
2. Click WHEEL AND RIGHT and move mouse to ROTATE.
3. Click WHEEL AND RIGHT, Release RIGHT and move mouse to ZOOM.
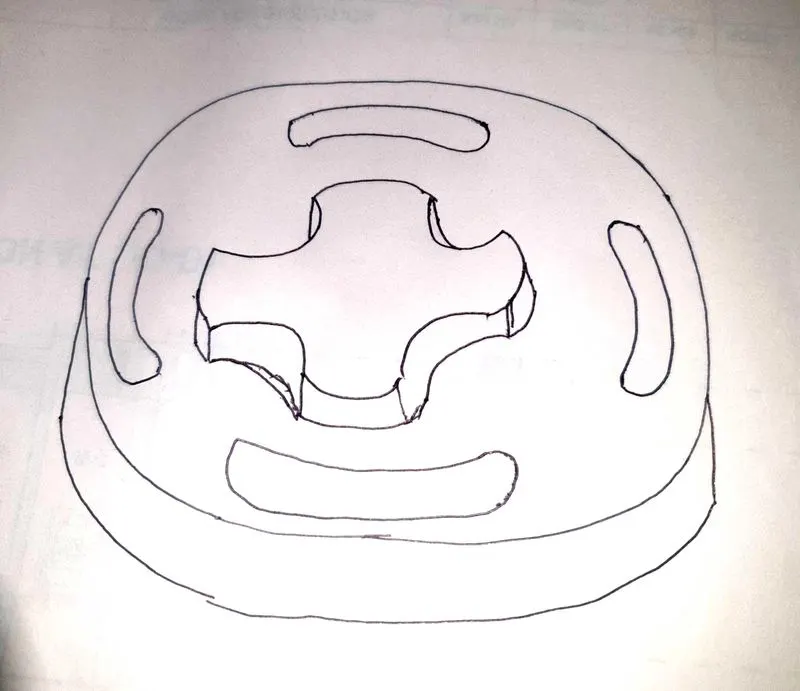
Sketch1:
3D-freehand Sketch1:
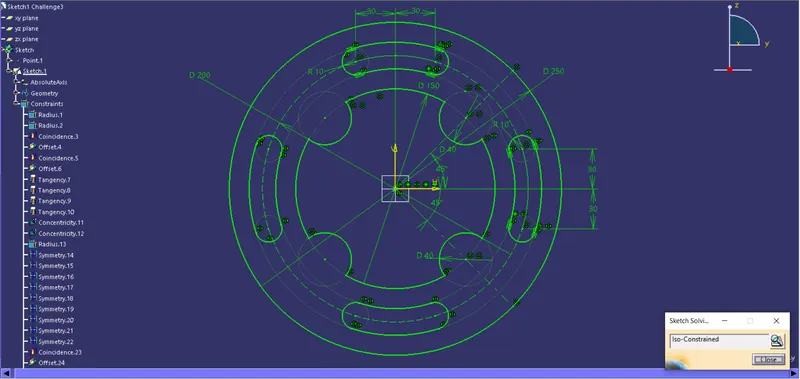
Sketch2:
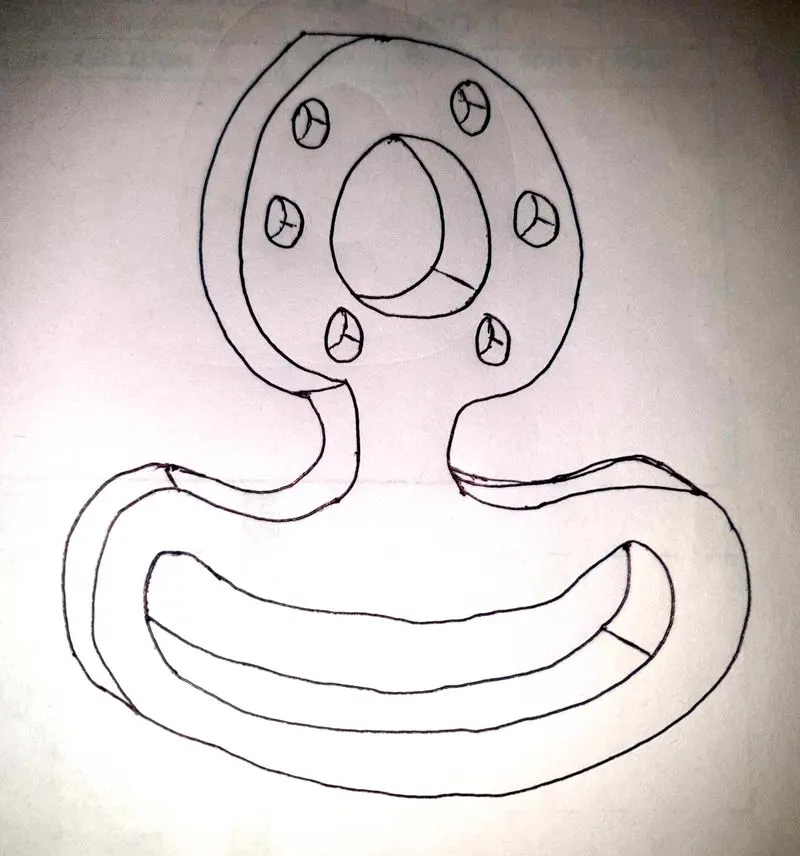
3D-freehand sketch2:
Conclusion:
Hence, we have studied to create a 2D sketch in Catia V5 Software.