Modified on
What Are Contacts In ANSYS?

Skill-Lync
Contacts and joints are usually created using the ANSYS APIs. Some of the options are pretty straightforward and they don't deviate much from what we have already studied till now. Basically, contacts and joints are helpful in transferring the forces from one end to the other in case of an assembly of components involving motion. Let's look into some of the nooks and corners of the contacts and joints APIs.
How To Create A Contact/Joint in ANSYS?
To create a Contact or joint, the very first code is,
Code 1: Contacts=ExtAPI.DataModel.Project.Model.Connections.AddConnectionGroup()
Under this connection tag only, each and every connection group is put together.
_1667224899.png)
Now, using code 1, only the connection group gets created and not a contact region. So, if one has to create a contact region, then he/she should use,
Code 2: Contacts=ExtAPI.DataModel.Project.Model.Connections.AddConnectionGroup().AddContact Region()
Running the above code creates a connection group and also a contact region is shown below,
_1667225024.png)
One can also directly write it as,
Code 4: Contacts=ExtAPI.DataModel.Project.Model.Connections.AddContact Region()
This will also automatically create a connection group and a contact region.
Now, if you try to run the above code once again, then the new contact region is created with a connection group. The new contact region will not get automatically created inside the already existing connection group as shown below,
_1667225073.png)
To avoid this issue, call the contact region by mentioning the children of the connection under which you wish to create a new contact. It can be done by using the following,
Code 5: Contacts=ExtAPI.DataModel.Project.Model.Connections.Children[0].AddContact Region()
A new contact region has been created inside the first connection group under the connections tag. This is based on the fact that each and every entity present in the outline window is considered a ‘List’.
_1667225134.png)
Now, the same goes for creating joints as well,
Code 6: Contacts=ExtAPI.DataModel.Project.Model.Connections.AddJoint()
The catch here is that joints cannot be created inside the connection group where contact is created. Joints require a separate connection group and the contact region requires a separate connection group. So care must be taken when going forward with joint creation.
_1667225178.png)
Now, Let's see how to define some of the constants that are present inside the contact region, here is a new connection group with a contact region is created and to that contact region we are defining the contact type to be ‘Frictional’
Code 7: c=ExtAPI.DataModel.Project.Model.Connections.AddContactRegion()
c1=ExtAPI.DataModel.Project.Model.Connections.Children[0]
d=c1.Children[0]
d.ContactType=ContactType.Frictional
The first line of the code instructs to create a new contact region. The second line is to call and define the children present below the ‘Connections’ tag which is nothing but the connection group. The third line is to call and define the contact region present inside the connection group. The fourth line is to assign the Frictional contact type for the contact region created as shown below in the image.
_1667225248.png)
In the same way, one can define the other constants as mentioned below. Some of the important constants are behaviour, formulation, interface treatment, Friction coefficient (if the contact is frictional).
Code 8: d.ContactType=ContactType.Frictional
Code 9: d.Behavior=ContactBehavior.ProgramControlled
Code 10: d.InterfaceTreatment=ContactInitialEffect.AdjustToTouch
Code 11: d.ContactFormulation=ContactFormulation.AugmentedLagrange
Code 12: d.ContactFormulation= ContactFormulation.PurePenalty
Code 13: d.UpdateStiffness = UpdateContactStiffness.EachIteration
In a similar manner, the constants in the joints can be defined as mentioned below,
c1=ExtAPI.DataModel.Project.Model.Connections.AddJoint()
c2=ExtAPI.DataModel.Project.Model.Connections.Children[1]
d1=c2.Children[1]
Code 14: d1.Type=JointType.Cylindrical
Code 15: d1.ConnectionType=JointScopingType.BodyToGround
Code 16: d1.ConnectionType=JointScopingType.BodyToBody
Now comes the important part of assigning the target and source faces. This can be easily carried out if a named selection has been created for the contact surfaces. The input required for the source and target location is the string, so just by calling the named selection, one can easily assign it to the contact or joints. Let's consider the faces have been already assigned a Named selection, Follow as shown below,
NS=ExtAPI.DataModel.Project.Model.NamedSelections
NS1=NS.Children[0]
NS2=NS.Children[1]
Code 17: d.TargetLocation=NS2
Code 18: d.SourceLocation=NS1
If joints are defined,
Code 19: d1.ReferenceBody=NS2
Code 20: d2.MobileBody=NS1
Author

Navin Baskar
Author
Skill-Lync
Subscribe to Our Free Newsletter

Continue Reading
Related Blogs
Learn how to render a shock-tube-simulation and how to work on similar projects after enrolling into anyone of Skill-Lync's CAE courses.
09 May 2020
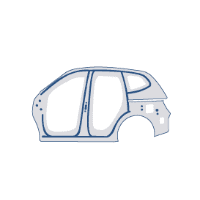
In this blog, read how to design the frontal BIW enclosure of a car (Bonnet) and learn how Skill-Lync Master's Program in Automotive Design using CATIA V5 will help you get employed as a design engineer.
09 May 2020
Tetrahedral is a four- nodded solid element that can be generated through the tria element by creating a volume and also through the existing volume of the geometry. These elements are used where the geometry has high thickness and complexity. The image attached below is a representation of a Tetra element. The Tetra element will have 4 triangular faces with four nodes joining them together
01 Aug 2022
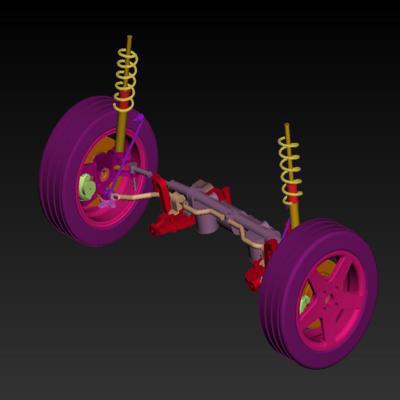
A connector is a mechanism that specifies how an object (vertex, edge, or face) is connected to another object or the ground. By often simulating the desired behaviour without having to build the precise shape or specify contact circumstances, connectors make modeling simpler.
02 Aug 2022
One of the most crucial processes in carrying out an accurate simulation using FEA is meshing. A mesh is composed of elements that have nodes—coordinate positions in space that might change depending on the element type—that symbolise the geometry's shape.
03 Aug 2022
Author
Skill-Lync
Subscribe to Our Free Newsletter
Continue Reading
Related Blogs
Learn how to render a shock-tube-simulation and how to work on similar projects after enrolling into anyone of Skill-Lync's CAE courses.
09 May 2020
In this blog, read how to design the frontal BIW enclosure of a car (Bonnet) and learn how Skill-Lync Master's Program in Automotive Design using CATIA V5 will help you get employed as a design engineer.
09 May 2020
Tetrahedral is a four- nodded solid element that can be generated through the tria element by creating a volume and also through the existing volume of the geometry. These elements are used where the geometry has high thickness and complexity. The image attached below is a representation of a Tetra element. The Tetra element will have 4 triangular faces with four nodes joining them together
01 Aug 2022
A connector is a mechanism that specifies how an object (vertex, edge, or face) is connected to another object or the ground. By often simulating the desired behaviour without having to build the precise shape or specify contact circumstances, connectors make modeling simpler.
02 Aug 2022
One of the most crucial processes in carrying out an accurate simulation using FEA is meshing. A mesh is composed of elements that have nodes—coordinate positions in space that might change depending on the element type—that symbolise the geometry's shape.
03 Aug 2022
Related Courses