Modified on
Mid-mesh tool in HyperMesh

Skill-Lync
Introduction:
Mid-mesh option in HyperMesh is used to create mesh at the midplane of the geometry automatically, without generating the mid surface for the geometry. Here are some design considerations for mid-mesh:
- The geometry should consist of a surface or solid to create the mid-mesh.
- It will increase the efficiency of mesh generation of thin solid parts without the need to create a mid-surface.
- The thickness of the original part can be mapped automatically onto the resulting mid-mesh.
In this article, we are going to perform the Mid-mesh on a component and also thickness is going to be provided for the same.
Steps to be followed to perform the Mid-mesh on a model:
1) Click on the 2D-->mid-mesh option.
2) In the Create option, select the Entity to have meshed, the entity might be a Solid, Surface, Component or Element of the parent geometry.
3) Click on the Edit criteria option to edit the Mesh elements criteria to be generated, while mid-meshing the model.
4) Click on the Create button to initiate the mid-meshing process (ref Fig1).
_1668774118.png)
5) Criteria Files can be separately created and utilized for Mid-mesh operation.
- The pathway to create the Criteria File: Preference → Criteria File Settings (ref Fig2).
- After clicking the option, Criteria File settings dialogue box will pop up.
- In that we can pre determine the Mesh Quality as per our requirements.
- Click on the Save Icon to save the criteria file for future reference.
_1668774223.png)
Reason for Checking the Tick box in the Mid-Mesh Create panel(ref Fig1):
- Ignore Flat Edges:
This option will determine the Imprint of Edges on the Mid-meshed model.
_1668774279.png)
- Flatten Connections:
Checking this option will improve the feature-capturing abilities at the Rib portions in Mid-mesh.
_1668774361.png)
- Suppress Proximity Edges Factor:
Checking this option will lead to suppressing the Edges in the Mid-mesh, whenever it falls less than the calculated value. Distance less than (0.90*Minimum Element Length) Edges will be suppressed, by using this option.
_1668774408.png)
- Combine Non-manifold Edges Factor:
Checking this option will combine the Non-manifold edges (T-connection edges), which come under the calculated value. Distance less than (0.70*Minimum Element Length) Edges will be combined together as shown below:
_1668774458.png)
- Defeature openings with width < :
This option will defeature the hole present on the Mid-mesh. By providing the diameter of the hole, we can close and mesh the hole, which is lesser than the specified value(diameter).
Steps for Editing the Mid-mesh Edges on a model:
1) Click on the 2D-->mid-mesh option.
2) In the Edit Edges option, we can edit the generated Mid-mesh Edges..
3) Under the Create mid-edge option (ref Fig3), we can create new Mid-edges.
_1668774525.png)
Steps for Creating Mid-edge using Create mid-edge option:
- Click the 1st node, to select the starting point of the Edge.
- Then select the 2nd node, to select the ending point of the Edge.
- Check on the 1st and 2nd guidelines as shown below. Click the Create button to create a new edge.
_1668774574.png)
Guidelines help in creating Edge in the middle as shown below:
_1668774631.png)
4) Under the Split by two nodes option (ref Fig4), we can split the Mid-mesh with newly created Edge. Select the Starting node and Ending node to create a cut as shown below. Click the Create button to complete the action.
_1668774713.png)
_1668774750.png)
5) Under the Split by node-edges option (ref Fig4), we can split the Mid-mesh with the newly created Edge. Here we have to select the Node and Edges. To create a cut, there will be three different options to modify the Edge creation as shown below:
_1668774799.png)
Above mentioned Edge creation methods can be selected by clicking the drop-down list box as shown below:
_1668774871.png)
5) Delete edge option is used to delete the existing edges or created edges.
6) Under the T-edge align option (ref Fig5), we can align the T-connection edges with respect to the surface. Here we have to select the edge(T-connection Edge) and Surfs(Surface) as shown below. To align or flatten the Edges, click the align button.
_1668774927.png)
_1668774956.png)
8) Under the By geom edge option (ref Fig6), we can align or Imprint the Mid-mesh with respect to the line path of the parent geometry. By clicking on the drop-down list box we can switch between align option and the Imprint option.
_1668774999.png)
- By using the align option (ref Fig6) from the drop-down list box under by geom edge option, we can align the nodes, based on the line path as shown below:
_1668775056.png)
- By using the imprint option (ref Fig7) from the drop-down list box under by Geom edge option, we can imprint the elements, based on the line path as shown below:
_1668775099.png)
_1668775133.png)
Steps for Editing the Mid-mesh Faces on a model:
- Click on the 2D-->mid-mesh option.
- In the Edit Faces option, we can edit the generated Mid-mesh faces.
- Under the Fill Face option (ref Fig8), we can create new faces (elements) for Mid-mesh.
_1668775182.png)
- Create a closed loop Edge by using the Edit Edge panel.
- Click on the Select loop option from the above mentioned Image.
- Click the Fill button, to create the new faces(Elements) in the close looped Edges as shown below:
_1668775218.png)
- Ticking the delete 1D check box, deletes the created close looped edges.
4) In the Repair face option(ref Fig9), we can attempt to fix topological problems in the mesh and remesh the face by selecting the elements in the damaged Mid-mesh, then click on repair button to complete the process as shown below:
_1668775272.png)
_1668775314.png)
5) In the Detect intersection/ gap option (ref Fig 10), we can identify the intersecting element clusters and holes/gaps/cracks, and create element sets for further handling. Element sets (ref Fig 11) are created to group the elements, which are needed to be repaired, separately as shown below:
_1668775366.png)

- Click on the Detect option, to identify the damaged elements.

Note: The elements will not be fixed using this detect option, only it groups the problematic elements
6) Under the align face option, we can align the element with respect to the surface of the parent geometry as shown below. Tick the checkbox of the offset and lock boundary nodes to increase the flexibility in elements alignment. Select the misaligned elements (elems) and click the surface (surfs) with respect to aligning the elements and then click the align button (ref Fig12).


Reason for ticking the Checkbox - Offset:
- Aligning elements with Offset option will allow us to specify the value, to offset the elements with respect to the selected surface as shown below:

Reason for ticking the Checkbox - lock boundary nodes:
- Aligning elements with the lock boundary nodes option will allow us to arrest the boundary edges when the elements are aligned to the surface.

Rebuild Option in Mid-mesh:
- The rebuild option will remesh the existing mesh to generate a new mesh with good quality and flow.
- The rebuild mesh functionality utilizes parameter and criteria files to define the quality criteria and relevant mesh parameters(ref Fig13).
- This algorithm saves significant time over the traditional automesh and quality correction approach.

The rebuild algorithm is useful for many different applications.
- To adjust mesh element size, quality, and flow.
- To change the mesh type as Tria, Mixed, Quads etc.
- To perform geometrical changes like adding or removing the washer split in the model, with the help of a parameter file.
- To clear the elemental failure, with the help of a criteria file.
Author

Navin Baskar
Author
Skill-Lync
Subscribe to Our Free Newsletter

Continue Reading
Related Blogs
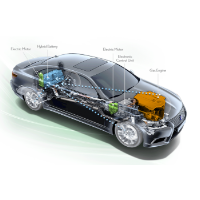
Learn how to render a shock-tube-simulation and how to work on similar projects after enrolling into anyone of Skill-Lync's CAE courses.
09 May 2020
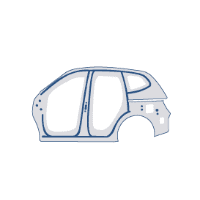
In this blog, read how to design the frontal BIW enclosure of a car (Bonnet) and learn how Skill-Lync Master's Program in Automotive Design using CATIA V5 will help you get employed as a design engineer.
09 May 2020
Tetrahedral is a four- nodded solid element that can be generated through the tria element by creating a volume and also through the existing volume of the geometry. These elements are used where the geometry has high thickness and complexity. The image attached below is a representation of a Tetra element. The Tetra element will have 4 triangular faces with four nodes joining them together
01 Aug 2022
A connector is a mechanism that specifies how an object (vertex, edge, or face) is connected to another object or the ground. By often simulating the desired behaviour without having to build the precise shape or specify contact circumstances, connectors make modeling simpler.
02 Aug 2022
One of the most crucial processes in carrying out an accurate simulation using FEA is meshing. A mesh is composed of elements that have nodes—coordinate positions in space that might change depending on the element type—that symbolise the geometry's shape.
03 Aug 2022
Author
Skill-Lync
Subscribe to Our Free Newsletter
Continue Reading
Related Blogs
Learn how to render a shock-tube-simulation and how to work on similar projects after enrolling into anyone of Skill-Lync's CAE courses.
09 May 2020
In this blog, read how to design the frontal BIW enclosure of a car (Bonnet) and learn how Skill-Lync Master's Program in Automotive Design using CATIA V5 will help you get employed as a design engineer.
09 May 2020
Tetrahedral is a four- nodded solid element that can be generated through the tria element by creating a volume and also through the existing volume of the geometry. These elements are used where the geometry has high thickness and complexity. The image attached below is a representation of a Tetra element. The Tetra element will have 4 triangular faces with four nodes joining them together
01 Aug 2022
A connector is a mechanism that specifies how an object (vertex, edge, or face) is connected to another object or the ground. By often simulating the desired behaviour without having to build the precise shape or specify contact circumstances, connectors make modeling simpler.
02 Aug 2022
One of the most crucial processes in carrying out an accurate simulation using FEA is meshing. A mesh is composed of elements that have nodes—coordinate positions in space that might change depending on the element type—that symbolise the geometry's shape.
03 Aug 2022
Related Courses