Modified on
How to Extract Mid-surface in a Complicated Area?

Skill-Lync
_1664799923.png)
It is impossible to capture trapezoidal cross-sectional threads after enabling thickness to shell elements. So it is preferred to have rectangular cross-sectional threads. For that, we can have one mid-surface in the middle, which will be the thread's width in geometry.
Steps to take Mid-Surface for Thread
Step:1
- The middle option under the curves module creates a curve in the middle of the selected two CONS. (As shown in the image below)
_1664799974.png)
- The fine option under the auxiliaries module increases the resolution of the curve and generates a curve on the top surface of the thread. (As shown in the image below)
_1664800028.png)
Step 2:
- Generating a middle curve in a normal direction to the base mid-surface. (As shown in the image below)
_1664800077.png)
- After projecting the middle curve to the side mid-surface, it will resemble the image below.
_1664800123.png)
- Pick double CONS and the middle curve to create a new surface, which will be the mid-surface of the thread. (Refer below image)
_1664800175.png)
- Note: The formation of a triple CON is normal and occurs due to the result of three edges sharing a common edge.
- The mid-surface will look like the image given below. (We have isolated the threads for better understanding)
_1664800221.png)
- The user should follow a similar procedure for generating mid-surface for threads.
How to take Mid-Surface for All Teeth?
Hint: The generation of the mid-surface of the bottle is a time-consuming process. The rotate command under the transform icon helps save time. (Here, the basic idea is to extract one mid-surface for one tooth & copy that mid-surface and then duplicate by required numbers).
Step 1:
- To create a mid-surface for one tooth,
- The user should use the middle option (under the curves module)to create a middle curve at the front face of the tooth. (Refer to the image below)
_1664800292.png)
Step 2:
- Use the project option (under curves module), select the line from the back side and Project that line to the base mid-surface. (Refer to the image below)
_1664800338.png)
Step 3:
- Select both curves and create a surface, which will be the mid-surface of a tooth. (Refer to the image below)
_1664800394.png)
Step 4:
- · This way, mid-surface is created for one tooth. (Refer to the image below)
_1664800446.png)
Step 5:
- The users should identify the axis of rotation to use the rotate option for duplicating the mid-surface of a tooth. To create the axis of rotation, the users need to identify two center points.
- The On COG option under the points modules helps identify the center points.
- Select two circular lines to create the center points. (Refer to the image below)
_1664800517.png)
Note: The creation of the axis of rotation requires two COG points at the center with different heights. To create these center points, use the On COG option (under the points module) and select any point at different heights.
- By selecting one circle, we are creating a centre point for that selected circular line.
- Selecting another circle at a different height creates a center point at the same height difference.
Step 6:
Select the transform option and select copy. Select the mid-surface of the tooth as the entity. (Refer to images below)
_1664800574.png)
Step 8:
Fill in the details as shown in the figure below.
- The total number of threads is nine, with a single tooth mid-surface. Therefore, the user input should be eight, creating eight more mid-surfaces.
- Select the X box and then select COG point one. Similarly, click on the dX box and then select COG point two. (Creating the axis of rotation)
- The angle between two entities = Total angle of a circle / Total number of teeth
_1664800638.png)
- The user can now successfully observe the generation of eight new mid-surfaces (in green colour). (Refer to the image below)
_1664800680.png)
Author

Navin Baskar
Author
Skill-Lync
Subscribe to Our Free Newsletter

Continue Reading
Related Blogs
Learn how to render a shock-tube-simulation and how to work on similar projects after enrolling into anyone of Skill-Lync's CAE courses.
09 May 2020
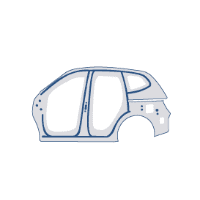
In this blog, read how to design the frontal BIW enclosure of a car (Bonnet) and learn how Skill-Lync Master's Program in Automotive Design using CATIA V5 will help you get employed as a design engineer.
09 May 2020
Tetrahedral is a four- nodded solid element that can be generated through the tria element by creating a volume and also through the existing volume of the geometry. These elements are used where the geometry has high thickness and complexity. The image attached below is a representation of a Tetra element. The Tetra element will have 4 triangular faces with four nodes joining them together
01 Aug 2022
A connector is a mechanism that specifies how an object (vertex, edge, or face) is connected to another object or the ground. By often simulating the desired behaviour without having to build the precise shape or specify contact circumstances, connectors make modeling simpler.
02 Aug 2022
One of the most crucial processes in carrying out an accurate simulation using FEA is meshing. A mesh is composed of elements that have nodes—coordinate positions in space that might change depending on the element type—that symbolise the geometry's shape.
03 Aug 2022
Author
Skill-Lync
Subscribe to Our Free Newsletter
Continue Reading
Related Blogs
Learn how to render a shock-tube-simulation and how to work on similar projects after enrolling into anyone of Skill-Lync's CAE courses.
09 May 2020
In this blog, read how to design the frontal BIW enclosure of a car (Bonnet) and learn how Skill-Lync Master's Program in Automotive Design using CATIA V5 will help you get employed as a design engineer.
09 May 2020
Tetrahedral is a four- nodded solid element that can be generated through the tria element by creating a volume and also through the existing volume of the geometry. These elements are used where the geometry has high thickness and complexity. The image attached below is a representation of a Tetra element. The Tetra element will have 4 triangular faces with four nodes joining them together
01 Aug 2022
A connector is a mechanism that specifies how an object (vertex, edge, or face) is connected to another object or the ground. By often simulating the desired behaviour without having to build the precise shape or specify contact circumstances, connectors make modeling simpler.
02 Aug 2022
One of the most crucial processes in carrying out an accurate simulation using FEA is meshing. A mesh is composed of elements that have nodes—coordinate positions in space that might change depending on the element type—that symbolise the geometry's shape.
03 Aug 2022
Related Courses