Modified on
Creation of Mid Surface for Varying Thickness of Rib Surfaces

Skill-Lync
In this article we will see how to find the thickness for the varying surfaces and extract the mid surface for the varying ribs on the surfaces by using the midline option.
First of all, we have to make sure that the surfaces have varying thicknesses or not.
What is Mid-Surface?
With the Mid-Surface feature, surface bodies that are halfway between the faces of an existing solid body can be created. The faces can be chosen manually, or you can use an automatic option to specify a thickness range and then find corresponding face pairs automatically. In addition to the fundamental name attribute, there are six other properties for manually choosing a Mid-Surface and four more for automatic discovery. The Thickness property specifies the thickness of the surface body or surface bodies that are produced.
How to Measure the Rib Thickness?
We have to create random nodes on both the top and bottom surfaces, which are perpendicular to each other. We can create these nodes by going into the project option (Shift+F7 is the shortcut key for a project).
_1668513542.png)
In the project, we can select the surface.
_1668513574.png)
_1668513743.png)
Long press of the left-click on your mouse so that the top surface will be highlighted now you can select the nodes on the top surface.
_1668513771.png)
_1668513800.png)
After selecting the nodes right click on the nodes and duplicate the nodes two times. We have to duplicate the nodes two times since the nodes should be presented on the top and bottom surfaces.
_1668513864.png)
_1668513899.png)
_1668513925.png)
_1668513960.png)
click on the project .
_1668514000.png)
We can switch the surface into wireframe mode.
_1668514136.png)
We can measure the thickness by choosing the distance command from the geometry.
_1668514220.png)
Click on the distance tab. Select the two nodes (one from top surface and another one from Bottom surface)
_1668514261.png)
The thickness of the surface will be displayed at distance.
_1668514373.png)
Since the nodes are at random places we can know whether the surfaces are of varying thickness are not.
Extraction of Mid Surface for Varying Rib Thickness
Here, we will create a midline for the varying thickness rib. By using that line we will be able to trim the base mid-surface, which is offset manually. A shared edge will form on the base mid-surface, by using the ruled option from the surface we will be able to create a surface in between the midline and the shared edge(the line in green colour).
_1668514528.png)
A midline should be created for the rib. The midline option is presented in the lines command{Geom->Lines->midline}.
_1668514604.png)
We have to select line list 1&2 and click on create . A midline is created as shown in the below picture.
_1668514668.png)
We have to trim the base mid-surface with respect to that line. We have to go to surface edit which is in geometry (Shift+F9 is the shortcut key for surface edit).
_1668514719.png)
We have to choose trim with lines.

Select the surface which is to be trimmed.

Select the midline and click on trim.

A shared edge will form on the base surface.

Now we have to create a surface between the shared edge(green line when we are in “by topo” mode ) and the midline.
We can use the ruled option from the surfaces in geometry {Geom->surfaces->Ruled}.
We can select the shared edge as one linelist and midline as the 2nd linelist and click on create.

A surface is created between the shared edge and midline . The created surface is the mid surface for the Varying thickness rib.

Author

Navin Baskar
Author
Skill-Lync
Subscribe to Our Free Newsletter

Continue Reading
Related Blogs
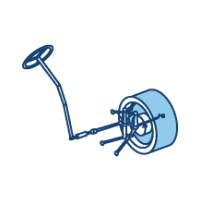
Learn how to render a shock-tube-simulation and how to work on similar projects after enrolling into anyone of Skill-Lync's CAE courses.
09 May 2020
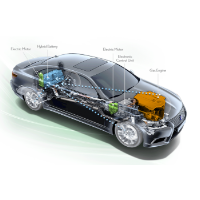
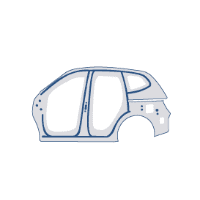
In this blog, read how to design the frontal BIW enclosure of a car (Bonnet) and learn how Skill-Lync Master's Program in Automotive Design using CATIA V5 will help you get employed as a design engineer.
09 May 2020
Tetrahedral is a four- nodded solid element that can be generated through the tria element by creating a volume and also through the existing volume of the geometry. These elements are used where the geometry has high thickness and complexity. The image attached below is a representation of a Tetra element. The Tetra element will have 4 triangular faces with four nodes joining them together
01 Aug 2022
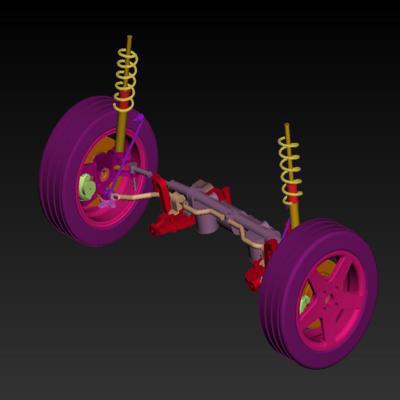
A connector is a mechanism that specifies how an object (vertex, edge, or face) is connected to another object or the ground. By often simulating the desired behaviour without having to build the precise shape or specify contact circumstances, connectors make modeling simpler.
02 Aug 2022
One of the most crucial processes in carrying out an accurate simulation using FEA is meshing. A mesh is composed of elements that have nodes—coordinate positions in space that might change depending on the element type—that symbolise the geometry's shape.
03 Aug 2022
Author
Skill-Lync
Subscribe to Our Free Newsletter
Continue Reading
Related Blogs
Learn how to render a shock-tube-simulation and how to work on similar projects after enrolling into anyone of Skill-Lync's CAE courses.
09 May 2020
In this blog, read how to design the frontal BIW enclosure of a car (Bonnet) and learn how Skill-Lync Master's Program in Automotive Design using CATIA V5 will help you get employed as a design engineer.
09 May 2020
Tetrahedral is a four- nodded solid element that can be generated through the tria element by creating a volume and also through the existing volume of the geometry. These elements are used where the geometry has high thickness and complexity. The image attached below is a representation of a Tetra element. The Tetra element will have 4 triangular faces with four nodes joining them together
01 Aug 2022
A connector is a mechanism that specifies how an object (vertex, edge, or face) is connected to another object or the ground. By often simulating the desired behaviour without having to build the precise shape or specify contact circumstances, connectors make modeling simpler.
02 Aug 2022
One of the most crucial processes in carrying out an accurate simulation using FEA is meshing. A mesh is composed of elements that have nodes—coordinate positions in space that might change depending on the element type—that symbolise the geometry's shape.
03 Aug 2022
Related Courses